How to Share Screenshots Instantly (2026 Guide)
Want to share screenshots instantly without email attachments, file uploads, or messaging app compression? Cloud screenshot sharing eliminates the friction between capturing something on your screen and getting it in front of the person who needs to see it. Tools like ScreenSnap Pro handle the capture-and-upload step in one motion on Mac and Windows.
With the right tools, sharing a screenshot takes less than two seconds — capture, auto-upload, paste the link. No more dragging files into Slack, waiting for email attachments to upload, or explaining where you saved that image.
This guide covers how cloud screenshot sharing works, the best tools available, security considerations, and how to set up a workflow that actually saves you time.
TL;DR: To share screenshots instantly, use a cloud screenshot tool like ScreenSnap Pro, Gyazo, or ScreenCloud. These tools auto-upload your captures and copy a shareable link to your clipboard in under 2 seconds — no dragging files or waiting for uploads.
How to Share Screenshots Instantly (And Why It Matters)
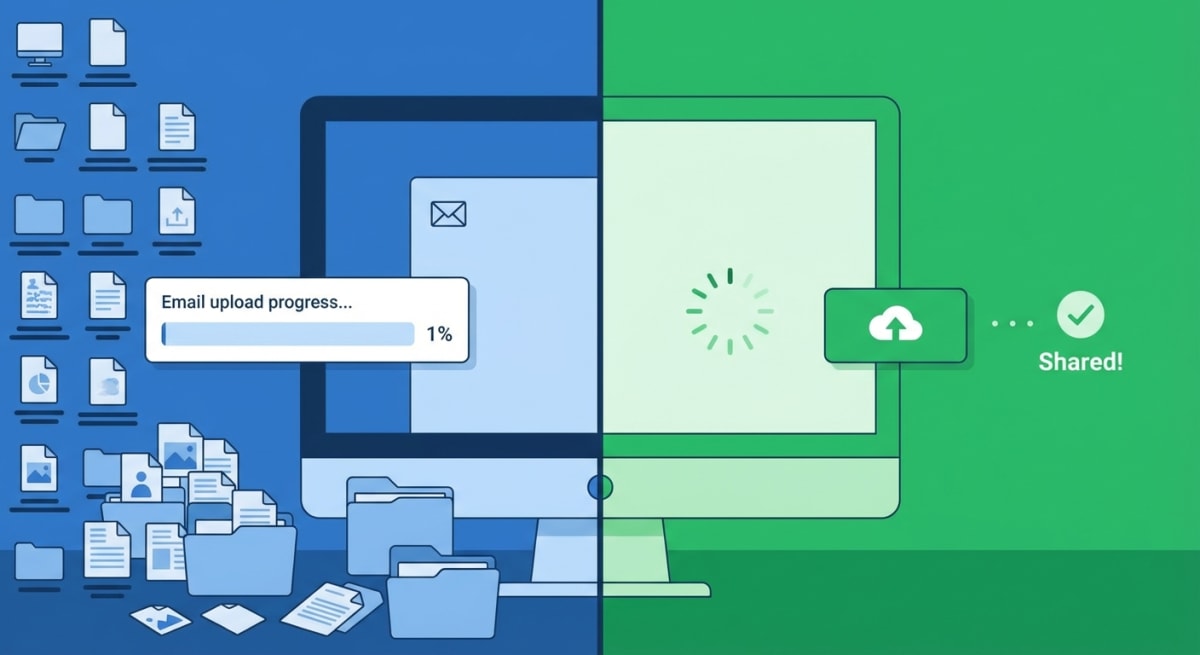
The traditional screenshot workflow looks like this: capture → save to desktop → open email/Slack/message → find file → attach → wait for upload → send. That's six steps minimum, and each one introduces friction.
Cloud sharing collapses this to: capture → paste link. Two steps. The upload happens in the background while you're already moving on with your work.
Here's what you gain:
Speed: A link is in your clipboard before you can switch windows. No upload progress bars, no "attaching file" spinners.
Consistency: Every recipient sees the same thing — full resolution, no compression artifacts from messaging apps resizing your image.
Accessibility: Links work anywhere. Email, Slack, Discord, Notion, Jira, GitHub issues, text messages. Anywhere you can paste text, you can share a screenshot.
History: Most cloud tools keep a searchable archive. Need that screenshot from two weeks ago? It's still there with its link intact.
Collaboration: Some tools let you annotate, comment, or create collections. Teammates can reference the same image without downloading and re-uploading.
The time savings compound quickly. If you share ten screenshots a day and save 30 seconds each, that's nearly an hour per week reclaimed.
How Cloud Screenshot Sharing Works
The mechanics are simpler than you might expect:
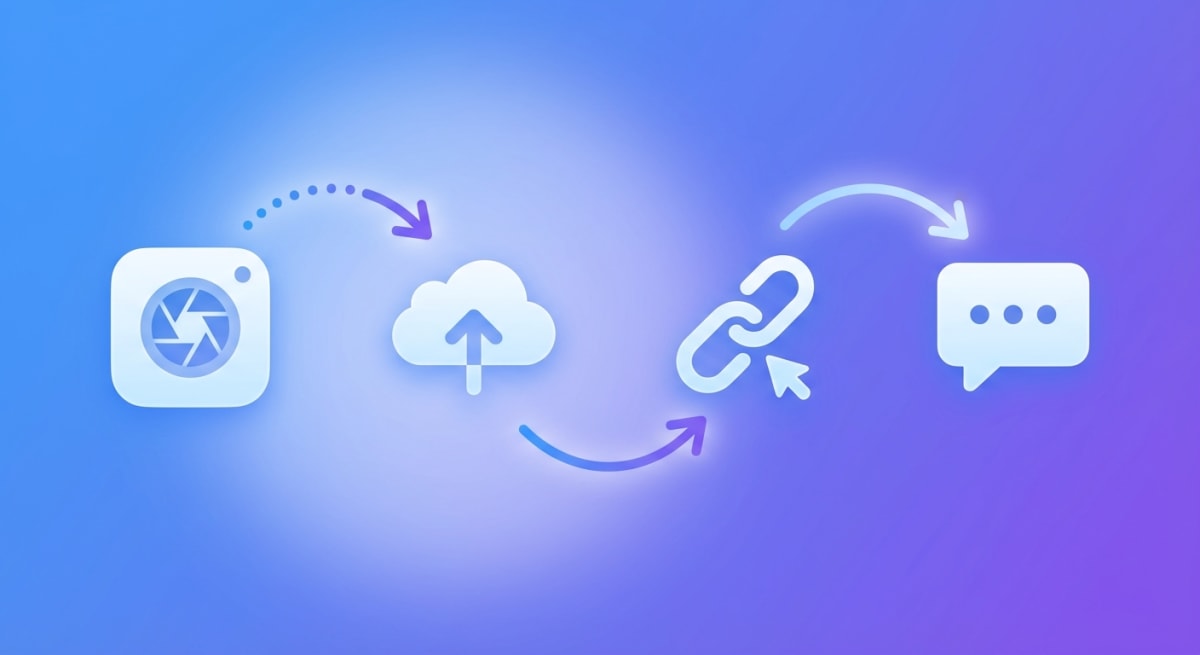
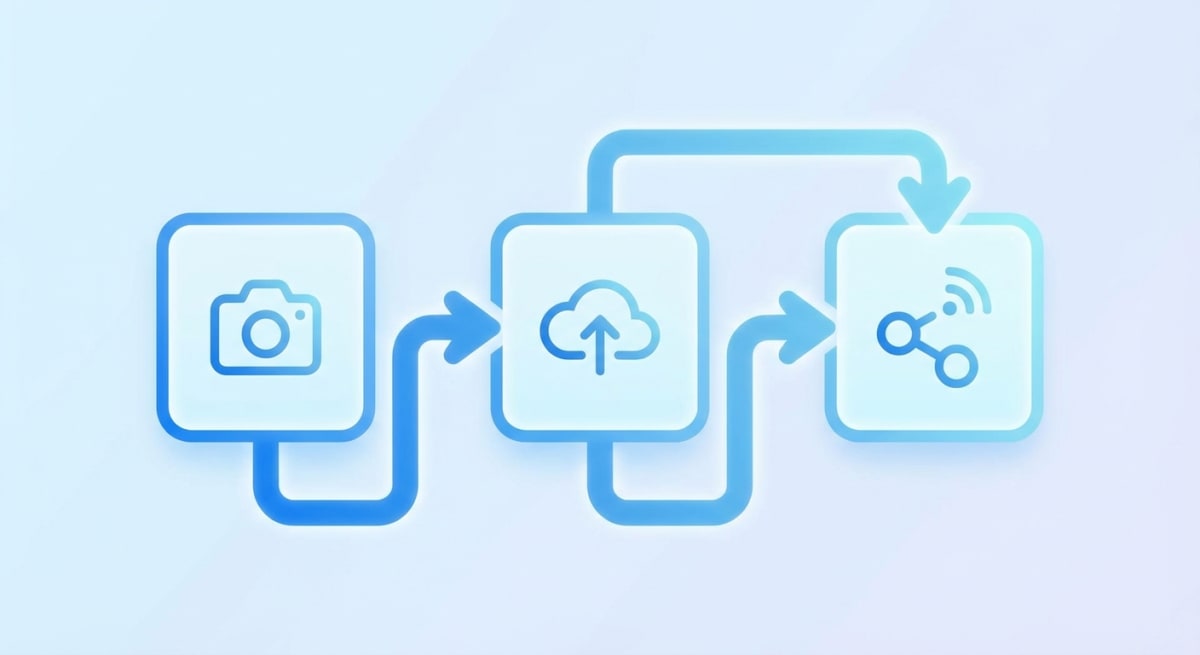
- Capture: You take a screenshot using the tool's hotkey or menu
- Upload: The image uploads automatically to the service's cloud storage
- Link Generation: A unique URL is created and copied to your clipboard
- Share: You paste the link wherever needed — recipient clicks and sees the image
The entire process typically happens in under two seconds for most tools. Some services upload while you're still selecting the capture area.
Most cloud screenshot tools use a content delivery network (CDN) to serve images, meaning your screenshots load quickly for recipients regardless of their location. When someone in Tokyo opens a link you shared from New York, they're served from a nearby CDN node rather than across the Pacific.
Link Structure
Different tools handle links differently:
- Short links: Some use URL shorteners (e.g.,
gyazo.com/abc123) for easy sharing - Direct image links: Others provide direct image URLs that work as
- Hashed URLs: Most use randomly generated characters to prevent guessing
The best tools offer both — a short shareable link and a direct image URL for embedding in documentation or websites.
Best Cloud Screenshot Tools Compared
Not all cloud screenshot tools are created equal. Here's how the major options stack up for Mac users.
ScreenSnap Pro
ScreenSnap Pro takes a different approach than subscription-based tools. Pay once, own forever — and the cloud service is entirely optional.
Key features:
- Instant cloud upload with CDN-backed links
- Signed URLs for security (only people with the link can access)
- Optional service — works offline without cloud if you prefer
- 150+ wallpapers for professional-looking screenshots
- Built-in annotation tools (arrows, shapes, text, blur)
- GIF recording for quick demos
- OCR text extraction from any capture
Pricing: $29 one-time purchase (cloud storage included, no subscription)
Best for: Mac users who want professional screenshot tools without recurring costs. The optional cloud approach means you're not locked in.
Gyazo
Gyazo is one of the oldest cloud screenshot tools, with over 23 million users and 3 billion uploads. It pioneered the "capture and share instantly" workflow that others have copied.
Key features:
- Frame capture for extracting stills from videos
- Collections for organizing related screenshots
- OCR search across all your captures
- Password protection for sensitive images
- Video recording (up to 10 minutes on Pro)
- Browser extensions and native apps
Pricing: Free tier with 7-second video limit and limited history; Pro at $3.99/month for unlimited
Best for: Users who need extensive organization features and cross-platform syncing. The collection and search features are particularly strong.
ScreenCloud
ScreenCloud focuses on flexibility — it can upload to its own servers, your FTP/SFTP server, or various cloud services through plugins.
Key features:
- Self-hosting support via FTP/SFTP
- Plugin ecosystem for extended cloud service support
- Simple three-step workflow
- Cross-platform (Windows, Mac, Linux)
- Open-source plugins on GitHub
Pricing: Free with community-maintained plugins
Best for: Users who want control over where their screenshots are stored. If you have your own server or specific cloud requirements, ScreenCloud's flexibility is unmatched.
ScreenRec
ScreenRec positions itself as a free alternative with enterprise features. It's built on the StreamingVideoProvider platform, which means solid video infrastructure.
Key features:
- 128-bit encryption for all uploads
- Deep analytics (see who viewed your content)
- 2GB free cloud storage
- Annotation tools built-in
- Works on Windows, Mac, and Linux
- No watermarks on free tier
Pricing: Free with 2GB storage; business tiers for larger teams
Best for: Teams that need analytics on screenshot and video views. The "who watched and for how long" tracking is unique among free tools.
Comparison Table
| Feature | ScreenSnap Pro | Gyazo | ScreenCloud | ScreenRec |
|---|---|---|---|---|
| Pricing | $29 one-time | Free/\$3.99/mo | Free | Free/Business |
| Cloud Storage | Included | 7 days free | Self-host or plugin | 2GB free |
| Annotations | ✅ 15 tools | ✅ Basic | ❌ | ✅ |
| Video/GIF | ✅ GIF | ✅ Video | ❌ | ✅ Video |
| OCR | ✅ | ✅ Pro | ❌ | ❌ |
| Analytics | ❌ | ❌ | ❌ | ✅ |
| Self-hosting | ❌ | ❌ | ✅ | ❌ |
| Encryption | Signed URLs | Hashed URLs | Depends on host | 128-bit |
For most Mac users, ScreenSnap Pro or Gyazo will cover all needs. ScreenCloud is the choice for self-hosters, and ScreenRec wins for teams needing view analytics.
Security Considerations
Sharing screenshots via cloud links raises legitimate security questions. Here's what you need to know.

Encryption
In transit: All reputable cloud screenshot services use HTTPS/TLS encryption. Your images are encrypted while uploading and when recipients view them.
At rest: Storage encryption varies. ScreenRec explicitly advertises 128-bit encryption at rest. Most others use standard cloud provider encryption (AWS, Google Cloud, etc.), which typically means AES-256.
End-to-end: No mainstream screenshot tool offers true end-to-end encryption where even the service can't access your images. If this is a requirement, consider self-hosting with ScreenCloud.
Password Protection
Gyazo Pro offers password protection for individual captures. Recipients must enter a password before viewing.
For most tools without built-in password protection, the link itself acts as the access control. Anyone with the link can view the image — which is fine for most use cases but not ideal for highly sensitive content.
Practical advice: Don't share screenshots containing passwords, API keys, or confidential data via cloud links unless the tool explicitly offers additional protection layers. For sensitive information, consider blurring or pixelating before sharing.
Link Expiration
Most free tiers keep links active indefinitely or for a limited time:
- Gyazo Free: Screenshots expire after 7 days of inactivity
- ScreenRec: Links persist as long as you have storage available
- ScreenSnap Pro: Links remain active permanently (no expiration)
For temporary shares, Gyazo Pro lets you set custom expiration times. Otherwise, you'll need to manually delete screenshots you no longer want accessible.
What Happens If the Service Shuts Down?
This is a valid concern with any cloud service. If Gyazo or ScreenRec shuts down tomorrow, your links break.
Mitigations:
- Local backups: Most tools save a local copy. Keep these organized.
- Export features: Gyazo offers bulk export of your captures.
- One-time purchase tools: Services like ScreenSnap Pro that aren't dependent on subscription revenue are less likely to pivot or shut down.
- Self-hosting: ScreenCloud uploading to your own server means you control the longevity.
For critical documentation, don't rely solely on cloud links. Embed the actual image in important documents rather than linking.
Tired of plain screenshots? Try ScreenSnap Pro.
Beautiful backgrounds, pro annotations, GIF recording, and instant cloud sharing — all in one app. Pay $29 once, own it forever.
See what it doesSetting Up Your Workflow
The best workflow is the one you'll actually use. Here's how to set up cloud screenshot sharing on Mac.
Step 1: Choose Your Tool
Consider:
- How many screenshots do you share daily? High volume favors paid tools with no storage caps.
- Do you need annotations? Professional annotation tools vary significantly between apps.
- What's your budget? Free works for occasional use; heavy users benefit from paid features.
- Security requirements? Strict requirements may push you toward self-hosting.
Step 2: Set Up Hotkeys
Every cloud screenshot tool supports global hotkeys. Set them to something you'll remember:
- Common choice:
⌘ + Shift + 4already captures screenshots on Mac. Some tools can intercept this, or you can use alternatives like⌘ + Shift + 2. - Consistency: Use the same modifier pattern for related actions (capture area, capture window, capture full screen).
Most tools let you customize hotkeys in preferences. Spend two minutes setting these up — it pays off immediately.
Step 3: Configure Upload Behavior
Decide whether you want:
- Auto-upload: Every capture goes to the cloud immediately
- Manual upload: You choose which captures to share
Auto-upload is fastest but means everything hits your storage. Manual upload adds a step but gives you control.
ScreenSnap Pro makes cloud optional — you can capture locally and only upload specific screenshots when needed.
Step 4: Test Your Workflow
Before relying on your setup:
- Capture a test screenshot
- Verify the link is in your clipboard
- Open the link in an incognito window (to confirm it works for others)
- Check the image quality matches your expectations
This catches configuration issues before they matter.
Tips for Faster Sharing
Once your workflow is set up, these tips squeeze out even more efficiency.
Use Area Selection, Not Full Screen
Capture only what matters. Full-screen captures include irrelevant chrome, personal bookmarks, or sensitive tabs. Area selection means recipients see exactly what you want them to see — and files are smaller, uploading faster.
For a full guide on capture options, see our Mac screenshot shortcuts reference.
Annotate Before Sharing
A screenshot with an arrow pointing to the relevant element communicates faster than a raw capture plus explanation. Most cloud tools include basic annotation. ScreenSnap Pro's annotation toolkit is particularly comprehensive.
Organize by Project
Tools like Gyazo support collections. Create a collection for each project or client. When you need to reference past screenshots, you'll know exactly where to look.
Use OCR When Possible
Need to share text that's locked in an image? Tools with OCR (text extraction) let you copy text directly from screenshots. Faster than retyping, and more accurate.
Set Reasonable Defaults
Configure your tool's default behavior once:
- Image format (PNG for quality, JPEG for smaller files)
- Default annotation colors
- Cloud upload destination
Fewer decisions per screenshot means faster workflow overall.
Free vs Paid: What's Worth Paying For?
Free tiers work for casual use. Here's when upgrading makes sense:
Pay for:
- Unlimited history: If you need to reference old screenshots, time-limited free tiers become frustrating
- OCR search: Finding a specific screenshot from months ago by searching its text is invaluable
- Annotation tools: Basic arrows are fine; advanced tools (blur, numbered steps, shapes) justify premium pricing
- No compression: Some free tiers compress images; paid versions preserve full quality (if you need to reduce file sizes yourself, try our free image compressor)
- Privacy features: Password protection, link expiration, analytics
Stay free if:
- You share fewer than 10 screenshots daily
- You don't need to reference old captures
- Basic annotation (or none) is sufficient
- You're not sharing sensitive content
For most professionals, the time saved by premium features pays for itself within weeks.
Frequently Asked Questions
Conclusion
Cloud screenshot sharing isn't complicated once you have the right setup. The key is choosing a tool that matches your workflow and actually using it consistently.
For Mac users, ScreenSnap Pro offers the best combination of professional features and no-subscription pricing. Gyazo remains strong for users who need extensive organization features. ScreenCloud is the choice for self-hosters, and ScreenRec works well for teams needing view analytics.
Whatever you choose, the workflow improvement is real. Two seconds to share a screenshot instead of thirty. That adds up.
Start with the free tier of any tool, get comfortable with the hotkeys, and upgrade when you hit the limits. Your future self — the one who needs that screenshot from two months ago — will thank you.
Morgan
Indie DeveloperIndie developer, founder of ScreenSnap Pro. A decade of shipping consumer Mac apps and developer tools. Read full bio
@m_0_r_g_a_n_