Mac Screenshot Shortcuts: Every Shortcut Explained (2026)
Taking a screenshot on Mac is simple once you know the right screenshot shortcut Mac users rely on daily. Whether you need to capture your entire screen, a specific window, or just a portion, macOS has built-in keyboard shortcuts that make the process instant. Power users often layer a tool like ScreenSnap Pro on top for extra capture modes and annotation.
This guide covers every Mac screenshot shortcut — from the basics to advanced tricks most people miss.
Screenshot Shortcut Mac: The 4 Core Commands
Here are the four main shortcuts you need to memorize:
| Shortcut | What It Does |
|---|---|
⌘ + Shift + 3 | Capture entire screen |
⌘ + Shift + 4 | Capture selected area |
⌘ + Shift + 4 + Space | Capture a specific window |
⌘ + Shift + 5 | Open Screenshot toolbar |
Let's break down exactly how each one works.
Capture Your Entire Screen: `⌘ + Shift + 3`
Press Command + Shift + 3 simultaneously to capture everything visible on your screen. The screenshot saves to your Desktop by default.
This is the fastest option when you need a quick capture. A small thumbnail appears in the bottom-right corner — click it to annotate, or let it disappear to save automatically.
Pro tip: If you have multiple monitors, this shortcut captures all of them as separate files.
Capture a Selected Area: `⌘ + Shift + 4`
Press Command + Shift + 4 and your cursor turns into a crosshair. Click and drag to select the exact area you want to capture.

This is the most versatile shortcut — perfect for capturing dialog boxes, error messages, or specific sections of a webpage.
Release the mouse button to capture. Press Escape to cancel.
Capture a Window: `⌘ + Shift + 4` then `Space`
Here's a shortcut within a shortcut:
- Press
⌘ + Shift + 4 - Press
Space— the crosshair becomes a camera icon - Click any window to capture it
The result? A clean screenshot of just that window, complete with a subtle drop shadow that makes it look polished in documents and presentations.
Bonus: Hold Option while clicking to capture without the shadow.
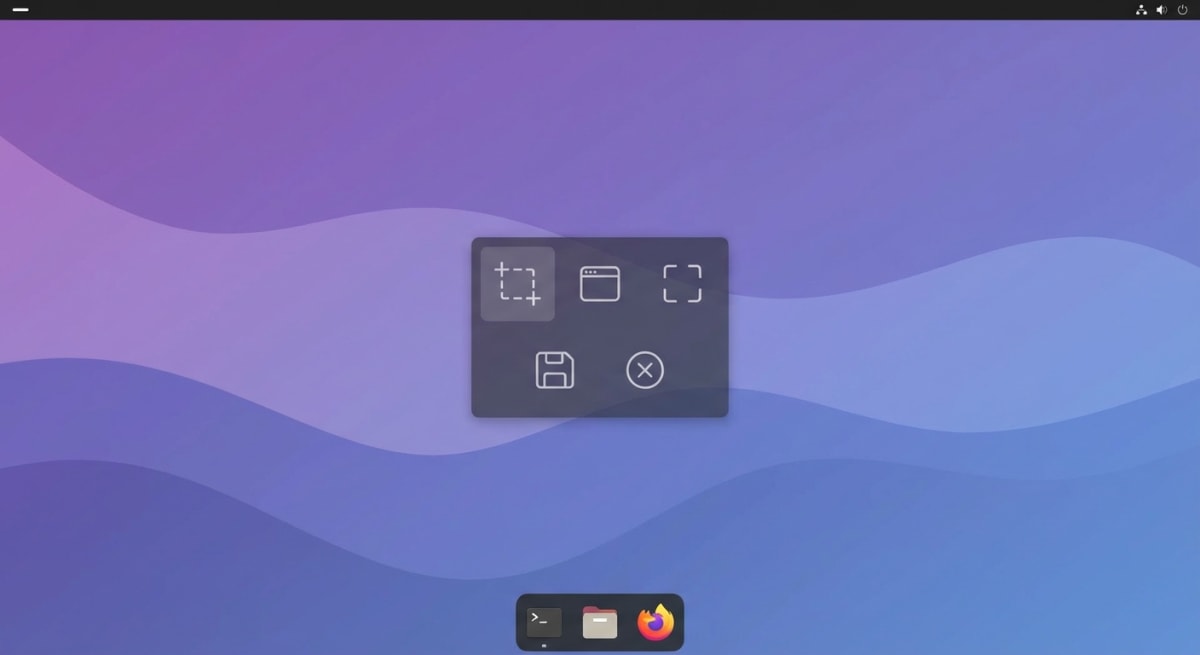
Open the Screenshot Toolbar: `⌘ + Shift + 5`
This shortcut opens the full Screenshot app toolbar at the bottom of your screen:
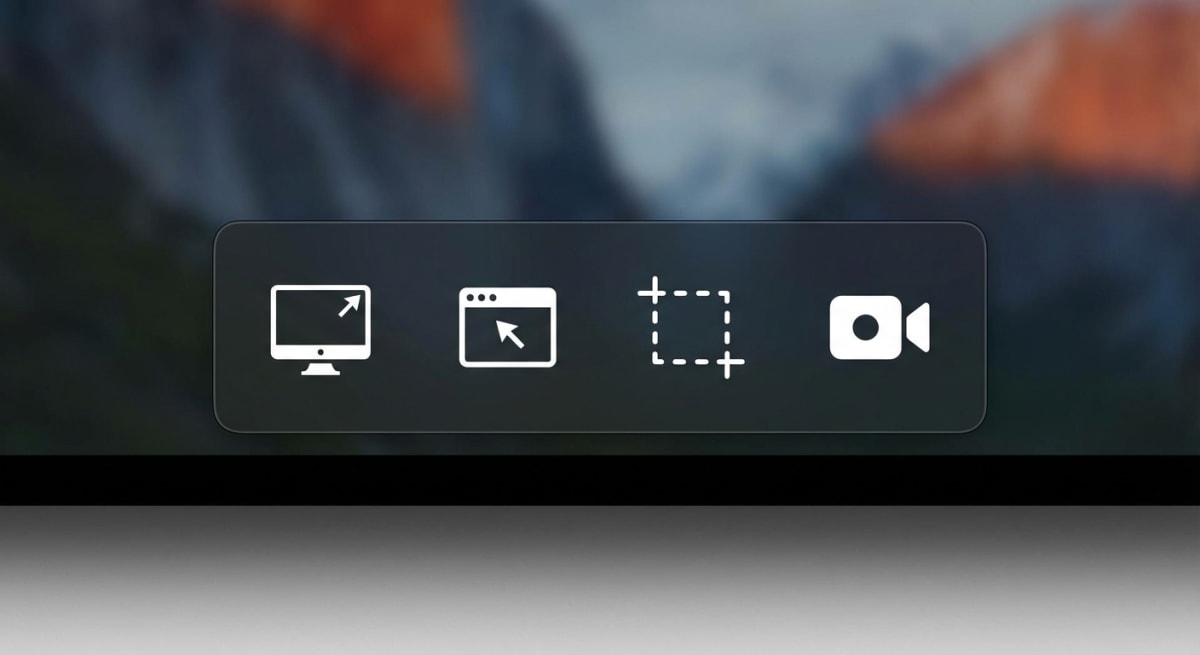
The toolbar includes buttons for:
- Full screen capture
- Window capture
- Selection capture
- Full screen recording
- Selection recording
Click Options to access additional settings like save location, timer delay, and whether to show the floating thumbnail.
If your Mac screenshot is not working, the ⌘ + Shift + 5 toolbar is often the easiest way to diagnose the issue.
Advanced Screenshot Shortcuts Most People Miss
Beyond the basics, these hidden tricks dramatically improve your screenshot workflow.
Copy to Clipboard Instead of Saving
Add Control to any screenshot shortcut to copy directly to your clipboard instead of saving a file:
⌘ + Control + Shift + 3— Copy full screen⌘ + Control + Shift + 4— Copy selection
This is invaluable when you want to paste a screenshot directly into Slack, email, or a document without cluttering your Desktop.
Lock and Reposition Your Selection
After starting a selection with ⌘ + Shift + 4:
- Hold Space while dragging to move the entire selection without changing its size
- Hold Shift to lock all sides except the bottom edge, then move your mouse to adjust
- Release and press Shift again to lock the bottom and adjust the right edge instead
These modifier tricks help you capture perfectly aligned areas, especially useful for UI screenshots.
Touch Bar Screenshot: `⌘ + Shift + 6`
If you have an older MacBook Pro with a Touch Bar, ⌘ + Shift + 6 captures whatever's currently displayed on it.
This creates a very wide, thin image — useful for documenting custom Touch Bar configurations or app-specific controls.
How to Customize Your Screenshot Shortcuts
Don't like the default shortcuts? You can change them:
- Open System Settings → Keyboard
- Click Keyboard Shortcuts
- Select Screenshots in the sidebar
- Double-click any shortcut to change it
- Type your new key combination
- Click Done to save
This is helpful if you're coming from Windows and want shortcuts that feel more familiar, or if you've installed apps that conflict with the defaults.
You can customize these screenshot functions:
- Save picture of screen as a file
- Copy picture of screen to the clipboard
- Save picture of selected area as a file
- Copy picture of selected area to the clipboard
- Screenshot and recording options
Choosing Effective Custom Shortcuts
When creating custom shortcuts, follow these guidelines for combinations that work reliably:
Use three or more modifier keys — Combinations like Control + Option + S are less likely to conflict with app-specific shortcuts. The standard screenshot shortcuts use ⌘ + Shift, so adding Option or Control creates unique combinations.
Avoid single-letter shortcuts — While ⌘ + S is tempting, it conflicts with "Save" in virtually every app. Stick to function keys (F1-F12) or less common letter combinations.
Test in your most-used apps — After setting a custom shortcut, open the apps you use daily and verify the shortcut triggers screenshots rather than app functions. Common conflicts include screen recording apps, clipboard managers, and window management tools.
Document your shortcuts — If you change the defaults, write them down somewhere accessible. You'll forget custom shortcuts faster than you'd expect, especially after a macOS update or when using someone else's Mac.
According to Apple's keyboard shortcut documentation, system shortcuts take priority over app shortcuts when there's a conflict, but custom screenshot shortcuts may behave differently depending on your configuration.
To restore the original shortcuts at any time, click Restore Defaults at the bottom of the window.
For more customization options, including third-party apps, check our guide to changing where screenshots save on Mac.
Productivity Tips for Screenshot Power Users
Once you've mastered the basics, these workflow strategies will save you significant time.
Batch Multiple Screenshots Efficiently
When documenting a multi-step process, use ⌘ + Shift + 5 to open the toolbar and leave it open. You can take multiple screenshots in sequence without pressing the shortcut each time — just click the capture button or press Enter after each shot.
This approach keeps your focus on the content rather than remembering shortcuts, especially useful when creating tutorials or documenting bug reports.
Create a Dedicated Screenshots Folder
Instead of letting screenshots pile up on your Desktop, create a dedicated folder structure:
~/Pictures/Screenshots/
├── Work/
├── Personal/
├── Bug Reports/
└── Tutorials/
Set your default save location to the main Screenshots folder, then sort images into subfolders during weekly cleanup sessions. This keeps your Desktop clean while maintaining organization for future reference.
Use Quick Look for Rapid Review
After taking multiple screenshots, select them in Finder and press Space to open Quick Look. Use arrow keys to flip through them quickly, deleting unwanted captures with ⌘ + Delete without opening each file individually.
This workflow is especially fast for reviewing a batch of screenshots and keeping only the best ones.
Pair Screenshots with Notes
For research or documentation tasks, consider this workflow:
- Take your screenshot with any shortcut
- Click the floating thumbnail to open Markup
- Add annotations immediately while context is fresh
- Share directly to Notes app using the share menu
The screenshot stays connected to your notes, making it easier to reference later.
Leverage Spotlight for Screenshot Search
macOS indexes screenshot metadata, including dates and times. Use Spotlight (⌘ + Space) to search for screenshots by typing "screenshot" followed by a date, like "screenshot January" to find all captures from that month.
Change Where Mac Screenshots Save
By default, screenshots save to your Desktop with names like Screenshot 2026-01-31 at 2.30.45 PM.png. Over time, this can clutter your Desktop with dozens of image files.
To change the save location:
- Press
⌘ + Shift + 5to open the Screenshot toolbar - Click Options
- Under "Save to," choose Desktop, Documents, Clipboard, Mail, Messages, Preview, or Other Location
Choosing Clipboard is particularly useful if you primarily share screenshots rather than archive them — the image copies directly to your clipboard without creating a file.
Alternatively, use Terminal to set a custom folder:
defaults write com.apple.screencapture location ~/Pictures/Screenshots
killall SystemUIServer
You can also change the default file format from PNG to JPEG (smaller files) or other formats:
defaults write com.apple.screencapture type jpg
killall SystemUIServer
Valid format options include png, jpg, gif, pdf, and tiff.
For detailed instructions and five different methods, see our complete guide on screenshot save locations.
Tired of plain screenshots? Try ScreenSnap Pro.
Beautiful backgrounds, pro annotations, GIF recording, and instant cloud sharing — all in one app. Pay $29 once, own it forever.
See what it doesEdit Screenshots Instantly with Floating Thumbnail
After taking a screenshot, a small thumbnail appears in the bottom-right corner of your screen for about 5 seconds:
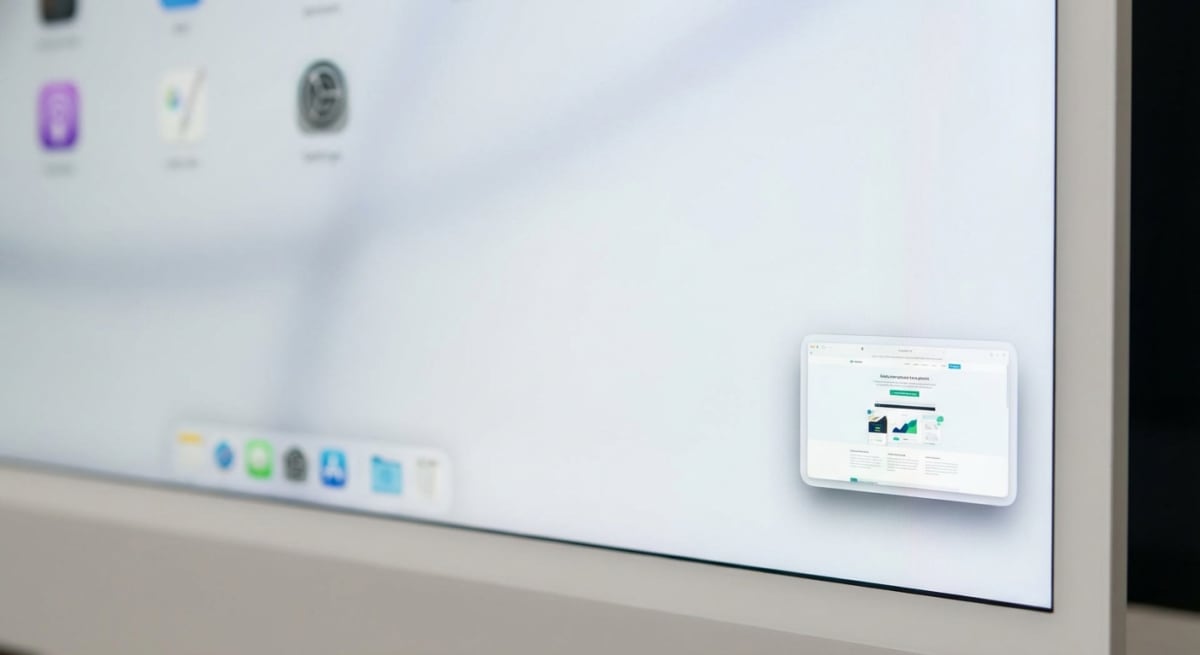
Click the thumbnail to open the Markup editor where you can:
- Add shapes, arrows, and text
- Highlight important areas
- Crop the image
- Sign documents
- Share directly to Messages, Mail, or AirDrop
Swipe it away or let it fade to save immediately to your chosen location.
Right-click the thumbnail for additional options like "Save to Desktop," "Delete," or "Open in Preview."
For professional annotation techniques beyond Markup's basics, see our guide on how to annotate screenshots on Mac.
When Native Shortcuts Aren't Enough
Mac's built-in screenshot tools are solid for everyday use, but they have limitations:
- No scrolling screenshots — You can't capture content that extends beyond your screen, like full webpage captures or long documents
- Basic annotation — Markup lacks advanced tools like blur, numbered steps, callout boxes, or arrows with customizable styles
- No instant cloud sharing — Screenshots save locally; sharing requires manually attaching files to messages or emails
- Limited editing — No background beautification, device mockups, or shadow customization
- No OCR — Can't extract or copy text from images
If you frequently share tutorials, document bugs, or create professional presentations, these gaps become noticeable quickly.
For capturing scrolling content or adding professional touches, dedicated screenshot apps fill these gaps. Here's what third-party tools typically add:
| Feature | Native Screenshot | Third-Party Apps |
|---|---|---|
| Scrolling capture | ❌ | ✓ |
| Cloud sharing | ❌ | ✓ |
| Blur/redact tool | ❌ | ✓ |
| OCR text extraction | ❌ | ✓ |
| Background styling | ❌ | ✓ |
| Numbered steps | ❌ | ✓ |
Tools like ScreenSnap Pro add features like one-click cloud sharing, advanced annotations, OCR text extraction, and the ability to blur sensitive information — all with a one-time purchase instead of subscriptions.
That said, for quick captures and basic needs, Mac's native shortcuts remain fast and reliable. Master them first, then add tools as your needs grow.
Screenshot Troubleshooting Tips
If your screenshot shortcuts suddenly stop working, try these fixes:
- Check keyboard shortcuts — Make sure they haven't been changed or disabled in System Settings → Keyboard → Keyboard Shortcuts → Screenshots
- Restart the SystemUIServer — Open Terminal and run:
killall SystemUIServer- Check for app conflicts — Some apps like Skitch, CleanShot, or screen recording software can capture screenshot shortcuts before macOS processes them
- Verify disk space — Screenshots won't save if your disk is full. Check by clicking the Apple menu → About This Mac → Storage
- Try a different shortcut — If
⌘ + Shift + 3doesn't work, try⌘ + Shift + 5to see if the Screenshot app opens. If it does, the issue may be with your specific shortcut configuration
- Reset NVRAM — Restart your Mac and hold
Option + Command + P + Rfor 20 seconds
- Boot in Safe Mode — Restart while holding Shift to check if a third-party extension is causing conflicts
- Check app permissions — Some streaming apps (Netflix, Apple TV+, Amazon Prime) block screenshots for DRM protection. This is intentional, not a malfunction.
According to Apple Support, screenshots should save to your Desktop by default with the name "Screenshot [date] at [time].png" — if yours appear elsewhere, check your Screenshot app Options settings.
For a complete list of solutions, see our Mac screenshot not working troubleshooting guide.
Frequently Asked Questions
Quick Reference Card
Keep this cheat sheet handy:
| Action | Shortcut |
|---|---|
| Full screen | ⌘ + Shift + 3 |
| Selected area | ⌘ + Shift + 4 |
| Window | ⌘ + Shift + 4 → Space → Click |
| Screenshot toolbar | ⌘ + Shift + 5 |
| Touch Bar | ⌘ + Shift + 6 |
| Copy instead of save | Add Control to any above |
| Cancel | Escape |
Take Your Screenshots Further
Mac's built-in screenshot shortcuts cover the essentials, and for most quick captures, they're all you need.
But if you find yourself frequently needing features like scrolling captures, instant cloud sharing, or professional annotations, it might be time to explore dedicated tools. Check out our roundup of the best screenshot apps for Mac to see what's available — including free options and one-time purchase alternatives to subscription-based apps.
Whatever tool you choose, mastering these keyboard shortcuts is the foundation of a fast screenshot workflow on Mac.
Morgan
Indie DeveloperIndie developer, founder of ScreenSnap Pro. A decade of shipping consumer Mac apps and developer tools. Read full bio
@m_0_r_g_a_n_