How to Screenshot FaceTime on Mac (2026 Guide)
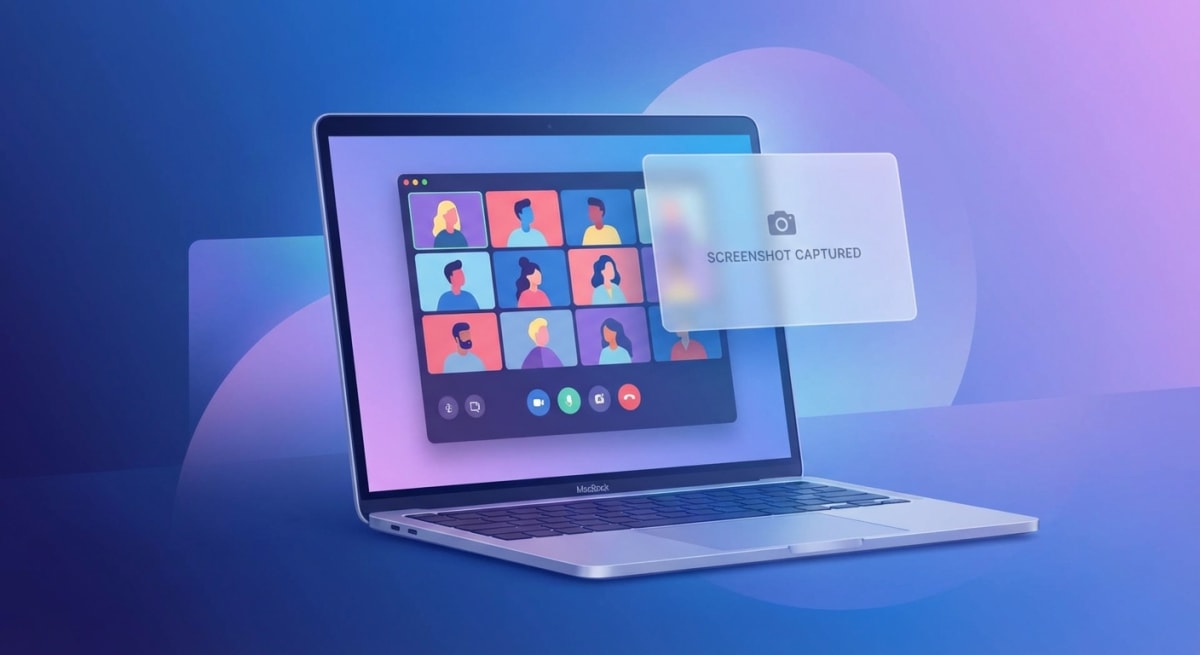
Want to screenshot FaceTime calls on your Mac? You're in the right place — and a dedicated capture app like ScreenSnap Pro makes it even faster.
Maybe you're capturing a funny reaction. Or saving a sweet moment with family. Whatever the reason, there are several ways to do it. And no — the other person won't know.
This guide covers every method to capture FaceTime calls on Mac:
- Keyboard shortcuts
- The built-in Live Photo feature
- Third-party screenshot tools
You'll also learn where FaceTime photos are saved. Plus, how to organize them automatically.
Does FaceTime Notify When You Screenshot?
Here's the #1 question everyone asks.
No, FaceTime doesn't notify the other person when you take a regular screenshot. Keyboard shortcuts and third-party apps work silently.
But there's one exception.
When you use FaceTime's built-in Live Photo feature, both people get notified. That's the camera button during a call.
| Capture Method | Notification Sent? |
|---|---|
Keyboard shortcuts (⌘ + Shift + 3/4/5) | No |
| Third-party screenshot apps | No |
| FaceTime Live Photo button | Yes, both users |
Want to capture discreetly? Stick with keyboard shortcuts or a screenshot tool.
The Live Photo feature is meant for mutual photo-taking. Apple built in the notification for transparency.
Method 1: Use Mac Keyboard Shortcuts
This is the fastest way to screenshot FaceTime calls. It uses macOS's built-in keyboard shortcuts. Zero notifications to the other caller.
These shortcuts are part of Apple's standard macOS keyboard shortcuts and work in any app — including FaceTime.
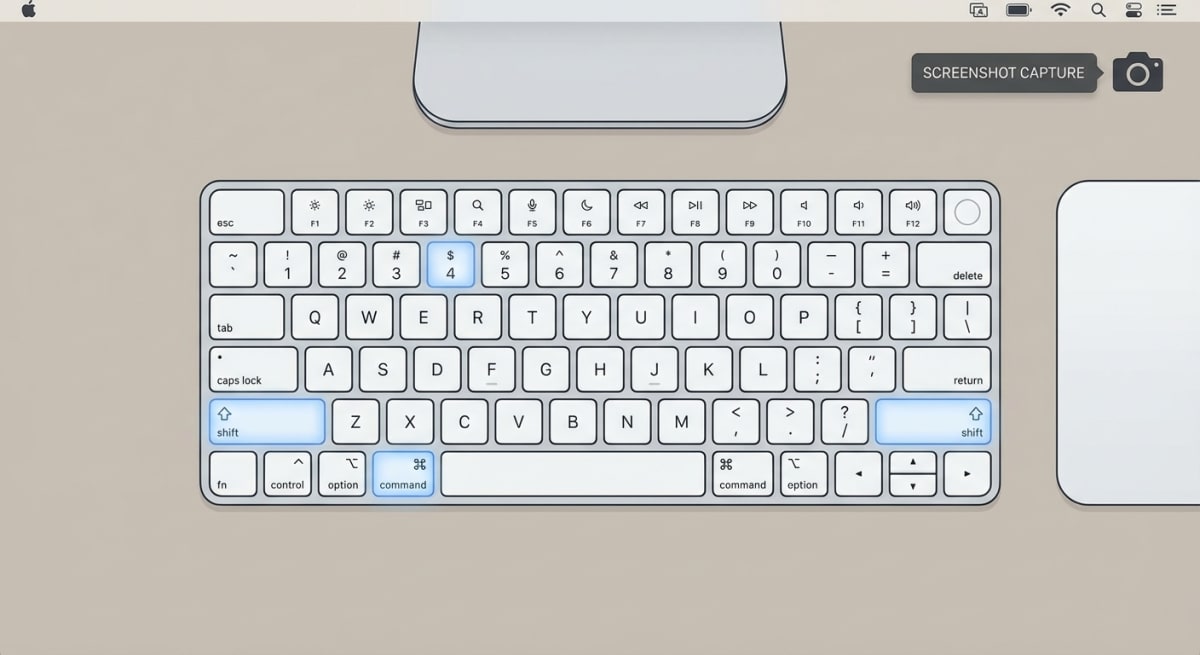
Capture the Entire Screen
Press ⌘ + Shift + 3. This grabs your full screen — FaceTime window and everything else visible.
Best for: Quick captures when you don't mind cropping later.
Capture a Selected Area
Press ⌘ + Shift + 4. Then drag to select just the FaceTime window. Or grab a specific part of the call.
Best for: Capturing one person's video tile in a group call.
Capture a Specific Window
Here's a neat trick:
- Press
⌘ + Shift + 4 - Tap
Spacebar - Your cursor becomes a camera icon
- Click the FaceTime window
You'll get a perfectly framed capture.
Best for: Clean window captures without the menu bar.
Use the Screenshot Toolbar
Press ⌘ + Shift + 5. This opens the Screenshot toolbar with all your options:
- Capture screen
- Capture window
- Capture selected area
- Set a timer (5 or 10 seconds)
Pro tip: The timer is perfect for getting ready before the capture.
All these screenshots save to your Desktop by default. Want them somewhere else? Check out our guide on changing screenshot location on Mac.
Method 2: Use FaceTime's Built-In Live Photo Feature
FaceTime has a native camera button. It captures Live Photos — short clips with a few seconds of motion.
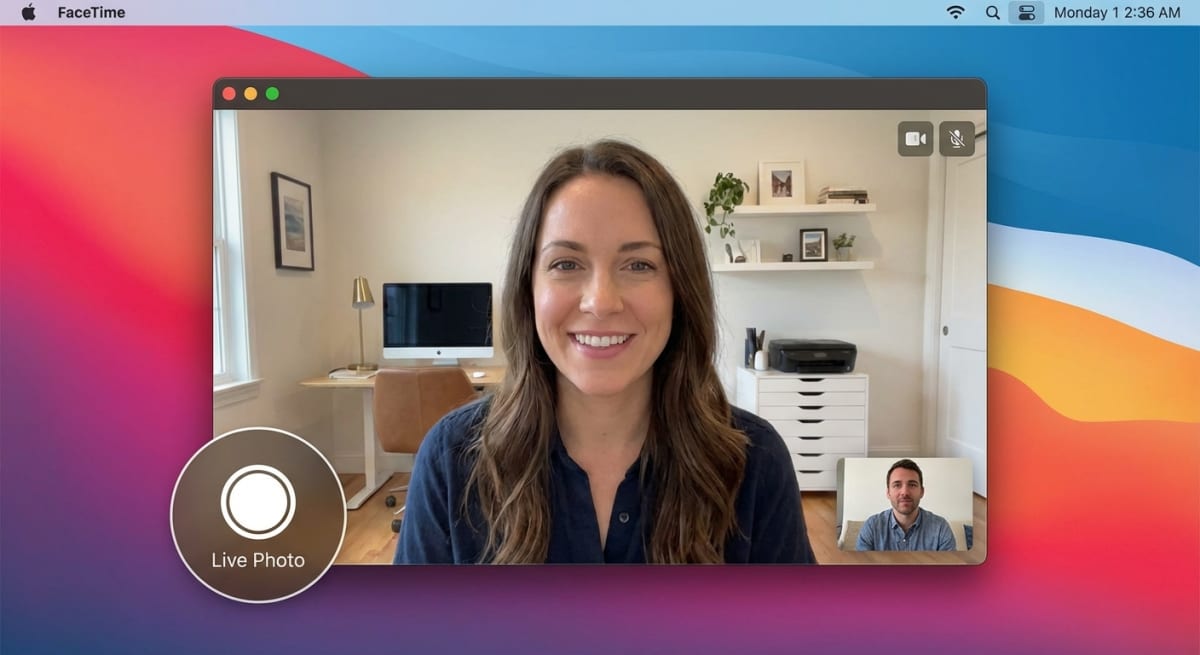
How to Take a FaceTime Live Photo
- Start or join a FaceTime video call
- Hover over the FaceTime window
- Click the shutter button (camera icon)
- Both you and the other person get notified
The Live Photo saves to your Photos app. Not your Desktop.
Both Users Must Enable Live Photos
Here's the catch.
FaceTime Live Photos only work if both callers have it enabled. If either person turned it off, the shutter button won't appear.
To enable it on your Mac:
- Open FaceTime > Settings
- Check FaceTime Live Photos
- Ask the other person to do the same
Per Apple's official docs, you also need to open Photos at least once. This gives Live Photos a place to save.
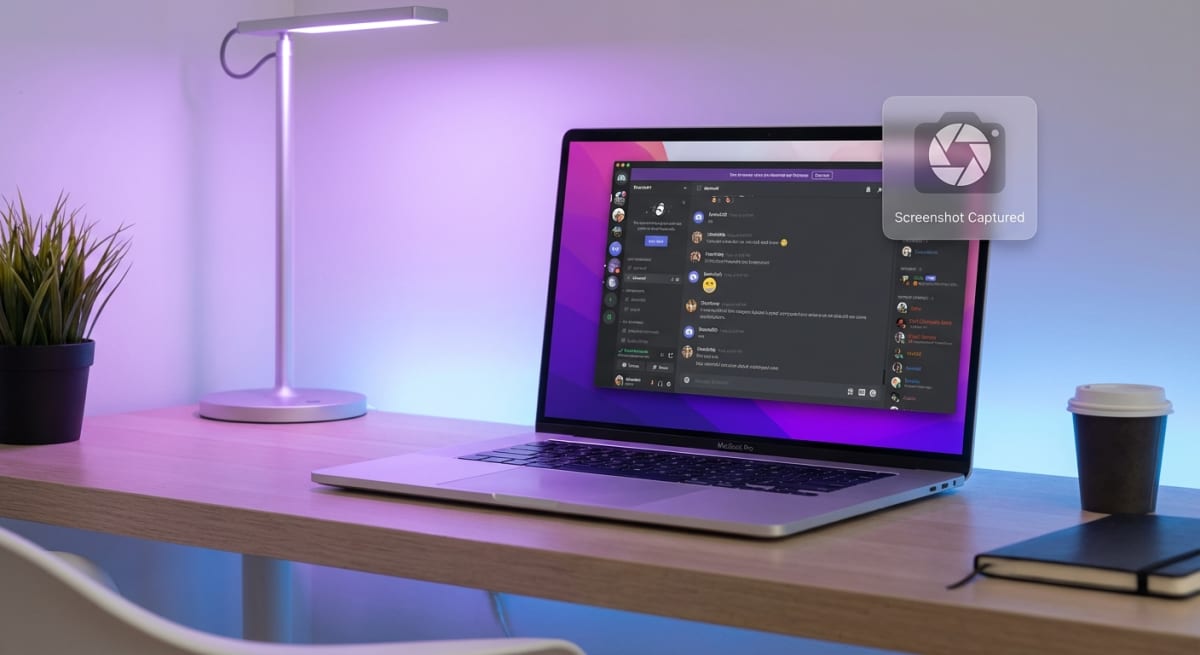
Method 3: Use a Screenshot Utility App
Take FaceTime screenshots often? Want more control? A screenshot app offers big advantages over macOS defaults.
Why Use a Third-Party Tool?
The built-in shortcuts work fine for basic captures. But they have limitations:
- FaceTime overlays: The call controls often appear in your screenshot
- No quick editing: You need to open Preview or another app to annotate
- Slow sharing: Screenshots save locally — sharing requires extra steps
- No pinning: Once captured, the image is buried on your Desktop
A screenshot app solves all of these.
Key Features to Look For
When choosing a screenshot utility for FaceTime calls, prioritize these features:
Clean window captures: Capture windows without overlay controls. Get cleaner FaceTime shots — no hang-up button or mute icon.
Instant annotation: Add arrows to point out reactions. Blur faces for privacy. Add text captions — all in one place.
Quick sharing: Generate a shareable link instantly. Send it to someone — even while still on the call.
Pin to screen: Keep your screenshot floating on top of other windows. No hunting through files during the call.
Tools like ScreenSnap Pro include all these features. You can:
- Capture FaceTime windows without distracting controls
- Annotate screenshots with arrows, text, or blur effects
- Share instantly via link
- Pin captures to your screen
The pin feature is especially useful during long calls. Capture something important — a shared screen, a document someone showed you — and keep it visible while you continue talking.
When Third-Party Tools Make Sense
Not everyone needs a screenshot app. But consider one if you:
- Take FaceTime screenshots multiple times per week
- Need to annotate or mark up captures
- Share screenshots with others frequently
- Want cleaner captures without FaceTime UI elements
- Take screenshots for work presentations or documentation
Method 4: Use the macOS Screenshot App
macOS includes a dedicated Screenshot app. It's separate from keyboard shortcuts. It offers recording and delayed captures.
How to Access the Screenshot App
- Open Finder > Applications > Utilities
- Double-click Screenshot
Or just press ⌘ + Shift + 5 and click Options.
This app gives you the same capture modes as shortcuts. But with a visual interface. It's helpful if you prefer clicking over memorizing shortcuts.
Tired of plain screenshots? Try ScreenSnap Pro.
Beautiful backgrounds, pro annotations, GIF recording, and instant cloud sharing — all in one app. Pay $29 once, own it forever.
See what it doesWhere Do FaceTime Screenshots Go on Mac?
It depends on which method you used.
| Capture Method | Save Location | File Format |
|---|---|---|
| Keyboard shortcuts | Desktop (default) | PNG |
| Screenshot toolbar | Desktop or custom | PNG |
| FaceTime Live Photo | Photos app | HEIC/MOV |
| Third-party apps | Varies by app | PNG/JPG |
Finding Regular Screenshots
Keyboard shortcut screenshots save to your Desktop by default. They're named with date and time:
Screenshot 2026-02-02 at 10.30.45.png
Want them elsewhere? You can change your screenshot location. Save to iCloud, a custom folder, or anywhere.
Finding FaceTime Live Photos
Live Photos go to the Photos app. Open Photos and go to Library. Scroll to the date — or search "FaceTime" to find them fast.
How to Create a Smart Album for FaceTime Photos
Here's a clever trick. Create a Smart Album in Photos. It'll automatically organize all your FaceTime captures.
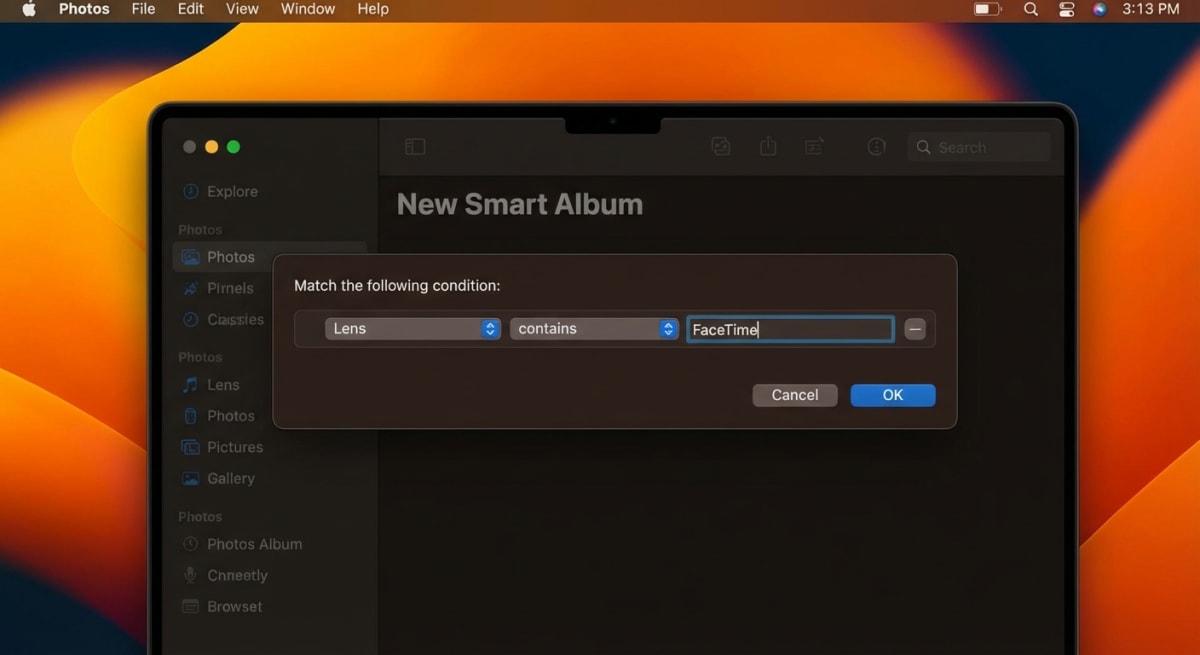
Create the Smart Album
- Open the Photos app
- Go to File > New Smart Album
- Name it "FaceTime Photos"
- Set the filter: Lens contains FaceTime
- Click OK
Now all FaceTime Live Photos appear here automatically.
Note: This only captures Live Photo button photos. Regular screenshots won't show — they don't have lens metadata.
Common Issues and Fixes
FaceTime Live Photo Button Not Working
Shutter button missing or grayed out? Try these fixes:
- Check both users' settings: Both need Live Photos enabled
- Open Photos first: Launch it once so Live Photos can save
- Update macOS: Some features need macOS Sonoma or later
Screenshots Are Blurry
FaceTime quality depends on your internet. If screenshots look fuzzy:
- Switch to a faster network
- Ask the other person to check their connection
- Wait for video to stabilize before capturing
Keyboard Shortcuts Not Working
⌘ + Shift + 3/4/5 not capturing anything?
- Check System Settings > Keyboard > Shortcuts > Screenshots
- Make sure shortcuts are enabled
- Some apps may intercept them — try closing other apps
- See our full guide: Mac screenshot not working
Can't Find My Screenshots
Screenshots not on your Desktop?
- Check if you changed the save location (
⌘ + Shift + 5> Options) - Search Finder for recent PNG files
- Check the Trash
Screenshots Capturing Wrong Monitor
Using multiple displays? Your screenshot might capture the wrong screen.
⌘ + Shift + 3captures all screens. Use⌘ + Shift + 4to select specific areas- Move FaceTime to your primary display for easier capturing
- Use
⌘ + Shift + 4+Spacebarand click the specific FaceTime window
FaceTime Window Has Black Bars
Black bars around the video? This happens when:
- The other person's camera aspect ratio differs from yours
- FaceTime window size doesn't match the video feed
Try resizing the FaceTime window. Or crop the black bars after capturing.
Tips for Better FaceTime Screenshots
Getting great FaceTime screenshots isn't just about knowing the shortcuts. These tips help you capture clearer, more flattering moments.
Timing Your Captures
The best screenshots come from anticipation.
- Watch for reactions: Listen for the punchline. Be ready to capture the laugh
- Use the timer: Press
⌘ + Shift + 5and set a 5-second timer. Position yourself, then let it capture automatically - Multiple shots: Take several captures quickly. Pick the best one later
Lighting and Positioning
Your screenshot quality depends on both callers' setups.
- Face a light source: A window or lamp in front of you lights your face evenly
- Avoid backlighting: Don't sit with a bright window behind you — you'll look like a silhouette
- Stable camera: Use a stand or prop your device. Shaky video leads to blurry captures
You can't control the other person's lighting. But you can wait for moments when they're well-lit.
Frame the Shot
Before capturing, consider the composition.
- Enlarge important elements: Double-click someone's tile to make them full-screen before capturing
- Hide unnecessary UI: Move your cursor away from the FaceTime window. Controls disappear after a few seconds
- Choose your capture area: Use
⌘ + Shift + 4to select just the part you want — skip the FaceTime chrome entirely
Group Call Strategies
Group FaceTime calls are trickier. Multiple people mean more variables.
- Pin the person you want: Click and hold someone's tile to pin it larger
- Full-screen one participant: Double-click to fill your screen with one person
- Capture grid view: Use
⌘ + Shift + 3to capture everyone at once - Time your shot: Wait for a moment when everyone's looking at camera — rare but worth waiting for
Quick Comparison: FaceTime Screenshot Methods
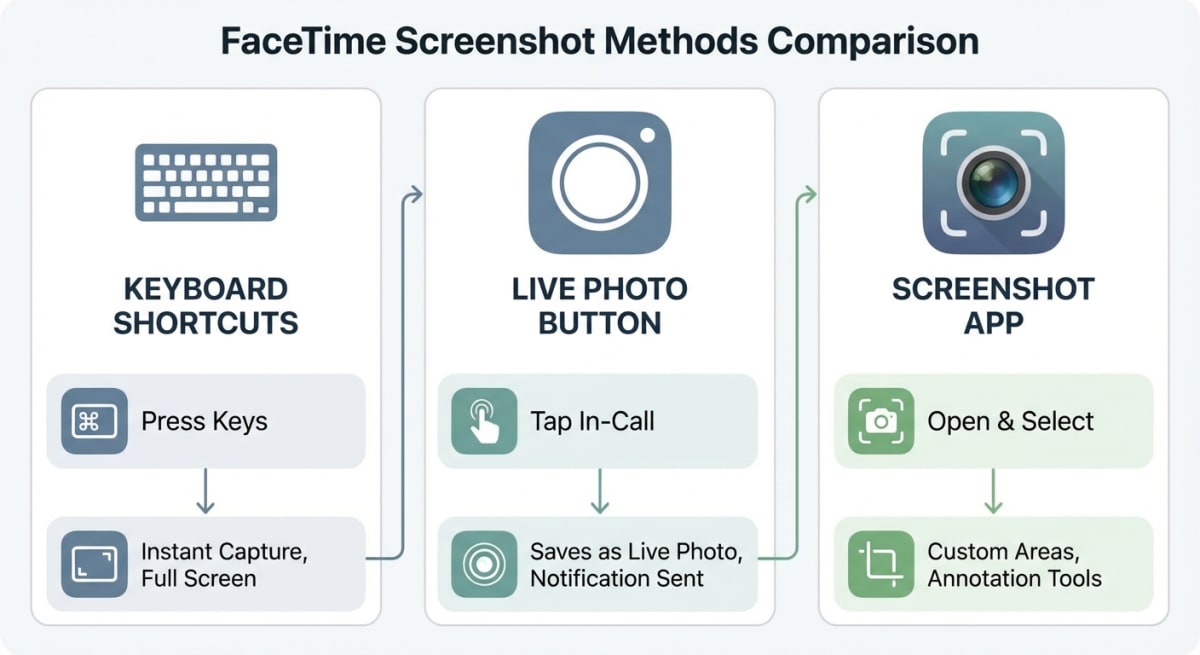
| Method | Speed | Notification | Best For |
|---|---|---|---|
⌘ + Shift + 3 | Instant | None | Full screen |
⌘ + Shift + 4 | Fast | None | Selected areas |
⌘ + Shift + 4 + Space | Fast | None | Clean windows |
| FaceTime Live Photo | Instant | Both users | Mutual moments |
| Screenshot app | Moderate | None | Timed captures |
For most people, ⌘ + Shift + 4 + Spacebar works best. It gives you the cleanest FaceTime window captures.
Want Live Photos with motion? Use FaceTime's built-in button. Just remember — the other person will know.
Frequently Asked Questions
- Keyboard screenshots: Desktop (default)
- FaceTime Live Photos: Photos app Library
- Third-party apps: Varies by app settings
- macOS Sonoma
- macOS Ventura
- Earlier versions
- Use
⌘ + Shift + 4to select just their video tile - Double-click their tile to enlarge it first. Then capture with
⌘ + Shift + 4+Spacebar
Capture FaceTime Moments with Confidence
Now you know four reliable ways to screenshot FaceTime calls on Mac.
The key takeaway: Regular screenshots are private. They don't notify anyone. Live Photos are designed for mutual capturing — with notifications.
For best results, use ⌘ + Shift + 4 + Spacebar for clean window captures.
Want instant annotation and sharing? Try ScreenSnap Pro — you can even pin screenshots while still on your call.
Morgan
Indie DeveloperIndie developer, founder of ScreenSnap Pro. A decade of shipping consumer Mac apps and developer tools. Read full bio
@m_0_r_g_a_n_