Best Screen Recorder for Mac (2026) | Free & Paid Compared
A screen recorder for Mac — like the GIF recorder built into ScreenSnap Pro — turns your display into video. Use it to make tutorials, record talks, or share quick demos. Need to record your screen with audio? The right tool matters.
There are lots of choices out there. Apple's built-in tools are free. Pro apps can cost more. Some capture system audio. Others add fancy zoom effects. A few focus on making GIFs for quick demos.
This guide breaks down 11 screen recorders one by one—free options first, then paid. Prefer to skim? Jump straight to the full comparison table, what to look for, or picks by use case.
Free Screen Recorders for Mac
macOS Screenshot Tool (Built-in)
The fastest way to record on Mac? It's already on your computer. Press ⌘ + Shift + 5 to open the Screenshot toolbar.
What you can do:
- Record Entire Screen — Captures your whole display
- Record Selected Portion — Drag to pick an area
- Timer — 5 or 10 second countdown
- Mic selection — Pick which mic to use
Files save to Desktop by default. You can trim clips in Quick Look. No extra app needed.
Pros:
- No setup needed
- Built into macOS
- Fast and light
- Saves where you want
- Works on Mojave and newer
Cons:
- No system audio (mic only)
- Can only trim, nothing else
- MOV format only
- No annotations
- Big file sizes
Best for: Quick captures. Bug reports. Sharing workflows. No-fuss recording.
Want more details? See our QuickTime screen recording guide.
OBS Studio
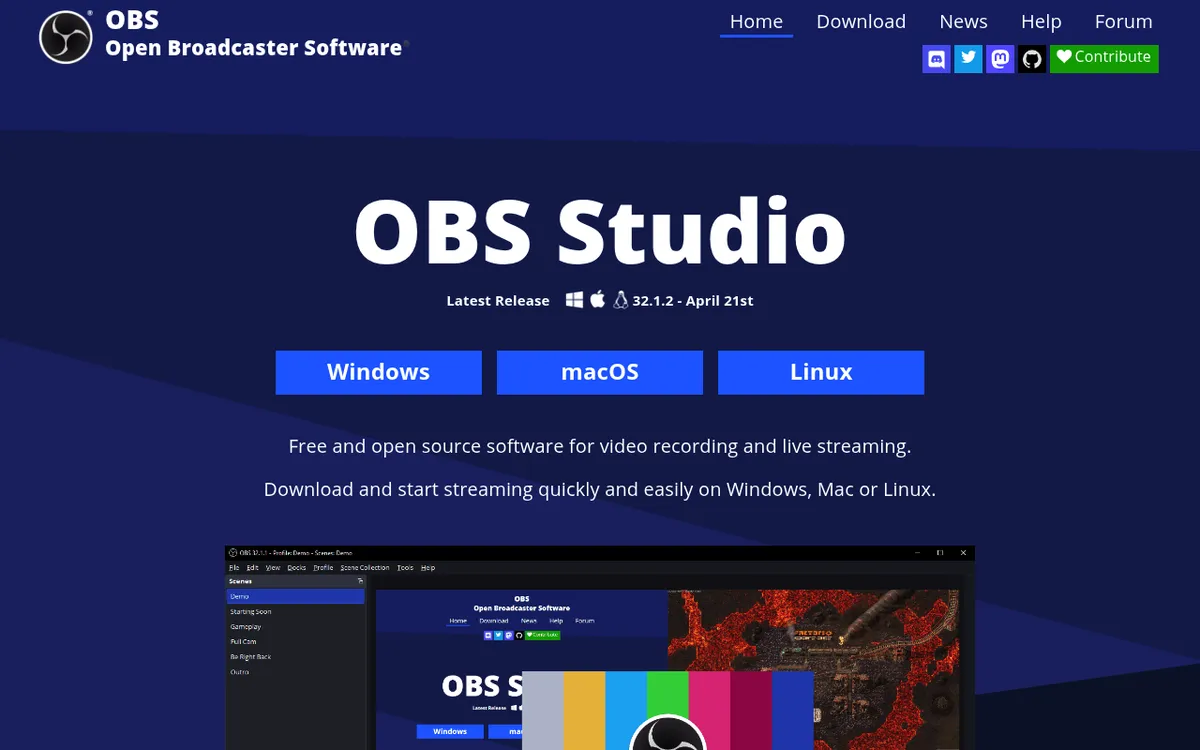
OBS Studio is a free, open-source recorder used by streamers and pros. It's widely adopted across Windows, Mac, and Linux.
OBS handles complex setups:
- Multiple cameras
- Picture-in-picture
- Custom overlays
- Real-time scene switching
The 2025 update added native multitrack video for macOS. Now you can split webcam from screen capture with ease.
Key features:
- Scenes and Sources — Mix screens, windows, webcams, images, text
- Audio Mixer — Control sources with filters
- Streaming — Works with Twitch, YouTube, Facebook
- Plugins — Thousands of add-ons for effects
Pros:
- No time limits or watermarks
- Mix many audio/video sources
- Scene overlays and effects
- Multitrack recording (2025)
- Huge plugin library
- 100% free
Cons:
- Takes time to learn
- Needs BlackHole for system audio
- Can feel complex at first
- Too much for simple tasks
Best for: Streaming, podcasts, gaming, complex tutorials. Great if you need full control.
#### How to Set Up OBS for Mac Screen Recording
New to OBS? Here's a quick start guide:
Step 1: Download and Install
- Go to obsproject.com
- Click "macOS" to download
- Drag OBS to your Applications folder
- Open it. Allow screen recording access when asked.
Step 2: Create Your First Scene
- In the bottom left, click the + under "Scenes"
- Name it "Screen Recording"
- Click OK
Step 3: Add Your Screen
- Click + under "Sources"
- Choose "Display Capture"
- Name it and click OK
- Pick your display (if you have more than one)
- Click OK again
Step 4: Add Your Microphone
- Click + under "Sources"
- Choose "Audio Input Capture"
- Pick your mic from the dropdown
- Click OK
Step 5: Set Up System Audio (Optional)
This part trips up most users. macOS doesn't let apps capture system audio by default.
To fix this:
- Install BlackHole (free)
- Open Audio MIDI Setup (search in Spotlight)
- Click + at bottom left → "Create Multi-Output Device"
- Check both BlackHole and your speakers
- In OBS, add "Audio Input Capture" for BlackHole
Now OBS captures what your Mac plays.
Step 6: Start Recording
- Click "Settings" → "Output"
- Set "Recording Path" to your Desktop
- Set "Recording Format" to MP4
- Click OK
- Press "Start Recording"
That's it! You're recording. Press "Stop Recording" when done.
Pro tips for OBS:
- Use
⌘ + Shift + Sto quick-start recordings - Set up shortcuts in Settings → Hotkeys
- Lower resolution to 1080p for smaller files
- Check Settings → Video → FPS (30 is fine for most)
Kap
Kap is an open-source screen recorder built specifically for creating GIFs and short videos. It's lightweight, beautiful, and perfect for developers who need to share quick demos.
Pros:
- Native GIF export
- Minimal, elegant interface
- Multiple export formats (GIF, MP4, WebM, APNG)
- Customizable FPS and quality
- Free and open-source
Cons:
- No system audio capture
- Limited editing tools
- No annotations
- macOS only
Best for: Developers sharing code demos, bug reports, or documentation GIFs.
Read our full Kap screen recorder review for setup tips and tricks.
GIPHY Capture
If you primarily create GIFs for social media or messaging apps, GIPHY Capture keeps things simple with a focused, no-frills interface.
Pros:
- Dead simple to use
- Direct upload to GIPHY
- Adjustable loop settings
- Free with no watermarks
Cons:
- GIF-only output
- No video export
- Limited to 30 seconds
- No audio at all
- Basic editing
Best for: Creating reaction GIFs and short social media clips.
Looking for alternatives? See our comparison of GIPHY Capture alternatives for Mac.
Paid Screen Recorders for Mac
CleanShot X
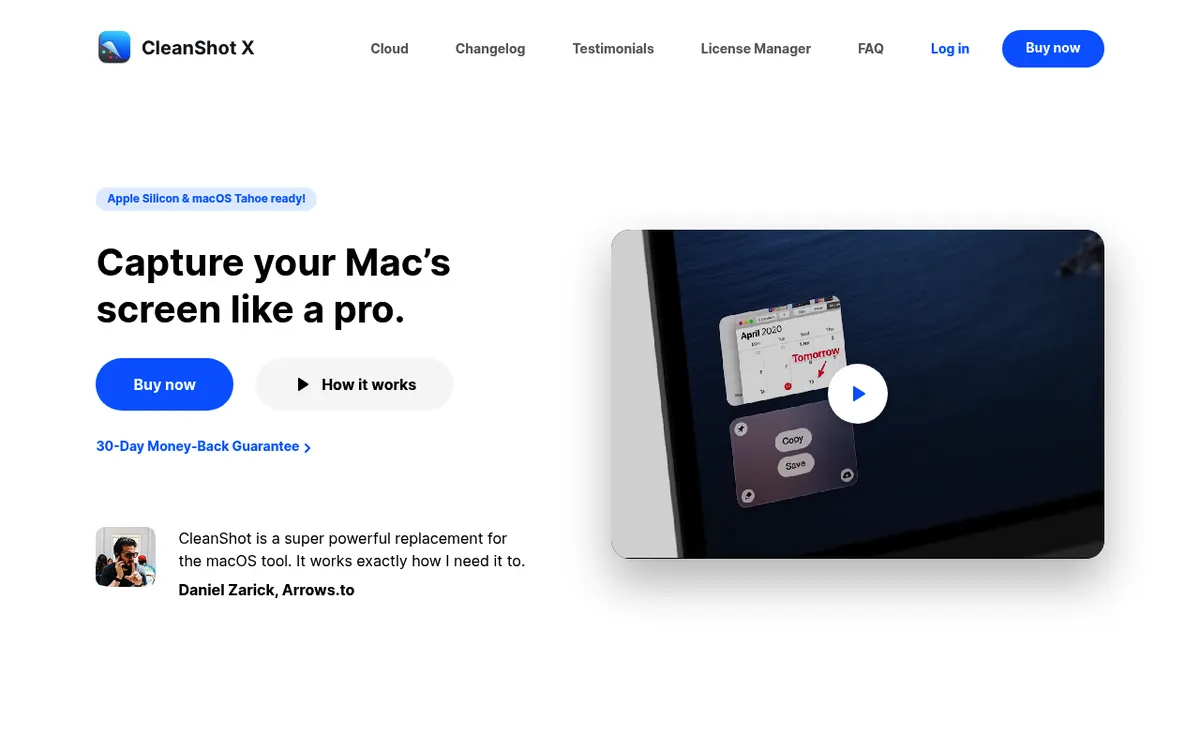
CleanShot X combines screenshots, recordings, GIFs, and cloud sharing in one app.
Price: $29 one-time (cloud costs extra)
Pros:
- Records system audio (no setup needed)
- Built-in GIF recording
- Instant cloud links
- Hides desktop icons while recording
- Great annotation tools
- Pay once, own forever
Cons:
- Cloud features cost extra
- Mac only
- No advanced video editing
Best for: People who want screenshots and screen recording in a single app.
ScreenCharm — Best for Cinematic Demos
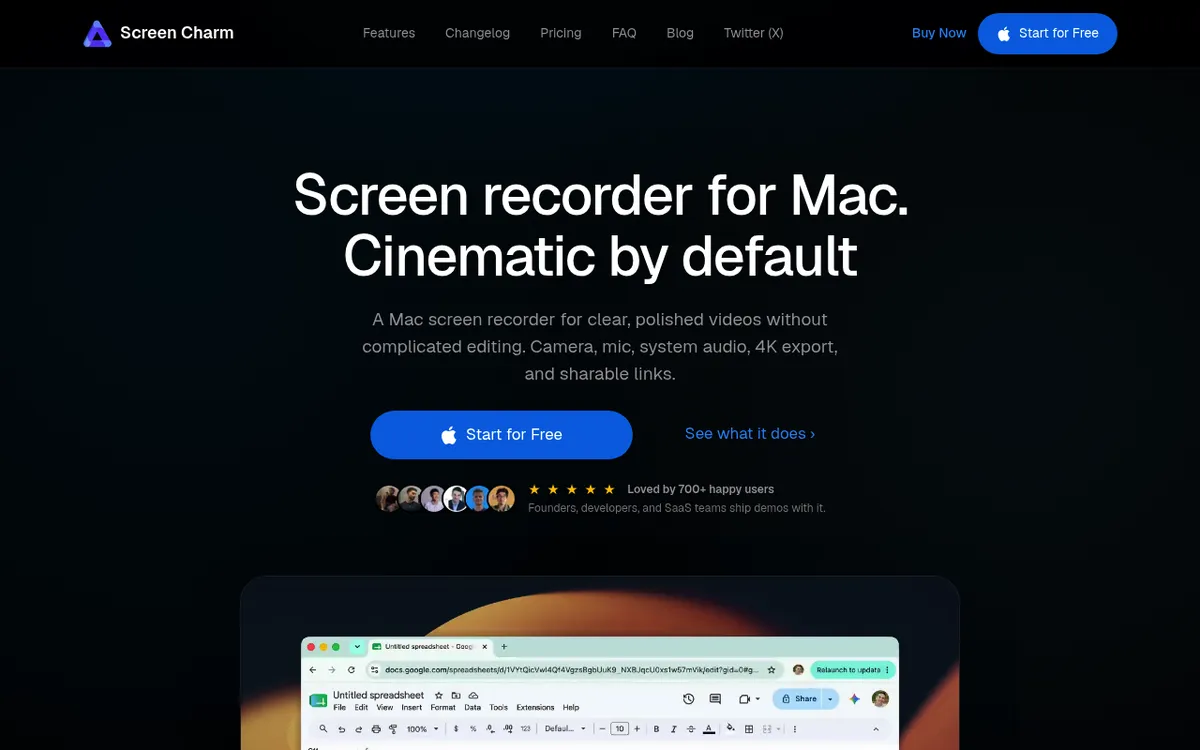
ScreenCharm turns raw screen recordings into polished, cinematic demos—no editing skills required. It auto-zooms on your clicks, smooths cursor motion, and adds motion blur on fast movements, so recordings look produced straight out of the box. Think Screen Studio's polish with a Mac-first feel.
Price: $79 one-time (lifetime, up to 3 devices, 14-day money-back guarantee)
Pros:
- Automatic smart auto-zoom on clicks
- Cursor smoothing + motion blur for a cinematic look
- Captures screen, camera, mic, and system audio
- 4K MP4 export or instant shareable links (no account needed to view)
- Device frames, custom backgrounds, and background music
- Trim, cut, and speed controls built in
- One-time purchase (no subscription)
Cons:
- Video only (no GIF export)
- Costs more than CleanShot X
- macOS only (Sonoma 14+), Apple Silicon ready
- Newer app with a smaller community
Best for: Developers, course creators, and founders who want product demos and tutorials that look professionally edited—without opening a video editor.
Screen Studio — Best for Polished Tutorials
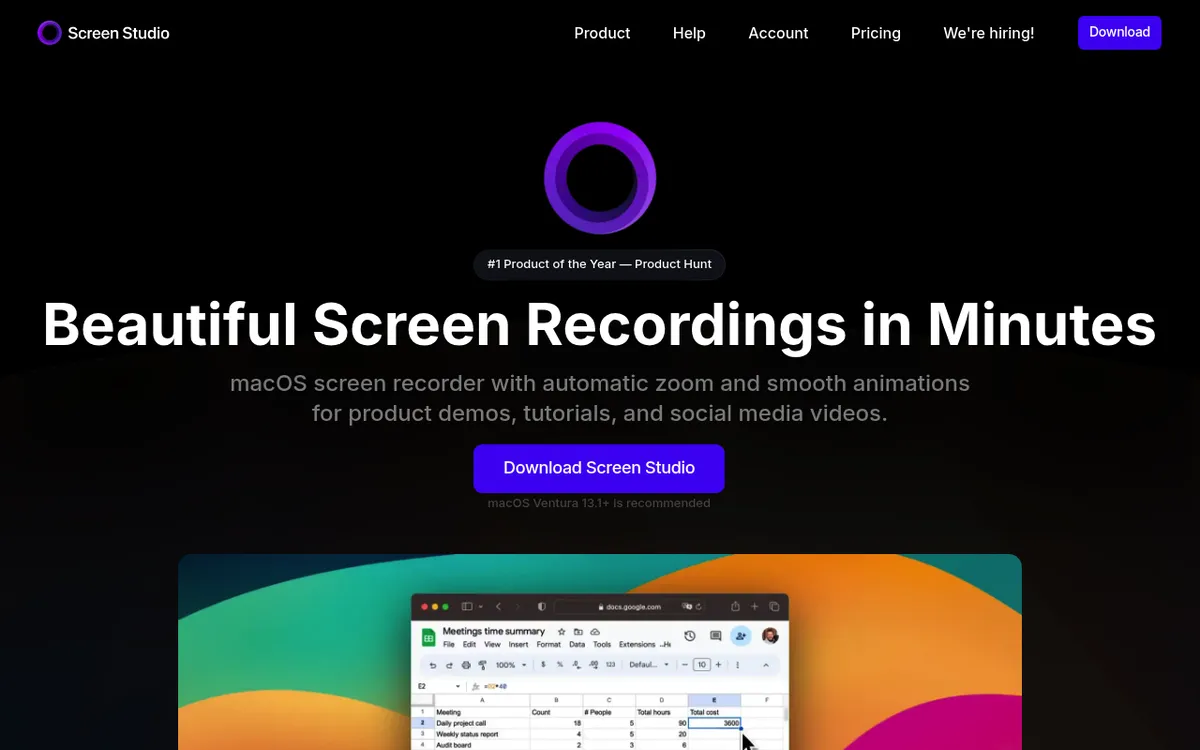
Screen Studio makes your videos look pro. It adds auto-zoom and cursor effects. Great for YouTube or online courses.
Price: $89 one-time
Pros:
- Auto-zoom follows your mouse
- Smooth motion effects
- Captures system audio
- Custom backgrounds
- One-time purchase
Cons:
- Costs more than others
- Video only (no GIFs)
- Can use more CPU
- Takes time to learn
Best for: YouTubers. Course creators. Anyone who wants polished videos fast.
Want options? See our Screen Studio alternatives.
Capto — Best for Recording + Editing
Capto mixes recording with a video editor. Capture, trim, and add notes—all in one app.
Price: $30/year or $50 one-time
Pros:
- Video editor built in
- Edit audio tracks
- Export to YouTube/Dropbox
- Screenshots + recording
- On Setapp too
Cons:
- Yearly cost (or higher one-time)
- Looks a bit dated
- No auto-zoom
- Less polished feel
Best for: People who want to record and edit without using two apps.
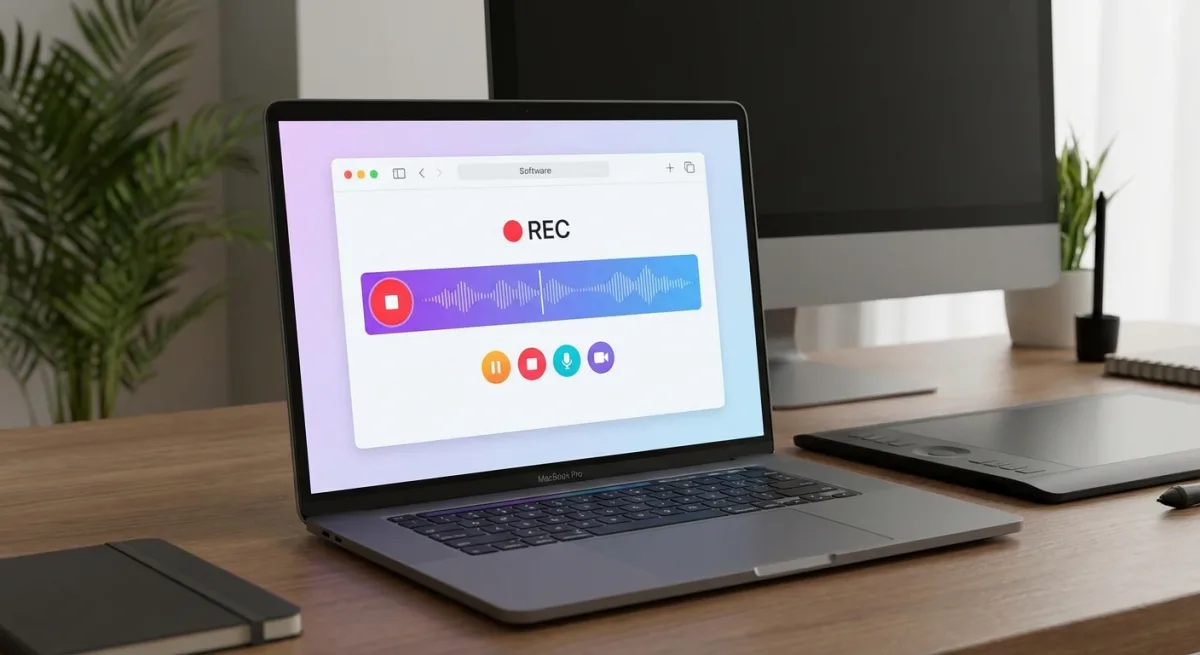
ScreenSnap Pro — Best for Quick GIF Demos
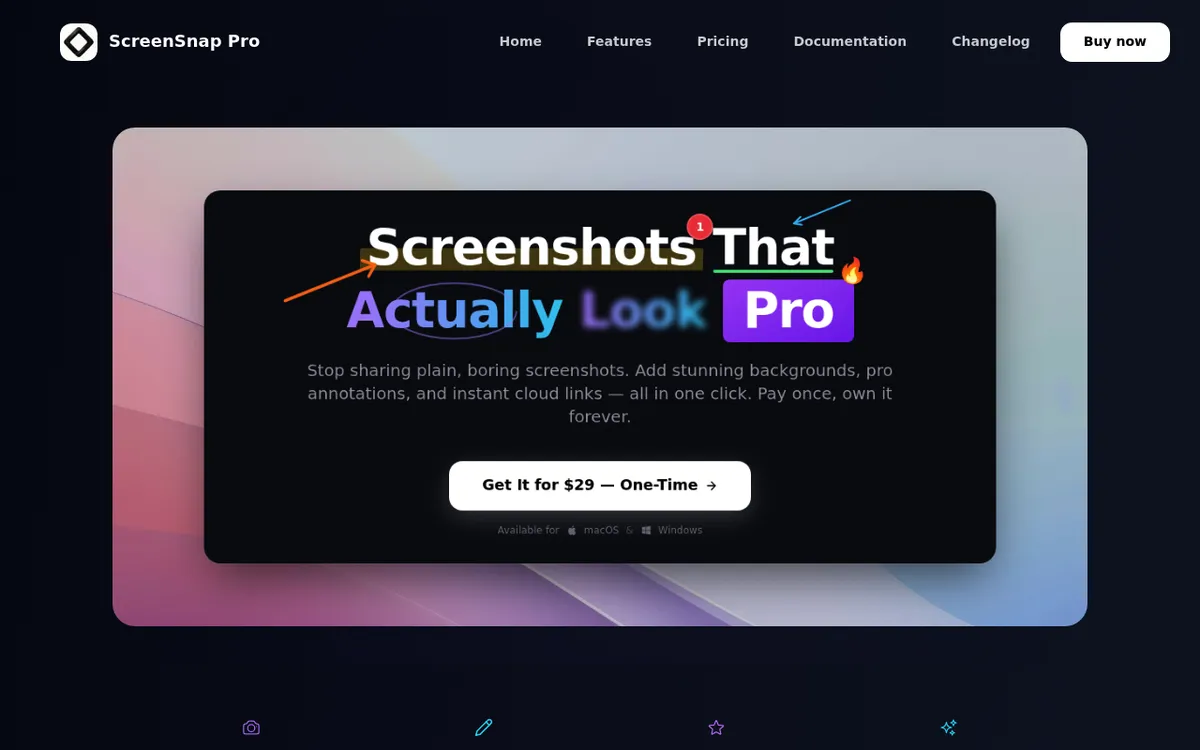
ScreenSnap Pro does what others overlook: creating GIFs fast. Share demos in Slack, GitHub, or docs. GIFs load instantly—no video player needed.
Price: $29 one-time
Pros:
- Direct GIF recording (no conversion)
- Beautiful annotation tools
- One-time purchase (no subscription)
- Lightweight and fast
- 150+ wallpapers for screenshots
Cons:
- GIF only (no video recording)
- No system audio capture
- macOS only
Best for: Developers, designers, and support teams who share quick demos in chat and documentation.
Movavi Screen Recorder
Movavi is a full-featured tool. It has webcam overlay, drawing tools, and timed recording. Good for webinars and live events.
Price: $45/year or $75 one-time
Pros:
- Show webcam and screen at once
- Draw while you record
- Set recordings to start later
- Works on Mac and Windows
- Cuts background noise
Cons:
- Yearly cost adds up
- Feels heavy at times
- Lots of upgrade pop-ups
- Uses more CPU
Best for: Webinars. Online classes. Any time you need your face on screen.
Loom — Best for Team Sharing
Loom is about fast sharing. Record and get a link in seconds. Great for remote teams.
Price: Free (5 min limit) / $15/month Pro
Pros:
- Share links right away
- See who watched your video
- Get comments and emoji replies
- Works in browser or as an app
- Record screen + webcam
Cons:
- Needs internet to work
- Free tier caps at 5 minutes
- Monthly cost adds up
- Videos live in the cloud only
- Less control over quality
Best for: Remote teams. Sales demos. Support videos. Quick async updates.
Quick Comparison: All 11 Screen Recorders
Now that you've seen each tool, here's how they stack up side by side:
| App | Price | System Audio | Video Output | GIF Support | Best For |
|---|---|---|---|---|---|
| macOS Screenshot | Free | ❌ | MOV | ❌ | Quick captures |
| QuickTime Player | Free | ❌ | MOV | ❌ | Basic recordings |
| OBS Studio | Free | ✅ (setup) | MP4/MKV | ❌ | Streaming & pro use |
| Kap | Free | ❌ | MP4/GIF | ✅ | GIF creation |
| GIPHY Capture | Free | ❌ | GIF only | ✅ | Social media GIFs |
| CleanShot X | $29 | ✅ | MP4/GIF | ✅ | All-in-one tool |
| ScreenCharm | $79 | ✅ | 4K MP4 | ❌ | Cinematic demos |
| Screen Studio | $89 | ✅ | MP4 | ❌ | Polished tutorials |
| Capto | $30/yr | ✅ | MP4 | ❌ | Recording + editing |
| ScreenSnap Pro | $29 | ❌ | GIF | ✅ | Quick GIF demos |
| Movavi | $45/yr | ✅ | MP4/MOV | ❌ | Webcam overlay |
| Loom | Free/$15/mo | ✅ | Cloud | ❌ | Team sharing |
What to Look for in a Mac Screen Recorder
Picking the right tool? Here's what matters most.
Audio Capture
Apple's built-in tools have one big limit. They can't capture system audio. If you want to record what plays through your speakers, you need a third-party app.
Here's how different apps handle audio:
- Built-in support: CleanShot X, Loom, Screen Studio
- Needs extra setup: OBS (requires BlackHole or Loopback)
- Mic only: macOS Screenshot, QuickTime, Kap
The short version: Making tutorials or gaming content? You need system audio. Sharing bug reports? Mic-only is fine.
Output Formats
Pick a format based on how you'll share your work.
Video formats:
- MP4 — Works everywhere. Best for YouTube, social media.
- MOV — Apple's format. Great for iMovie, Final Cut.
Other formats:
- GIF — Plays in Slack, GitHub, docs. No video player needed. Small files (under 10MB).
- Cloud links — Share a link, not a file. Great for teams.
- WebM/MKV — Less common. Used for web or archives.
Editing Tools
Some apps just record. Others let you edit too.
Common editing features:
- Trimming — Cut out mistakes
- Annotations — Add arrows, text, shapes
- Auto-zoom — Camera follows your cursor
- Backgrounds — Add colors or images behind your recording
Create content often? Built-in editing saves hours.
Pricing: What's the Catch?
Three pricing models to know:
- One-time purchase — Pay once. Own forever. Best value long-term.
- Subscription — Monthly or yearly fees. Costs add up.
- Freemium — Free with limits. Pay to unlock more.
Do the math: A $15/month app costs $540 over 3 years. A $29 one-time app pays for itself in 2 months.
Tired of plain screenshots? Try ScreenSnap Pro.
Beautiful backgrounds, pro annotations, GIF recording, and instant cloud sharing — all in one app. Pay $29 once, own it forever.
See what it doesBest Screen Recorder by Use Case
Not sure which to pick? Here's the quick recommendation based on what you're doing:
For Polished Video Tutorials
Winner: Screen Studio (or ScreenCharm at $79)
Auto-zoom and cursor effects create pro videos fast. No hours in Final Cut. Worth $89 for regular tutorial creators. ScreenCharm delivers the same cinematic auto-zoom and motion blur for $10 less if you want a Mac-first alternative.
For Quick GIF Demos
Winner: ScreenSnap Pro or Kap
For Slack, Discord, or GitHub—GIFs beat video. ScreenSnap Pro has annotation tools. Kap is free and open-source.
For Live Streaming
Winner: OBS Studio
Nothing else comes close for streaming to Twitch or YouTube. It's free, infinitely customizable, and supports every streaming platform.
For Remote Team Communication
Winner: Loom
The instant sharing and viewer analytics make async video communication seamless. The free tier works for most occasional users.
For Budget-Conscious Users
Winner: macOS Screenshot + Kap
Combine the built-in Screenshot tool for basic recordings with Kap for GIFs, and you have a capable free setup.
For Enterprise/IT Teams
Winner: Loom or Movavi
Loom's team features and analytics work well for enterprise. Movavi's scheduling suits IT documentation and training.
Apple Silicon Optimization
On M1, M2, M3, or M4 Mac? Here's the breakdown:
- Native (best speed): CleanShot X, ScreenCharm, Screen Studio, Kap, ScreenSnap Pro, macOS built-in
- Universal (runs well): OBS Studio, Capto, Loom
- Rosetta (uses more power): Some older Movavi versions
Native apps drain less battery. They also record smoother at high resolutions.
Common Recording Issues and How to Fix Them
Even the best screen recorders can hit snags. Here are the most common problems—and how to solve them fast.
"Screen Recording Permission Denied"
Your Mac blocks apps from recording by default. Here's how to fix it:
- Open System Settings (or System Preferences on older Macs)
- Go to Privacy & Security → Screen Recording
- Find your recording app in the list
- Toggle it ON
- Restart the app
Still not working? Try removing the app from the list, then re-adding it. Some users need to restart their Mac after this step.
No Audio in Recording
This is the #1 complaint. There are two types of audio to check:
Microphone audio missing:
- Check if your mic is selected in the app
- Make sure System Settings → Sound → Input shows your mic
- Test the mic in another app (Voice Memos works well)
System audio missing:
- Most free recorders don't capture system audio
- Built-in Screenshot tool only records mic audio
- For system audio, use CleanShot X, Screen Studio, or set up OBS with BlackHole
Quick test: Play a YouTube video while recording. If you hear it in playback, system audio works.
Laggy or Choppy Recordings
Your recording looks like a slideshow? Try these fixes:
Lower your settings:
- Drop from 4K to 1080p
- Lower frame rate from 60fps to 30fps
- Close other apps while recording
Free up system resources:
- Check Activity Monitor for CPU hogs
- Quit Chrome (it's often the culprit)
- Make sure you have 10GB+ free disk space
Use the right app:
- Built-in tools are lightest on resources
- OBS can be heavy on older Macs
- Native Apple Silicon apps run best on M-series chips
Recording File Too Large
A 10-minute recording shouldn't be 2GB. Here's how to shrink files:
Before recording:
- Use 1080p instead of 4K
- Set frame rate to 30fps (not 60)
- Choose MP4 format over MOV
After recording:
- Use QuickTime → File → Export As → 1080p
- Or use HandBrake (free) for more control
- GIFs are smaller than video for short demos
File size guide:
- 5-minute 1080p video ≈ 200-400MB
- 5-minute 4K video ≈ 800MB-1.5GB
- 10-second GIF ≈ 2-8MB
Black Screen in Recording
You clicked record, but the video is just black. Common causes:
DRM content:
- Netflix, Disney+, and other streaming apps block screen capture
- This is by design—you can't record protected content
Wrong display selected:
- If you have multiple monitors, check you picked the right one
- In OBS, go to Sources → Display Capture → Properties
Hardware issues:
- Some older GPUs have issues with screen capture
- Try recording a specific window instead of full screen
- Update to the latest macOS version
Recording Stops Randomly
Your recording ends before you stop it. Likely causes:
Low disk space:
- Recordings need lots of space (1GB per 5-10 minutes)
- Keep 20GB+ free for long sessions
- Set recording location to a drive with more room
App crash:
- Update your recording app
- Check Activity Monitor for memory issues
- Record shorter clips and combine them later
Power settings:
- Go to System Settings → Battery
- Turn off "Put hard disks to sleep when possible"
- Keep your Mac plugged in for long recordings
Can't Record a Specific App
Some apps block screen recording for security:
Banking and password apps:
- 1Password, banking apps, and some finance tools block capture
- This protects your private data
- Use screenshots instead (they often work)
Protected streaming:
- Netflix, Hulu, Amazon Prime Video block recording
- The screen goes black or shows an error
- No workaround—this is copyright protection
Secure input fields:
- Password fields often don't record
- This is a macOS security feature
Frequently Asked Questions
- Basic recordings: macOS Screenshot (
⌘ + Shift + 5). Already on your Mac. - GIF creation: Kap. Great and free.
- Streaming: OBS Studio. Powerful but takes time to learn.
- CleanShot X, Screen Studio, Loom — Works out of the box.
- OBS Studio — Needs BlackHole. More setup, but free.
- Kap
- CleanShot X
- GIPHY Capture
- ScreenSnap Pro
- Loom free tier: 5-minute max
- Longer recordings = bigger files (1-hour 1080p ≈ 5GB+)
- Minimal impact: CleanShot X, ScreenSnap Pro
- More demanding: OBS (runs fine on M1+)
- Older Intel Macs: Avoid max resolution during heavy tasks
- 1080p — Best balance of quality and file size. Works for most uses.
- 1440p/4K — Sharper text. Good for YouTube or courses.
- 720p — Fine for quick demos and GIFs. Smaller files.
The Bottom Line
The best Mac screen recorder depends on your workflow:
- Polished tutorials? Screen Studio
- Quick GIF demos? ScreenSnap Pro or Kap
- Remote teams? Loom
- Screenshots + recording in one app? CleanShot X
- Zero budget? macOS Screenshot + Kap
The right tool fades into the background. Start with free options. Upgrade when you hit their limits.
For more tips, see our guides on recording with audio and editing recordings.
Morgan
Indie DeveloperIndie developer, founder of ScreenSnap Pro. A decade of shipping consumer Mac apps and developer tools. Read full bio
@m_0_r_g_a_n_