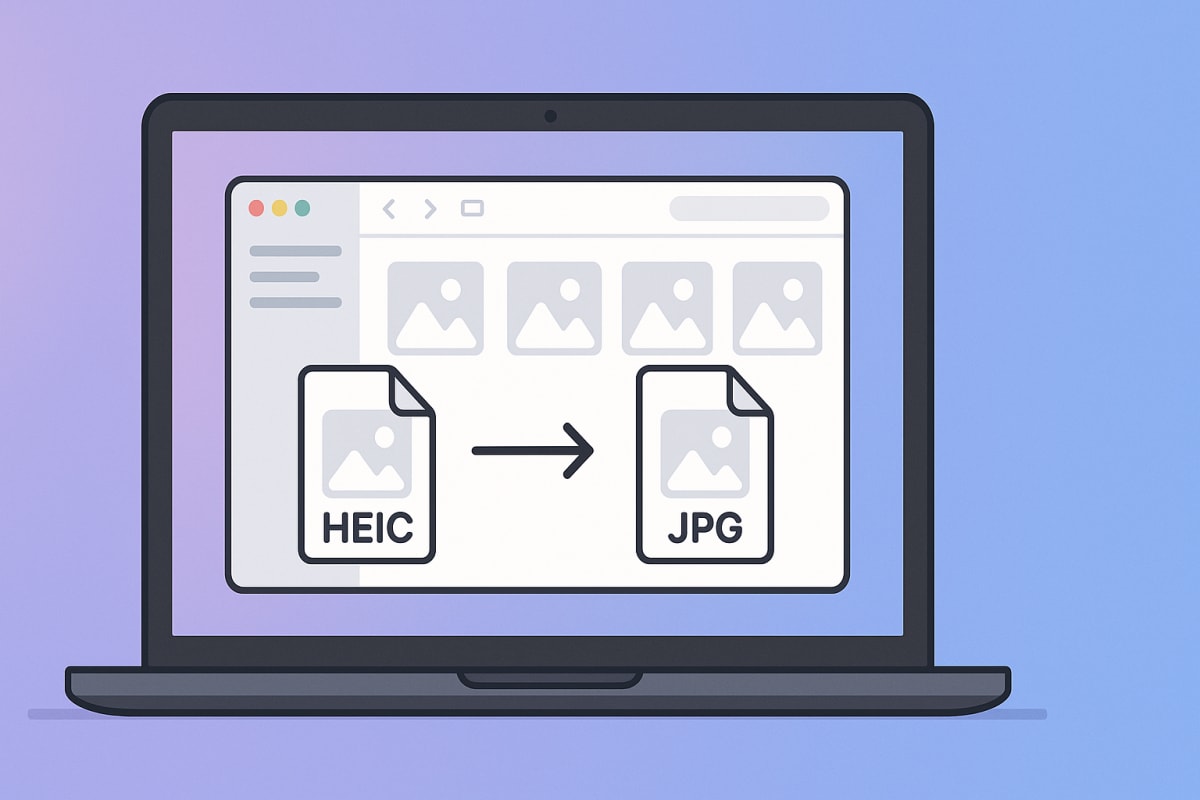
How to Combine Screenshots on Mac (5 Easy Methods)
Need to combine screenshots into a single image on your Mac? You're in the right place. Tools like ScreenSnap Pro can capture and stitch multiple shots without leaving the screenshot workflow.
Whether you're making comparison graphics, showing a multi-step process, or stitching a long chat thread — it's easier than you think.
This guide covers five ways to combine screenshots on Mac. You'll find free built-in tools and professional apps. Pick what fits your workflow best.
Why Combine Screenshots?
Before we dive in, here's when you might want to merge screenshots:
- Before/after comparisons — Show design changes or UI updates side by side
- Multi-step tutorials — Put numbered steps into one visual guide
- Long conversations — Stitch Slack, iMessage, or email threads together
- Code comparisons — Place two code snippets side by side for review
- Documentation — Create reference images for wikis or help docs
- Social media — Build comparison posts or carousel alternatives
Good news: macOS has several free options built in. You probably won't need to install anything for basic tasks.
But if screenshots are part of your daily work, knowing all your options helps. Let's explore how to merge those screenshots.
Quick Comparison: 5 Methods to Combine Screenshots
| Method | Difficulty | Best For | Cost |
|---|---|---|---|
| Preview App | Medium | Occasional users, precise control | Free |
| Shortcuts App | Easy | Quick grid layouts, automation | Free |
| Screenshot Tools | Easy | Daily workflow, professionals | $29-50 |
| Online Tools | Easy | One-off tasks, no install needed | Free |
| ImageMagick | Hard | Developers, batch automation | Free |
Now let's walk through each method in detail.
Method 1: Use Preview App (Free, Built-in)
Preview is already on your Mac. It can combine screenshots without installing anything extra.
The process takes some manual work. But it's completely free.
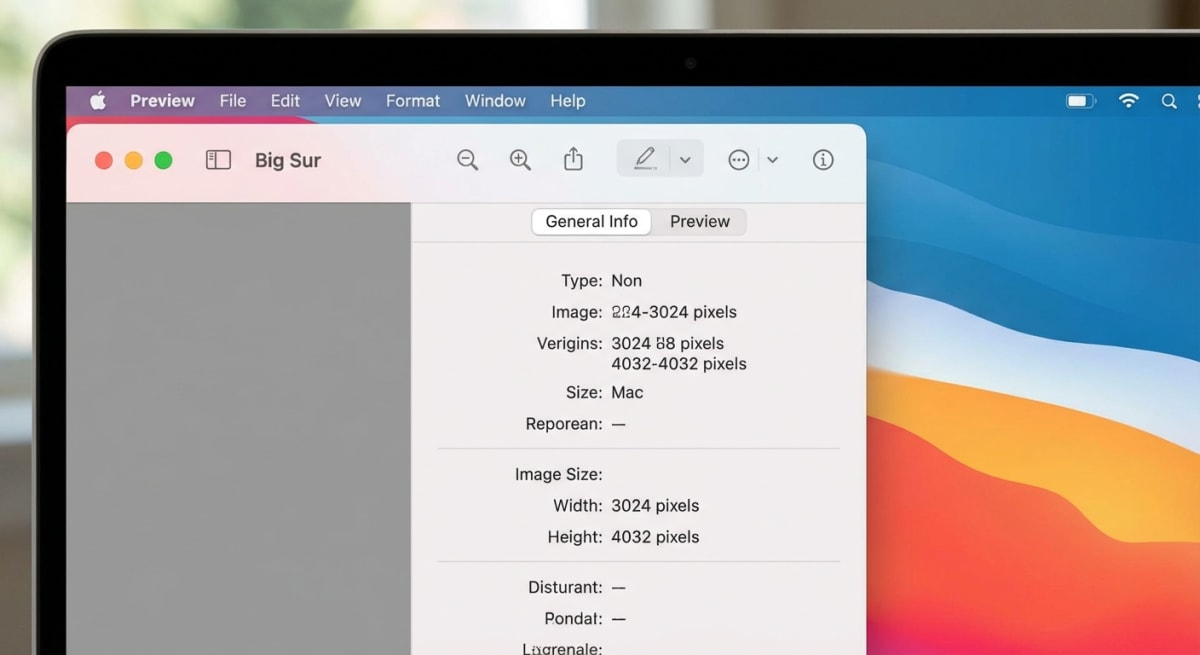
Step 1: Check your screenshot dimensions
First, you need to know each screenshot's size.
- Select all screenshots in Finder
- Right-click and choose Open With > Preview
- Go to Tools > Show Inspector (or press
⌘ + I) - Click the Info (i) tab
- Note each image's width and height
Step 2: Create a blank canvas
Now create a new document sized for all your screenshots:
- Select any image in Preview's sidebar
- Press
⌘ + Cto copy it - Go to File > New from Clipboard
- Click Tools > Adjust Size
- Uncheck Scale proportionally
- For horizontal layout: Set Width to the total of all widths
- For vertical layout: Set Height to the total of all heights
- Click OK
Step 3: Combine your screenshots
- Press
⌘ + Ato select all, then Edit > Delete to clear the canvas - Go back to your original screenshots in Preview
- Select the first image, press
⌘ + Athen⌘ + C - Switch to your blank canvas
- Press
⌘ + Vto paste - Drag the image into position
- Repeat for each screenshot
- Save with File > Export (PNG for transparency, JPG for smaller files)
Alignment tips for Preview
Getting screenshots to line up perfectly takes practice. Here are some tricks:
- Use the arrow keys after clicking an image. This moves it pixel by pixel for precise positioning.
- Watch the alignment guides. Preview shows yellow guides when edges align with other elements.
- Start from one corner. Place your first screenshot at the top-left (0,0 position) and build from there.
- Leave some padding. Add 10-20 extra pixels to your canvas size for breathing room between images.
The whole process takes 5-10 minutes. Not ideal for daily use, but perfect when you need exact control over positioning.
Pro tip: Need to edit screenshots before combining? You can edit screenshots on Mac right in Preview. Add arrows, text, or highlights before merging.
This method works for occasional use. But if you often crop a screenshot on Mac or combine images, a dedicated tool saves lots of time.
Method 2: Use the Shortcuts App (Automation)
macOS has a built-in shortcut called Photo Grid. It automates everything. This is the fastest free way to create a combine screenshots shortcut on your Mac.
How to set up Photo Grid
- Open the Shortcuts app (use Spotlight:
⌘ + Space) - Click Gallery in the sidebar
- Search for "Photo Grid"
- Click Add Shortcut
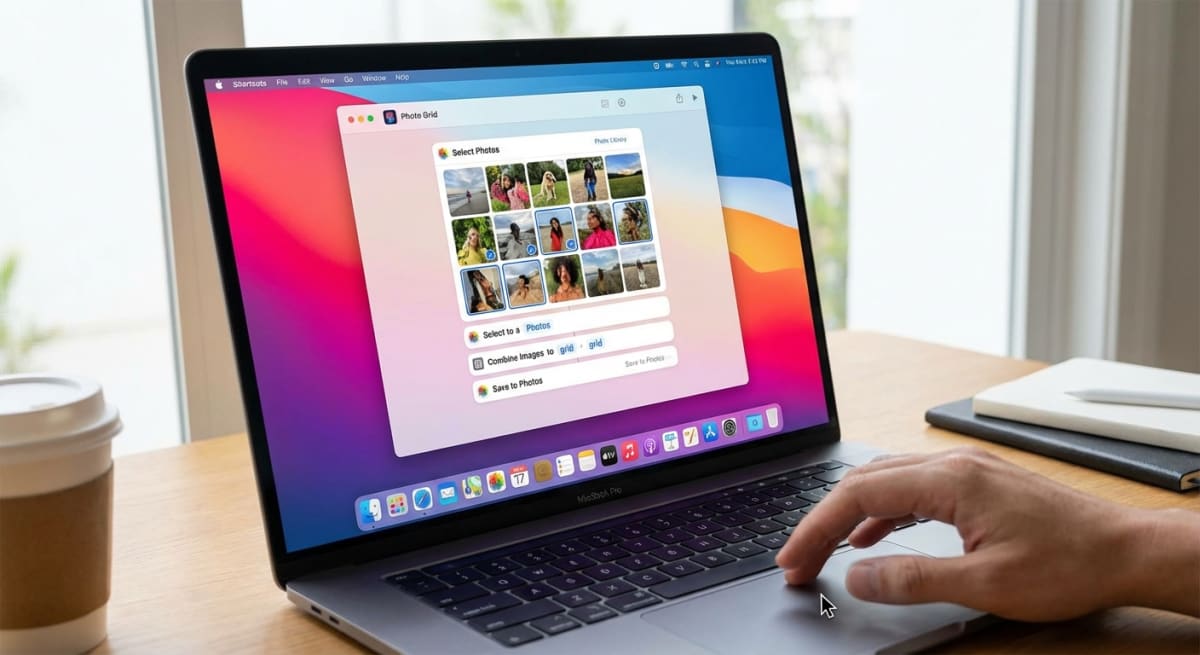
How to use it
- Go to All Shortcuts
- Click Play on Photo Grid
- Select the screenshots you want to combine
- Click Add
- Preview your combined image
- Click Open with Preview to save, or Share to send directly
The shortcut arranges images in a grid automatically. For more control, you'll need another method.
Tip: Make sure your screenshots are saved somewhere easy to find. Not sure where macOS puts them? Check our guide on how to change screenshot location on Mac.
Method 3: Screenshot Tools With Built-in Combining
If you combine screenshots regularly, dedicated apps offer one-click solutions. They can save hours of manual work every week.
Why consider a dedicated screenshot app?
Preview works, but it wasn't built for screenshots. Dedicated tools understand your workflow:
- Capture and combine in one step — No exporting, opening, resizing dance
- Built-in annotation — Add arrows, text, and highlights without switching apps
- Professional backgrounds — Make screenshots look polished instantly
- Cloud sharing — Get shareable links without uploading manually
- Scrolling capture — Grab entire webpages instead of stitching screenshots
Tools worth checking out
ScreenSnap Pro has instant annotation and cloud sharing. It streamlines the entire capture-to-share process. The one-time pricing (no subscription) appeals to many users.
CleanShot X offers similar features with a polished interface. Shottr is free and lightweight if you need basics.
Check our best screenshot apps for Mac roundup for detailed comparisons.
When a screenshot app makes sense
Invest in a dedicated tool if you:
- Combine screenshots more than 2-3 times per week
- Need to annotate screenshots professionally for documentation
- Share screenshots with clients or teammates regularly
- Want to add backgrounds to screenshots for marketing
The time savings add up quickly. What takes 10 minutes in Preview might take 30 seconds with the right tool.
Tired of plain screenshots? Try ScreenSnap Pro.
Beautiful backgrounds, pro annotations, GIF recording, and instant cloud sharing — all in one app. Pay $29 once, own it forever.
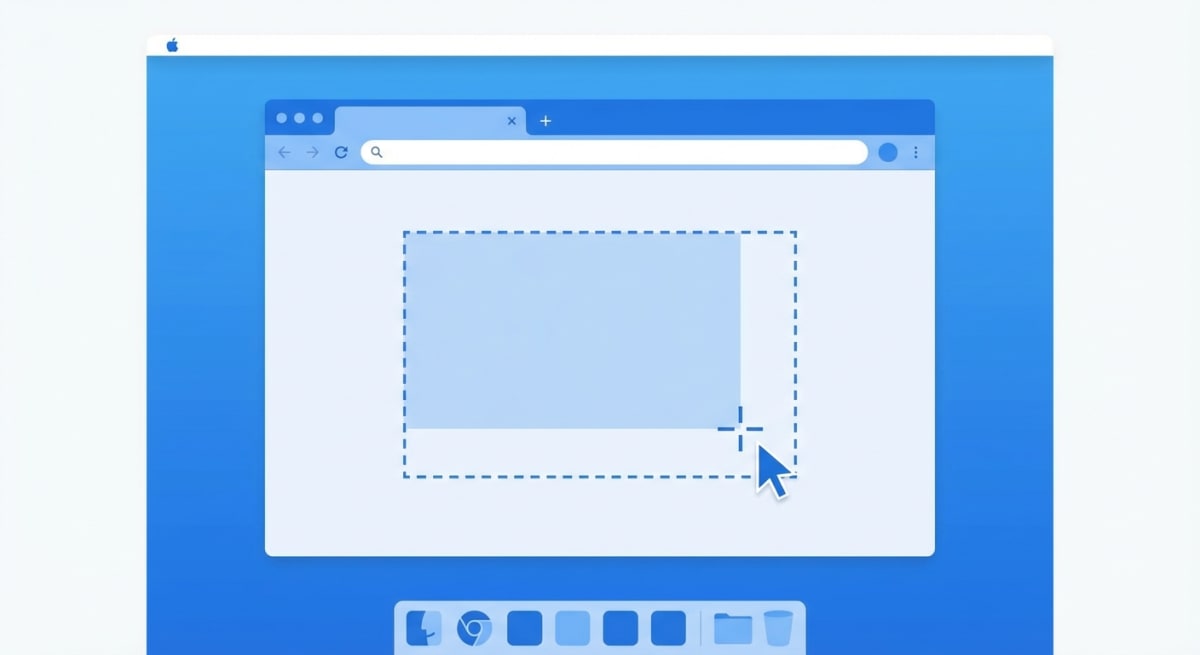
See what it doesMethod 4: Online Tools (No Installation Required)
Web apps let you merge screenshots online without installing anything.
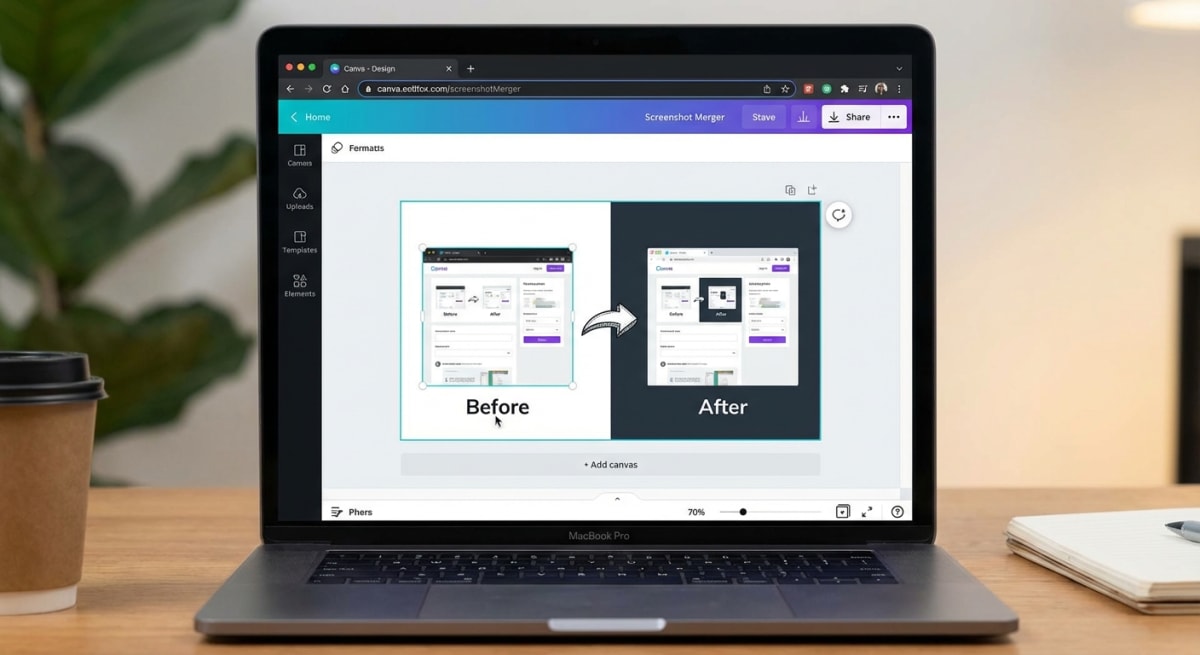
Canva
Canva has a free tier with solid editing:
- Go to canva.com and create a free account
- Click Create a design and choose Custom size
- Upload your screenshots
- Drag them onto the canvas
- Arrange as needed
- Download as PNG or JPG
Photopea
Photopea is a free Photoshop alternative. It runs entirely in your browser:
- Go to photopea.com
- Open your first screenshot with File > Open
- Use Image > Canvas Size to expand the canvas
- Open more screenshots and copy/paste them
- Position layers as needed
- Export with File > Export As
Online tools are great for quick one-off tasks. They're especially handy on work computers where you can't install apps. You can also use our free combine images tool to merge screenshots right in your browser — no upload to third-party servers required.
One thing to consider: Online tools upload your images to their servers. For screenshots with sensitive info—code, passwords, or private chats—use a local tool instead. Preview or a dedicated app is more secure.
Method 5: Terminal With ImageMagick (For Developers)
Developers often prefer the command line. ImageMagick is free and open-source. It can combine images with a single command.
Installation
First, install Homebrew if needed. Then install ImageMagick:
# Install Homebrew (if needed)
/bin/bash -c "$(curl -fsSL https://raw.githubusercontent.com/Homebrew/install/HEAD/install.sh)"

# Install ImageMagick
brew install imagemagick
Combine screenshots horizontally
convert +append screenshot1.png screenshot2.png screenshot3.png combined.pngCombine screenshots vertically
convert -append screenshot1.png screenshot2.png screenshot3.png combined.png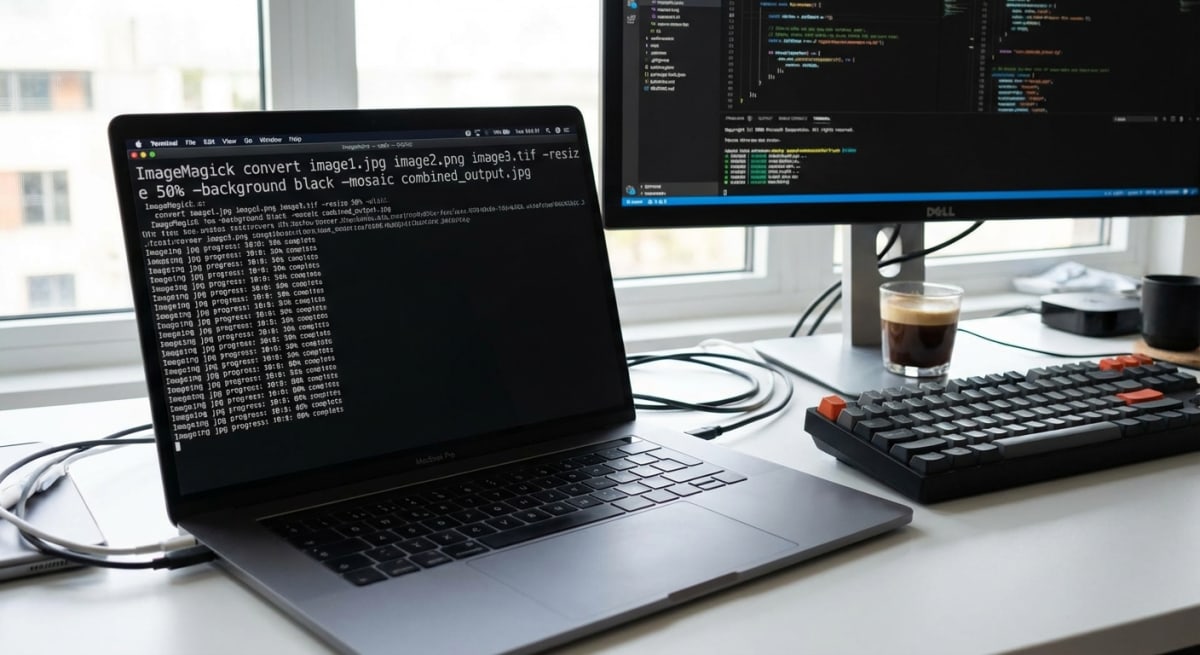
Add spacing between images
convert screenshot1.png screenshot2.png +append -bordercolor white -border 10x0 combined.pngCreate a grid layout
Want four screenshots in a 2x2 grid? Use this:
montage screenshot1.png screenshot2.png screenshot3.png screenshot4.png -tile 2x2 -geometry +5+5 grid.pngThe -tile 2x2 sets the grid size. The -geometry +5+5 adds 5 pixels of spacing.
ImageMagick is perfect for automation. Use it in shell scripts or CI/CD pipelines. Check Apple's Terminal docs if you're new to command-line tools.
Tips for Clean Screenshot Combinations
Whichever method you pick, these tips help your combined images look professional:
Match dimensions when possible
Screenshots with different heights look awkward side by side. Before combining:
- Capture at the same resolution
- Crop to matching sizes if needed
- Use the same window size for app screenshots
Add visual separation
White space or borders between screenshots improve readability:
- Add 10-20 pixels of padding between images
- Use light gray backgrounds instead of pure white
- Consider thin border lines for definition
Keep styling consistent
For docs or tutorials:
- Stick to one macOS appearance (Light or Dark mode)
- Keep wallpapers and menu bars the same
- Use matching annotation styles across all screenshots
Choose the right file format
- PNG — Best for text, UI elements, or transparency
- JPG — Good for photos or smaller file sizes
- WebP — Great compression, but not supported everywhere
Troubleshooting Common Issues
Combined image looks blurry
This usually happens when you resize or compress too aggressively. Always start with full-resolution screenshots. If you need a smaller file, reduce quality at the final export step only—not during combining.
Screenshots have different sizes
Mismatched dimensions make combinations look awkward. Before combining:
- Crop screenshots to the same height (for horizontal layouts)
- Or crop to the same width (for vertical layouts)
- Use our guide on how to crop a screenshot on Mac if you need help
Preview won't paste images correctly
If pasted images appear distorted or won't position correctly:
- Make sure you selected the entire image (
⌘ + A) before copying - Check that your canvas dimensions are large enough
- Try creating a fresh canvas and starting over
ImageMagick command fails
Common fixes for terminal issues:
- Verify ImageMagick installed:
which convert - Check file paths are correct (use full paths if unsure)
- Ensure screenshots are in supported formats (PNG, JPG)
Frequently Asked Questions
Wrapping Up
You now have five solid methods to combine screenshots on Mac:
- Preview — Free but manual
- Shortcuts — Quick automated grid layouts
- Screenshot apps — Pro workflow with editing tools
- Online tools — No install needed, works anywhere
- ImageMagick — Command-line power for automation
For occasional use, the Shortcuts app hits the sweet spot. It's fast and simple. If you combine screenshots daily, a proper tool pays for itself in time saved.
Ready to streamline your screenshot workflow? Try ScreenSnap Pro free and see how much time you save.
Morgan
Indie DeveloperIndie developer, founder of ScreenSnap Pro. A decade of shipping consumer Mac apps and developer tools. Read full bio
@m_0_r_g_a_n_