How to Edit Screenshots on Mac: 7 Methods (2026)
Want to know how to edit screenshots on Mac? You can turn basic screen captures into polished images in seconds with built-in tools or a dedicated app like ScreenSnap Pro. No extra apps needed.
Maybe you're documenting a bug. Maybe you're making a tutorial. Or maybe you just want to share something with a coworker. Either way, edited screenshots look better and get your point across faster.
Here's the good news: macOS has built-in editing tools that most people don't know about. You can:
- Crop out unwanted areas
- Add text and arrows
- Draw shapes and highlights
- Resize images
- And more
This guide covers seven ways to edit screenshots. We'll start with the quickest methods. Then we'll move to advanced tricks like blurring sensitive info and adding backgrounds.
Quick Edit Using the Floating Thumbnail
The fastest way to edit a screenshot? Use the floating thumbnail. It pops up after every capture. Just click it to start editing instantly.
Apple added this feature in macOS Mojave. It saves you from opening extra apps.
Here's how it works:
- Take a screenshot using any Mac screenshot shortcut (like
⌘ + Shift + 3or⌘ + Shift + 4) - Look for the thumbnail in the bottom-right corner
- Click it within 5 seconds
- The Markup window opens — edit away!
- Click Done to save or Share to send
Pro tip: Missed the thumbnail? No worries. Your screenshot still saves normally. Just open it in Preview to edit later.
The thumbnail window has all the editing tools you need. You can circle items, add arrows, or write text. It's perfect for quick touch-ups.
Edit Screenshots in Preview (Built-in)
Already saved a screenshot? Preview is your friend. It's free and comes with every Mac. And it has more editing power than most people realize.
Here's how to edit a saved screenshot:
- Find your screenshot (usually on your Desktop)
- Double-click to open it in Preview
- Click the pencil icon to show the Markup toolbar
- Make your edits
- Press
⌘ + Sto save
Important: Preview saves over your original file. Want to keep the original? Duplicate it first with ⌘ + D. Or use File → Save As to create a new copy.
Using the Markup Toolbar
The Markup toolbar is where the magic happens. You get the same tools whether you use the thumbnail or Preview.

Here's what each tool does:
| Tool | What It Does |
|---|---|
| Selection | Move items around |
| Shapes | Add rectangles, circles, arrows, lines |
| Text | Add text boxes |
| Signature | Insert your saved signature |
| Highlight | Draw see-through marks |
| Sketch | Draw freehand |
| Color Picker | Change colors |
| Border Width | Make lines thicker or thinner |
To show the toolbar in Preview, press ⌘ + Shift + A. Or click View → Show Markup Toolbar.
Deep Dive: Getting the Most from Each Tool
The Selection Tool isn't just for moving objects. You can also resize shapes by dragging their handles. Double-click a shape to edit its properties. And if you hold Option while dragging, you'll duplicate the object instead of moving it.
The Shapes Tool deserves special attention. When you draw an arrow, you can change where it points by dragging the endpoints. For rectangles and circles, the corner handles resize while the edge handles stretch. Want a perfect square or circle? Hold Shift while dragging.
The Text Tool has hidden depth. After adding text, click it to reveal formatting options. You can change the font, size, color, and alignment. For callouts, add a colored background rectangle first, then place white text on top.
The Sketch Tool gets smarter with practice. Draw a rough shape — like a wobbly circle — and macOS often converts it to a clean shape. This feature, called Shape Recognition, works for circles, rectangles, triangles, arrows, and lines. If you want raw sketches, just scribble faster.
The Magnifier Tool (the loupe icon) creates a zoom bubble. Place it over details you want to highlight. Drag the green dot to resize the magnified area. Drag the blue dot to change the zoom level. This is perfect for showing small UI elements.
For more options, check out Apple's Screenshot app documentation. It covers timers, save locations, and other settings.
Cropping and Resizing Screenshots
Cropping removes the parts you don't need. This helps viewers focus on what matters.
- Open the screenshot in Preview or Markup
- Click and drag to select what you want to keep
- Press
⌘ + Kto crop - Done! Everything outside your selection is gone.
Helpful tips:
- Hold
Shiftwhile dragging to keep proportions - Click outside the selection to start over
- Use the rectangle tool for precise edges
What about resizing? That's different. In Preview:
- Go to Tools → Adjust Size
- Type your new dimensions
- Check Scale proportionally to avoid stretching
- Click OK
One thing to know: making a screenshot bigger hurts the quality. It's better to capture at the right size from the start.
Adding Text and Annotations
Annotations make screenshots easier to understand. Instead of saying "click the blue button in the top right corner," just add an arrow pointing to it.
For professional screenshot annotations, try these techniques. Need a quick annotation without installing software? Our free image annotation tool lets you add arrows, shapes, and text right in your browser.
Adding Text
- Click the Text tool (T icon)
- Click where you want the text
- Type your message
- Change the font, size, or color as needed
Tips for better text:
- Use bold, bright colors that stand out
- Keep it short — just a few words
- Put text near (not on top of) the thing you're labeling
Drawing Shapes and Arrows
- Click the Shapes tool
- Pick a shape (rectangle, circle, arrow, line)
- Click and drag to draw
- Change the color or thickness if you want
Arrows work great for pointing things out. Rectangles and circles are perfect for highlighting areas.
Using the Highlighter
The highlighter adds see-through color. It's like using a real highlighter pen.
- Select the highlighter tool
- Pick a color (yellow is classic)
- Drag over what you want to highlight
This works great for marking important text in documents.
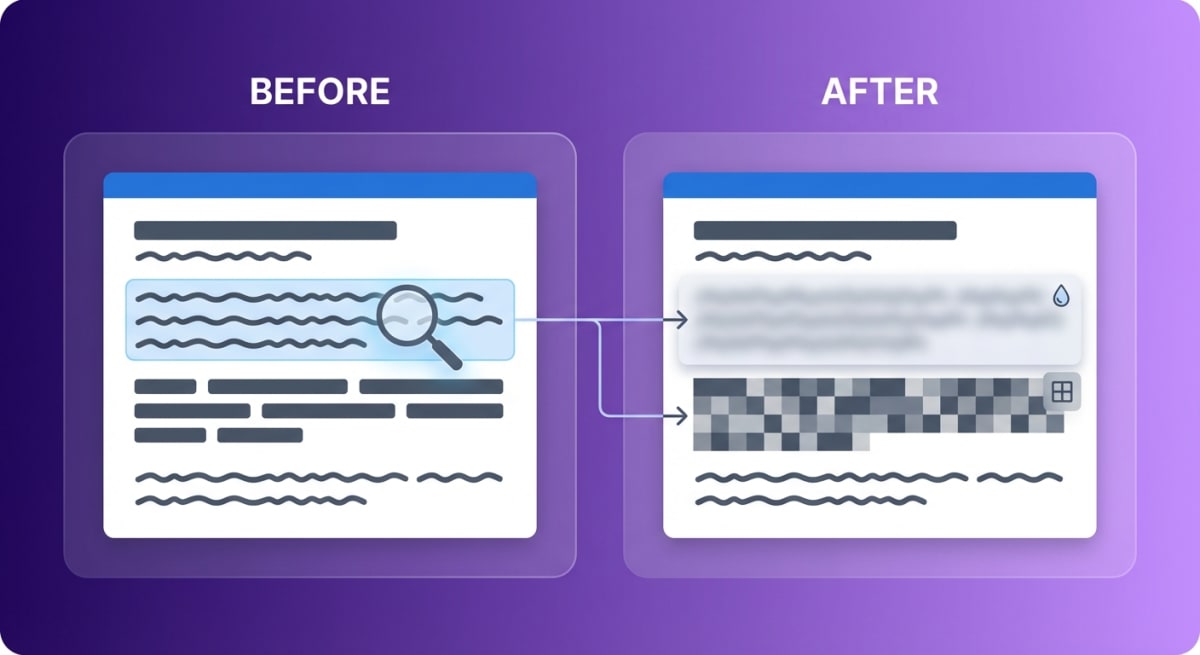
Blurring Sensitive Information
Before sharing screenshots, you might need to hide private info. Things like:
- Email addresses
- Phone numbers
- Passwords
- Personal data
Here's the problem: macOS doesn't have a built-in blur tool. But there are workarounds.
The Shape Overlay Method
You can hide info using Preview's shapes:
- Select the Shapes tool
- Choose a rectangle
- Draw it over the private info
- Fill it with black or white
- Remove the border for a clean look
This blocks the info completely. It's obvious something is hidden, though.
When to use what:
- Black/white boxes: For complete removal. Good for legal docs.
- Blur effect: Looks more natural. Shows something is there but hidden.
- Pixelation: Similar to blur. Common in videos.
Getting Real Blur Effects
Want actual blur instead of boxes? You need a third-party tool.
Check out our guide on how to blur sensitive information on Mac for more options. For a quick fix without installing anything, try our free blur image tool — it works right in your browser.
ScreenSnap Pro has one-click blur and pixelate tools. Just brush over the area and it's hidden instantly.
Tired of plain screenshots? Try ScreenSnap Pro.
Beautiful backgrounds, pro annotations, GIF recording, and instant cloud sharing — all in one app. Pay $29 once, own it forever.
See what it doesUsing Third-Party Screenshot Editors
Preview handles the basics well. But dedicated screenshot tools go further.
What Built-in Tools Can't Do
macOS native tools don't include:
- One-click blur or pixelation
- Professional backgrounds
- Cloud sharing with instant links
- Text copying from images (OCR)
- Step numbering for tutorials
- GIF recording
ScreenSnap Pro: A Better Option
ScreenSnap Pro fills these gaps. It's built specifically for screenshots.
What you get:
- 15 annotation tools — arrows, shapes, text, blur, pixelate, highlighter, emojis
- 150+ wallpapers — make screenshots look polished
- Instant cloud upload — share with a link, no email attachments
- OCR text copying — copy text from any screenshot
It costs $29 one time. No subscription. If you take lots of screenshots, it pays for itself fast.
Advanced Editing: Backgrounds and Effects
Plain screenshots can look boring. Adding a background makes them pop.
This matters most for:
- Marketing materials
- Documentation
- Social media posts
- Presentations

Why Backgrounds Help
Compare two screenshots of the same thing. One is plain. One has a nice gradient behind it.
The one with the background:
- Looks more professional
- Stands out from surrounding content
- Works better on social media
- Signals "this image is important"
Adding Backgrounds with ScreenSnap Pro
ScreenSnap Pro makes this easy:
- Capture your screenshot
- Open the editor
- Pick a background from 150+ options
- Adjust padding if needed
- Save or share
That's it. No Photoshop needed. Takes just seconds.
For a full guide, see how to add backgrounds to screenshots.
Other Ways to Polish Screenshots
Beyond backgrounds, you can also try:
- Window shadows — macOS adds these automatically (hold
Optionto remove) - Device frames — wrap screenshots in iPhone or Mac frames
- Rounded corners — soften sharp edges
- Color tweaks — fix washed-out images
Keyboard Shortcuts for Faster Editing
Want to speed things up? Learn these shortcuts.
Editing Shortcuts
| Shortcut | What It Does |
|---|---|
⌘ + K | Crop to selection |
⌘ + T | Add text |
⌘ + Shift + A | Toggle Markup toolbar |
⌘ + Z | Undo |
⌘ + S | Save |
⌘ + Shift + S | Save as new file |
Capture Shortcuts
| Shortcut | What It Does |
|---|---|
⌘ + Shift + 3 | Capture whole screen |
⌘ + Shift + 4 | Capture selected area |
⌘ + Shift + 5 | Open Screenshot app |
Hold Control | Copy to clipboard instead of saving |
Even learning a few of these will speed up your workflow a lot.
Common Screenshot Editing Mistakes to Avoid
Even experienced users make these errors. Here's how to avoid them.
Editing the Original File
This is the biggest mistake. You crop a screenshot, add some arrows, save it — then realize you need the original. Too late. Preview overwrites by default.
The fix: Always duplicate first. Press ⌘ + D before editing. Or use File → Export to save a copy with your changes while keeping the original intact.
Overcrowding with Annotations
More arrows doesn't mean more clarity. Too many annotations create visual noise. Your viewer doesn't know where to look first.
The fix: Limit yourself to 2-3 annotations per screenshot. If you need more, consider splitting into multiple images. Each screenshot should make one clear point.
Using Low-Contrast Colors
Red arrows on a dark interface? Hard to see. Yellow text on a light background? Invisible.
The fix: Pick annotation colors that contrast with your screenshot. White with a black outline works on almost anything. Or use the opposite of your background — light colors on dark screenshots, dark on light.
Ignoring File Size
You added a gorgeous gradient background. Your screenshot went from 200KB to 5MB. Now it loads slowly on web pages and clogs email attachments.
The fix: Export as JPEG for photos and complex images. Use PNG for screenshots with text (keeps them sharp). And resize before adding backgrounds — a 4K screenshot rarely needs to stay that large.
Forgetting to Remove Sensitive Info
You shared a screenshot showing your browser. Your email address is visible in the corner. Your bank tab is open. Oops.
The fix: Before sharing, scan for: personal info, passwords, email addresses, financial data, other browser tabs, and desktop icons with revealing names. When in doubt, blur it out.
Using Inconsistent Styles
First screenshot has red arrows. Second has blue circles. Third has yellow highlights. Your tutorial looks like a mess.
The fix: Pick a style and stick with it. Same colors, same line widths, same annotation types. Consistency looks professional and helps viewers follow along.
Screenshot Editing for Different Use Cases
Different contexts need different approaches. Here's what works best for each situation.
For Bug Reports and Technical Support
Your goal: Help someone understand and reproduce the problem.
What to include:
- Circle or arrow pointing to the exact error
- Red color (universally signals "problem")
- Relevant error messages or codes
- App version info if visible
- Timestamps when timing matters
What to avoid:
- Unnecessary personal info (blur your email)
- Unrelated parts of the screen (crop tight)
- Multiple issues in one screenshot
Pro tip: Add step numbers if the bug requires specific actions to reproduce. The counter tool in screenshot annotation apps makes this easy.
For Tutorials and How-To Guides
Your goal: Walk someone through a process step by step.
What to include:
- Numbered steps in order
- Arrows showing where to click
- Highlighted buttons or menu items
- Brief text labels for context
What to avoid:
- Cluttered annotations (one clear action per image)
- Tiny text that's hard to read
- Skipping steps (capture everything)
Pro tip: Use consistent arrow colors throughout. Red for "click here," green for "this is the result." Your readers will learn the pattern.
For Social Media Posts
Your goal: Grab attention and look professional.
What to include:
- Clean, gradient backgrounds
- Adequate padding around the screenshot
- High contrast for mobile viewing
- Your brand colors if applicable
What to avoid:
- Raw screenshots with messy desktops
- Tiny text that won't read on phones
- Cluttered backgrounds that compete for attention
Pro tip: Adding backgrounds to screenshots takes seconds with the right tools and dramatically improves engagement.
For Documentation and Knowledge Bases
Your goal: Create clear, searchable reference material.
What to include:
- Descriptive text labels (not just arrows)
- Consistent formatting across all screenshots
- High resolution for zooming
- Alt text for accessibility
What to avoid:
- Ambiguous callouts like "click here"
- Outdated UI (re-capture after updates)
- Personal data from test accounts
Pro tip: Name your screenshot files descriptively. "edit-preferences-dialog.png" beats "Screenshot 2026-02-01.png" when you need to find it later.
For Client Presentations
Your goal: Look polished and professional.
What to include:
- Beautiful backgrounds that match your brand
- Clean annotations with consistent colors
- High-resolution exports
- Device frames for mobile screenshots
What to avoid:
- Visible bookmarks toolbar with personal sites
- Notification badges
- Messy desktop icons in the background
Pro tip: Capture screenshots in a clean browser profile. No extensions, no bookmarks, no history suggestions. It only takes a minute to set up and saves hours of editing.
How to Edit Screenshots You Already Saved
Missed the floating thumbnail? Need to edit an old screenshot? Here's what to do.
Finding Your Screenshots
By default, macOS saves screenshots to your Desktop. They have names like "Screen Shot 2026-02-01 at 10.30.45 AM.png".
Quick way to find them:
- Open Finder
- Press
⌘ + Fto search - Type "Screen Shot"
- Sort by date to see recent ones
Editing Old Screenshots
- Right-click the screenshot
- Choose Open With → Preview
- Click the Markup toolbar button
- Make your edits
- Save
You can also drag screenshots into Preview or any image editor.
Batch editing tip: Need to edit multiple screenshots the same way? Open them all in Preview at once. Edit the first one. Then select all and apply the same edit to all of them.
Frequently Asked Questions
Conclusion
Editing screenshots on Mac is easy once you know how. The floating thumbnail and Preview handle most basic needs. Cropping, text, arrows, shapes — it's all built in.
For advanced stuff like blurring or adding backgrounds, tools like ScreenSnap Pro help a lot. They save time and make screenshots look better.
Start with the built-in tools. See how far they take you. When you hit their limits — drawing boxes instead of blurring, wishing for backgrounds, wanting easier sharing — that's when a dedicated tool makes sense.
Ready to level up your screenshots? Try ScreenSnap Pro and see how much time you save.
Morgan
Indie DeveloperIndie developer, founder of ScreenSnap Pro. A decade of shipping consumer Mac apps and developer tools. Read full bio
@m_0_r_g_a_n_