How to Convert MOV to GIF on Mac - 5 Methods (2026)
A MOV to GIF conversion on Mac lets you transform QuickTime screen recordings into lightweight, shareable animations perfect for tutorials, bug reports, and social media. Whether you prefer dedicated apps, command-line tools, or online converters, this guide covers every approach so you can pick the method that fits your workflow. If you skip QuickTime altogether, screen-recording apps like ScreenSnap Pro export GIFs directly with no conversion step.
In this article, you'll learn five proven ways to convert MOV files to GIF format on macOS—from the popular Gifski app to Terminal commands using ffmpeg, plus a bonus tip on recording GIFs directly without any conversion step.
Why Convert MOV to GIF?
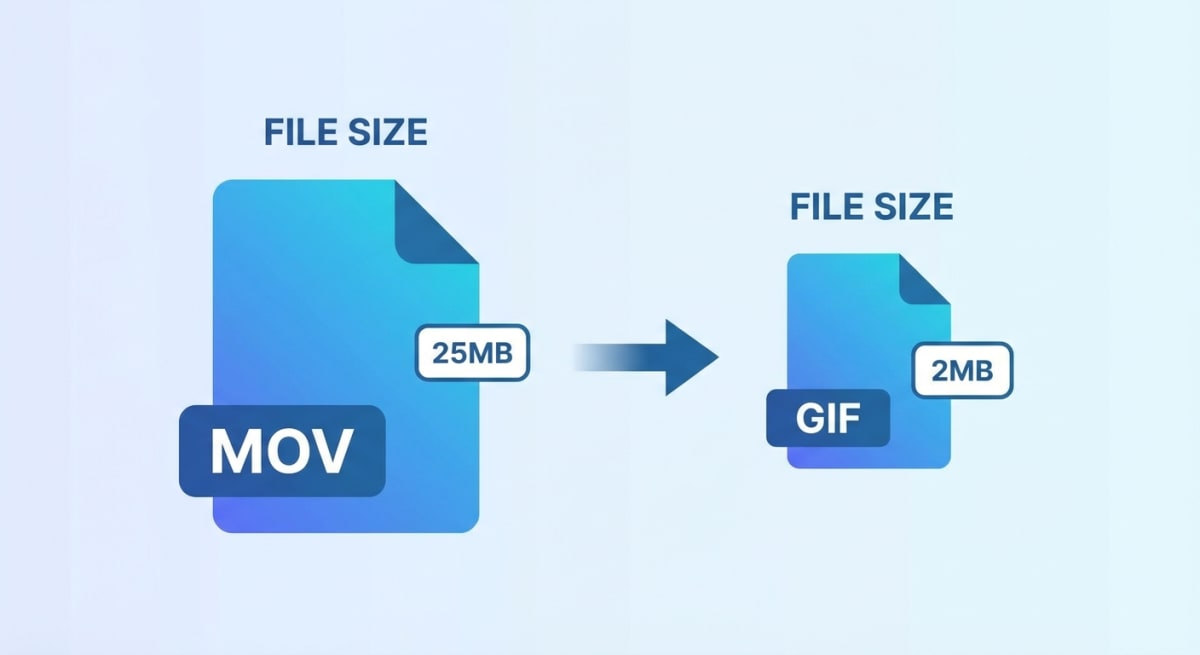
If you've ever tried to share a QuickTime screen recording, you know the pain. MOV files are often too large for email, don't preview in Slack or GitHub, and require recipients to download and open them in a separate player. GIFs solve all of these problems.
Before diving into the methods, here's why GIF format often beats MOV for sharing:
| Factor | MOV | GIF |
|---|---|---|
| File size | Large (10-50MB typical) | Small (1-5MB) |
| Auto-play | Requires click | Plays automatically |
| Platform support | Limited preview | Universal |
| Social media | Often compressed | Native support |
| Email embedding | Attachment only | Inline display |
GIFs are the go-to format for:
- Developer pull requests — Show UI changes without forcing reviewers to download files
- Tutorial snippets — Quick demos that loop automatically
- Social media — Twitter, Slack, Discord, and Notion all render GIFs inline
- Documentation — Visual guides that work everywhere
The tradeoff? GIFs have limited color depth (256 colors) and no audio. For longer recordings or high-fidelity content, consider keeping the MOV or converting to MP4 instead.
Method 1: Gifski App (Best Quality)
Gifski is a free, open-source Mac app that produces some of the highest-quality GIFs available. Developed by Sindre Sorhus, the same developer behind popular Mac utilities like Lungo and Battery Indicator, Gifski uses a specialized algorithm called pngquant that generates remarkably smooth gradients despite GIF's inherent 256-color limitation.
What makes Gifski special is its approach to color quantization. Instead of applying a single palette to the entire animation, it can optimize colors frame-by-frame, resulting in GIFs that look almost like video despite the format's technical constraints.
Step-by-step instructions:
- Download Gifski from the Mac App Store (free)
- Open Gifski and drag your MOV file onto the window
- Set your preferences:
- Quality: Higher means larger files (18 is a good balance)
- FPS: 10-15 for most screen recordings
- Dimensions: Match your original or scale down for smaller files
- Click "Convert" and choose where to save
Gifski pros and cons:
Pros:
- Best-in-class GIF quality
- Simple drag-and-drop interface
- Free and open-source
- No internet connection required
Cons:
- Manual process (no batch conversion)
- Mac App Store only
- Limited editing options
Pro tip: For screen recordings, 12-15 FPS usually looks smooth enough while keeping file sizes manageable. Anything above 20 FPS rarely improves perceived quality but significantly increases file size.
Method 2: Terminal with ffmpeg (Developer Favorite)
For developers who prefer command-line tools, ffmpeg combined with gifsicle produces excellent results with full control over output parameters. This method is perfect for automation and batch processing.
The beauty of the ffmpeg approach is its flexibility. You can integrate it into shell scripts, CI/CD pipelines, or even Git hooks that automatically convert MOV recordings in your repository. Once you've crafted the perfect command, you can reuse it indefinitely without opening any application.
Prerequisites:
First, install the required tools using Homebrew, the popular package manager for macOS:
brew install ffmpeg gifsicleBasic conversion command:
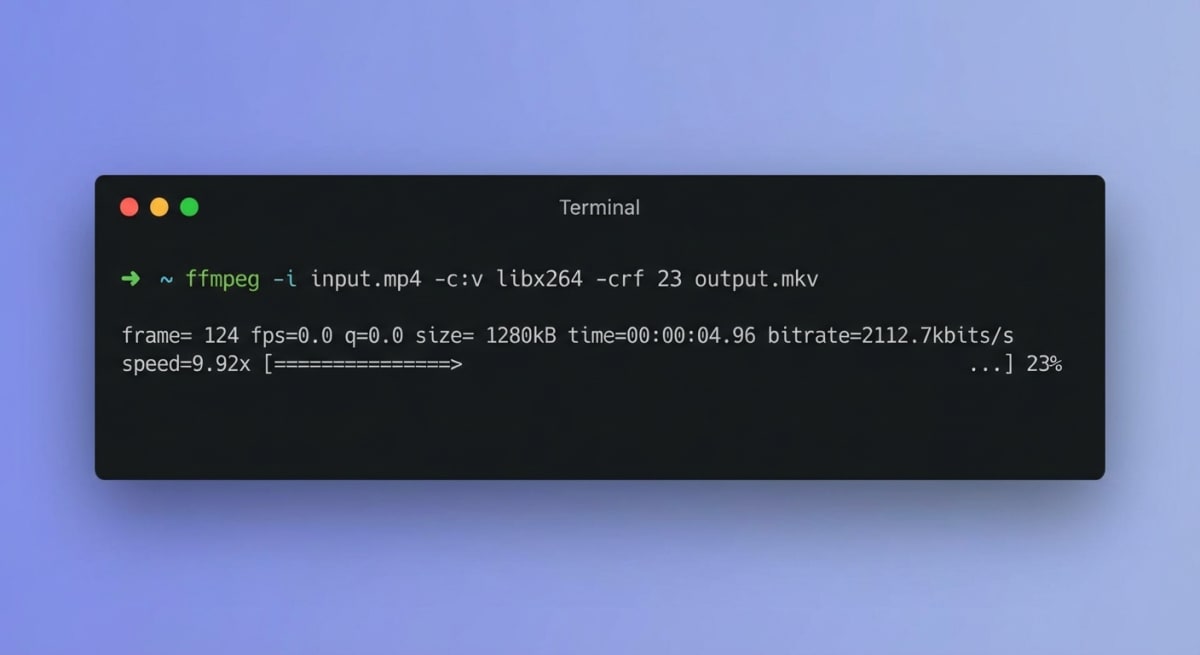
ffmpeg -i input.mov -pix_fmt rgb8 -r 10 output.gif && gifsicle -O3 output.gif -o output.gifWhat each flag does:
-i input.mov— Input file path-pix_fmt rgb8— Pixel format for GIF compatibility-r 10— Frame rate (10 FPS is usually sufficient)gifsicle -O3— Maximum optimization to reduce file size
Advanced options:
Resize while converting:
ffmpeg -i input.mov -vf "fps=10,scale=640:-1:flags=lanczos" -pix_fmt rgb8 output.gifTrim to specific duration (first 5 seconds):
ffmpeg -i input.mov -t 5 -pix_fmt rgb8 -r 10 output.gifCreate a palette for better colors:
ffmpeg -i input.mov -vf "fps=10,scale=640:-1:flags=lanczos,palettegen" palette.png
ffmpeg -i input.mov -i palette.png -filter_complex "fps=10,scale=640:-1:flags=lanczos[x];[x][1:v]paletteuse" output.gif
The palette method produces noticeably better colors, especially for screen recordings with gradients or photographs.
This approach pairs well with your existing screen recording workflow on Mac and integrates naturally into shell scripts or CI/CD pipelines.
Method 3: Online Converters (No Installation)
When you can't install software—say, on a work computer with restrictions—online converters offer a quick solution. These browser-based tools handle the conversion on remote servers, so you don't need admin access or Homebrew installed.
The downside is that you're uploading your files to someone else's server, which may not be appropriate for sensitive content. For personal projects, tutorials, or public-facing demos, online tools work perfectly well. Here are the most reliable options:
CloudConvert
CloudConvert is a professional-grade converter with extensive customization options.
How to use:
- Visit cloudconvert.com/mov-to-gif
- Upload your MOV file (drag and drop or click to browse)
- Adjust settings (FPS, resolution, quality)
- Click "Convert" and download the result
Best for: Users who need fine-grained control over output settings.
Ezgif
Ezgif specializes in GIF creation and offers built-in editing tools.
Features:
- Trim video before converting
- Add text overlays
- Adjust speed
- Crop and resize
Best for: Quick edits without installing additional software.
Privacy considerations
Online converters upload your files to external servers. For sensitive screen recordings showing proprietary code, customer data, or unreleased features, stick to offline methods like Gifski or ffmpeg. Alternatively, you can use our free online image to GIF converter — it processes files directly in your browser without uploading anything to a server.
Method 4: Shortcuts App (Built-in Automation)
macOS Shortcuts can automate MOV to GIF conversion without installing any third-party software. This method uses the built-in "Make GIF" action.
Create the shortcut:
- Open Shortcuts (search in Spotlight)
- Click "+" to create a new shortcut
- Add "Make GIF from Video" action (search in the actions library)
- Configure options:
- Seconds per Photo: 0.1 (for 10 FPS)
- Auto Size: On (or specify dimensions)
- Add "Save File" action to save the result
- Name your shortcut (e.g., "MOV to GIF")
Quick Actions integration:
To convert files directly from Finder:
- Open your shortcut
- Click the shortcut name dropdown → "Shortcut Details"
- Enable "Use as Quick Action" and "Finder"
- Now right-click any MOV file → Quick Actions → MOV to GIF
This method works well alongside your Mac screenshot shortcuts for a fully keyboard-driven workflow.
Limitations:
- Less optimization than dedicated tools
- Limited control over quality settings
- Larger output files compared to Gifski or ffmpeg
Tired of plain screenshots? Try ScreenSnap Pro.
Beautiful backgrounds, pro annotations, GIF recording, and instant cloud sharing — all in one app. Pay $29 once, own it forever.
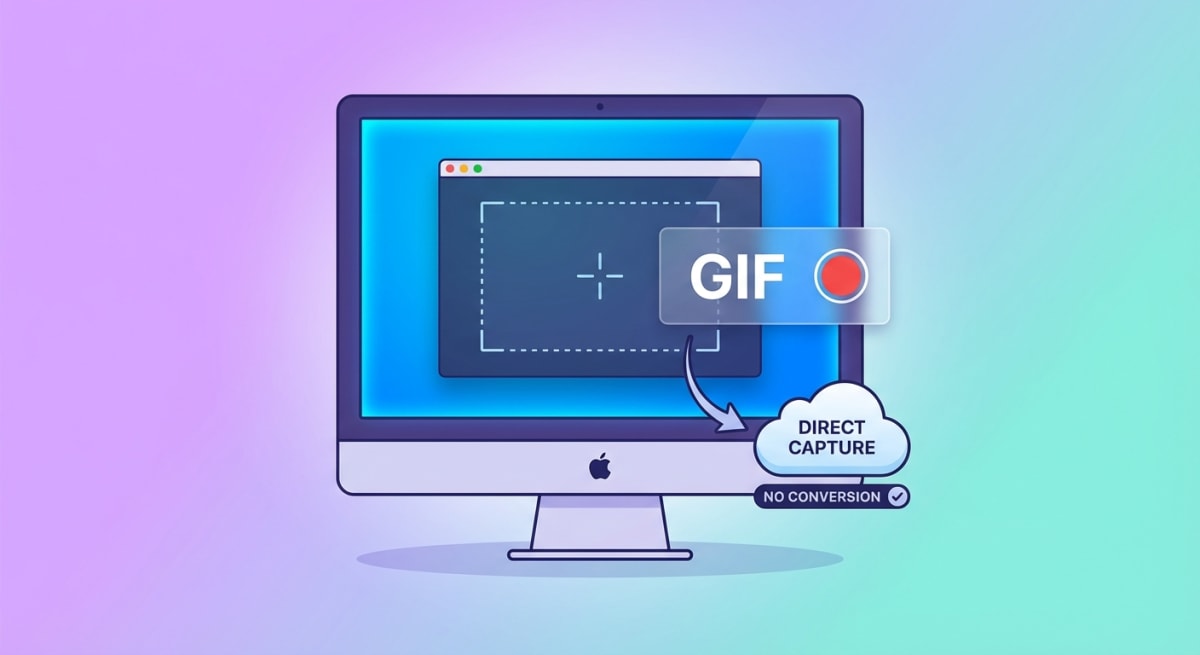
See what it doesMethod 5: Skip Conversion—Record GIFs Directly
Here's a secret that will save you countless hours: the most efficient workflow isn't converting MOV to GIF—it's recording GIFs directly in the first place.
Think about it. When you record with QuickTime and then convert to GIF, you're compressing twice: once during the MOV encoding and again during the GIF conversion. Each step introduces quality loss and requires manual effort. By recording directly to GIF, you skip the intermediate format entirely.
Several Mac apps support native GIF recording, eliminating the conversion step entirely.
ScreenSnap Pro
ScreenSnap Pro lets you record screen areas directly to GIF format:
- Launch ScreenSnap Pro
- Select "Record GIF" from the capture menu
- Choose your screen area
- Record your action (up to 30 seconds)
- The GIF is ready immediately—no conversion needed
Why this is better:
- No quality loss from MOV → GIF conversion
- Smaller file sizes (optimized during recording)
- Faster workflow (record → share)
- Built-in annotation tools for adding arrows and highlights
For a complete guide on GIF recording, check out our detailed tutorial on how to record GIFs on Mac.
Other apps with direct GIF recording:
- GIPHY Capture — Free, basic features
- Kap — Open-source, developer-focused
- CleanShot X — Premium, feature-rich
Direct GIF recording is the recommended approach for new recordings. Reserve MOV-to-GIF conversion for existing files or when you need QuickTime's audio recording capabilities first.
Comparison: Which Method Should You Choose?
| Method | Best For | Quality | Ease | Cost |
|---|---|---|---|---|
| Gifski | Highest quality needs | ⭐⭐⭐⭐⭐ | ⭐⭐⭐⭐ | Free |
| ffmpeg | Developers, automation | ⭐⭐⭐⭐⭐ | ⭐⭐ | Free |
| Online tools | Quick one-off conversions | ⭐⭐⭐ | ⭐⭐⭐⭐⭐ | Free |
| Shortcuts | No-install solution | ⭐⭐ | ⭐⭐⭐ | Free |
| Direct recording | New recordings | ⭐⭐⭐⭐ | ⭐⭐⭐⭐⭐ | Varies |
My recommendation:
- For existing MOV files: Use Gifski for best results, ffmpeg if you need automation
- For new recordings: Record directly to GIF with ScreenSnap Pro or similar
- For occasional use: Online converters work fine for non-sensitive content
Tips for Better GIFs
Creating a GIF is easy. Creating a good GIF—one that's small enough to share quickly but high enough quality to be useful—takes a bit more thought.
Regardless of which method you choose, these tips help create smaller, higher-quality GIFs:
1. Keep recordings short
GIFs work best under 10 seconds. Longer animations balloon in file size and lose viewer attention. If you need more time, consider linking to a video instead.
2. Reduce dimensions
A 640px-wide GIF is often sufficient for documentation and chat. Full-resolution screen recordings (1920px+) create unnecessarily large files.
3. Lower the frame rate
Screen recordings at 10-15 FPS look smooth enough for UI demonstrations. Dropping from 30 FPS to 12 FPS cuts file size roughly in half.
4. Minimize motion
Large areas of changing pixels increase file size exponentially. Record only the relevant portion of your screen, not the entire display.
5. Use consistent backgrounds
GIF compression works better when large areas stay static. Close unnecessary windows and use a solid desktop background before recording. If you're recording a browser, consider using Reader Mode or a minimal theme.
6. Plan your recording
Before hitting record, rehearse the action you're demonstrating. Fumbling around looking for buttons or making mistakes adds frames that increase file size without adding value. A clean, deliberate recording converts to a much smaller GIF.
7. Consider your audience
Different platforms have different GIF limits. Slack caps GIFs at 50MB, Twitter at 15MB, and many email clients struggle with anything over 5MB. Know your target platform and optimize accordingly.
For more tips on optimizing your screen captures, see our guide on editing screen recordings on Mac.
Troubleshooting Common Issues
GIF is too large
- Reduce dimensions (scale to 50%)
- Lower FPS to 10
- Trim unnecessary frames
- Use Gifski or ffmpeg with palette optimization
Colors look washed out
GIF's 256-color limit causes color banding. Solutions:
- Use ffmpeg's palette generation method
- Use Gifski (better color quantization)
- Accept some quality loss or use a different format
GIF won't play in browser
Some very large GIFs (50MB+) may not play in browsers. Split into multiple shorter GIFs or reduce quality settings.
ffmpeg command not found
Ensure Homebrew and ffmpeg are installed:
/bin/bash -c "$(curl -fsSL https://raw.githubusercontent.com/Homebrew/install/HEAD/install.sh)"
brew install ffmpeg
Frequently Asked Questions
Conclusion
Converting MOV to GIF on Mac is straightforward once you know your options. For the best quality with minimal effort, Gifski is hard to beat. Developers will appreciate ffmpeg's scriptability, while casual users can rely on online converters or the built-in Shortcuts app.
That said, the most efficient workflow is often to skip conversion entirely. If you regularly create GIFs for documentation, bug reports, or social sharing, consider switching to a tool like ScreenSnap Pro that records GIFs directly. You'll save time and get better results.
Ready to level up your screen capture game? Check out our roundup of the best screenshot apps for Mac to find the perfect tool for your workflow.
Morgan
Indie DeveloperIndie developer, founder of ScreenSnap Pro. A decade of shipping consumer Mac apps and developer tools. Read full bio
@m_0_r_g_a_n_