Mac Screenshot Settings: Customize Format, Location & More (2026)
Your Mac screenshot settings control everything from file format to save location, and most users never touch them. Whether you want to change screenshots from PNG to JPG, remove those pesky window shadows, or customize filenames, macOS gives you surprising control — if you know where to look. (For settings that macOS doesn't expose, a dedicated app like ScreenSnap Pro opens up more options.)
This guide covers every Mac screenshot setting. You'll learn the easy Screenshot app methods and the hidden options that use simple commands.
Essential Mac screenshot settings at a glance
Here's a quick reference for all Mac screenshot settings:
| Setting | Method | Difficulty |
|---|---|---|
| Save location | Screenshot app (⌘ + Shift + 5) | Easy |
| File format | Simple command | Medium |
| Window shadows | Option key or command | Easy |
| Filename prefix | Simple command | Medium |
| Date/time in name | Simple command | Medium |
| Timer delay | Screenshot app | Easy |
| Floating thumbnail | Screenshot app | Easy |
| Mouse cursor | Screenshot app | Easy |
| Keyboard shortcuts | System Settings | Easy |
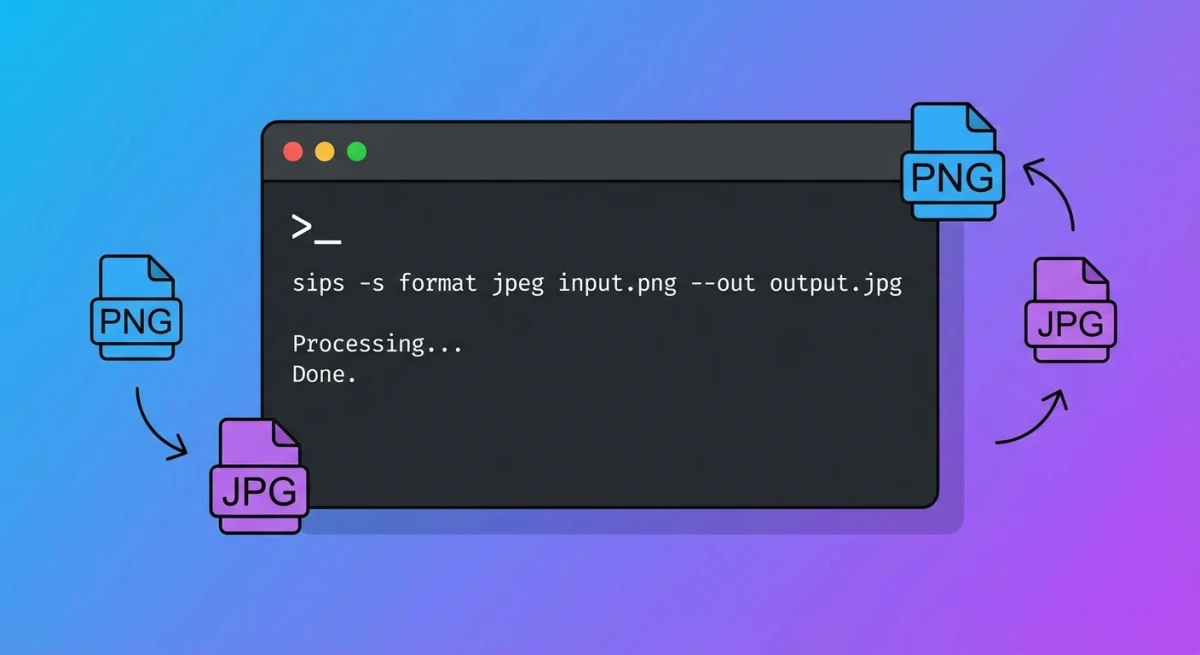
Change screenshot format (PNG to JPG, PDF, and more)
By default, Mac screenshots save as PNG files. PNG keeps images crisp, but the files can be large. You can switch to JPG, PDF, or other formats with a simple command.
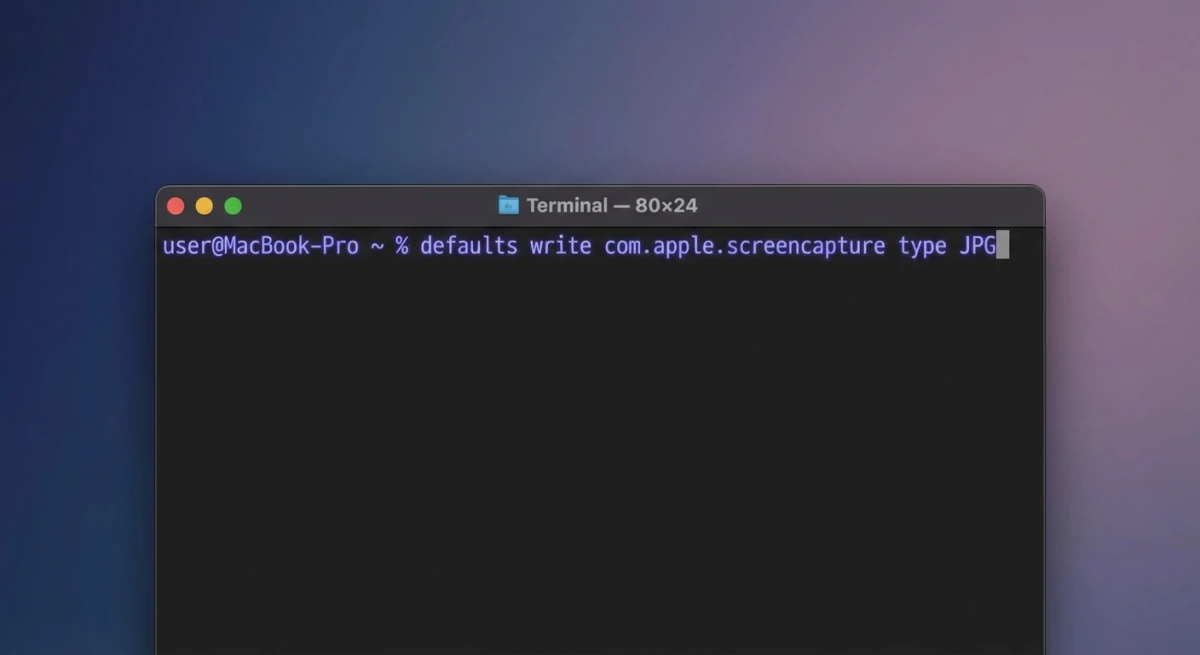
How to change screenshot format
- Open Terminal (search for it in Spotlight or find it in Applications → Utilities)
- Type the command for your format:
For JPG:
defaults write com.apple.screencapture type jpgFor PDF:
defaults write com.apple.screencapture type pdfFor GIF:
defaults write com.apple.screencapture type gifFor TIFF:
defaults write com.apple.screencapture type tiff- Restart the screenshot service:
killall SystemUIServerSupported formats and when to use them
macOS supports these screenshot formats:
- PNG (default) — Keeps every pixel crisp and clear. Best for screenshots with text, buttons, or anything that needs sharp edges. Files range from 500KB to several MB.
- JPG — Makes smaller files but can look fuzzy around text. Best for photos or when you need to email lots of images. Files are much smaller at 50-200KB. If you need to switch between formats after the fact, you can use our free image format converter.
- PDF — Stays sharp when you zoom in or print. Great for reports, slide decks, or print jobs.
- GIF — Only shows 256 colors, so it looks bad for most screenshots. Skip this unless you really need GIF format.
- TIFF — Perfect quality but huge files. Mainly used by print shops and graphic designers.
- BMP — Old format that creates large files for no good reason. Avoid this one.
Which format should you choose?
For most users, stick with PNG. It keeps images sharp without making files too large.
Switch to JPG only if:
- You need to email lots of screenshots
- Your screenshots are mostly photos (not text or buttons)
- You're posting to social media (they shrink images anyway)
Pro tip: For Slack or Discord, use PNG — these apps keep your images sharp. For Twitter or Instagram, JPG is fine since they shrink all uploads.
Revert to PNG
To change back to the default PNG format:
defaults write com.apple.screencapture type png
killall SystemUIServer
Change screenshot save location
By default, screenshots land on your Desktop. If you take lots of screenshots, this gets messy fast.
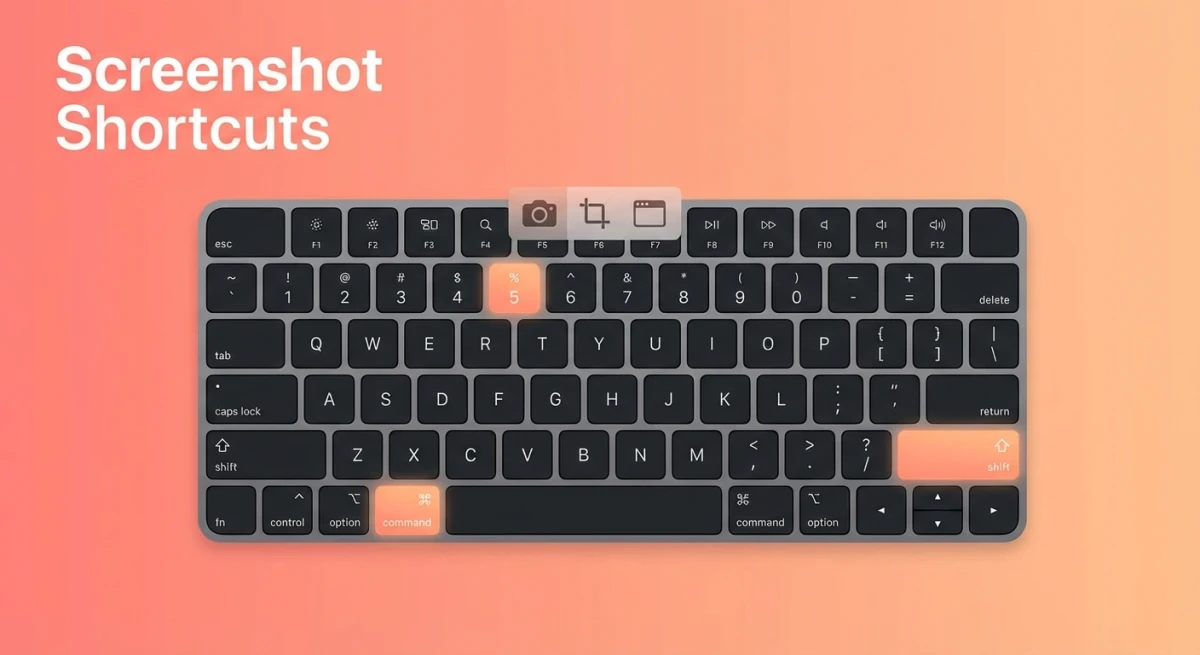
The easiest method uses the built-in Screenshot app:
- Press
⌘ + Shift + 5to open the Screenshot toolbar - Click Options
- Under "Save to," choose your preferred location:
- Desktop (default)
- Documents
- Clipboard
- Messages
- Preview
- Other Location (choose any folder)
For more advanced options including cloud storage folders, Automator workflows, and organizing screenshots by project, check out our detailed guide on how to change screenshot location on Mac.
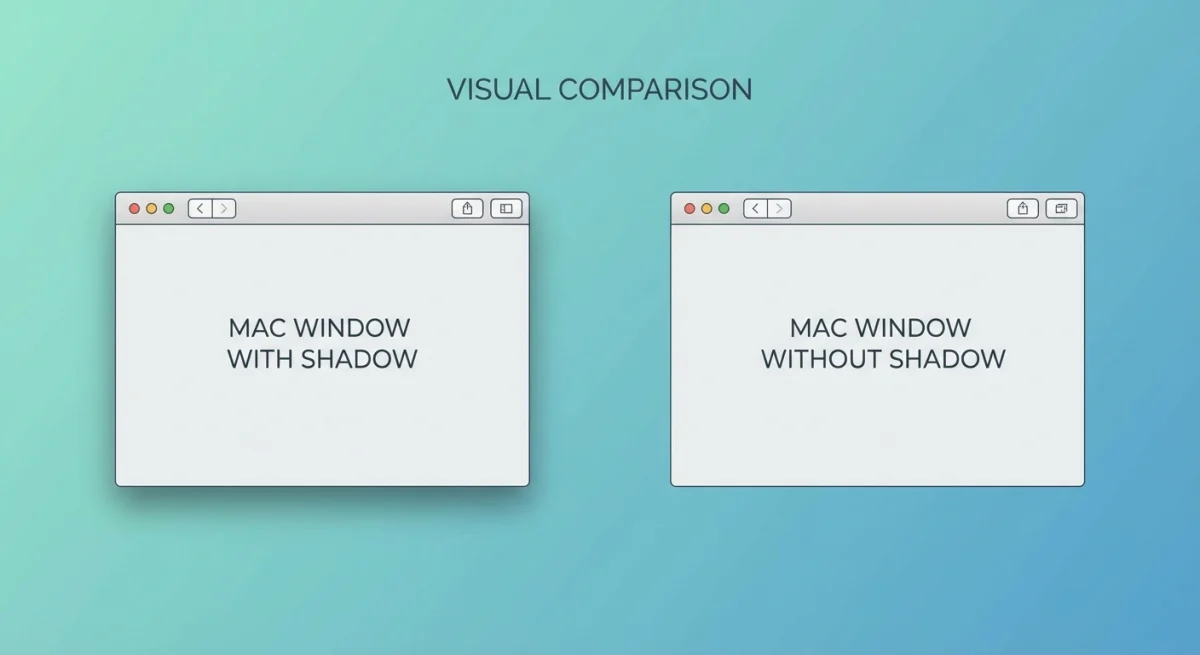
Remove window shadows from Mac screenshots
When you capture a window using ⌘ + Shift + 4 then Space, macOS adds a drop shadow. It looks nice, but the shadow can cause problems when you crop or place the image on colored backgrounds.
Method 1: Hold Option while capturing (one-time)
The quick way to skip shadows for a single screenshot:
- Press
⌘ + Shift + 4 - Press
Spaceto enter window capture mode - Hold
Optionwhile clicking the window
This captures the window without the shadow, just this once.
Method 2: Turn off shadows for good
To remove shadows from all window screenshots:
defaults write com.apple.screencapture disable-shadow -bool true
killall SystemUIServer
To bring shadows back:
defaults write com.apple.screencapture disable-shadow -bool false
killall SystemUIServer
Customize filename and timestamp
macOS names screenshots as "Screenshot [date] at [time].png" — useful but not always what you want. You can change the name and remove the date/time.
Change the filename prefix
To replace "Screenshot" with your own prefix:
defaults write com.apple.screencapture name "MyCapture"
killall SystemUIServer
Now screenshots will be named "MyCapture [date] at [time].png"
To reset to the default:
defaults delete com.apple.screencapture name
killall SystemUIServer
Remove date and time from filenames
For cleaner filenames without timestamps:
defaults write com.apple.screencapture include-date -bool false
killall SystemUIServer
Your screenshots will now be named simply "Screenshot.png" (or your custom prefix). Note that macOS will add numbers to prevent overwriting: "Screenshot.png", "Screenshot 2.png", etc.
To restore the timestamp:
defaults write com.apple.screencapture include-date -bool true
killall SystemUIServer
Set a timer delay
Need a few seconds to set up your screen before the capture? The Screenshot app has a built-in timer.
- Press
⌘ + Shift + 5 - Click Options
- Under "Timer," select:
- None (instant capture)
- 5 seconds
- 10 seconds
- Click Capture — the countdown begins
The timer setting persists until you change it, so remember to switch back to "None" when you're done.
When to use a timer delay
Menus and hover states: Menus close when you move your cursor. Set a 5-second timer, then hover over the menu. The screenshot fires while it's still open.
Window setups: Need to show several windows at once? The timer gives you time to arrange them first.
Tutorials: For step-by-step guides, you can start an action and capture what happens next.
Video calls: If you want yourself in the screenshot, the timer lets you look ready before the capture.
Touch Bar: On older MacBook Pro models, use the timer to set up the Touch Bar before pressing ⌘ + Shift + 6.
Disable the floating thumbnail
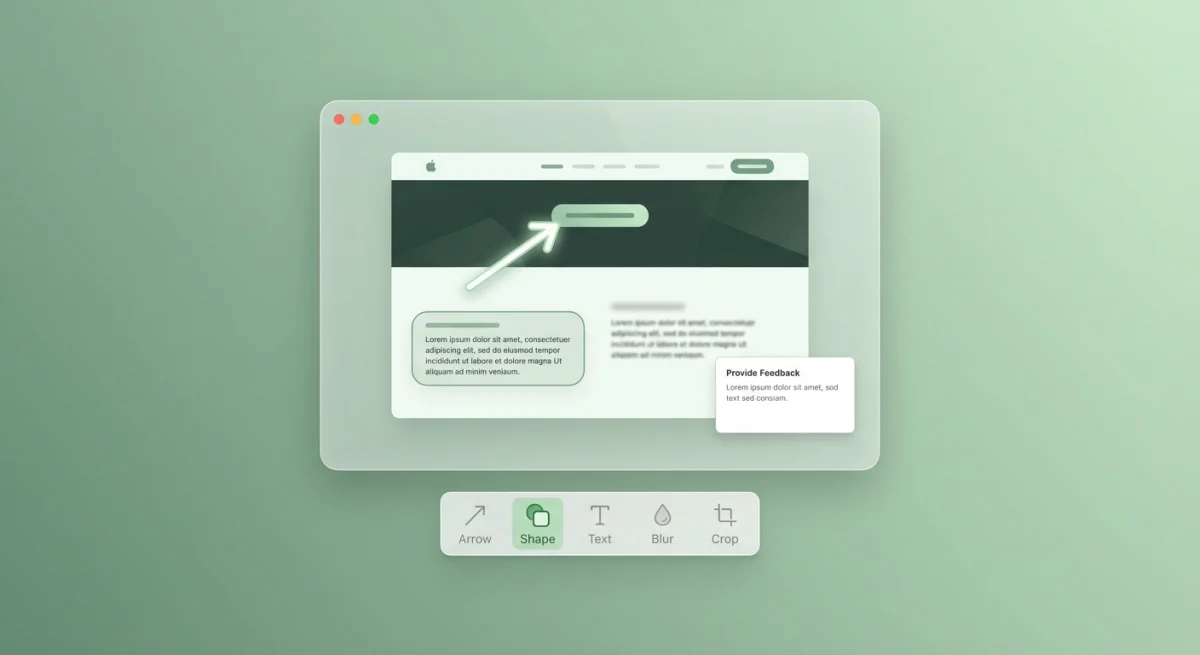
After you take a screenshot, macOS shows a small preview in the corner. Click it to edit, or wait for it to save on its own.
If you find this distracting:
- Press
⌘ + Shift + 5 - Click Options
- Uncheck Show Floating Thumbnail
Screenshots will now save right away.
When to keep it on: The preview is handy for quick edits. You can crop, add arrows, highlight text, or blur private info before the image saves. See our guide on how to add notes to screenshots.
Tired of plain screenshots? Try ScreenSnap Pro.
Beautiful backgrounds, pro annotations, GIF recording, and instant cloud sharing — all in one app. Pay $29 once, own it forever.
See what it doesShow or hide the mouse cursor
Sometimes you need the cursor visible in screenshots (for tutorials), other times you don't (for clean product shots).
- Press
⌘ + Shift + 5 - Click Options
- Check or uncheck Show Mouse Pointer
This setting affects both screenshots and screen recordings.
Customize keyboard shortcuts
If the default shortcuts (⌘ + Shift + 3, ⌘ + Shift + 4, etc.) clash with other apps or feel hard to press, you can change them.
How to change screenshot shortcuts
- Open System Settings (or System Preferences on older macOS)
- Go to Keyboard → Keyboard Shortcuts
- Select Screenshots in the sidebar
- Double-click any shortcut to change it
- Press your new key combination
If your chosen combination is already in use, macOS will warn you. Either pick a different shortcut or change the conflicting app's settings.
Default shortcuts reference
| Shortcut | Action |
|---|---|
⌘ + Shift + 3 | Capture entire screen |
⌘ + Shift + 4 | Capture selected area |
⌘ + Shift + 4, then Space | Capture specific window |
⌘ + Shift + 5 | Open Screenshot app |
⌘ + Shift + 6 | Capture Touch Bar |
Copy to clipboard instead of saving
Add Control to any shortcut to copy the image instead of saving it:
Control + ⌘ + Shift + 3— Copy full screenControl + ⌘ + Shift + 4— Copy selected areaControl + ⌘ + Shift + 4, thenSpace— Copy window
This lets you paste screenshots right into emails, chats, or docs without filling up your Desktop.
Handy keys while capturing
While dragging your selection, try these keys:
- Space — Move the whole selection box
- Shift — Lock width or height while you drag
- Option — Grow the box from the center out
- Escape — Cancel and start over
If your screenshot shortcuts stopped working, check that another app didn't take over the keys.
Best practices for Mac screenshot settings
Now that you know all the settings, here's when to use each one.
For everyday use
Keep defaults and use keyboard shortcuts:
⌘ + Shift + 3for full screen⌘ + Shift + 4for selected area- Add
Controlto copy to clipboard instead of saving
Leave screenshots as PNG and save to Desktop. It's simple and works for most tasks.
For documentation and tutorials
Turn on these settings:
- Show Mouse Pointer — Readers need to see where to click
- Keep floating thumbnail on — Quick editing before you save
- Use PNG format — Text stays sharp and readable
- Custom filename prefix — Name it "Tutorial-" or your project name
Consider using the 5-second timer so you can set up hover states and dropdown menus.
For social media and marketing
Optimize for file size and appearance:
- JPG format — Smaller files, faster uploads
- Disable shadows — Cleaner look for presentations
- Custom save folder — Keep marketing assets organized separately
For polished screenshots with backgrounds, consider a tool like ScreenSnap Pro that adds gradient backgrounds without editing.
For developers and bug reports
Focus on clarity and context:
- PNG format — Preserves code and error messages perfectly
- Include date/time — Timestamps help track when bugs happened
- Show mouse cursor — Sometimes the cursor position matters
- Copy to clipboard — Paste directly into GitHub issues or Slack
For design work
Keep maximum quality:
- PNG or TIFF format — No compression artifacts
- Disable shadows — Easier to composite in design tools
- Full screen captures — More context for design reviews
- Organized folders — Save to project-specific folders
Capture tricky content
Some things are harder to screenshot than others. Here's how to get them.
Capture a menu or dropdown
Menus close when you click away, so they're hard to capture. Try one of these:
Method 1: Timer approach
- Press
⌘ + Shift + 5, set a 5-second timer - Click Capture, then quickly open your target menu
- The screenshot fires while the menu is visible
Method 2: Area selection
- Open the menu you want to capture
- Press
⌘ + Shift + 4 - Drag to select the menu area (the menu stays open while you drag)
Capture the full screen with Dock
Press ⌘ + Shift + 3 to grab the whole screen, including the menu bar and Dock. If your Dock is hidden, it won't show up — turn off Auto-hide first.
Capture one of several monitors
With multiple screens, ⌘ + Shift + 3 makes a file for each one. To grab just one screen, use ⌘ + Shift + 4 and drag across it.
Capture part of a window
Sometimes you only need part of a window. Press ⌘ + Shift + 4 and drag to select just the part you want.
Capture a notification or alert
Notifications disappear fast. Here's how to catch them:
- Press
⌘ + Shift + 5and set a 5-second timer - Trigger the notification (send yourself a message, etc.)
- Wait for the timer to capture it
Alternatively, press ⌘ + Shift + 4 quickly when the notification appears — it stays visible while you drag your selection.
Capture login screen or FileVault
Standard shortcuts don't work on the login screen. You'll need to:
- Log in, then take a screenshot of Lock Screen by pressing
Control + ⌘ + Qto lock - Quickly press
⌘ + Shift + 3(this works on the lock screen in recent macOS versions)
For FileVault screens, you'll need to use a camera or another device — macOS can't screenshot before login.
Capture Touch ID prompts
Touch ID dialogs block other interactions. Use the timer approach:
- Press
⌘ + Shift + 5, set a 5-second timer - Trigger the Touch ID prompt
- Wait for the screenshot to fire
Troubleshooting common issues
When your Mac screenshot settings aren't working, here's how to fix them.
Terminal commands not working
After running any defaults write command, you must restart the screenshot service:
killall SystemUIServerIf that doesn't work:
- Check for typos — commands are case-sensitive
- Try logging out and back in
- Restart your Mac
Still stuck? Delete the setting and start fresh:
defaults delete com.apple.screencapture type
killall SystemUIServer
Screenshots saving to wrong location
If screenshots aren't going where you expect:
- Press
⌘ + Shift + 5 - Click Options
- Check where "Save to" is set
- Change it to your preferred folder
If it keeps resetting, check that the folder exists and you have write permission.
Screenshot files are too large
PNG files can be big, especially for Retina displays. Solutions:
- Switch to JPG format (see commands above)
- Use Preview to export at lower quality: Open the PNG → File → Export → reduce quality
- Use a tool that compresses automatically
Screenshots look blurry
This usually happens with JPG screenshots of text. Fix it by:
- Switching back to PNG format for text-heavy screenshots
- Checking your display settings (scaled resolutions can cause blur)
- Making sure you're not zoomed in while capturing
Keyboard shortcuts stopped working
Several things can steal your shortcuts:
- Third-party apps — Tools like Alfred, Raycast, or BetterTouchTool might use the same keys
- System Settings reset — Check Keyboard → Keyboard Shortcuts → Screenshots
- App-specific shortcuts — Some apps override system shortcuts when focused
See our full guide on Mac screenshot not working for more solutions.
Floating thumbnail won't go away
If the thumbnail preview stays on screen:
- Press
⌘ + Shift + 5 - Click Options
- Uncheck Show Floating Thumbnail
If it's stuck, try clicking it to dismiss, or wait 5 seconds for it to save.
What built-in settings can't do
Mac's screenshot tools work well for basics, but they have limits:
- No scrolling capture — Can't grab full web pages (here's how to take scrolling screenshots)
- Basic markup only — No blur tool or fancy shapes
- No quick sharing — You have to upload files by hand
- Plain backgrounds — No way to add nice backdrops
When to try a third-party app
If you often need more than the basics, a screenshot app can save you time.
ScreenSnap Pro has instant cloud sharing, 150+ wallpapers, GIF capture, and pro markup tools — with no monthly fees. Great if you share a lot on Slack, Discord, or social media.
CleanShot X offers similar features but charges a monthly fee for cloud tools.
For adding backgrounds to screenshots, apps like these turn plain captures into polished images for slides or social posts.
All commands in one place
Here's a quick list of every command from this guide:
# Change format
defaults write com.apple.screencapture type jpg

# Change filename prefix
defaults write com.apple.screencapture name "MyPrefix"

# Remove date/time from filename
defaults write com.apple.screencapture include-date -bool false

# Disable shadows
defaults write com.apple.screencapture disable-shadow -bool true

# Apply changes
killall SystemUIServer

# Reset to defaults
defaults delete com.apple.screencapture type
defaults delete com.apple.screencapture name
defaults delete com.apple.screencapture include-date
defaults delete com.apple.screencapture disable-shadow
killall SystemUIServer
Frequently Asked Questions
Wrapping up
Mac gives you more control over screenshots than most people know. With the Screenshot app (⌘ + Shift + 5) and a few simple commands, you can change the format, save folder, file names, shadows, and more.
For more help, see Apple's screenshot guide.
If you take and share lots of screenshots, think about whether the built-in tools do enough — or if a dedicated app would save you time with cloud links, nice backgrounds, and better markup.
Morgan
Indie DeveloperIndie developer, founder of ScreenSnap Pro. A decade of shipping consumer Mac apps and developer tools. Read full bio
@m_0_r_g_a_n_