GIF Screen Capture on Mac: Record, Edit & Share (2026 Guide)
GIF screen capture records your Mac's screen as a moving image. Unlike videos that need a play button, GIFs play on their own and loop forever. This makes them great for bug reports, quick demos, tutorials, and docs that people will actually watch — and tools like ScreenSnap Pro can record straight to GIF without the video conversion step.
The catch? macOS can't record GIFs on its own. The built-in screen recorder (⌘ + Shift + 5) only makes videos. But many tools can help. You can record GIFs directly or turn screen recordings into GIFs.
This guide covers:
- Every way to capture screen GIFs on Mac
- Free tools and paid options
- Tips for smooth, shareable GIFs
Quick Answer: Best GIF Screen Capture Methods
| Method | Type | Cost | Best For |
|---|---|---|---|
| ScreenSnap Pro | Direct GIF recording | $29 once | Fastest workflow, cloud sharing |
| GIPHY Capture | Direct GIF recording | Free | Casual use, simple setup |
| Kap | Direct GIF recording | Free | Developers, open source |
| macOS + Shortcuts | Video → GIF | Free | No install needed |
| Online tools | Video → GIF | Free | One-time use |
For regular GIF work, direct recording tools save a lot of time. You skip the extra step of turning videos into GIFs.
Why GIFs Beat Video for Screen Captures
Before we look at methods, here's why GIFs often work better than video:
They play right away: GIFs start on their own. They work in Slack, Discord, GitHub, docs, and email. No play button. No waiting.
They work everywhere: Every site and app supports GIFs. Videos need special embed codes, players, or certain formats.
They loop on their own: Great for showing actions that repeat, UI moves, or "before and after" demos.
They're quick to grasp: A 5-second looping GIF gets the point across faster than a 30-second video.
When to use video instead: Long how-tos (over 30 seconds), content that needs sound, or recordings where you need top-notch quality.
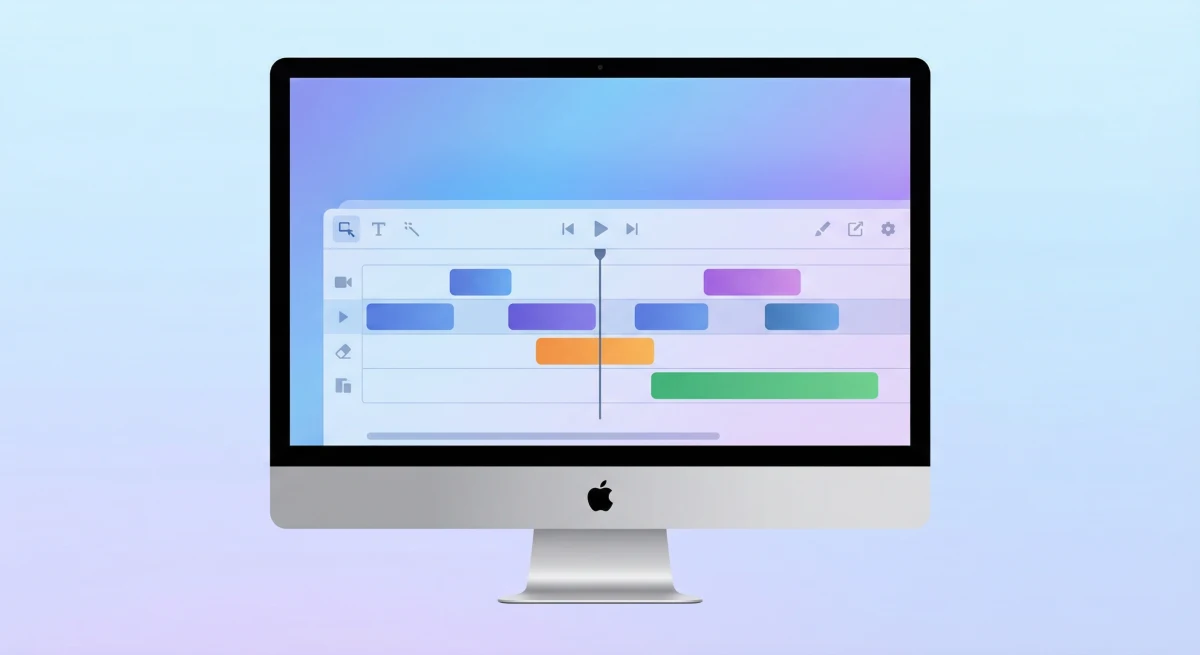
Method 1: ScreenSnap Pro (Fastest Way)
ScreenSnap Pro records straight to GIF. No video step needed. It captures your screen, lets you edit right there, and uploads to the cloud for fast sharing.
How to Record a GIF with ScreenSnap Pro
- Click the ScreenSnap Pro menu bar icon
- Pick Record GIF (or use your set hotkey)
- Drag to select the part you want to capture
- Click Start Recording to begin
- Click Stop when done (or use the hotkey)
- Edit and share from the Quick Access panel
Your GIF is ready right away. Drag it into Slack, copy the cloud link, or save it to your Mac.
Why ScreenSnap Pro Works Best for GIF Capture
| Feature | ScreenSnap Pro | Free Tools |
|---|---|---|
| Direct GIF recording | ✓ | ✓ (most) |
| Cloud upload + instant link | ✓ | ✗ |
| No watermarks | ✓ | Some add watermarks |
| Nice backgrounds | ✓ (150+ options) | ✗ |
| Markup tools | ✓ (15 tools) | Limited |
| One-time price | ✓ ($29) | Free (with limits) |
The cloud link feature shines for team work. Share a link instead of big GIF files. People can view right away. Learn more about our cloud screenshot sharing features.
Pro Tips for ScreenSnap Pro GIFs
- Keep recordings under 15 seconds to keep files small
- Use trim to cut dead time at the start and end
- Add markups before sharing to point out key actions
- Use backgrounds to make GIFs look polished in slides
Method 2: GIPHY Capture (Free)
GIPHY Capture is a free GIF recorder from the team behind the GIF search site. It's simple and works fine for basic needs.
How to Use GIPHY Capture
- Get GIPHY Capture from the App Store
- Open the app—a green recording box shows up
- Resize and move the box over your target area
- Click the red record button to start (max 30 seconds)
- Click again to stop
- Trim and tweak settings in the edit window
- Click Save As and choose GIF format
GIPHY Capture Limits
- 30 seconds max per recording
- Box capture only—can't snap to windows
- No cloud sharing—you must upload files yourself
- Basic editing—trim works, but no markups
- No hotkeys for quick captures
GIPHY Capture works for quick, casual GIF screen captures. For work use or frequent recording, its limits get in the way. See our full GIPHY Capture alternatives guide for more options.
Method 3: Kap (Free, Open Source)
Kap is a light, open-source screen recorder built by devs for devs. It exports to GIF with no extra steps.
How to Use Kap
- Get Kap from getkap.co
- Click the menu bar icon to start
- Pick your capture area (region, window, or full screen)
- Click Record to begin
- Click Stop when done
- Choose GIF as the export format
- Adjust quality and save
Kap's Strengths
- Free and open source
- Many export formats (GIF, MP4, WebM, APNG)
- Plugin system for add-ons
- Light on resources—won't slow your Mac
- Window capture mode
Kap's Limits
- Less polished look than paid tools
- No cloud upload—files only
- No markup tools
- Export can take time for long recordings
Kap is great for devs who want a simple, no-frills GIF recorder. Check out our Kap screen recorder review for the full story.
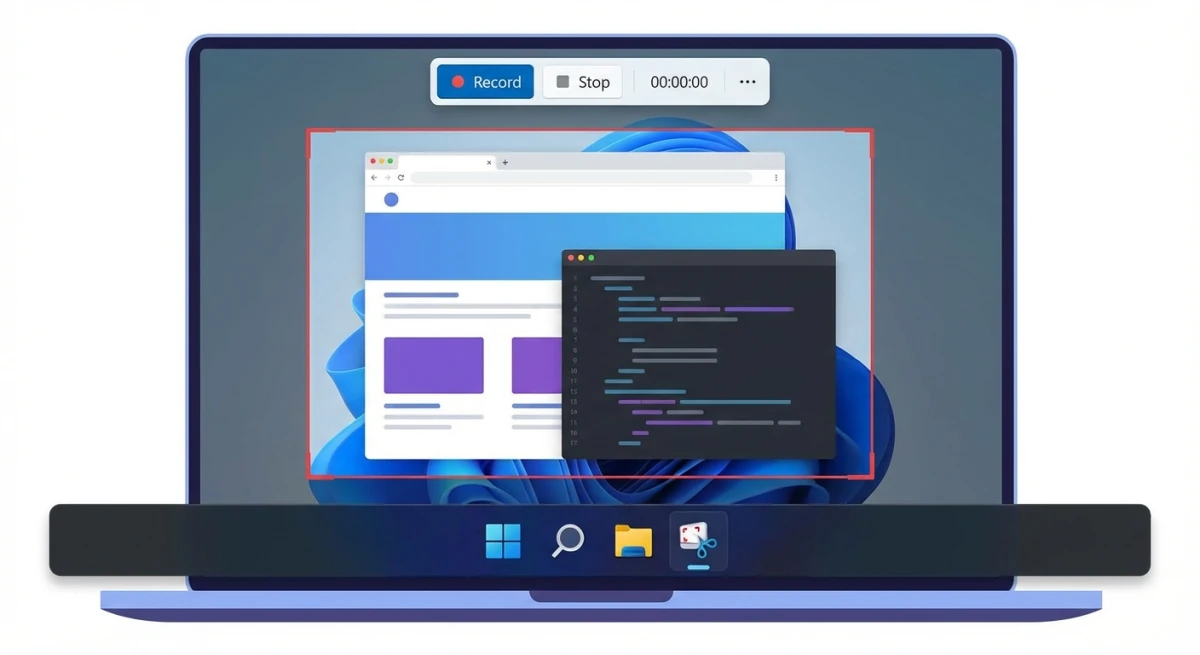
Method 4: macOS Screen Recording + Convert (Free, No Apps)
Don't want to install anything? Record with macOS and turn it into a GIF using the built-in Shortcuts app.
Step 1: Record Your Screen
- Press
⌘ + Shift + 5to open the screen recording toolbar - Choose Record Selected Portion or Record Entire Screen
- Click Record
- Do the action you want to capture
- Click the stop button in the menu bar when done
Your recording saves to Desktop as a MOV file. For more on the built-in recorder, see our QuickTime screen recording guide.
Step 2: Turn It Into a GIF with Shortcuts
- Open the Shortcuts app (built into macOS)
- Create a new shortcut with these actions:
- Select Photos (enable Videos in "Show More")
- Make GIF (set loop, frame rate, size)
- Save to Photo Album or Quick Look
- Name your shortcut (e.g., "Video to GIF")
- Run it and pick your recording
Limits of the Free Method
- Two steps—slower workflow
- Quality drops when you convert
- No trim before you convert (unless you edit in QuickTime first)
- Basic output—no markups, backgrounds, or sharing
This way works for one-off GIF making but gets old fast for regular use. For a full workflow, see our guide on turning MOV to GIF on Mac.
Method 5: Online GIF Tools
If you have a screen recording already, online tools can turn it into a GIF without adding any apps.
Using Ezgif (Free)
- Record your screen with
⌘ + Shift + 5 - Go to ezgif.com/video-to-gif
- Upload your video file
- Set start/end times and output settings
- Click Convert to GIF and download
Online Tool Limits
- Privacy worries—you're uploading to other servers
- File size caps on free tiers
- Slow upload/download for big files
- Just converts—no direct recording
Online tools work for rare use but aren't handy for regular GIF making.
Tired of plain screenshots? Try ScreenSnap Pro.
Beautiful backgrounds, pro annotations, GIF recording, and instant cloud sharing — all in one app. Pay $29 once, own it forever.
See what it doesGIF Recording Best Practices
Great GIFs need the right settings.
Best Recording Settings
| Setting | What to Use | Why |
|---|---|---|
| Length | 5-15 seconds | Keeps files small |
| Frame rate | 10-15 fps | Smooth enough for demos, not too big |
| Width | 800px max | Good mix of quality and file size |
| Colors | Let the tool pick | GIFs can only use 256 colors |
Before You Record
- Close other apps to cut system lag
- Clear your capture area of things that distract
- Plan your actions—know what you'll show
- Resize windows to fit what you're capturing
- Hide private info before you start
While Recording
- Move slowly—fast mouse moves look choppy in GIFs
- Pause briefly at key moments to make them stand out
- Stay focused—show one thing per GIF
- Scroll slowly—fast scrolling makes blurry spots
After Recording
- Trim the start and end to cut setup time
- Check file size—shrink if needed for platform limits
- Add markups to point out key actions
- Test the loop to make sure it plays smoothly

Platform File Size Limits
Each platform has its own GIF upload limits:
| Platform | File Size Limit | Work Around It |
|---|---|---|
| Slack (free) | 10 MB | Use cloud links |
| Discord | 8 MB (no Nitro) | Make it smaller |
| Twitter/X | 15 MB | Shrink or shorten |
| GitHub | 10 MB per file | Split into parts |
| Varies (5-25 MB) | Host elsewhere |
Pro tip: ScreenSnap Pro's cloud links skip all these limits. People click a link instead of downloading the file.
Making GIF Files Smaller
Big GIFs get blocked by platforms and load slowly. Here's how to fix that:
Quick Fixes
- Make it shorter—each second adds a lot to file size
- Shrink the size—800px wide is enough for most uses
- Lower frame rate—10 fps looks fine for UI demos
- Crop tight—capture only what matters
Deeper Cuts
- Use lossy shrinking—tools like Gifski, ImageOptim, or our free GIF compressor cut size a lot
- Fewer colors—256 is the max, but fewer colors mean smaller files
- Drop repeat frames—some tools add frames you don't need
What File Sizes to Expect
| Length | Size | About How Big |
|---|---|---|
| 3 seconds | 800×600 | 1-3 MB |
| 10 seconds | 800×600 | 3-8 MB |
| 15 seconds | 800×600 | 5-15 MB |
| 30 seconds | 800×600 | 15-40 MB |
Making Loops That Look Good
GIFs that loop without a hitch look more pro. Here's how to nail it:
For UI Demos
- Start and end the same way—cursor in same spot, same screen showing
- Plan the full action cycle—show the action going back to the start
- Add a short pause at the end before it loops again
For Motion Loops
- Match the first and last frame exactly
- Ease the shift—sudden cuts feel jarring
- Test the loop before you finish
When Loops Don't Matter
- Step-by-step guides showing a one-time process
- Bug reports where the issue shows once
- Before/after shows
GIF Screen Capture Use Cases
Bug Reports
GIFs show bugs faster than words can describe:
- Show the exact steps to make it happen again
- Show what went wrong
- Include screen context that screenshots miss
Best practices:
- Keep under 10 seconds
- Show the bug clearly
- Include the right UI context
Product Demos
Quick GIFs show off features better than bullet points:
- Spotlight a single feature
- Show the workflow in action
- Build hype for new releases
Best practices:
- Polish the recording—cut mistakes
- Add markups to guide the eye
- Use the same style across all demos
Docs and Help Content
GIFs in docs cut support tickets:
- Show how to get around complex UIs
- Walk through step-by-step processes
- Show ideas that are hard to explain
Best practices:
- Focus on one idea per GIF
- Add numbered steps with markup tools
- Make sure GIFs load fast (keep files small)
For markup tips, see our guide on how to mark up screenshots like a pro.
Social Media
Moving GIFs grab more eyes than still images:
- Show app features in action
- Make fun how-to content
- Show before/after changes
Fixing Common Problems
Recording Is Choppy or Slow
Why it happens:
- Too many apps open while recording
- Frame rate set too high
- Capture area is too big
How to fix it:
- Close heavy apps before recording
- Lower frame rate to 10-15 fps
- Shrink capture area to just what you need
File Is Too Big
Why it happens:
- Recording is too long
- Capture area is too big
- Too many colors or too high frame rate
How to fix it:
- Trim to just the key content
- Shrink size (800px width max)
- Use tools like ImageOptim to shrink it
GIF Won't Play on a Platform
Why it happens:
- File is too big for that platform
- Format isn't supported
- File got messed up when you made it
How to fix it:
- Check platform limits and shrink to fit
- Use a cloud link instead of direct upload
- Make it again from scratch
Can't Record Some Apps
Why it happens:
- App has copy protection (streaming sites)
- Screen recording permission not granted
- App uses tech that blocks capture
How to fix it:
- Protected content can't be captured (this is on purpose)
- Grant screen recording access in System Settings > Privacy & Security
- Some apps may not work—try window capture instead
Quality Looks Bad After Export
Why it happens:
- Too much shrinking
- Source wasn't good quality
- Colors look weird due to GIF's 256-color cap
How to fix it:
- Record at higher quality, then shrink
- Use direct GIF recording instead of turning video into GIF
- For top quality needs, use video format instead
Frequently Asked Questions
- Shrink the size (width/height)
- Cut the length
- Lower the frame rate
Which GIF Capture Method Should You Pick?
| If you need... | Use this |
|---|---|
| Fastest workflow + sharing | ScreenSnap Pro |
| Free + simple setup | GIPHY Capture |
| Free + open source | Kap |
| No installs needed | macOS + Shortcuts |
| Turn existing videos into GIFs | Ezgif online |
For regular GIF work—bug reports, demos, docs—ScreenSnap Pro's one-click flow pays for itself in time saved. Capture, edit, and share without breaking your flow.
For rare use, GIPHY Capture or Kap handle basics well. The macOS + Shortcuts way works when you can't install anything.
Wrapping Up
macOS can't record GIFs on its own. You'll need a tool or a way to turn videos into GIFs. The best choice depends on how often you make GIFs.
For pros: ScreenSnap Pro gives the fastest flow. It records GIFs straight away, edits right there, and shares via cloud links.
For rare use: GIPHY Capture or Kap work well. Kap is better for devs who like open-source tools.
For one-time needs: Use the built-in macOS screen recorder plus Shortcuts. No install needed.
Key tips:
- Keep GIFs short (under 15 seconds)
- Shrink files to fit your platform
- Plan your recording before you start
Related guides:
Morgan
Indie DeveloperIndie developer, founder of ScreenSnap Pro. A decade of shipping consumer Mac apps and developer tools. Read full bio
@m_0_r_g_a_n_