How to Take a Partial Screenshot on Mac (5 Methods)
A partial screenshot on Mac captures just part of your screen—not the whole thing. Press ⌘ + Shift + 4, drag to select what you need, and you're done. No cropping needed. For pixel-perfect area capture with built-in annotation, a tool like ScreenSnap Pro takes it further.
This guide shows five ways to capture screen areas on Mac. You'll learn keyboard shortcuts, built-in tools, and pro tips for perfect captures.
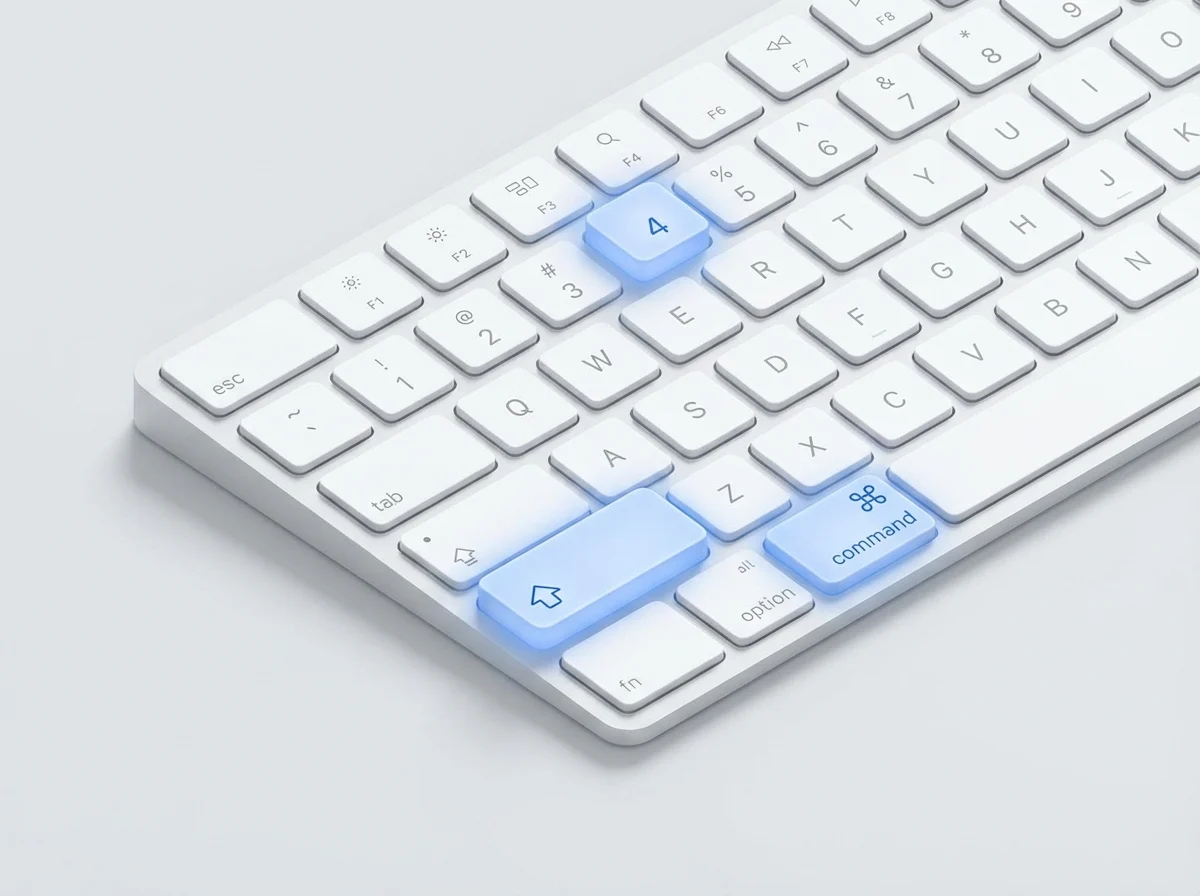
Method 1: Use ⌘ + Shift + 4 (Quickest Method)
This is the fastest way to take a partial screenshot on Mac. It works on every macOS version and requires no setup.
Step-by-step:
- Press and hold
⌘ + Shift + 4(all three keys at once) - Your cursor changes to a crosshair with pixel coordinates
- Click and drag to draw a rectangle around what you want
- Watch the pixel dimensions update as you drag
- Release the mouse button to capture
Your screenshot saves to the desktop with a timestamp filename. You can change the save location to any folder you prefer.
The crosshair shows X and Y coordinates as you move. When you drag, it switches to show width × height in pixels. This helps you capture precise areas—useful for app store screenshots or documentation images.
Pro tips for ⌘ + Shift + 4
Lock your selection: Start dragging, then hold Space without releasing the mouse. The selection shape stays fixed. Now you can move it around the screen. Release Space to continue resizing, or release the mouse to capture.
Adjust one edge: Hold Shift while dragging to lock the horizontal or vertical axis. This lets you change only the width or only the height. Release Shift and press it again to switch which axis is locked.
Resize from center: Hold Option while dragging. The selection grows from the center instead of the corner. Combine with Shift to lock proportions while resizing from center.
Copy to clipboard: Press ⌘ + Control + Shift + 4 instead. This copies the screenshot directly without saving a file. Paste with ⌘ + V into Messages, Slack, email, or any app that accepts images.
Cancel the capture: Press Esc at any point to cancel. The crosshair disappears and nothing is captured.
Combine window and area selection: Press ⌘ + Shift + 4, then hit Space to switch to window selection mode. Hover over a window—it highlights. Click to capture just that window with its shadow. Press Space again to return to area selection.
For a complete list of shortcuts, see our Mac screenshot shortcuts guide.
Method 2: Screenshot App (⌘ + Shift + 5)
macOS has a built-in Screenshot app with a visual interface. Press ⌘ + Shift + 5 to open it. This feature arrived in macOS Mojave (10.14) and works in all newer versions.
A floating toolbar appears at the bottom of your screen with these capture modes:
- Entire Screen — captures your full display (same as
⌘ + Shift + 3) - Selected Window — click any window to capture it with shadows
- Selected Portion — drag to capture part of the screen (same as
⌘ + Shift + 4) - Record Entire Screen — creates a video of your display
- Record Selected Portion — records part of your screen
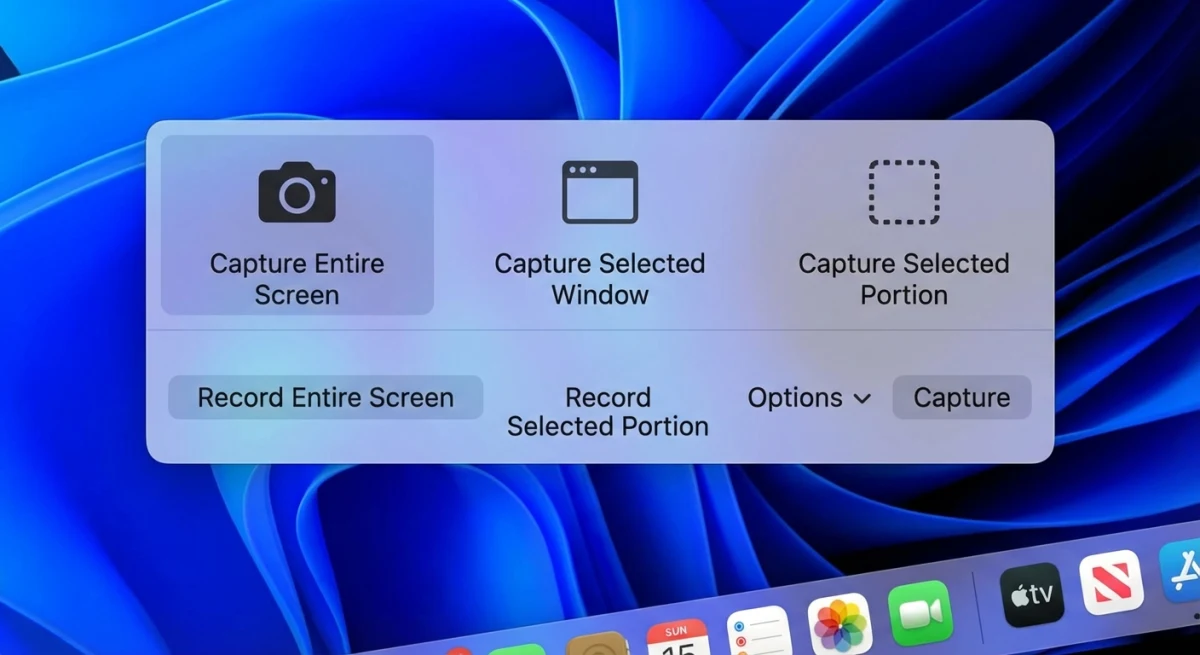
For partial screenshots, click the dotted-rectangle icon (third from left). A resizable selection box appears on screen. Drag any edge or corner to adjust the size and position. Click Capture when you're happy with the selection.
The selection box persists until you close the toolbar. This makes it easy to fine-tune your capture area before committing. Unlike ⌘ + Shift + 4, you can see exactly what you'll capture before taking the shot.
Screenshot app options
Click Options in the toolbar to access advanced settings:
Save to:
- Desktop (default)
- Documents folder
- Clipboard (copies instead of saving)
- Mail, Messages, or Preview (opens directly)
- Any custom folder you choose
Timer:
- None (instant capture)
- 5 seconds delay
- 10 seconds delay
Timers are essential for capturing dropdown menus, tooltips, and hover states that disappear when you press keys.
Other options:
- Show Floating Thumbnail: Enables the preview that appears in the corner after capture. Click it to markup before saving.
- Show Mouse Pointer: Include your cursor in the capture. Useful for tutorials.
- Remember Last Selection: Keeps your selection box the same size and position. Perfect for capturing multiple similar items.
Your settings persist across restarts. Once configured, the app remembers your preferences.
When to use the Screenshot app
The Screenshot app is ideal when you need:
- Visual preview before capturing
- Precise control over selection edges
- A timer delay for menus and tooltips
- Quick access to screen recording
- Consistent sizing for multiple captures
For single quick captures, ⌘ + Shift + 4 is faster since it skips the toolbar. But for anything requiring precision or timing, the Screenshot app is more reliable.
According to Apple's macOS User Guide, the Screenshot app provides the most comprehensive built-in capture options on Mac.
Method 3: Preview App
Preview can take screenshots too:
- Open Preview from your Apps folder or Spotlight
- Click File in the menu bar
- Select Take Screenshot → From Selection
- Drag to pick your area
The capture opens right in Preview. You can edit it on the spot. This is great when you need to annotate screenshots fast.
Preview also has From Window and From Entire Screen with a 10-second timer.
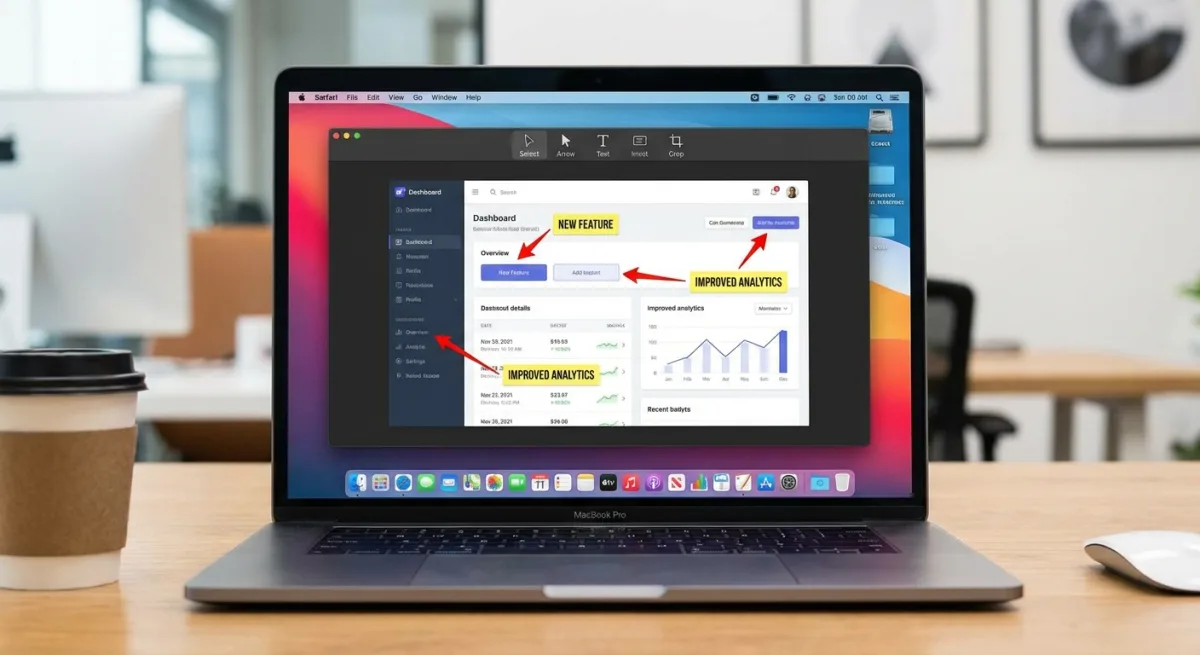
Method 4: Third-Party Screenshot Tools
Built-in tools handle basic captures well. But dedicated screenshot apps add features macOS lacks—features that matter when you share screenshots daily.
What third-party tools add:
- Instant cloud sharing: Capture and get a shareable link in one click. No manual uploads to Imgur or Dropbox.
- Beautiful backgrounds: Add gradient backgrounds and shadows. Turn plain screenshots into polished visuals.
- Advanced markup: Blur sensitive info, pixelate faces, add arrows, numbered steps, and callouts.
- GIF recording: Capture short screen recordings as GIFs. Great for demos without video complexity.
- OCR text extraction: Copy text from any screenshot, PDF, or locked document.
- Scrolling capture: Grab entire webpages or long documents that don't fit on screen.
- History and organization: Find past captures without digging through your Desktop folder.
For a complete comparison, see our guide to the best screenshot apps for Mac.
Popular Mac screenshot tools:
| Tool | Pricing | Best For |
|---|---|---|
| CleanShot X | $29 one-time (cloud extra) | Power users who want everything |
| Shottr | Free | Lightweight, keyboard-first workflow |
| ScreenSnap Pro | One-time purchase | Backgrounds, GIF recording, cloud sharing |
| Snagit | $63 + subscription | Enterprise and team features |
| Monosnap | Freemium | Basic cloud sharing |
| Lightshot | Free | Quick captures with basic editing |
Most tools let you keep your familiar shortcuts. Press ⌘ + Shift + 4 and capture the same way—but with better editing and sharing afterward.
If you regularly blur sensitive info in screenshots or add custom backgrounds to screenshots, a dedicated app saves significant time. The gap between macOS built-in tools and professional options becomes obvious when you need polished visuals quickly.
Why upgrade from built-in tools?
The macOS Screenshot app captures images. That's it. After capturing, you need separate steps: open Preview to edit, export to change format, upload somewhere to share, copy the link.
Dedicated screenshot apps compress this into one flow: capture → annotate → share. The preview appears instantly, you add markup, and get a shareable link—all without leaving the tool.
The math is simple: If you take 5 screenshots a day and save 30 seconds each, that's 2.5 minutes daily. Over a year, you save 15+ hours. For anyone who shares screenshots regularly—developers, designers, support staff, writers—the time savings justify the cost.
One-time vs subscription: Most Mac screenshot tools offer one-time pricing. You pay once and own the software forever. This differs from cloud-focused tools like Droplr or CloudApp that charge monthly. Consider what matters more: cloud storage (subscription) or local features (one-time).
Method 5: Touch Bar Screenshots (Legacy MacBooks)
MacBook Pro models from 2016-2020 have a Touch Bar. You can add a screenshot button to it:
- Open System Settings → Keyboard
- Click Customize Control Strip
- Drag the Screenshot icon to your Touch Bar
- Click Done
Tap it to open capture options. Press ⌘ + Shift + 6 to capture the Touch Bar itself.
Note: Apple removed the Touch Bar in 2021. This only works on older MacBook Pro models.
Tired of plain screenshots? Try ScreenSnap Pro.
Beautiful backgrounds, pro annotations, GIF recording, and instant cloud sharing — all in one app. Pay $29 once, own it forever.
See what it doesPartial Screenshot Pro Tips
These tips help you capture exactly what you need, every time. Master these techniques and you'll work faster with better results.
Capture menus and tooltips
Menus close when you press keyboard shortcuts. The menu vanishes before you can capture it. Here's the reliable fix:
- Press
⌘ + Shift + 5to open the Screenshot app - Click Options → set a 5-second timer
- Click the dotted-rectangle icon for partial capture
- Position and size your selection area
- Click Capture to start the countdown
- Quickly open the menu or hover to show the tooltip
- Hold still—the timer captures automatically
This technique works for:
- Dropdown menus (File, Edit, View menus)
- Right-click context menus
- Tooltips that appear on hover
- Menu bar items with dropdown panels
- Notification Center content
Alternative method: Some users prefer the Preview app approach. Open Preview, select File → Take Screenshot → From Selection, then quickly open your menu. Preview gives you 10 seconds—more time than the Screenshot app's 5-second maximum.
Get exact pixel sizes
The crosshair shows live pixel dimensions as you drag. Watch the numbers in the corner of your selection:
- Before dragging: Shows X,Y cursor position on screen
- While dragging: Shows width × height in pixels
This precision matters when you need:
- App Store screenshots: Apple requires specific sizes (1280×800, 1440×900, etc.)
- Documentation images: Consistent sizes for a professional look
- Social media graphics: Platform-specific dimensions
- Thumbnail series: Matching sizes for galleries
Pro tip: Enable "Remember Last Selection" in ⌘ + Shift + 5 options. Your selection size persists, making batch captures identical.
Capture windows without shadows
By default, window captures include the drop shadow. Press ⌘ + Shift + 4, then Space, hover over a window, and click. The captured image has a shadow border.
To remove the shadow:
- Press
⌘ + Shift + 4 - Press
Spaceto switch to window mode - Hold
Optionwhile clicking the window - The capture has no shadow—just the window
Shadowless captures are better for:
- Technical documentation (cleaner look)
- Embedding in slide presentations
- Comparison images (shadows add visual noise)
- Print materials (saves ink)
Understand Retina resolution
Modern Macs have Retina displays that capture at 2x resolution. If you select an 800×600 pixel area, your file saves at 1600×1200 pixels. This preserves sharpness on high-DPI screens.
The tradeoff: Higher resolution means larger files. A typical PNG screenshot can be 2-5 MB.
To reduce file size:
- Change format to JPG: Run
defaults write com.apple.screencapture type jpgin Terminal, thenkillall SystemUIServer - Resize in Preview: Open the screenshot, select Tools → Adjust Size, and reduce dimensions
- Use compression: Tools like ImageOptim (free) shrink PNGs without quality loss
- Capture at 1x: Hold
Shiftwhile capturing to disable Retina scaling (works in some apps)
For detailed format options, the TechRadar guide to Mac screenshots covers format selection in depth.
Move your selection while drawing
Started dragging but the selection is in the wrong spot? Don't start over.
- Keep holding the mouse button
- Press and hold
Space - Move the entire selection to the correct position
- Release
Spaceto continue resizing - Release the mouse to capture
This saves time when you almost got the right area but started slightly off.
Combine modifier keys for precision
You can combine multiple modifier keys while selecting:
Space— Move selection without resizingShift— Lock horizontal or vertical axisOption— Resize from center instead of cornerShift + Option— Resize proportionally from center
Practice these combinations and you'll capture exactly what you need on the first try.
Capture multiple monitors
If you have multiple displays, ⌘ + Shift + 4 works across all of them. The crosshair can move from one screen to another. Your selection can span monitors—useful for capturing elements that cross screen boundaries.
For full-screen captures of a specific display, press ⌘ + Shift + 3 and click on the monitor you want (if you have the Screenshot app open with multiple displays).
Troubleshooting Partial Screenshots
Sometimes screenshots don't work as expected. Here are solutions to common problems.
Screenshots not saving
If your partial screenshots don't appear:
- Check the default location: Screenshots save to Desktop unless you changed it. Look there first.
- Verify your custom folder: If you set a custom save location, make sure that folder still exists. Deleting it breaks screenshot saving.
- Restart the screenshot service: Open Terminal and run:
killall SystemUIServer. This restarts the process that handles screenshots. - Check disk space: If your startup disk is full, screenshots can't save. Free up space and try again.
- Test with clipboard: Press
⌘ + Control + Shift + 4to copy to clipboard. If that works, the issue is with file saving, not capturing.
Crosshair doesn't appear
If pressing ⌘ + Shift + 4 does nothing:
- Check keyboard shortcuts: Go to System Settings → Keyboard → Keyboard Shortcuts → Screenshots. Make sure the shortcuts are enabled and haven't been reassigned.
- Test in a new user account: Create a temporary user account and try there. If it works, your user settings are corrupted.
- Check for conflicting apps: Some apps (like screen recording tools or automation software) can intercept keyboard shortcuts. Quit running apps and try again.
- Reset NVRAM: Restart your Mac and hold
Option + Command + P + Rfor 20 seconds. This resets system settings that might affect screenshots.
Captures look wrong
Blurry screenshots: Macs with Retina displays capture at 2x resolution. If your image looks blurry after sharing, the receiving app might be downscaling it. For sharp results, share the original file or use apps that preserve resolution.
Wrong portion captured: If you keep missing the area you want, use ⌘ + Shift + 5 instead. The visual selection box lets you adjust before capturing.
Missing parts of the screen: Some content (like DRM-protected video) can't be captured for copyright reasons. The screenshot will show a black area where the protected content was.
Screenshot shortcut changed after update
macOS updates can sometimes reset keyboard shortcuts. If your shortcuts stopped working after an update, check System Settings → Keyboard → Keyboard Shortcuts → Screenshots and re-enable them.
For more troubleshooting help, see our complete Mac screenshot not working guide.
Where Do Mac Screenshots Go?
By default, screenshots save to your Desktop. Names look like Screen Shot 2026-02-01 at 10.30.45 AM.png. This helps you find them—but clutters your Desktop fast.
To change where they go:
- Press
⌘ + Shift + 5 - Click Options
- Pick a new spot under Save to
Good options:
- Desktop: Easy to find, but messy
- Documents/Screenshots: Keeps Desktop clean
- Clipboard: No file—paste right into apps
- iCloud Drive: Syncs to all your devices
- Custom folder: Make a Screenshots folder
For more on save spots and file naming, see our guide on changing screenshot location.
Need to capture a full webpage? Partial screenshots won't work. Check our scrolling screenshot guide instead.
Partial Screenshot Keyboard Shortcuts Reference
| Action | Shortcut |
|---|---|
| Partial screenshot (save to file) | ⌘ + Shift + 4 |
| Partial screenshot (copy to clipboard) | ⌘ + Control + Shift + 4 |
| Open Screenshot app | ⌘ + Shift + 5 |
| Full screen screenshot | ⌘ + Shift + 3 |
| Window screenshot | ⌘ + Shift + 4, then Space |
| Cancel screenshot | Esc |
| Lock selection position | Space (while dragging) |
| Lock horizontal/vertical edge | Shift (while dragging) |
For more macOS screenshot capabilities, see Apple's official screenshot documentation.
Frequently Asked Questions
Wrap Up
Taking a partial screenshot on Mac is easy once you know the shortcuts. ⌘ + Shift + 4 works for most cases. The Screenshot app (⌘ + Shift + 5) gives more control when needed.
If you capture and share often, tools like ScreenSnap Pro help. They add markup, backgrounds, and cloud sharing—all in one quick flow. Need to crop an existing screenshot down to size? Our free image cropper handles it right in your browser.
Morgan
Indie DeveloperIndie developer, founder of ScreenSnap Pro. A decade of shipping consumer Mac apps and developer tools. Read full bio
@m_0_r_g_a_n_