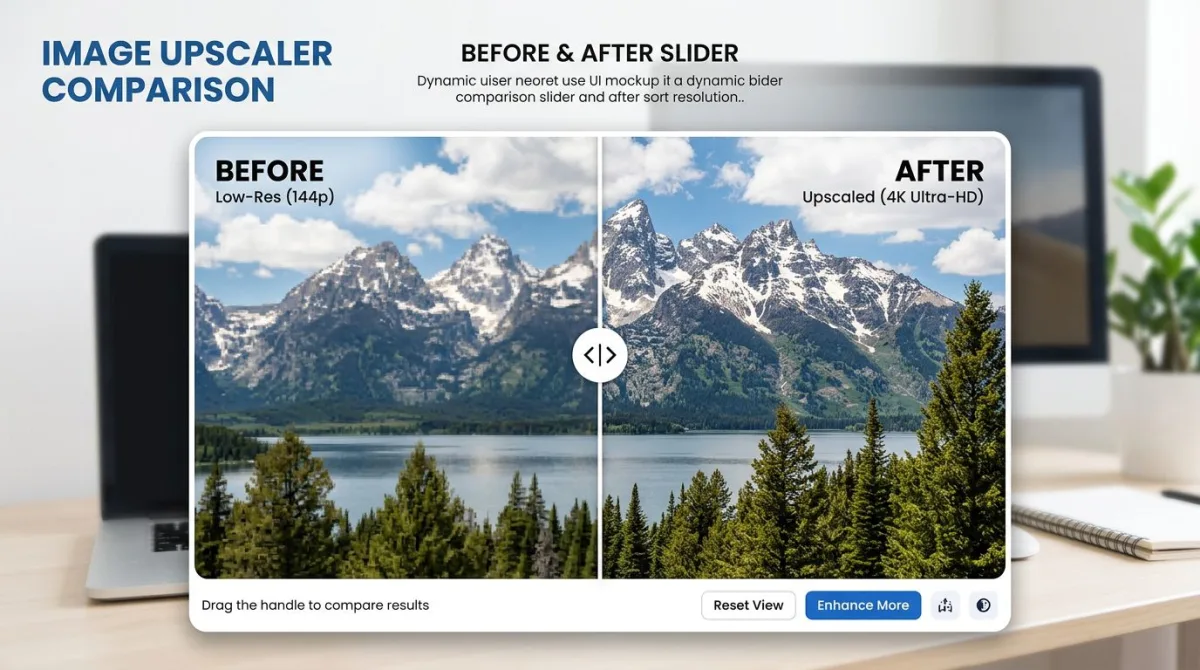
AI Image Upscaler — Upscale Photos to 4K Free (2026)
An AI image upscaler takes a small photo and uses AI to make it bigger and sharper — without the blurry, blocky mess you get from basic resizing. Instead of stretching pixels, the AI guesses what the missing detail should look like and fills it in. You get a larger, cleaner image that looks like it was shot at a higher resolution. (Pair it with a screenshot tool like ScreenSnap Pro when you need to enlarge captured screens for retina-quality docs.)
If you have ever tried to blow up a photo for print, zoom into a cropped screenshot, or prep a product shot for your store, you know the pain. Normal resize tools just smear what is already there. An AI upscaler adds new visual detail, keeping edges crisp, textures real, and colors true.
How AI image upscaling works
Normal resizing just averages nearby pixel colors to fill in the gaps. That is why blown-up photos look soft or blocky.
AI upscaling works differently. Models like Real-ESRGAN and waifu2x are trained on millions of image pairs: one small, one large. The model learns how skin, fabric, text, and edges should look at full size.
When you feed in a photo, the AI:
- Splits the image into small patches that overlap.
- Looks at each patch to find textures, edges, and patterns.
- Guesses what the sharp, full-size version of each patch should be.
- Joins the patches back into one smooth, larger image.
The output can be 2x or 4x the source size with details still sharp. Fine things like hair, text, and fabric stay clean instead of turning to mush.
How to upscale an image (step by step)
Getting started with an image upscaler takes about 30 seconds. Here is the typical process.
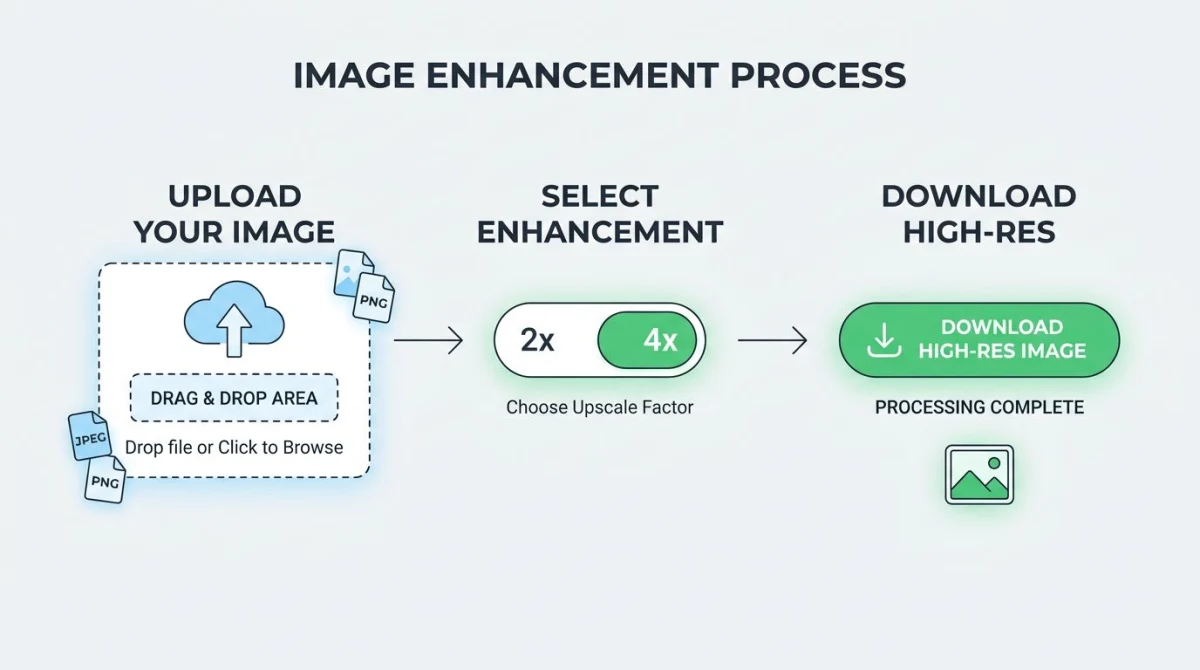
1. Upload your image
Drag and drop your photo into the upscaler, or click to browse your files. Most tools accept JPG, PNG, and WebP formats. Keep your source image under 5 MB for the fastest results.
2. Pick your scale factor
Choose between 2x and 4x upscaling:
- 2x doubles the width and height (a 500 x 500 image becomes 1000 x 1000). Good for small boosts and social media posts.
- 4x makes it four times wider and taller (500 x 500 becomes 2000 x 2000). Best for print, posters, and big displays.
Start with 2x if you are not sure. You can always run it again, but pushing too far can add glitches.
3. Download the result
Once it is done, check the result. Look at edges, text, and fine details up close. If it all looks sharp, save the PNG file to your device.
Pro tip: After upscaling, you may want to compress the image to keep file sizes small, or resize it to exact sizes for your target platform.
2x vs 4x upscaling: which should you choose?
The right scale factor depends on your goal. Here is a quick look.
| Factor | Output size (from 800 x 600) | Best for | Processing time |
|---|---|---|---|
| 2x | 1600 x 1200 | Social media, web, email | 2-5 seconds |
| 4x | 3200 x 2400 | Print, posters, large monitors | 5-15 seconds |
Choose 2x when:
- You need a sharper version for a blog post or social feed.
- The source image is already decent quality (just slightly too small).
- Speed matters more than max size.
Choose 4x when:
- You are preparing images for print at 300 DPI.
- The source is very small (under 500 px on the longest side).
- You need large-format output for banners or signage.
One thing to note: 4x on a blurry or heavy-compressed JPEG will make flaws worse. If the source is noisy or has blocky patches, clean it up first or stick with 2x for a more natural look.
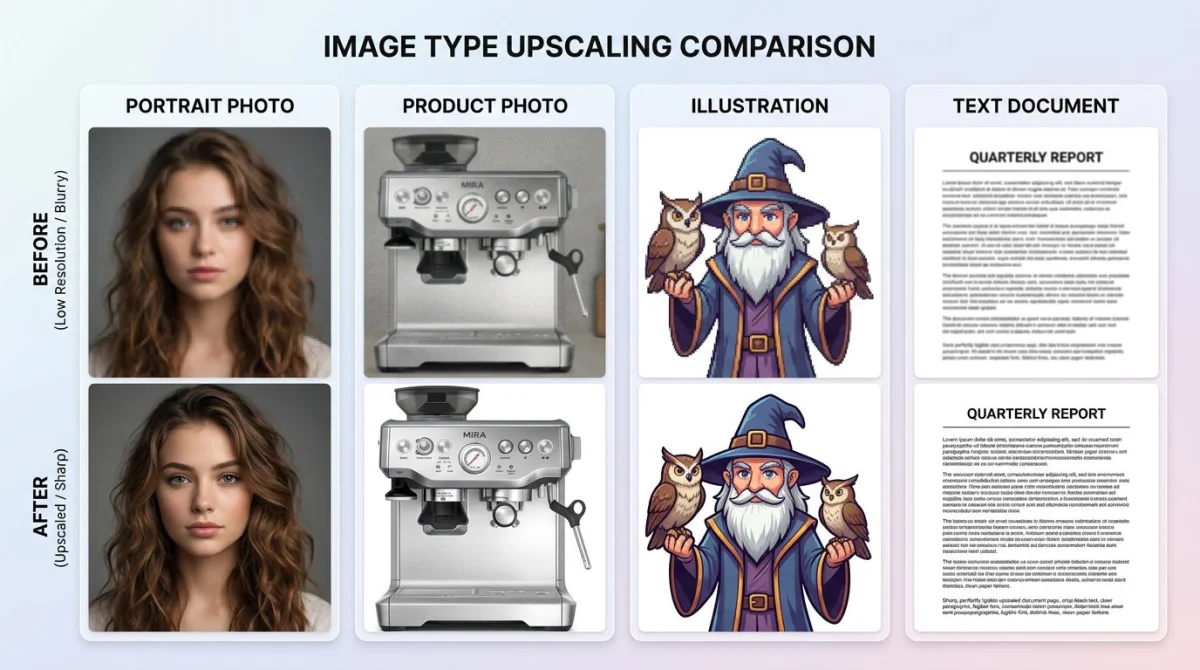
Best use cases for AI image upscaling
AI upscaling shines in specific situations. Here is where it makes the biggest difference.
Old photos and family archives
Scanned family photos from the 1990s or older are often too small by today's standards. A quick 2x or 4x upscale can bring them up to a quality good enough for reprints or digital frames. The AI handles faces and clothing well, bringing back detail that basic enlarging wipes out.
E-commerce and product photos
Online shoppers zoom in on product images. If your photos are low-res, buyers may lose trust. Upscaling product shots to fill large display areas keeps things sharp without a reshoot. This is great for older stock photos you cannot retake.
Social media content
Each platform has its own ideal image sizes. When your source image is too small, upscaling beats stretching. A 2x boost is usually enough to hit the right sizes for Instagram, LinkedIn, and X (Twitter) with no visible drop in quality.
Screenshots and presentations
Cropped screenshots often end up tiny. If you grabbed a small area and need to show it full-screen, upscaling brings back the sharpness. For even better results, start with high-quality screenshots from the start.
Print projects
Print needs 300 DPI at the target size. A photo that looks fine on screen at 72 DPI will look blurry on paper. Upscaling gives you the extra pixels you need to meet print specs with no visible flaws.
Tired of plain screenshots? Try ScreenSnap Pro.
Beautiful backgrounds, pro annotations, GIF recording, and instant cloud sharing — all in one app. Pay $39 once, own it forever.
See what it doesBrowser-based vs server-based upscalers
Not all upscaling tools work the same way. The two main types are browser-based (client-side) and server-based.
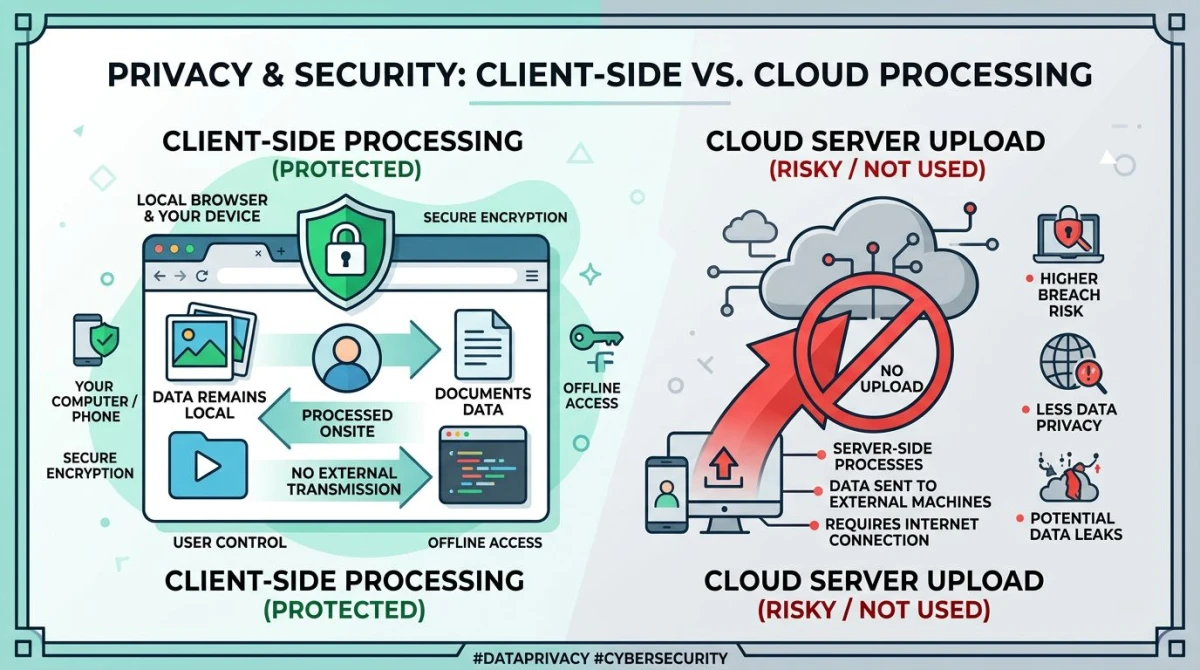
Browser-based (client-side)
Your image stays on your device. The AI runs right in your browser using WebAssembly or WebGL. Nothing gets sent to any server.
Pros:
- Complete privacy. Your photos never leave your computer.
- No account or signup required.
- Works offline once the model loads.
- No daily limits or watermarks.
Cons:
- Slower on older hardware.
- Large images (over 4 MP) may take longer on mobile.
- Model size is smaller to fit in the browser.
Server-based
Your image is sent to a remote server where a larger, more powerful AI model processes it. The result is sent back.
Pros:
- Can handle very large images quickly.
- Larger models may give slightly better output.
- Works even on low-powered devices.
Cons:
- Your images are uploaded to a third party.
- Most services need signup or add watermarks on free tiers.
- Daily limits are common.
- Images may sit on their servers for a while.
The bottom line: If privacy matters to you (and it should), a browser-based upscaler is the better pick. The quality gap has shrunk a lot with modern WebAssembly and tuned models like Real-ESRGAN lite.
Tips for getting the best upscaling results
AI upscaling is not magic. What you get out depends on what you put in. Follow these tips for the best results.
Start with the best source you have. If you have more than one version of a photo, pick the largest, least-compressed one. A 400 x 300 PNG will upscale better than a 400 x 300 JPEG saved at low quality.
Use the right input format. PNG and WebP keep more detail than JPEG. If you can, convert your image to PNG before upscaling for the cleanest output.
Upscale before editing, not after. Crop, adjust color, and annotate after you upscale. Editing a small image and then blowing it up makes every flaw worse.
Watch for glitches. Check the output at 100% zoom. Common issues: halos around sharp edges, waxy skin (the "plastic" look), and odd textures where the AI guessed wrong. If you see problems, try a lower scale.
Pair upscaling with compression. A 4x upscale makes a big file. Once you are happy with the look, run it through a compressor to cut file size with no visible quality loss. This keeps your site fast and storage lean.
How upscaling compares to other image tools
Upscaling solves one problem: making images bigger. But people often mix it up with other tools. Here is how they differ.
| Tool | What it does | When to use |
|---|---|---|
| Image upscaler | Makes images bigger with AI | Small images that need more pixels |
| Image resizer | Changes size (up or down) | Fitting images to exact sizes |
| Image compressor | Shrinks file size | Faster loading, less storage |
| Image enhancer | Tweaks brightness, contrast, sharpness | Better look without changing size |
| Format converter | Swaps file type (PNG to JPG, etc.) | Format needs or file size goals |
If you need to resize images without losing quality, a resizer handles shrinking better than an upscaler. For format swaps, use a format converter.
When upscaling is not the right answer
AI upscaling has limits. Here are situations where you should consider a different approach.
The source is too damaged. Heavy JPEG compression, banding, or lots of noise will get worse with upscaling. The AI tries to rebuild detail that was never there, which creates odd marks. Clean up the image first (or reshoot it) for better results.
You need pixel-perfect output. AI upscaling fills in gaps with guesses based on learned patterns. For legal docs, medical images, or forensic work, the added pixels are not facts. They are the model's best guess.
The image is already big enough. Upscaling a 3000 x 2000 photo to 6000 x 4000 rarely adds useful detail. It mostly grows the file size. If your image is already sharp, focus on compression and format changes instead.
You can reshoot. A fresh capture at the size you need will always beat an upscaled version. If the option exists, take a new photo. Tools like ScreenSnap Pro let you capture screenshots at full retina size from the start, so you rarely need to upscale screen grabs. At $39 one-time with 15 annotation tools and 500+ wallpapers, it is a smart choice for anyone who works with screenshots daily.
Supported image formats
Most AI upscalers work with the three main web formats:
- PNG — Lossless. Best input and output quality. Larger files.
- JPEG/JPG — Lossy. The most common photo format. Compression flaws can get worse after upscaling.
- WebP — A newer format from Google with a good balance of quality and size. More tools support it each year.
Some tools also handle HEIC (from iPhones) and AVIF. If your upscaler does not accept your format, convert it to PNG or JPG first.
For output, PNG is the safest pick. It keeps all the detail the AI added without piling on new compression flaws.
Frequently Asked Questions
Morgan
Indie DeveloperIndie developer, founder of ScreenSnap Pro. A decade of shipping consumer Mac apps and developer tools. Read full bio
@m_0_r_g_a_n_