How to Take High Quality Screenshots on Mac (Pro Tips)
How to take high quality screenshots on Mac is easier than you think. You just need the right display, file format, and capture settings — plus a sharp tool like ScreenSnap Pro when the built-in shortcuts fall short. A blurry screenshot can make your work look amateur—whether you're writing docs, sharing designs, or building a portfolio.
This guide shows you how to capture sharp, clear screenshots every time. No tech degree needed.
Why high quality screenshots matter
Blurry screenshots hurt your credibility. When people see fuzzy images in your docs, they question your work.
Think about it:
- Designers lose clients when portfolio shots look pixelated
- Developers waste time explaining blurry bug reports
- Writers get ignored when tutorial images are unclear
Here's what really happens. A tutorial with crisp screenshots gets bookmarked. The same tutorial with blurry images? People close it fast. In tech support, clear screenshots close tickets faster. No one has to ask "can you send a clearer image?"
For marketers, this hits the wallet. Sharp screenshots on landing pages build trust. Blurry ones kill sales. Social posts with clear visuals get shared more.
The gap between amateur and pro often comes down to screenshot quality.
What affects it?
- Your screen — Newer Mac screens (called "Retina") capture more detail
- File type — Some file types blur your images
- How you capture — Wrong settings destroy sharpness
- How you edit — Bad resizing ruins everything
The good news? Once you learn this, crisp screenshots become easy.
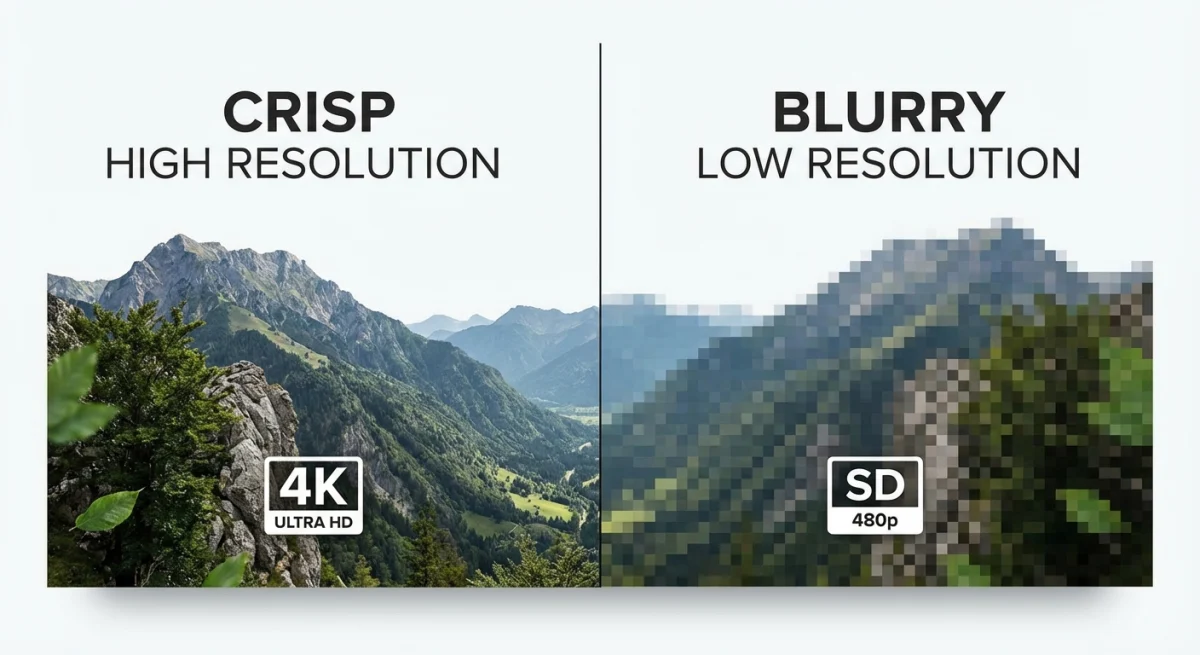
Use a Retina display for sharper images
Your screen is the biggest factor in screenshot quality.
What's a Retina display? It's Apple's name for high-resolution screens. Most Macs made after 2012 have them. These screens pack more pixels into the same space. That means sharper text and clearer images.
Here's the key: Retina screens capture at double the resolution. A 1000×600 window becomes a 2000×1200 image. That's 4 times more detail.
Why does this matter?
- Sharper text — Letters look smooth, not jagged
- Cleaner icons — Buttons and images stay detailed
- Better for the future — Images look great on any modern screen
Using an external monitor? Check if it supports high-resolution mode. Older monitors capture at half the detail. That looks noticeably worse on modern screens.
How to check your display
- Click the Apple menu → System Settings
- Click Displays
- Look at your resolution setting
- Choose "Default for display" for the best quality
Quick tip: If you only have a standard monitor, make your window as big as possible before capturing. More size means more pixels to work with.
Choose the right file format
Your file format affects quality more than you'd think. macOS saves screenshots as PNG by default. That's usually right—but not always.
Let's break down your options in plain English.
| Format | Best for | Quality | File size |
|---|---|---|---|
| PNG | Most screenshots | Perfect | Medium |
| TIFF | Printing | Perfect | Large |
| JPEG | Photos only | Loses detail | Small |
| HEIC | Saving space | Loses some detail | Tiny |
PNG: The safe choice
PNG keeps every detail. Text stays sharp. Colors stay true. Edges stay clean.
Use PNG for:
- App windows and menus
- Tutorials and docs
- Anything with text
- Charts and diagrams
This is probably what you want 90% of the time.
TIFF: For printing
TIFF files are huge but perfect. Use them only if your screenshots will be printed in books, magazines, or posters. For screen use, they're overkill.
Our guide on Mac screenshot settings covers when to use each format.
JPEG: Almost never for screenshots
Here's the thing about JPEG: it was made for photos, not screenshots.
JPEG squashes files to make them smaller. That works fine for photos of trees and faces. But for screenshots? It blurs text. It creates ugly patches around sharp edges. It makes buttons look smudgy.
Rule of thumb: Never use JPEG for screenshots unless someone demands small files AND doesn't care about quality.
How to change your default format
Open the Terminal app and paste this:
defaults write com.apple.screencapture type pngReplace png with tiff, jpg, or heic if needed. Then restart your Mac.
Adjust Mac settings for better captures
A few settings can make a big difference. Let's walk through them.
Turn off window shadows
By default, Mac adds a shadow around window screenshots. Shadows look nice but cause problems:
- They add extra space around your image
- They can mess up composites when layering images
- Some platforms crop them weirdly
To turn off shadows, open Terminal and paste:
defaults write com.apple.screencapture disable-shadow -bool true
killall SystemUIServer
For all the options, see our Mac screenshot settings guide.
Learn the keyboard shortcuts
Knowing the Mac screenshot shortcuts gives you more control:
⌘ + Shift + 3— Captures your whole screen⌘ + Shift + 4— Lets you draw a box around what you want⌘ + Shift + 4 + Space— Captures one window⌘ + Shift + 5— Opens a toolbar with more options
The draw-a-box method (⌘ + Shift + 4) is most precise. You capture exactly what you need. No cropping later.
Apple's official guide covers all built-in options.
Don't use "More Space" mode
This is a common trap.
Many people set their Mac to "More Space" to fit more on screen. Makes sense, right? But here's the catch: your screenshots capture at that smaller size too.
The "More Space" option fakes a lower resolution. Your screen still has the same pixels. But screenshots capture the fake resolution, not the real one.
For the best quality:
- Open System Settings → Displays
- Switch to "Default for display"
- Take your screenshot
- Switch back if you want
This captures every pixel your screen can offer.
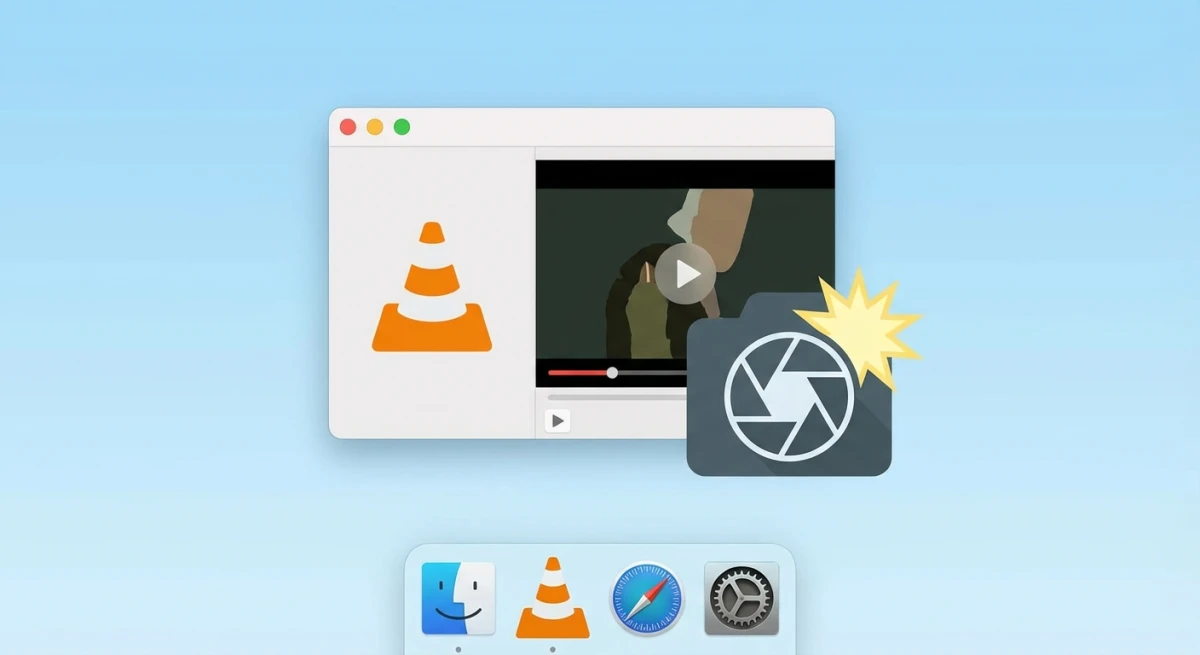
Tired of plain screenshots? Try ScreenSnap Pro.
Beautiful backgrounds, pro annotations, GIF recording, and instant cloud sharing — all in one app. Pay $39 once, own it forever.
See what it doesUse a dedicated screenshot tool
Mac's built-in tools work fine for basic captures. But if you want pro-level quality, dedicated apps help a lot.
What do screenshot apps offer?
- Always high-quality — Works right even with weird display settings
- Instant editing — Add arrows and text without quality loss
- Pretty backgrounds — Make screenshots look polished fast
- Easy sharing — Send links instead of files
Tools like ScreenSnap Pro capture at full quality every time. You get 500+ wallpapers to make screenshots look professional instantly. And it's a one-time purchase—no monthly fees.
Our best screenshot apps for Mac comparison helps you pick the right tool.
Edit without ruining quality
Got a great screenshot? Don't wreck it while editing. Here's how to keep quality intact.
Crop smart
When you crop a screenshot on Mac, you're removing pixels. You can't get them back.
Tips for cropping:
- Only crop what you truly don't need
- Crop from the original, not a resized copy
- Don't crop if you might need to enlarge later
Add backgrounds the right way
Putting screenshots on pretty backgrounds looks pro. But doing it wrong hurts quality.
The key: Add backgrounds BEFORE any resizing. Not after.
Our guide on adding backgrounds to screenshots shows the best methods. Dedicated tools handle this automatically.
Mark up images safely
Adding arrows, circles, and text shouldn't blur your image. Some apps do this wrong and squash quality when saving.
Use tools that save in PNG format. Learn proper methods in our screenshot annotation guide.
Resize the right way
Sometimes you need smaller images. Here's how to resize without damage:
- Only shrink, never stretch — Making images bigger always blurs them
- Use round numbers — 50% or 25%, not 47%
- Resize once at the end — Don't resize, edit, then resize again
The image resizer tool handles this properly for web images.
Best practices for different uses
Different situations need different approaches. Here's what works for each.
Docs and tutorials
Tech docs need crystal-clear screenshots. Every button must be readable.
- Use a high-resolution screen (Retina)
- Always save as PNG
- Keep window sizes the same across all screenshots
- Add arrows or boxes to highlight what matters
Social media
Social platforms squash uploaded images. Fight back by:
- Starting with bigger images than you need
- Avoiding gradient backgrounds in the screenshot itself (they show compression worst)
- Adding any backgrounds before you upload
- Testing how it looks on phones
Printed materials
Print needs way more detail than screens. For screenshots that will be printed:
- Use a high-resolution Retina screen at minimum
- Save as TIFF for editing
- Think about DPI (usually 300 for print). Our free DPI converter checks a capture's current DPI and converts it to 300 right in the browser
- A 1000×600 window captured at 2x gives 2000×1200 pixels—about 6.7×4 inches at print quality
Slides and presentations
PowerPoint and Keynote can blur your screenshots if you're not careful.
- Add images at their real size first
- Shrink them in the app if needed (never stretch)
- Export as PDF if quality matters
- Use PNG files, not JPEG
Mistakes that kill screenshot quality
Watch out for these common errors.
Using "More Space" display mode
If your Mac is set to "More Space," your screenshots capture at that lower quality. Switch to "Default for display" before important captures.
Saving as JPEG
JPEG kills screenshot quality. Every save adds blur and ugly patches.
If someone wants smaller files, use PNG with an optimizer like ImageOptim or our image compressor. Don't switch to JPEG.
Screenshot of a screenshot
Taking a screenshot of an image on your screen cuts quality in half. Always share the original file.
Using the wrong editing app
Preview works but can squash quality when you save. Use dedicated tools for editing screenshots on Mac to keep images sharp.
Resizing before you're done editing
Every resize can add blur. Edit at full size first. Resize only at the very end, once.
Ignoring color settings
Screenshots use your display's color settings. For color-accurate work, make sure your screen is set up right. This matters most for designers.
Frequently asked questions
Start capturing crisp screenshots today
High quality screenshots come from three things: a good screen, the right file format, and avoiding common editing mistakes. With the right setup, sharp captures become second nature.
For the easiest path to pro screenshots, try tools built for the job. ScreenSnap Pro captures at full quality, adds pretty backgrounds with one click, and exports perfectly—all without complex photo software.
Your screenshots show your work. Make them look as good as what they're showing.
Morgan
Indie DeveloperIndie developer, founder of ScreenSnap Pro. A decade of shipping consumer Mac apps and developer tools. Read full bio
@m_0_r_g_a_n_