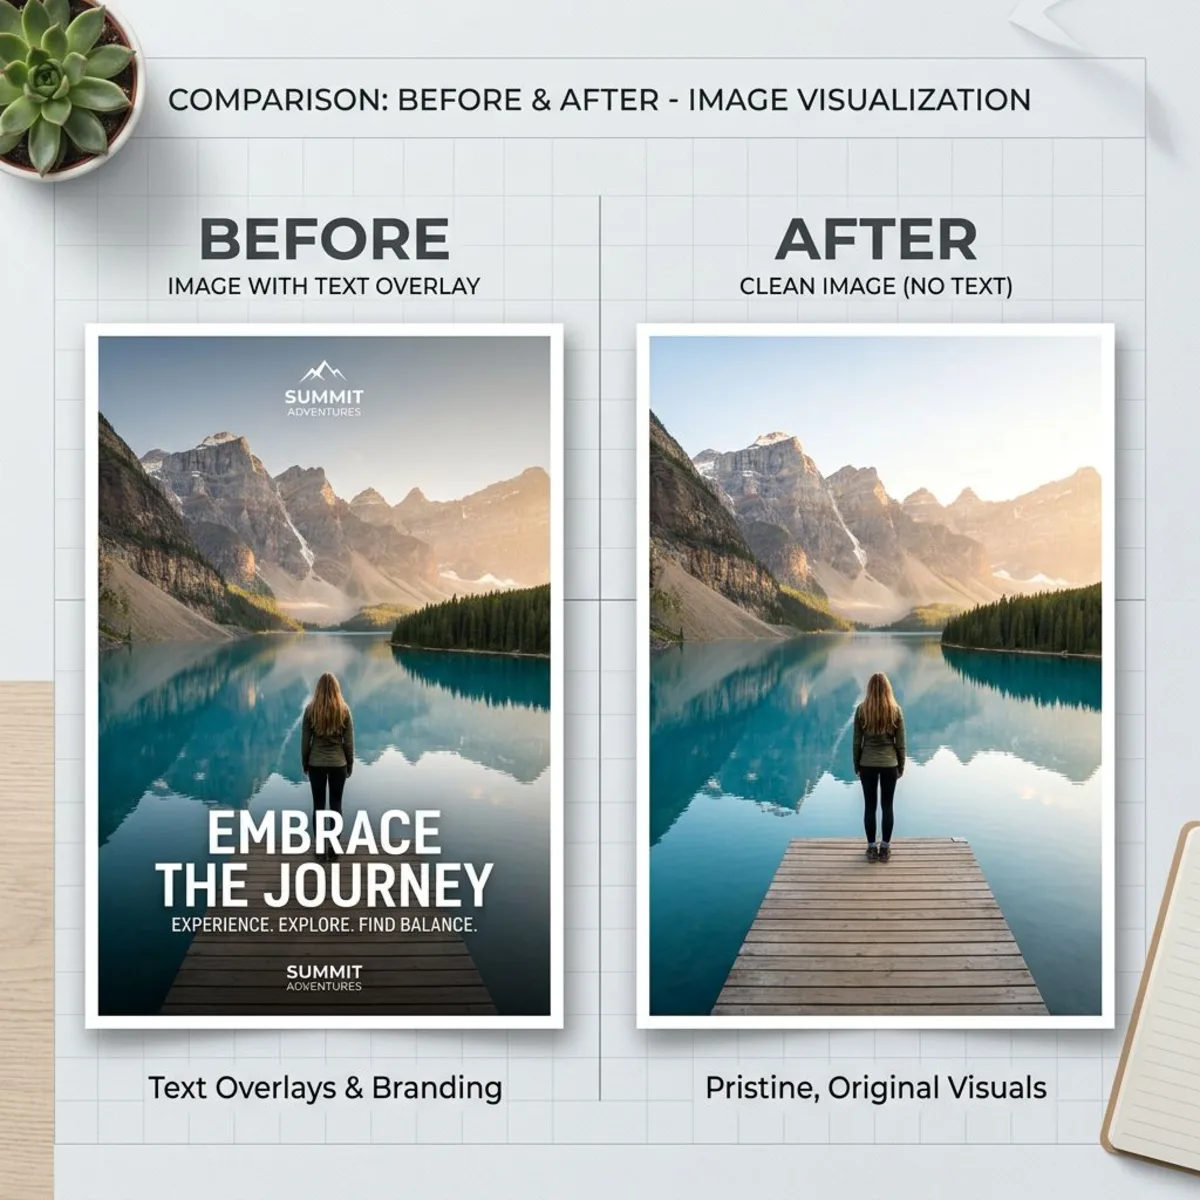
How to Remove Text from Image: 7 Free Methods (2026)
Need to remove text from an image without ruining the background? Whether it's an unwanted watermark, a date stamp, or overlay text that's blocking a perfectly good photo, the right tool makes it a 30-second job. This guide covers 7 free methods — from AI-powered one-click tools to manual techniques in Photoshop and GIMP — so you can erase text from any image cleanly. If the source is a screenshot you grabbed with ScreenSnap Pro, the cleaner the original, the easier the text removal.
Why you'd want to remove text from images
Before jumping into the tools, here are the most common reasons people need to erase text from photos:
- Repurposing stock photos — Free images often come with watermarks or attribution text baked in. Removing it gives you a clean canvas for design work.
- Cleaning up screenshots — Old date stamps, notification banners, or usernames you'd rather not share. If you regularly capture and edit screenshots on Mac, you've run into this.
- Removing captions or subtitles — Video stills often have burned-in text that doesn't belong in a static image.
- Social media content — Reusing an image across platforms where the original overlay text doesn't apply.
- Fixing personal photos — Date stamps from cameras, accidental text overlays, or event banners obscuring the shot.
The best method depends on what's behind the text. Solid colors are easy. Busy textures or faces behind text need smarter AI tools.
Best AI tools to remove text from images online
AI text removers look at the pixels around the text and fill in what was behind it. These are the fastest options for most people.
1. Cleanup.pictures — Best for quick edits
Cleanup.pictures is a browser tool that uses AI to erase objects, people, and text from images. It's one of the cleanest free options out there.
How to use it:
- Go to cleanup.pictures
- Upload your image or drag and drop it onto the page
- Paint over the text you want removed with the brush tool
- The AI fills in the background automatically
Pros:
- No account required for basic use
- Handles complex backgrounds well
- Works on desktop and mobile browsers
Cons:
- Free version exports at 720px max resolution
- Pro plan costs $5/month for full-resolution exports
- May leave marks on very detailed backgrounds
Best for: Quick single-image edits where you don't need full resolution.
2. Fotor — Best all-in-one editor with text removal
Fotor offers an AI text remover as part of its broader photo editing suite. The text removal is automatic — no manual brushing required.
How to use it:
- Open Fotor's text remover tool
- Upload your image
- Select "Text Remover" from the toolbar and click "Remove"
- Wait a few seconds for the AI to process
- Download the cleaned image
Pros:
- Finds text on its own — no need to select it
- Supports JPG, PNG, BMP, and WebP formats
- Part of a larger editing suite (crop, filter, adjust)
Cons:
- Requires a free account for downloads
- Can be aggressive — may remove text you wanted to keep
- Results vary with handwritten or stylized fonts
Best for: Removing printed text from photos when you want a hands-off approach.
3. NoteGPT AI Text Remover — Best for batch processing
NoteGPT offers an AI-powered text eraser that processes images without requiring sign-up. It uses a prompt-based approach where you describe what to remove.
How to use it:
- Upload your image (supports PNG, JPG, JPEG, WebP up to 20MB)
- Enter a prompt describing what to remove, or select "Remove Text"
- Download the cleaned result
Pros:
- No sign-up needed
- Prompt-based control gives you precision
- Handles up to 8 images at once
- Keeps the original size and quality
Cons:
- Limited to 2 free images per day
- Premium credits needed for additional edits
- Prompts take some getting used to
Best for: Users who need precise control over what gets removed versus kept.
4. Pixelbin.io — Best for e-commerce product images
Pixelbin focuses on commercial use cases, particularly e-commerce product photography. It's designed to handle product images where text overlays, price tags, or labels need to go.
How to use it:
- Open the Pixelbin text remover tool
- Upload your product or marketing image
- The AI detects and removes text automatically
- Download or export to your workflow
Pros:
- Built for product photos
- API available for developers and bulk processing
- Clean results on solid and gradient backgrounds
Cons:
- Less effective on busy natural scenes
- Free tier has usage limits
- Made mainly for business use
Best for: Online stores and marketers who need to clean up lots of product photos.
Manual methods for removing text from photos
AI tools are fast, but sometimes you need full control over every pixel. These manual methods let you handle each edit yourself.
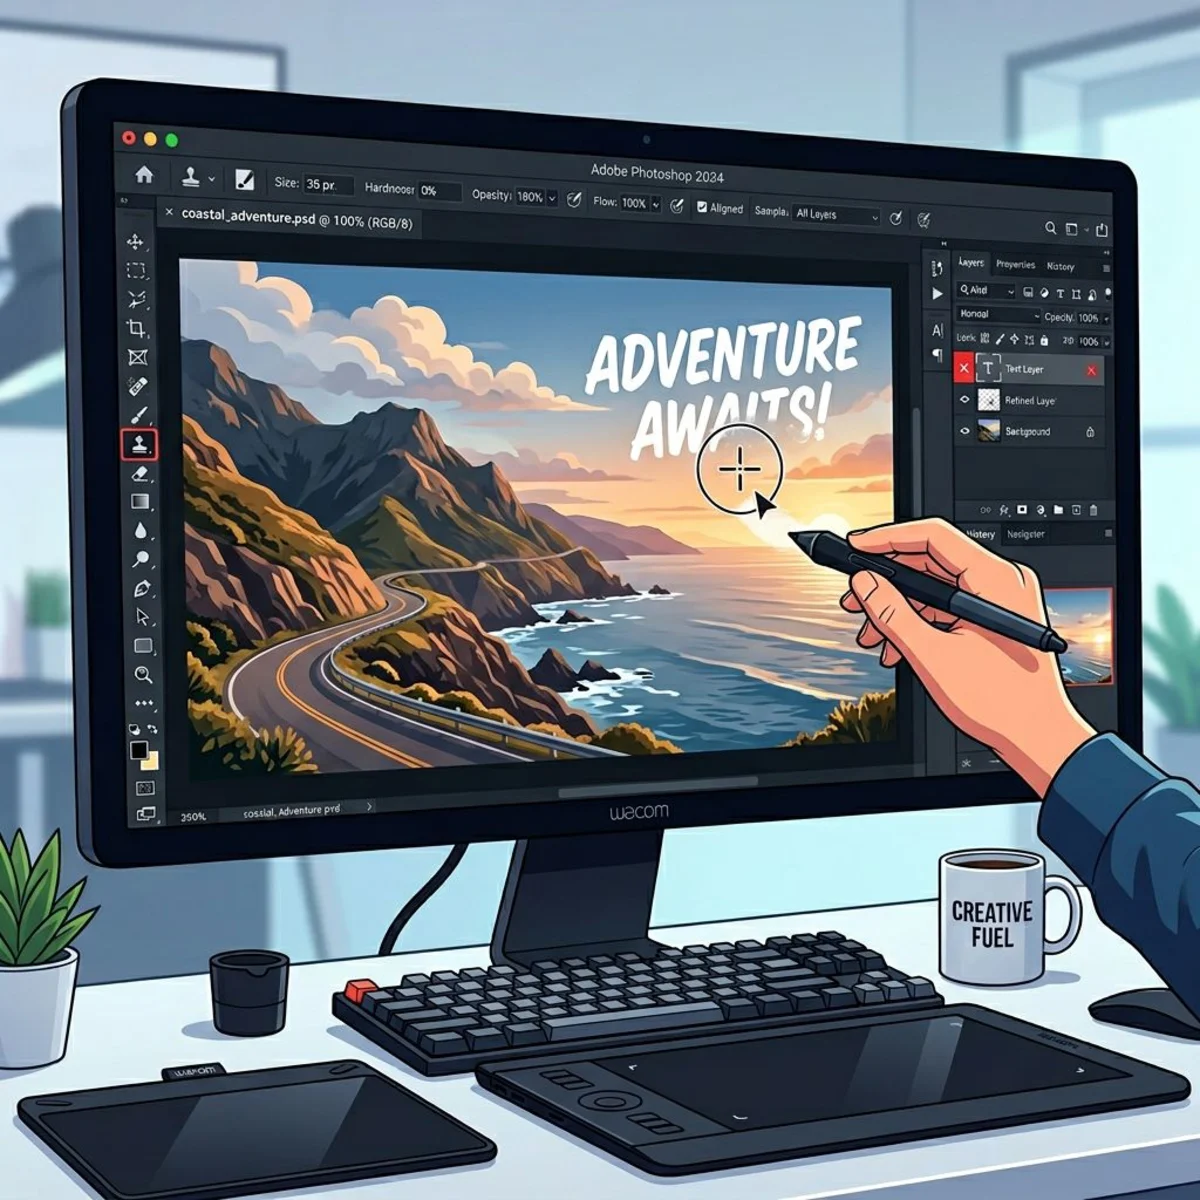
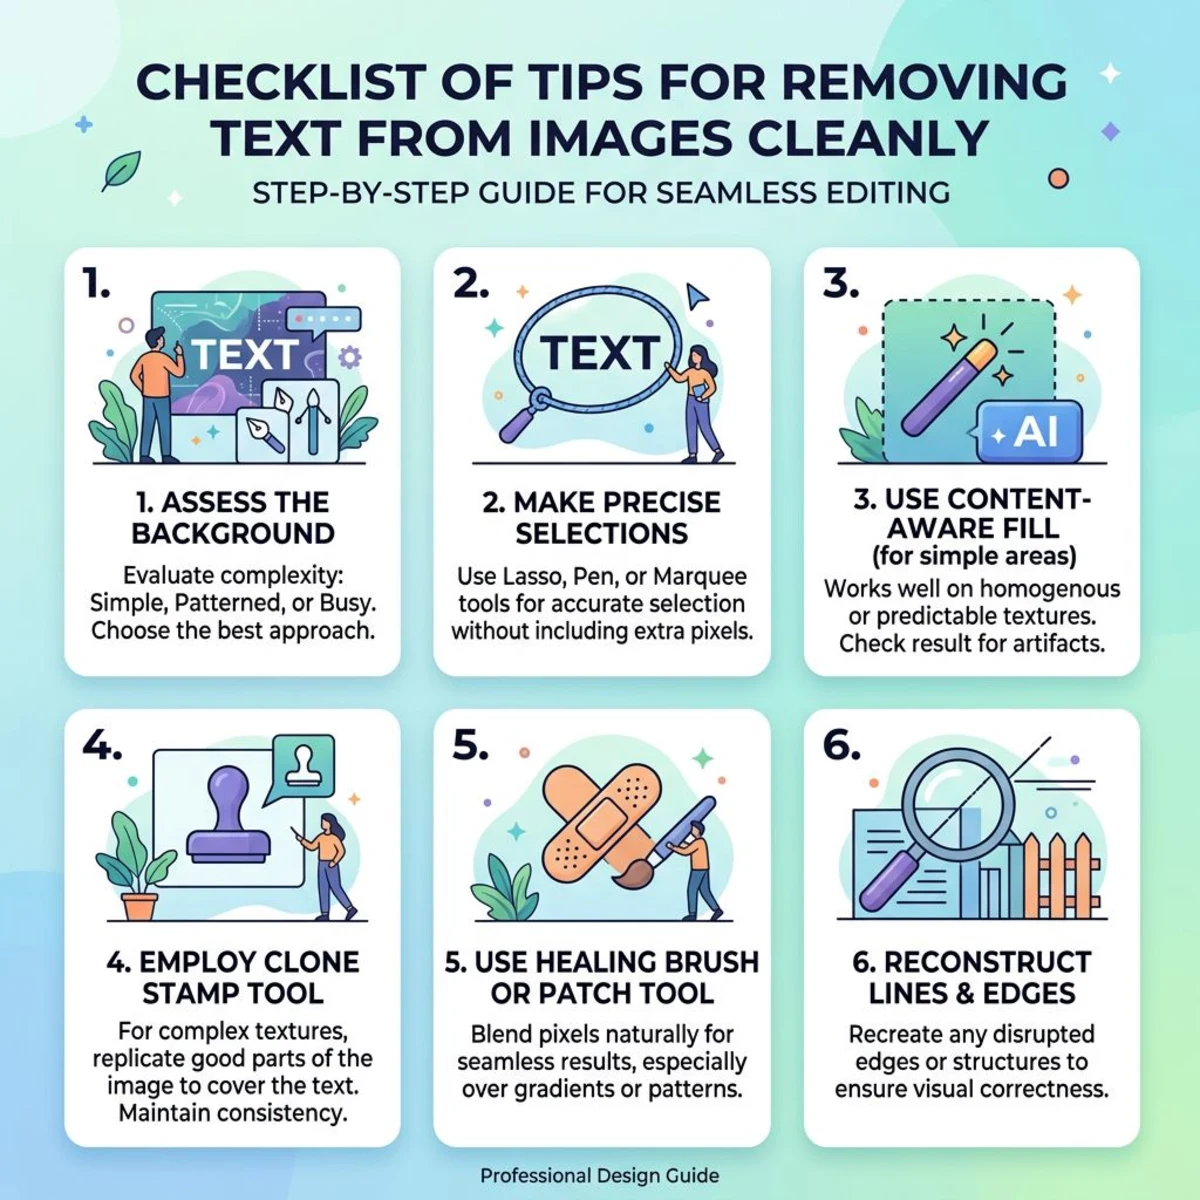
5. Adobe Photoshop — Content-Aware Fill and Clone Stamp
Photoshop remains a strong tool for exact image edits. It gives you several ways to erase text from photos, and the 2026 updates made Content-Aware Fill even better.
Method A: Content-Aware Fill (recommended)
- Open your image in Photoshop
- Use the Lasso Tool (
L) to select the text area loosely - Go to Edit → Content-Aware Fill (or press
Shift + F5) - Adjust the sampling area if needed
- Click OK and Photoshop fills in the background
Method B: Clone Stamp Tool
- Select the Clone Stamp Tool (
S) - Hold
Optionand click a clean area near the text to sample it - Paint over the text — Photoshop copies that texture onto the text
- Use small strokes and pick new source spots often for a natural look
Method C: Spot Healing Brush
- Select the Spot Healing Brush (
J) - Set it to Content-Aware mode
- Paint directly over the text
- Works best for small text on simple backgrounds
Pros:
- Most exact results you can get
- Several tools for different cases
- Works on any background, no matter how busy
- Full size output, no quality loss
Cons:
- Needs a Photoshop plan ($23/month)
- Harder to learn than AI tools
- Takes more time since it's hands-on
Best for: Pros who need exact results on tricky images. Check Adobe's system needs page if you're not sure your Mac can run it.
6. GIMP — Free Photoshop alternative
GIMP is a free, open-source photo editor that can do the same job — it just takes more hands-on work.
How to remove text in GIMP:
- Open your image in GIMP
- Select the Clone Tool (
C) - Hold
Ctrland click a clean area to set the source - Paint over the text, picking new source spots as you go
- For a smoother look, try the Heal Tool — it blends edges better
- On newer GIMP versions, use Filters → Enhance → Heal Selection to fill areas in one click
Pro tip: Work on a duplicate layer so you can always undo. If you need to extract text from the image before removing it (to save the content), do that step first using OCR.
Pros:
- Completely free and open source
- Available on Mac, Windows, and Linux
- Full manual control over every pixel
- No subscription, no account needed
Cons:
- The layout feels old next to Photoshop
- No smart fill tool like Photoshop has
- Harder for new users to pick up
Best for: Anyone who wants strong editing tools without paying for Photoshop.
Mobile apps for removing text from photos
Sometimes you need to clean up an image on your phone — whether it's a screenshot you just took or a photo you're about to post.

7. TouchRetouch (iOS & Android) — Best mobile app
TouchRetouch is a handy app for erasing text, wires, and small objects from photos on your phone.
How to use it:
- Open TouchRetouch and import your photo
- Tap "Quick Repair" and select the brush or lasso tool
- Paint over the text or draw a selection around it
- Tap "Go" and the app removes it instantly
Alternatives for mobile:
- Snapseed (free, Google) — Use the Healing tool to paint over text
- PicsArt (free with ads) — AI-powered remove tool handles text well
- Samsung Gallery (Samsung phones only) — Built-in object eraser in the editor
Best for: Quick mobile edits when you don't have access to a desktop.
Tired of plain screenshots? Try ScreenSnap Pro.
Beautiful backgrounds, pro annotations, GIF recording, and instant cloud sharing — all in one app. Pay $39 once, own it forever.
See what it doesHow to remove watermarks (and when you shouldn't)
Let's talk about the big one. Many people looking for ways to erase text from images really want to remove watermarks. The tools above can do this, but there's an ethical line to keep in mind.
When it's okay to remove watermarks:
- It's your own image and you added a watermark for previews
- You purchased the license and the watermark-free version isn't available yet
- The watermark is from a tool you used (like a free editing app that stamps its logo)
When it's not okay:
- Removing a creator's watermark to use their work without paying
- Stripping credit from images that require it
- Getting around stock photo watermarks instead of buying a license
Watermarks exist to protect the work of creators. If you find an image you love, think about buying the license — most stock photos cost just a few dollars, and you'll get a better version without the watermark.
That said, if you have legitimate reasons, the same tools work. AI tools like Cleanup.pictures handle see-through watermarks well. For repeated watermark patterns, Photoshop's Content-Aware Fill tends to give the cleanest result.
Tips for getting clean text removal results
Not getting great results? These tips apply to any tool or method.
Choose the right tool for the background
| Background type | Best approach |
|---|---|
| Solid color | Any tool works — even basic paint/fill |
| Simple gradient | AI tools (Cleanup.pictures, Fotor) |
| Repeating pattern | Clone Stamp in Photoshop/GIMP |
| Complex scene (faces, objects) | Photoshop Content-Aware Fill |
| Product photography | Pixelbin or Photoshop |
Work in stages, not all at once
Don't try to remove all text in a single pass. Work on one word or line at a time, especially with manual tools. This gives the AI or clone tool better context for each section and prevents smearing artifacts.
Zoom in and check edges
After removing text, zoom to 100% and check the edges where text met the background. Look for:
- Color mismatches or halos
- Repeated patterns (a telltale sign of cloning)
- Blurring that doesn't match the surrounding sharpness
Save your original
Always keep a copy of the original image before editing. If you're working on screenshots, a tool like ScreenSnap Pro can help you organize captures before editing — its cloud upload feature means you'll always have the original backed up.
Consider the file format
When saving your edited image, format matters. PNG preserves quality for screenshots and graphics with sharp edges. JPG works better for photographs where slight compression isn't noticeable. If you're unsure which to pick, our guide on PNG vs JPG breaks down the differences.
Need to convert between formats after editing? Our free image format converter handles PNG, JPG, WebP, and more — right in your browser.
Common mistakes when removing text from images
Even with the best tools, a few missteps can ruin your results. Watch out for these:
Over-painting with AI tools. When using brush-based removers like Cleanup.pictures, paint just slightly beyond the text edges. Going too far removes background detail you want to keep. Going too tight leaves visible remnants of the text.
Ignoring text shadows. Many overlays have a drop shadow or outline to help them stand out. After erasing the main text, zoom in and look for faint shadow traces. These are easy to miss at normal zoom but stand out in the final image.
Using JPG for repeated saves. Each time you save a JPG, it compresses again and loses quality. If you're making several editing passes, save as PNG between edits and only switch to JPG for the final file. You can use our free image format converter when you're ready for that last step.
Not matching grain and noise. Photos have natural grain in the background. Clone stamp and AI fills can create patches that look too smooth — a clear "clean spot." In Photoshop, add a light noise layer (Filter → Noise → Add Noise) to blend it with the rest of the image.
AI vs. manual: which method should you choose?
| Factor | AI tools | Manual (Photoshop/GIMP) |
|---|---|---|
| Speed | Seconds | Minutes to hours |
| Cost | Free (with limits) | Free (GIMP) or $23/mo (Photoshop) |
| Skill needed | None | Some to a lot |
| Quality (simple BG) | Excellent | Excellent |
| Quality (complex BG) | Good | Excellent (with skill) |
| Batch processing | Some tools support it | Possible with actions/scripts |
| Size limits | Often capped on free tier | None |
The verdict: Start with AI tools. If the result isn't clean enough, switch to Photoshop or GIMP for manual refinement. For most images, an AI tool gets you 90% of the way there in under a minute.
If you need to blur sensitive information rather than remove it completely, that's often a faster alternative — and there's no risk of background artifacts.
Frequently Asked Questions
Morgan
Indie DeveloperIndie developer, founder of ScreenSnap Pro. A decade of shipping consumer Mac apps and developer tools. Read full bio
@m_0_r_g_a_n_