How to Extract Text from Image on Mac (7 Methods) | 2026
Need to extract text from an image on your Mac? Whether it's a scanned document, a photo of a whiteboard, a receipt, or a screenshot, OCR (Optical Character Recognition) can save you from tedious manual typing. This guide covers 7 methods to copy text from any image — from built-in macOS features to powerful third-party tools like ScreenSnap Pro.
TL;DR — Best Methods at a Glance:
- Quickest: Press Space on any image file → click Live Text icon → Copy All- Most versatile: ScreenSnap Pro (works on screen content, locked PDFs, video)
- Best for batch: Google Drive (upload → open with Docs) or Shortcuts automation
- For developers: Vision framework or tesseract CLI
What is OCR and How Does It Work on Mac?
OCR (Optical Character Recognition) converts images of text into actual editable text. Instead of seeing pixels that look like letters, OCR analyzes shapes and patterns to identify actual characters.
On Mac, OCR works in several ways:
- Live Text: Apple's built-in OCR available in macOS Monterey and later. It works automatically in Preview, Photos, Safari, and Quick Look.
- Third-party OCR apps: Tools like ScreenSnap Pro offer more features and flexibility.
- Cloud-based OCR: Services like Google Drive process images on remote servers.
The quality of OCR depends on image resolution, text clarity, lighting, and font type. Clean, high-contrast images produce the best results. (Curious which typeface an image uses? A font identifier tool can name it from the same picture.)
Method 1: Extract Text from Image with Preview (Built-In)
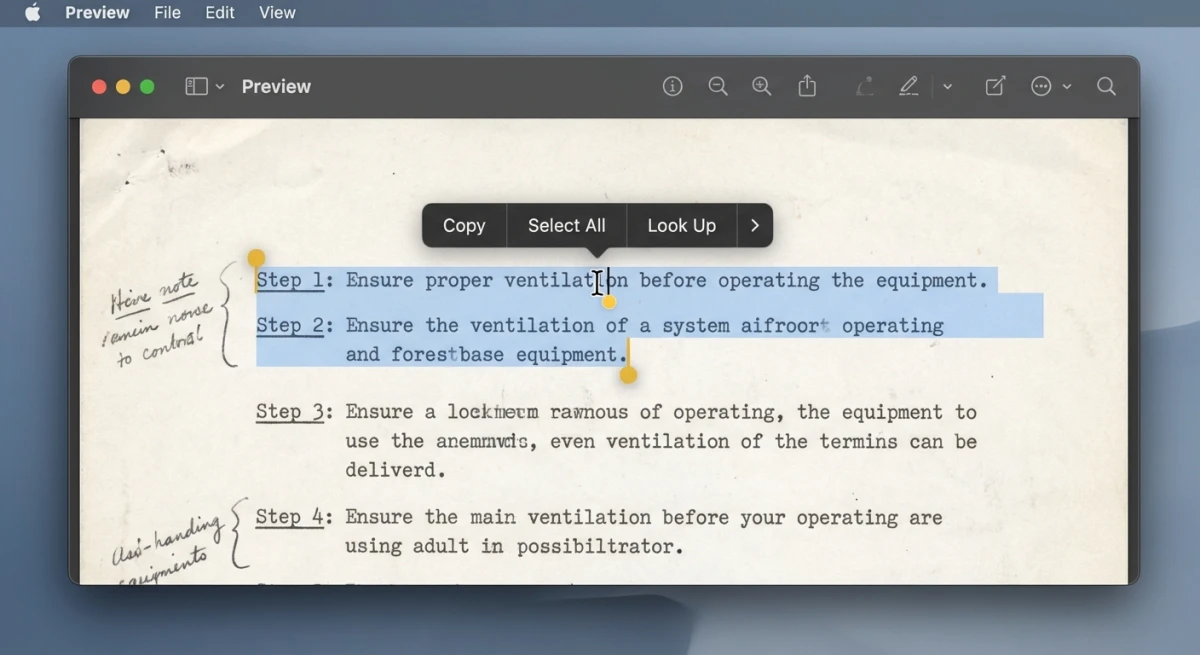
The easiest way to extract text from image files is using Apple's Live Text in Preview. No installation required — it's built right into macOS.
How to use Live Text in Preview:
- Open your image file in Preview. Double-click or right-click → Open With → Preview.
- Hover your cursor over any text in the image.
- Notice how the cursor changes to a text selection cursor.
- Click and drag to select the text you want.
- Press
⌘ + Cto copy. - Paste anywhere with
⌘ + V.
What types of images work:
- JPEG, PNG, HEIC, TIFF, and most common formats
- Photos from your iPhone camera
- Scanned documents
- Screenshots
Limitations:
- Requires macOS Monterey (12.0) or later
- Works best with horizontal, printed text
- May struggle with handwriting or stylized fonts
- Can't process images inside PDFs (for that, see Method 3)
Live Text is perfect for quick, one-off text extraction. For a related use case, check out our guide on how to copy text from screenshots on Mac.
Method 2: Extract Text from Image in Safari (Web Images)
When you see an image on a website containing text you need, Safari lets you grab it without saving the image first.
How to extract text from images in Safari:
- Navigate to the webpage containing the image.
- Right-click (or Control-click) on the image.
- If Live Text detects text, you'll see a "Copy Text" option.
- Click it to copy all detected text to your clipboard.
Alternatively, you can:
- Click and hold on the image.
- Drag to select specific text within the image.
- Right-click the selection → Copy.
Pro tip: This works great for extracting text from infographics and product images. It also handles social media posts embedded as images.
Method 3: Quick Look OCR (Fastest Method)
Quick Look is the fastest way to preview files on Mac. Just select a file and press Space. Starting with macOS Monterey, Quick Look includes full Live Text support.
How to use Quick Look for OCR:
- Select any image file in Finder.
- Press
Spaceto open Quick Look. - Look for a small Live Text icon in the bottom-right corner.
- Click the icon to highlight all detected text.
- Click "Copy All" to grab everything. Or manually select specific text.
- Press
Spaceagain to close Quick Look.
Why Quick Look is great for OCR:
- No need to open a full application
- Works on multiple file types (images, PDFs, documents)
- Quick keyboard shortcut (
Space) means minimal friction - "Copy All" button saves time when you need everything
This method is ideal when browsing files. Need to quickly grab text? You don't have to interrupt your workflow. It pairs well with efficient screenshot organization.
Method 4: Extract Text from Image with ScreenSnap Pro (Screen Capture + OCR)
Here's where things get interesting. What if you could capture a screenshot and extract text in a single step?
ScreenSnap Pro includes built-in OCR that works on anything visible on your screen. This goes beyond saved image files. It's incredibly useful for:
- Locked PDFs that prevent text selection
- Video streams or webinars showing text on screen
- Error messages and dialog boxes
- Images inside apps that don't support Live Text
- Remote desktops and virtual machines
- Text in YouTube videos or tutorials
How to use ScreenSnap Pro's OCR:
- Open ScreenSnap Pro (or use your configured keyboard shortcut).
- Select the "Text Recognition" or OCR capture mode from the menu.
- Drag to select the area containing text.
- Text is automatically recognized and copied to your clipboard.
- Paste anywhere with
⌘ + V.
Step-by-step example — extracting text from a YouTube video:
Let's say you're watching a coding tutorial. The instructor shows code on screen that you want to copy. With Live Text, you'd have to screenshot, save the file, open it, then extract text. Four steps minimum.
With ScreenSnap Pro:
- Pause the video (optional, but helps with clarity).
- Press your OCR shortcut key.
- Drag a box around the code.
- Done. The text is on your clipboard.
Why choose ScreenSnap Pro over built-in Live Text:
| Feature | Live Text | ScreenSnap Pro |
|---|---|---|
| Works on saved image files | ✓ | ✓ |
| Works on screen content | ✗ | ✓ |
| Works on video/streams | ✗ | ✓ |
| Works on locked PDFs | ✗ | ✓ |
| Single-step capture + OCR | ✗ | ✓ |
| Works offline | ✓ | ✓ |
Real-world use cases:
- Developers: Copy error messages from terminal screens. Grab code snippets from video tutorials.
- Researchers: Extract quotes from protected PDFs. Copy data from academic paper images.
- Students: Grab text from recorded lectures. Copy equations from math videos.
- Business users: Extract data from Zoom presentations. Copy text from remote desktop sessions.
If you frequently need to annotate and share screenshots, having OCR built into your screenshot tool eliminates extra steps.
Method 5: Google Drive OCR (Works Online, Batch Capable)
Google Drive offers free OCR that's surprisingly powerful. Upload an image or PDF to Google Drive. Open it with Google Docs. Google automatically runs OCR and makes the text editable.
How to use Google Drive OCR:
- Go to drive.google.com.
- Upload your image file (drag and drop, or click New → File upload).
- Right-click the uploaded image.
- Select Open with → Google Docs.
- A new Google Doc opens with the OCR-extracted text.
What you get:
- The original image appears at the top of the document
- Extracted text appears below, fully editable
- Formatting is preserved reasonably well
- Works with PDFs containing scanned pages
Batch processing tip:
Upload multiple images at once. Open each with Google Docs separately. While not fully automated, it's free and needs no software installation.
Best for:
- Processing scanned documents in bulk
- When you're already in the Google ecosystem
- Extracting text from PDFs with locked text layers
- When you don't have macOS Monterey or later
The downside? You need an internet connection and a Google account. For offline work, use the built-in Mac methods or ScreenSnap Pro.
Tired of plain screenshots? Try ScreenSnap Pro.
Beautiful backgrounds, pro annotations, GIF recording, and instant cloud sharing — all in one app. Pay $39 once, own it forever.
See what it doesMethod 6: Shortcuts Automation (Batch Processing)
Mac's Shortcuts app includes actions for text recognition. You can automate OCR workflows. This is perfect for processing multiple images without clicking through each one.
How to create an OCR shortcut:
- Open the Shortcuts app (
⌘ + Space, type "Shortcuts"). - Click the + button to create a new shortcut.
- Search for "Extract Text from Image" action.
- Add it to your workflow.
- Add a "Copy to Clipboard" action (or "Save File" to store results).
- Optionally, add "Select Files" at the start to choose images.
Example workflow:
1. Select Files (allow multiple selection)
2. Extract Text from Image
3. Combine Text
4. Copy to Clipboard
Advanced automation ideas:
- Set up a Folder Action to automatically OCR images dropped into a folder
- Create a Quick Action that appears in Finder's right-click menu
- Use Shortcuts with voice commands via Siri
- Email yourself the extracted text automatically
Best for:
- Processing batches of images regularly
- Automating repetitive OCR tasks
- Custom workflows (extract → clean up → send to Notes)
This approach requires a bit of setup. But it pays off when you process many images. Learn more about automating your screenshot workflow.
Method 7: Extract Text from Image via Terminal (Vision Framework + CLI)
For developers and power users, macOS includes Apple's Vision framework. It provides OCR accessible from the command line. This is the same technology powering Live Text, but programmable.
Option A: Using Swift with Vision framework
Create a file called ocr.swift:
import Vision
import AppKit

// Read the image path from command line
guard CommandLine.arguments.count > 1 else {
    print("Usage: swift ocr.swift <image-path>")
    exit(1)
}

let imagePath = CommandLine.arguments[1]
guard let image = NSImage(contentsOfFile: imagePath) else {
    print("Error: Could not load image")
    exit(1)
}

// Create the OCR request
let request = VNRecognizeTextRequest { request, error in
    guard let observations = request.results as? [VNRecognizedTextObservation] else {
        print("No text found")
        return
    }

    // Print each line of recognized text
    for observation in observations {
        if let text = observation.topCandidates(1).first?.string {
            print(text)
        }
    }
}

// Configure for accuracy
request.recognitionLevel = .accurate
request.recognitionLanguages = ["en-US"]

// Run the OCR
let cgImage = image.cgImage(forProposedRect: nil, context: nil, hints: nil)!
let handler = VNImageRequestHandler(cgImage: cgImage, options: [:])
try? handler.perform([request])
Run it with:
swift ocr.swift /path/to/image.pngOption B: Using Shortcuts CLI
The shortcuts command can run your Shortcuts from Terminal:
# First, create a shortcut called "OCR Image" in the Shortcuts app
# Then run it from Terminal:
shortcuts run "OCR Image" -i /path/to/image.png
This is simpler than writing Swift code. Just build the shortcut once in the GUI.
Option C: Tesseract (open-source OCR)
Install via Homebrew:
brew install tesseractUse it:
# Extract text from an image
tesseract image.png output

# The result goes to output.txt
cat output.txt

# Get output directly without saving to file
tesseract image.png stdout
Tesseract supports many languages:
# Install additional language packs
brew install tesseract-lang

# Use German OCR
tesseract image.png output -l deu

# Use multiple languages
tesseract image.png output -l eng+deu+fra
Option D: ocrmypdf (for PDF documents)
For batch OCR of PDF files:
brew install ocrmypdf

# Make a scanned PDF searchable
ocrmypdf scanned.pdf searchable.pdf

# Process all PDFs in a folder
for f in *.pdf; do ocrmypdf "$f" "ocr_$f"; done
Best for:
- Developers building OCR into applications
- Scripting batch OCR jobs
- Processing images programmatically
- CI/CD pipelines that need OCR
- Automating document processing
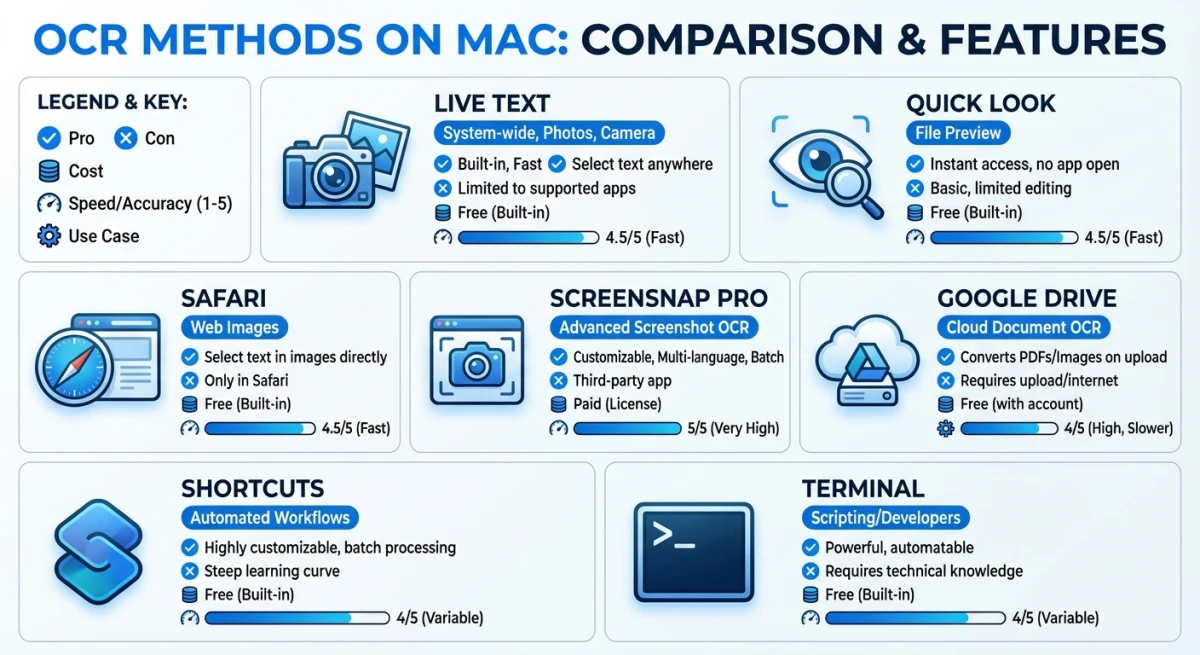
Which Method Should You Use? (Comparison Table)
| Method | Best For | Speed | Cost | Offline |
|---|---|---|---|---|
| Live Text (Preview) | Quick one-off extraction from image files | Fast | Free | ✓ |
| Live Text (Safari) | Web images without downloading | Fast | Free | ✓ |
| Quick Look | Fastest preview + extract workflow | Fastest | Free | ✓ |
| ScreenSnap Pro | Screen content, locked PDFs, video text | Fast | One-time | ✓ |
| Google Drive | Batch processing, scanned PDFs | Slow | Free | ✗ |
| Shortcuts | Automated workflows, batch processing | Medium | Free | ✓ |
| Vision/CLI | Developer integration, scripting | Variable | Free | ✓ |
Quick decision guide:
- Just need to copy a few words? → Live Text in Preview or Quick Look
- Grabbing text from a website? → Safari's Live Text
- Need to OCR locked PDFs or screen content? → ScreenSnap Pro
- Processing many scanned documents? → Google Drive or Shortcuts
- Building OCR into an app? → Vision framework or tesseract
Tips for Better OCR Accuracy
OCR isn't perfect. Here's how to get the best results.
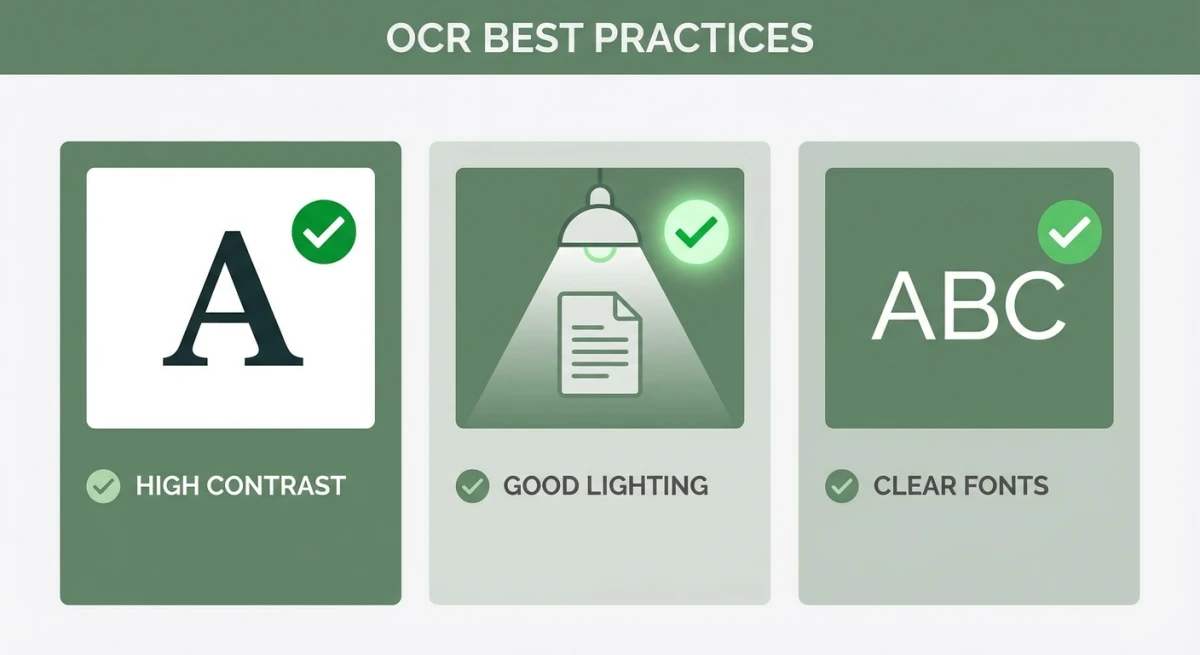
Image quality matters
- Resolution: Higher resolution = better accuracy. Aim for 300 DPI minimum for scanned documents.
- Contrast: Black text on white background works best. Avoid low-contrast colors.
- Lighting: When photographing documents, use even lighting. Avoid shadows.
- Focus: Blurry images produce garbled text. Use a scanner for important documents.
Font and layout tips
- Standard fonts: Arial, Times New Roman, and common fonts work best.
- Text size: Very small text (under 10pt) is harder to recognize.
- Rotation: Straight, horizontal text works better than angled text.
- Layout: Simple single-column layouts beat complex multi-column designs.
When OCR struggles
- Handwritten text (especially cursive)
- Heavily stylized or artistic fonts
- Text on complex backgrounds
- Very old or degraded documents
- Some non-Latin scripts (support varies by tool)
Pro tip: If OCR gives poor results, adjust the image first. Use our free image tools to increase contrast or resize before running OCR again. You can also try our free text extraction tool directly in your browser — no install needed.
Troubleshooting Common OCR Problems
"Live Text isn't showing up"
- Check your macOS version. Live Text requires Monterey (12.0) or later.
- Make sure the image contains actual text. Live Text may not detect very small or stylized text.
- Try zooming in. Sometimes Live Text activates at higher zoom levels.
"OCR results are garbled"
- Check image quality. Blurry or low-resolution images produce bad results.
- Adjust contrast. Open the image in Preview → Tools → Adjust Color. Increase contrast.
- Straighten the image. Rotated text is harder to read. Use Preview's rotate tool.
"Some text is missing"
- OCR may skip text that's too small. Try enlarging the image first.
- Complex layouts confuse OCR. Crop to just the section you need.
- Some fonts simply don't work well. Try a different OCR tool.
"PDF text won't select"
- The PDF might be image-based (scanned). Use Google Drive OCR or ocrmypdf.
- The PDF might have copy protection. ScreenSnap Pro can OCR directly from the screen.
"OCR is slow"
- Large images take longer. Resize before processing.
- Google Drive OCR depends on your internet speed.
- For batch processing, use CLI tools like tesseract. They're faster than GUI apps.
Beyond Text Extraction
Once you've extracted text from images, you can:
- Edit and format: Paste into Pages, Word, or Google Docs
- Search: Put extracted text in Notes or Evernote for searchable archives
- Translate: Paste into Google Translate or DeepL
- Organize: Create searchable PDFs from scanned documents
For working with screenshots, check out our guides on editing screenshots on Mac and cropping screenshots.
Frequently Asked Questions
Morgan
Indie DeveloperIndie developer, founder of ScreenSnap Pro. A decade of shipping consumer Mac apps and developer tools. Read full bio
@m_0_r_g_a_n_