How to Convert WebP to JPG — 5 Free Methods (2026)
You saved an image from a website and it's a .webp file. Now your email client won't attach it, your editor can't open it, or your printer doesn't recognize it. Sound familiar? (If the original was a screen capture, a tool like ScreenSnap Pro can save straight to JPG and skip this step.)
WebP to JPG conversion fixes this instantly. JPG works everywhere — every device, every app, every platform. Here are five free ways to convert WebP files to JPG without losing noticeable quality.
What is WebP (and why you need to convert it)
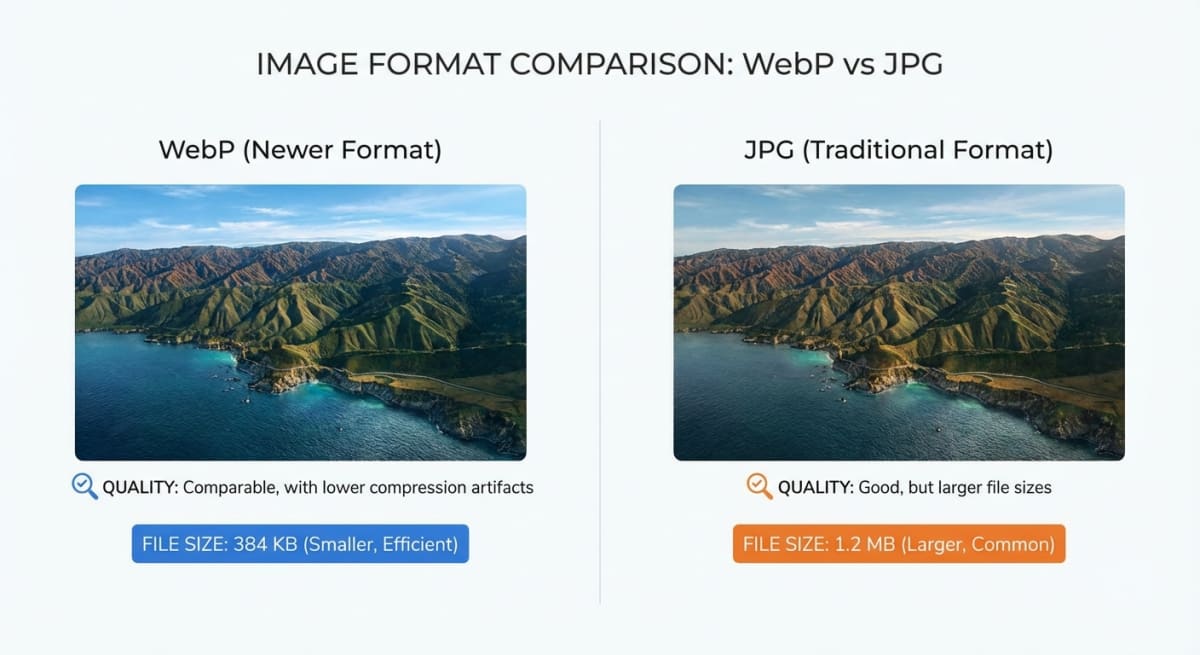
WebP is an image format created by Google in 2010. It produces files 25-35% smaller than JPG at similar visual quality, which makes web pages load faster. That's why most major websites — including Google Images, Facebook, and eBay — serve images in WebP format.
The problem? WebP still isn't universally supported. While modern browsers handle it fine, many other tools don't:
- Older image editors can't open WebP files
- Email clients sometimes reject WebP attachments
- Print services typically require JPG or PNG
- Some social platforms don't accept WebP uploads
- Presentation software may not embed WebP images properly
When you right-click an image on a website and choose "Save Image As," Chrome and other browsers often save it as WebP — even if the image looks like a regular photo. That's because the website delivered it in WebP format to save bandwidth.
Converting to JPG gives you a universally compatible file that works in every app and on every device. Google's WebP documentation explains the format's benefits for web performance, but those benefits don't help when you need to share files outside the browser.
WebP format at a glance
| Feature | WebP | JPG |
|---|---|---|
| Compression | Lossy or lossless | Lossy only |
| Transparency | ✅ Yes | ❌ No |
| Animation | ✅ Yes | ❌ No |
| File size | 25-35% smaller than JPG | Larger but universal |
| Browser support | All modern browsers | Everything, everywhere |
| Editor support | Limited (growing) | Universal |
| Created by | Google (2010) | JPEG Group (1992) |
If you need transparency rather than JPG, convert to PNG instead. Our guide on PNG vs JPG explains when each format is the better choice.
Method 1: free online WebP to JPG converter
The quickest option — works on any device with a browser.
- Open our free WebP to JPG converter.
- Drag and drop your WebP file (or click to browse).
- The conversion happens instantly in your browser.
- Click Download to save the JPG.
Your files never leave your device — everything processes locally in the browser. No uploads, no accounts, no watermarks, no limits.
This is the best option for quick, one-off conversions. If you need to convert to PNG instead (for transparency support), use our image format converter which handles multiple output formats.
Method 2: Mac Preview
Mac's built-in Preview app handles WebP files natively on macOS Big Sur (11) and later.
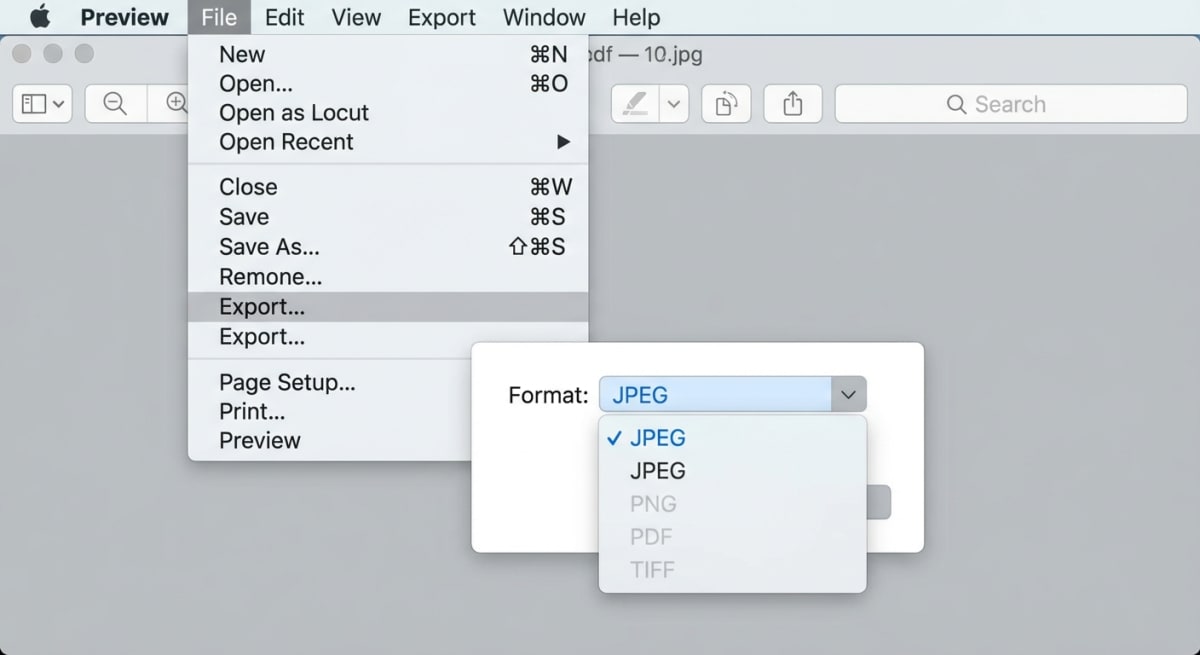
- Double-click the WebP file to open it in Preview.
- Go to File → Export (or press
⌘ + Shift + S). - Click the Format dropdown and select JPEG.
- Adjust the Quality slider — 80-85 gives the best balance of size and quality.
- Click Save.
Can't open the WebP file? If you're on macOS Catalina (10.15) or earlier, Preview doesn't support WebP. Use the online converter or upgrade your macOS. On newer versions, you can also use Quick Look — press Space on any WebP file in Finder to preview it.
If you regularly work with screenshots and images on Mac, you might find our guides on Mac screenshot shortcuts and screenshot settings helpful for getting images in the right format from the start.
Method 3: command line
For developers and power users who prefer the terminal.
Mac (sips)
macOS includes sips with WebP support on Big Sur and later:
# Single file
sips -s format jpeg image.webp --out image.jpg

# All WebP files in current folder
for file in *.webp; do
  sips -s format jpeg "$file" --out "${file%.webp}.jpg"
done
ImageMagick (any platform)
Install ImageMagick, then:
# Single file
magick image.webp image.jpg

# Batch convert with quality control
magick mogrify -format jpg -quality 85 *.webp
ffmpeg
ffmpeg -i image.webp image.jpg

# With quality setting (2 = high quality, 31 = low)
ffmpeg -i image.webp -q:v 2 image.jpg
cwebp/dwebp (Google's tools)
Google provides official WebP tools:
# Install on Mac
brew install webp

# Convert WebP to PNG first (dwebp doesn't output JPG directly)
dwebp image.webp -o image.png
The command line shines for batch operations and automation. If you handle lots of images, scripting these conversions saves hours of manual work.
Setting up a quick alias: Add this to your ~/.zshrc (Mac) or ~/.bashrc (Linux) for instant WebP to JPG conversion anytime:
webp2jpg() { for f in "$@"; do magick "$f" -quality 85 "${f%.webp}.jpg"; done; }Then just run webp2jpg photo1.webp photo2.webp from Terminal.
Method 4: browser extensions
If you frequently save images from websites, browser extensions can skip the WebP problem entirely by saving images as JPG automatically.

Save Image as Type (Chrome/Edge)
This extension adds format options to your right-click menu:
- Install "Save Image as Type" from the Chrome Web Store.
- Right-click any image on a website.
- Hover over "Save Image as Type".
- Select JPG, PNG, or WebP.
The image downloads in your chosen format — no separate conversion step needed.
Other options
- "Save image as PNG" — Chrome extension that forces PNG saves
- "WebP / Avif image converter" — converts on download
Browser extensions are convenient for casual use, but they only help when saving from websites. For converting existing WebP files on your computer, use one of the other methods.
Tired of plain screenshots? Try ScreenSnap Pro.
Beautiful backgrounds, pro annotations, GIF recording, and instant cloud sharing — all in one app. Pay $29 once, own it forever.
See what it doesMethod 5: batch conversion for multiple files
When you have a folder full of WebP files, converting them one at a time is painful. Here are the fastest bulk methods.
Mac Automator workflow
- Open Automator → create a Quick Action.
- Set "Workflow receives current" to Image files in Finder.
- Add Change Type of Images → select JPEG.
- Save the workflow with a name like "Convert to JPG."
Now select multiple WebP files in Finder, right-click, and choose your workflow from Quick Actions. All files convert at once.
Command line batch (recommended for large sets)
# Convert an entire folder, preserving original files
mkdir -p converted
for file in *.webp; do
  magick "$file" -quality 85 "converted/${file%.webp}.jpg"
done
echo "Converted $(ls converted/*.jpg | wc -l) files"
Online batch converters
Our image format converter handles multiple files at once. Drop all your WebP files in, select JPG as the output, and download the results.
For very large batches (hundreds of files), the command line is the fastest and most reliable option.
WebP vs JPG: when to keep WebP
Converting isn't always necessary. Here's when WebP is actually the better choice:
| Scenario | Keep WebP | Convert to JPG |
|---|---|---|
| Website images | ✅ Smaller, faster loading | Only if supporting very old browsers |
| Email attachments | ❌ | ✅ Universal support |
| Printing | ❌ | ✅ Print services expect JPG/PNG |
| Social media | Depends on platform | ✅ Safest choice |
| Editing in Photoshop | ✅ Supported since 23.2 | ✅ If using older version |
| Archiving photos | ✅ Saves storage | ✅ Maximum compatibility |
| Sharing with others | ❌ They might not open it | ✅ Everyone can open JPG |
The rule of thumb: Keep WebP for web use. Convert to JPG when sharing files with people or using software that doesn't support WebP.
For a deeper comparison of image formats, check our PNG vs JPG guide — it covers when each format makes sense and how quality and file size compare.
How to stop Chrome from saving images as WebP
Tired of every saved image being WebP? Here's how to get JPGs instead:
Option 1: use "Save Image as Type" extension
Install the extension mentioned in Method 4. It adds JPG/PNG options to your right-click menu, so you always control the output format.
Option 2: copy the image URL and download directly
- Right-click the image → Copy Image Address.
- Paste the URL in a new tab.
- Look for format parameters in the URL (like
?format=webpor&type=webp). - Change
webptojpgin the URL and press Enter. - Right-click the loaded image → Save Image As.
This trick works on many websites because they serve multiple formats through the same URL with different parameters.
Option 3: use the image's original source
Some websites embed the original JPG URL in the page source. Right-click → Inspect Element on the image, and look for src attributes ending in .jpg or .jpeg. Copy that URL directly.
Option 4: save as screenshot instead
If other methods feel too complicated, you can screenshot the image directly:
- Right-click the image on the website and open it in a new tab.
- Press
⌘ + Shift + 4on Mac (or use your screenshot shortcut). - Select the image area.
- The screenshot saves as PNG by default.
This isn't ideal for high-resolution images, but it works in a pinch when you need a quick JPG or PNG and don't want to install anything. Tools like ScreenSnap Pro let you capture, crop, and annotate the image in one step.
Why does Chrome save as WebP?
It's not Chrome's fault. The website itself sends WebP images to browsers that support them (all modern browsers do). This is called content negotiation — the server checks your browser's capabilities and serves the most efficient format. It saves bandwidth but creates the compatibility headache you're experiencing.
Troubleshooting WebP to JPG conversion
Converted JPG looks worse than the WebP
WebP often uses better compression than JPG. When converting, the JPG may look slightly softer — especially with gradients or fine detail. To minimize this:
- Set JPG quality to 90 or higher
- Avoid re-compressing already compressed images
- Keep the WebP as your source file for future conversions
Colors look different after conversion
WebP supports a wider color gamut than standard JPG. If colors shift, the image may have used an extended color profile. Most tools convert to sRGB automatically, which can cause subtle changes. For color-critical work, verify your tool preserves the profile.
Converted file is larger than the original
This is normal. WebP compresses 25-35% better than JPG at similar quality. Your JPG will almost always be larger. If file size matters, run it through our image compressor afterward.
Transparent areas turn white in JPG
JPG doesn't support transparency. Any transparent areas in a WebP become solid white when converted to JPG. If you need transparency, convert to PNG instead using our WebP to PNG tool.
Choosing the right quality settings
When converting WebP to JPG, the quality setting controls file size vs visual fidelity:
| Quality | File size | Best for |
|---|---|---|
| 95-100 | Large | Archival, print, professional photography |
| 85-90 | Medium | General sharing, documents, presentations |
| 75-85 | Small | Web images, email attachments |
| Below 75 | Very small | Thumbnails, previews |
Start at quality 85. Compare the result to the original. If you can't see a difference, you're done. If you can, bump to 90. Most people can't tell quality 85 from 100, but the file is 3-4x smaller.
As web.dev's image optimization guide explains, choosing the right quality level is one of the most impactful things you can do for web performance.
Frequently Asked Questions
Morgan
Indie DeveloperIndie developer, founder of ScreenSnap Pro. A decade of shipping consumer Mac apps and developer tools. Read full bio
@m_0_r_g_a_n_