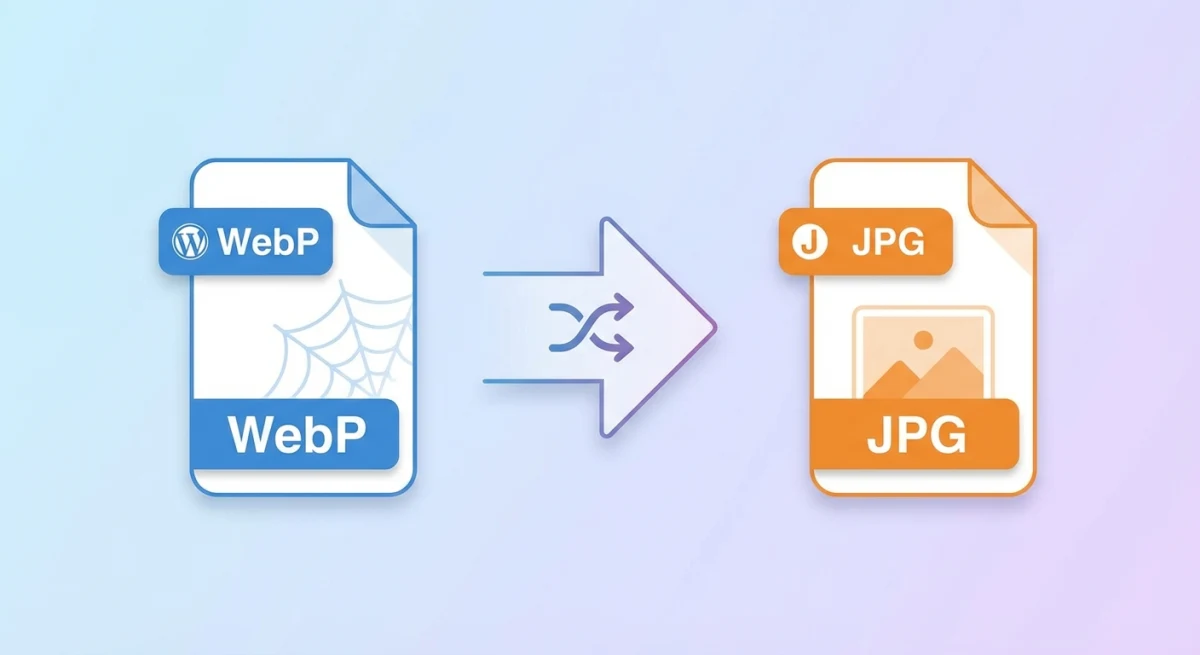
How to Convert WebP to PNG Free (5 Methods) | 2026
# How to Convert WebP to PNG: 5 Free Methods for Any Device
You save an image from the web and realize it's in a format half your tools can't open. That's WebP — Google's lightweight image format. It's great for websites, but not ideal when you need a PNG for presentations, design software, or printing. (Tip: if the file started as a screen capture, an app like ScreenSnap Pro saves directly to PNG so you skip the conversion.)
The good news? Converting WebP to PNG is quick and free on Mac, Windows, or Linux. Here are five methods that work right now.
Quick answer: On Mac, open the WebP file in Preview, then click File → Export and choose PNG. On Windows, open it in Paint and click File → Save as → PNG picture. For any device, use a free online converter that processes files locally in your browser.
What is WebP and why convert to PNG?
WebP is an image format developed by Google that delivers smaller file sizes than PNG or JPG while maintaining decent quality. Most modern browsers support it, which is why websites increasingly serve images in WebP format.
So why would you need to convert WebP to PNG? A few common reasons:
- Software support — Older apps, design tools like some versions of Photoshop, and print services don't accept WebP files
- Transparency needs — WebP supports transparency, but PNG is the go-to standard for transparent images on all platforms
- Editing flexibility — PNG uses lossless compression, so you won't lose quality when editing over and over
- Sharing — Not everyone can open a .webp file, but PNG works everywhere
If you're working with image formats regularly on Mac, our guide to changing screenshot formats covers how to set your default output format.
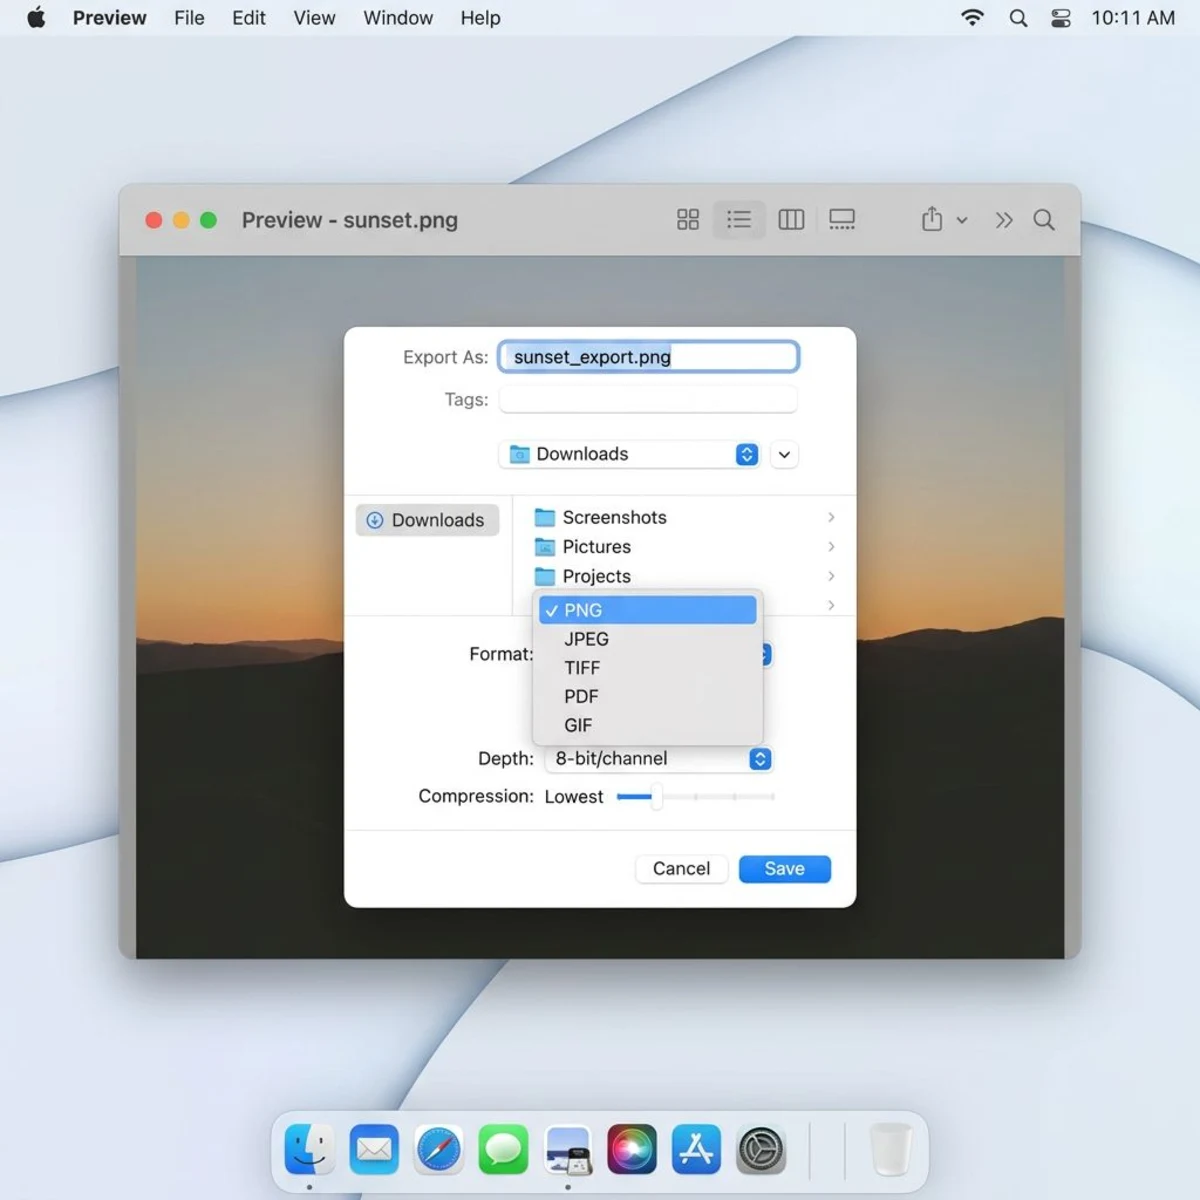
Method 1: Convert WebP to PNG on Mac using Preview
Mac's built-in Preview app handles WebP to PNG conversion without installing anything. This is the fastest method for Mac users.
Steps:
- Right-click the WebP file and select Open With → Preview
- Click File → Export in the menu bar (or press
⌘ + Shift + S) - In the Format dropdown, select PNG
- Choose your save location and click Save
That's it. Preview preserves full image quality during the conversion since PNG is lossless.
Pro tip: If you need to convert multiple WebP files, select them all in Finder, right-click, and open them together in Preview. Then use File → Export Selected Images and choose PNG as the format. This handles batch WebP to PNG conversion natively.
For more image handling tricks on Mac, check out our guide on how to crop screenshots on Mac.
Method 2: Convert WebP to PNG online (no install needed)
Online converters work on any device with a browser. Here are the most reliable free options:
CloudConvert
- Go to cloudconvert.com/webp-to-png
- Upload your WebP file (drag and drop or click to browse)
- Click Convert
- Download your PNG
CloudConvert allows up to 25 free conversions per day and supports batch processing. Files are deleted from their servers after 24 hours.
Convertio
- Visit convertio.co/webp-png
- Upload from your device, Dropbox, or Google Drive
- Hit Convert
- Download the PNG file
Convertio's free tier handles files up to 100MB with 10 conversions per day.
Ezgif
- Head to ezgif.com/webp-to-png
- Upload your WebP image or paste a URL
- Click Convert to PNG
- Save the result
Ezgif is particularly handy because it also handles animated WebP files — it converts them to animated PNG (APNG) or lets you extract individual frames.
Privacy note: Online converters upload your images to external servers. Avoid these for sensitive or confidential images — especially screenshots containing passwords, financial data, or personal information. If privacy matters, use a local method (Methods 1, 3, or 4) instead. You can also blur sensitive information before uploading anything online.
If you want a converter that runs entirely in your browser without uploading files, our WebP to PNG tool processes everything locally — your images never leave your device.
Method 3: Convert WebP to PNG on Windows
Windows offers a couple of built-in options that don't require any downloads.
Using Microsoft Paint
- Open the WebP file in Paint (right-click → Open with → Paint)
- Click File → Save as → PNG picture
- Choose your save location and confirm
Paint ships with every Windows installation, making this the simplest method for Windows users.
Using the Photos app
- Open the WebP file in the Photos app
- Click the three-dot menu (⋯) → Save as
- Change the file type to PNG
- Save
Using Paint 3D (Windows 10)
- Right-click the WebP file → Open with → Paint 3D
- Click Menu → Save as → Image
- Select PNG from the format dropdown
- Hit Save
All three methods produce lossless PNG output. Paint is the quickest since it's lightweight and loads instantly.
If you frequently work with screenshots and image conversions on Windows, a dedicated capture tool that exports directly to PNG can save you the extra conversion step entirely.
Method 4: Convert WebP to PNG using the command line
For developers or anyone comfortable with the terminal, command-line tools offer the fastest batch WebP to PNG conversion. This method works on Mac, Windows, and Linux.

Using dwebp (Google's official tool)
Install the WebP toolkit first:
# Mac (Homebrew)
brew install webp

# Ubuntu/Debian
sudo apt install webp

# Windows (Chocolatey)
choco install webp
Convert a single file:
dwebp image.webp -o image.pngBatch convert all WebP files in a folder:
for f in *.webp; do dwebp "$f" -o "${f%.webp}.png"; doneUsing ImageMagick
ImageMagick is a Swiss Army knife for image processing:
# Install
brew install imagemagick  # Mac
sudo apt install imagemagick  # Linux

# Single file
magick image.webp image.png

# Batch convert
magick mogrify -format png *.webp
Using ffmpeg
If you already have ffmpeg installed (common for video work):
ffmpeg -i image.webp image.pngThe command-line approach is unbeatable for batch WebP to PNG conversion — you can process hundreds of files in seconds. It's also easy to script into automated workflows or cron jobs. If you're already working with images from the terminal, you might find our guide on converting images to GIF useful for creating animations from those PNGs.
Tired of plain screenshots? Try ScreenSnap Pro.
Beautiful backgrounds, pro annotations, GIF recording, and instant cloud sharing — all in one app. Pay $39 once, own it forever.
See what it doesMethod 5: Use a browser extension to save images as PNG
Tired of right-clicking "Save Image As" only to get a .webp file? Browser extensions intercept the save process and let you choose your format.
Save Image As Type (Chrome)
- Install Save Image As Type from the Chrome Web Store
- Right-click any image on a webpage
- Select Save Image As Type → Save as PNG
This extension adds format options directly to the right-click context menu. No more dealing with .webp files you didn't ask for.
Save webP as PNG or JPEG (Firefox)
Firefox users can install the Save webP as PNG or JPEG extension for the same functionality.
When to use this method: If you frequently download images from the web and don't want to convert them one by one afterward. The extension handles conversion on the fly, so every image lands on your disk as a proper PNG.
How to batch convert WebP to PNG
When you have dozens (or hundreds) of WebP files to convert, you need a method that scales.
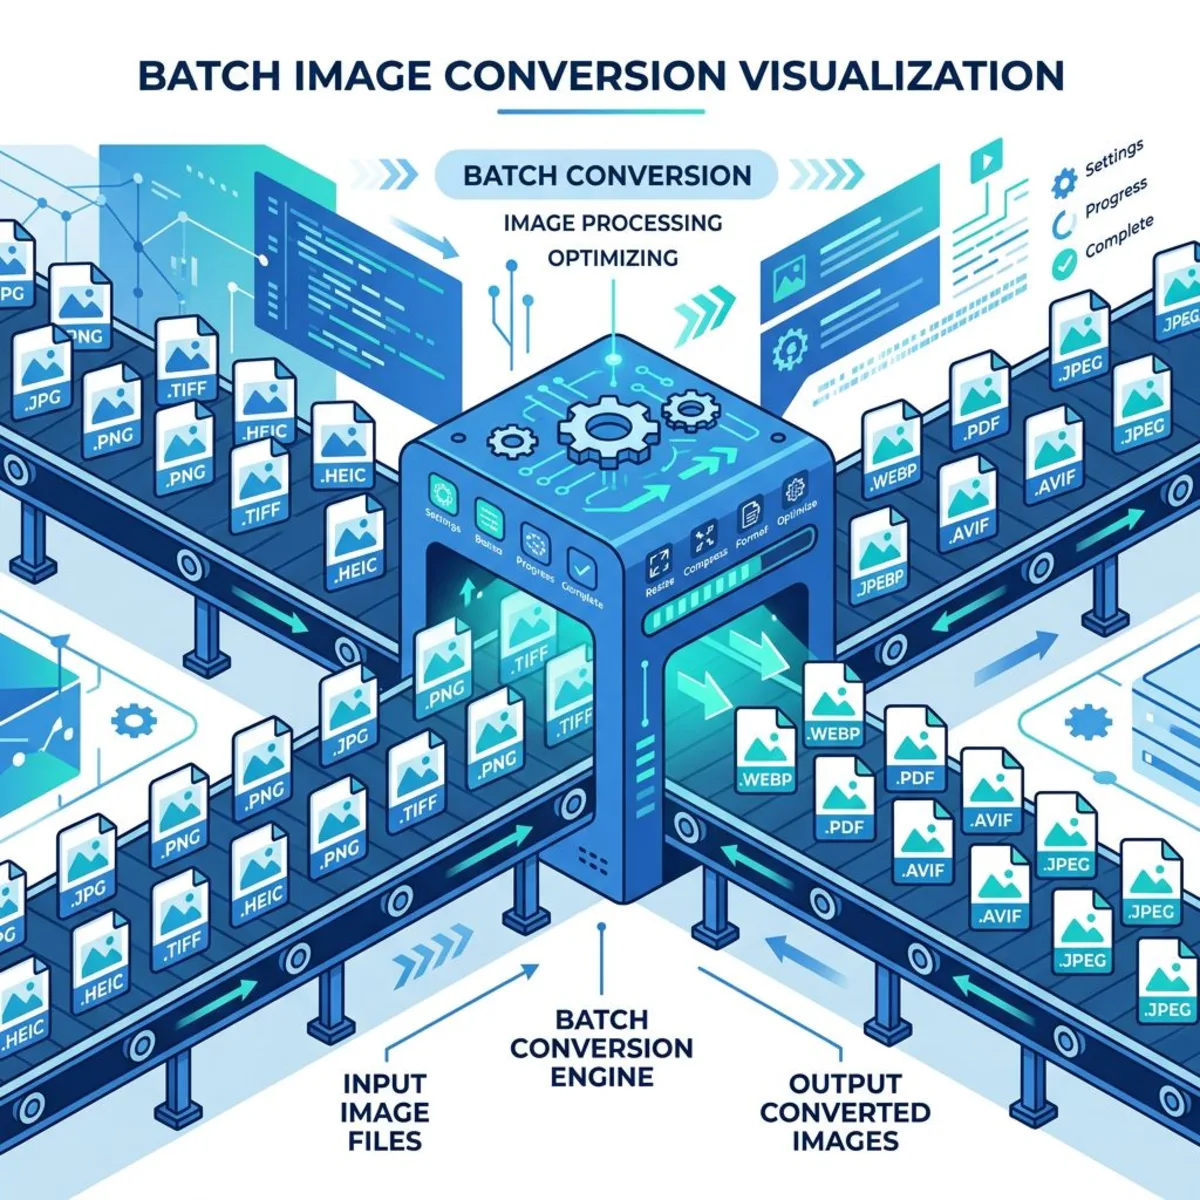
Best options for batch conversion:
| Method | Files at once | Speed | Ease |
|---|---|---|---|
| Command line (dwebp/ImageMagick) | Unlimited | ⚡ Fastest | Requires terminal knowledge |
| Mac Preview (select all → export) | ~50 practical limit | Fast | Easy |
| CloudConvert | 25/day free | Medium | Very easy |
| ScreenSnap Pro WebP to PNG tool | Unlimited | Fast | Very easy |
For large batches, the command line wins hands down. A single mogrify command can convert an entire folder in seconds.
For occasional batches, Mac Preview's multi-file export or an online converter works fine without any setup.
If you regularly work with different image formats, our image format converter supports WebP, PNG, JPG, and more — all processed locally in your browser.
WebP vs PNG: which format is better?
Neither format is "better" across the board. Each has strengths depending on what you're doing with the image.
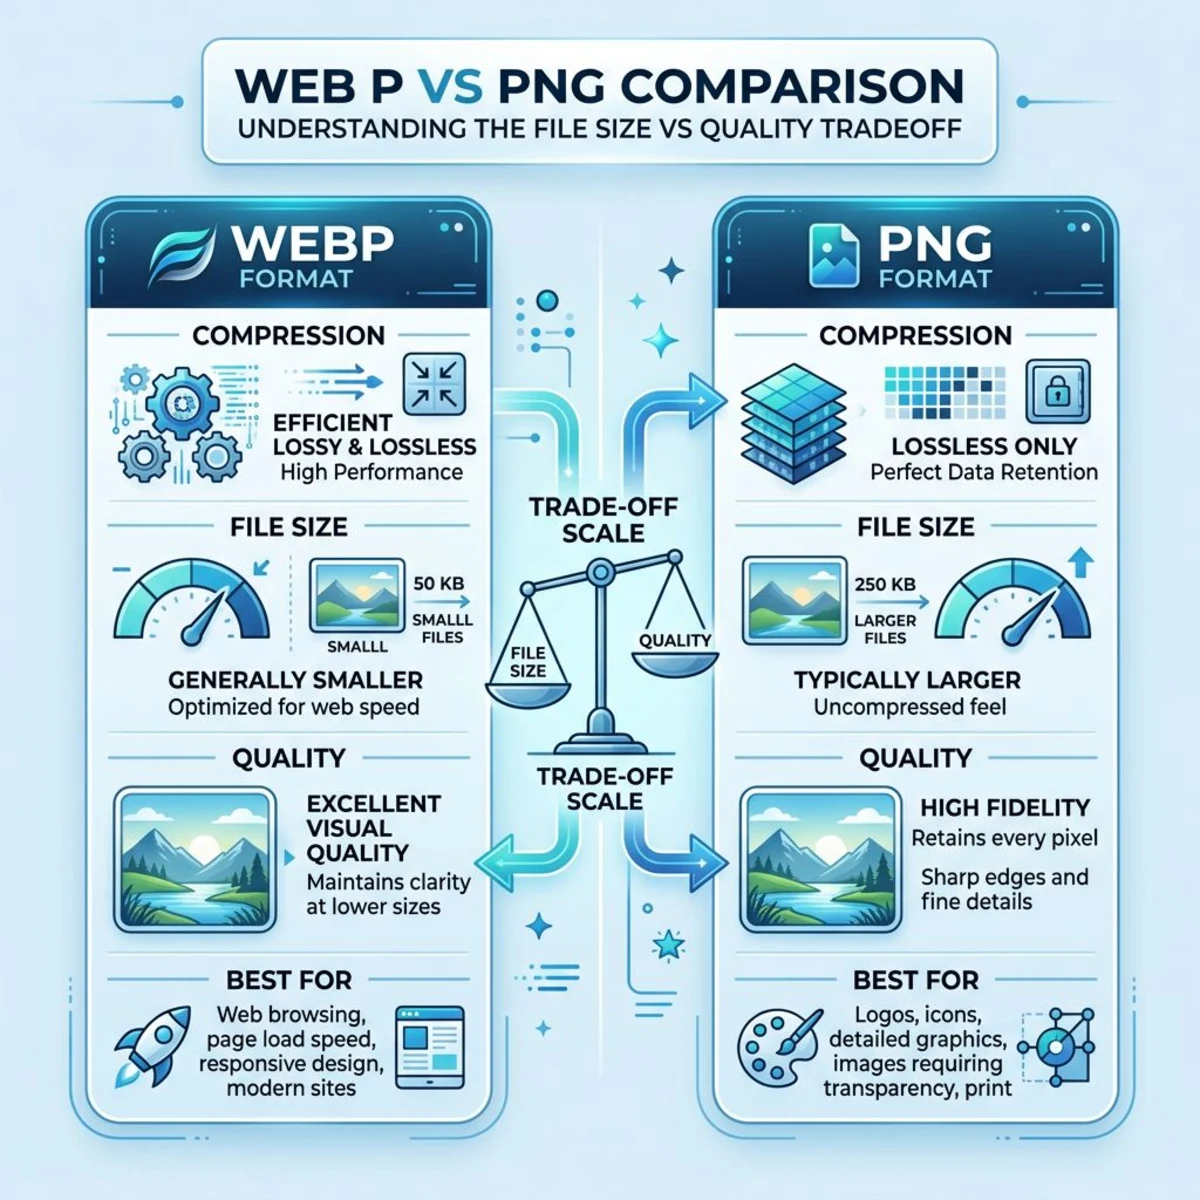
| Feature | WebP | PNG |
|---|---|---|
| File size | 25-35% smaller | Larger |
| Quality | Lossy + lossless modes | Lossless only |
| Transparency | ✅ Supported | ✅ Supported |
| Animation | ✅ Supported | ✅ (APNG) |
| Browser support | All modern browsers | Universal |
| Software support | Limited | Universal |
| Best for | Web delivery | Editing, printing, sharing |
Real-world scenarios
Uploading to social media? Most platforms accept both formats, but PNG guarantees no extra compression artifacts. If your image has text overlays, logos, or sharp edges, PNG keeps those details crisp.
Working in design tools? Figma, Canva, and older versions of Photoshop handle PNG natively. WebP support is growing but still spotty across creative tools — especially plugins and automation workflows.
Printing or creating PDFs? PNG is the safer choice. Print services universally accept it, and the lossless compression means what you see on screen matches what comes off the printer.
Archiving or long-term storage? PNG is more future-proof. Every OS, image viewer, and browser has read it for decades. WebP is newer and still gaining ground outside of the web.
Use WebP when: You're serving images on a website and want faster page loads. WebP's smaller file size directly improves Core Web Vitals, which affects SEO.
Use PNG when: You need maximum compatibility, lossless quality for editing, transparent backgrounds for design work, or you're sharing images with people who might not have WebP support.
For a deeper dive into format differences, our PNG vs JPG comparison breaks down when to use each common image format.
How to stop Chrome from saving images as WebP
This is the real pain point. You right-click an image on a website, hit "Save Image As," and Chrome saves it as .webp. The image looked like a normal JPG or PNG — so what happened?
Here's why: many websites detect what your browser can handle. Chrome supports WebP, so the server sends the WebP version by default.
Three ways to fix this:
1. Use a browser extension (recommended)
Install "Save Image As Type" (covered in Method 5 above). It adds PNG and JPG options to the right-click menu. This is the most convenient permanent fix.
2. Change the URL
Some CDNs append format parameters to image URLs. Look for ?format=webp or /f_webp/ in the URL and remove it, then load the direct image URL to save the original format.
3. Take a screenshot instead
If the image is displayed on screen, taking a screenshot captures it as PNG by default on both Mac (⌘ + Shift + 4) and Windows (Win + Shift + S). Tools like ScreenSnap Pro make this even faster with instant capture, annotation, and cloud sharing — useful when you need to grab web images regularly.
For more screenshot shortcuts and techniques, check out our complete Mac screenshot keyboard shortcuts guide.
Troubleshooting common WebP to PNG issues
Conversions don't always go smoothly. Here are fixes for the most common problems.
"Preview can't open this file" on Mac
This usually means the .webp file is corrupt or incomplete. Try downloading it again. If the file came from a website, right-click the image and copy the URL. Open it directly in your browser, then save it fresh.
Converted PNG looks blurry or low quality
The PNG itself isn't the problem. If the source WebP used lossy compression at low quality, that blur carries over. PNG keeps whatever quality the WebP had — it won't sharpen a blurry image. Try finding a higher-res version of the source.
Transparency lost after conversion
Make sure you're saving as PNG, not JPG. JPG doesn't support transparency and fills transparent areas with white. All five methods in this guide preserve alpha channels when exporting to PNG.
File size increased dramatically
This is normal. PNG files are larger than WebP because PNG uses lossless compression. A 200KB WebP might become 500KB–1MB as PNG. If file size matters, try compressing the PNG after conversion.
Batch conversion stops partway through
If using the command line, check for filenames with spaces or special characters. Wrap the variable in quotes: dwebp "$f" -o "${f%.webp}.png". For online tools, free tiers have daily limits — switch to a local method for large batches.
Frequently Asked Questions
Morgan
Indie DeveloperIndie developer, founder of ScreenSnap Pro. A decade of shipping consumer Mac apps and developer tools. Read full bio
@m_0_r_g_a_n_