




Screen recorder for Mac with system audio

ScreenSnap Pro is screen recording software for Mac that records system audio with one button, no BlackHole or virtual driver. Add your mic and webcam, polish the take with auto zoom, and export MP4 or GIF. Pay $34 once, on Apple Silicon or Intel.

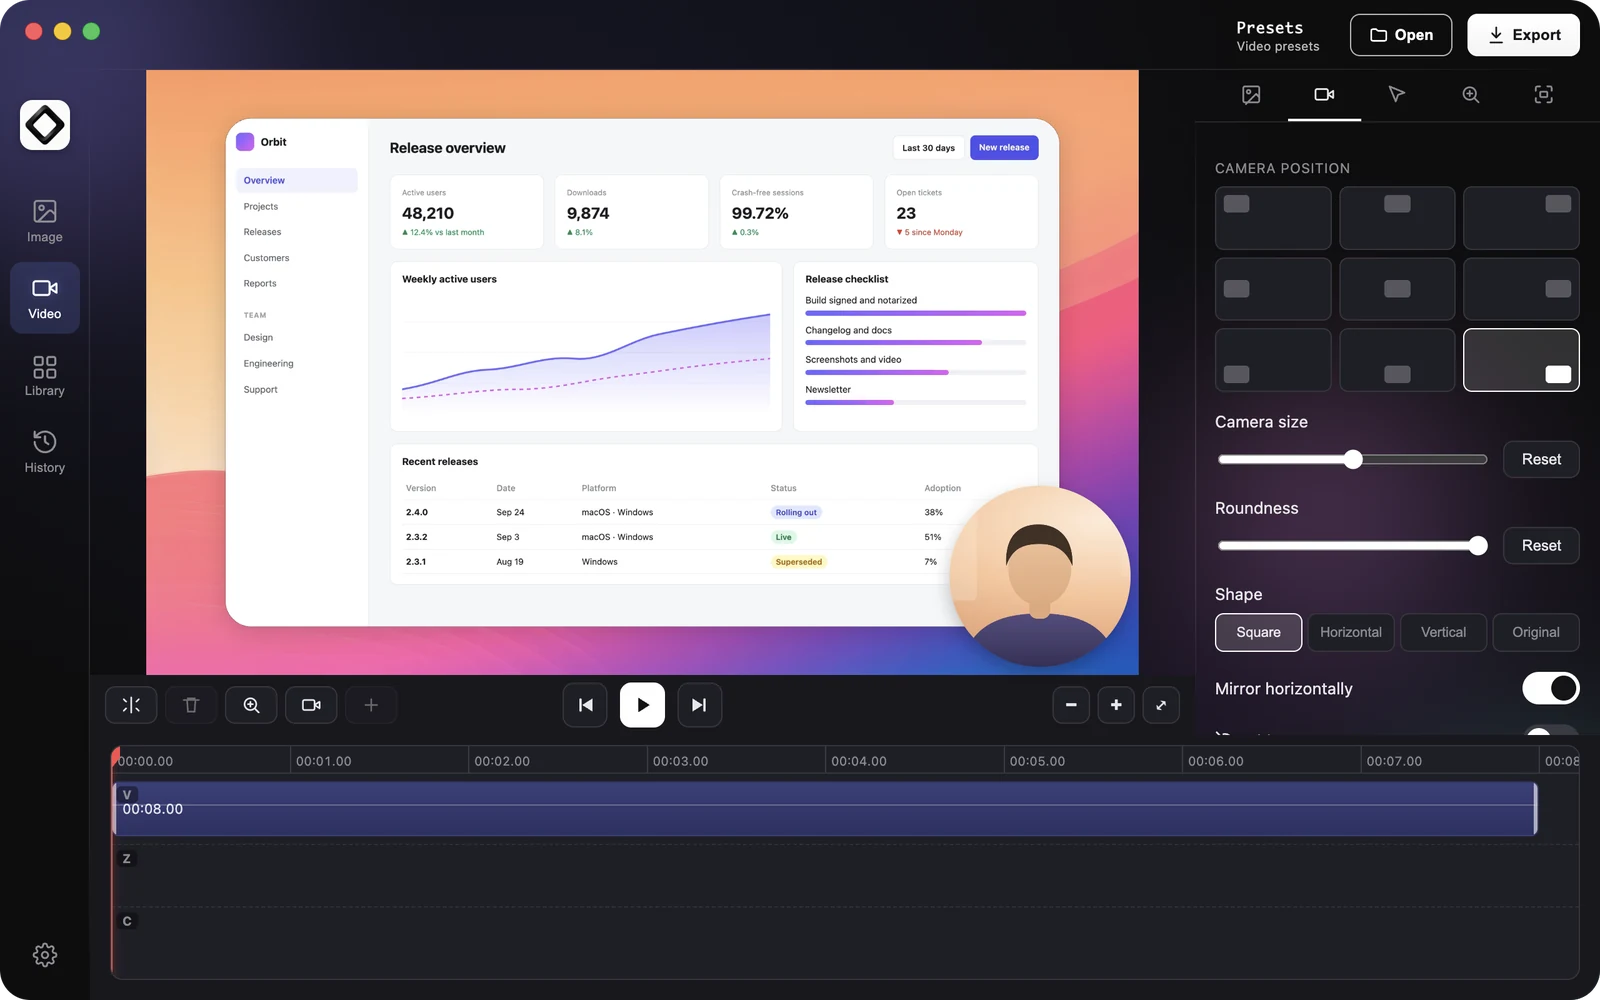
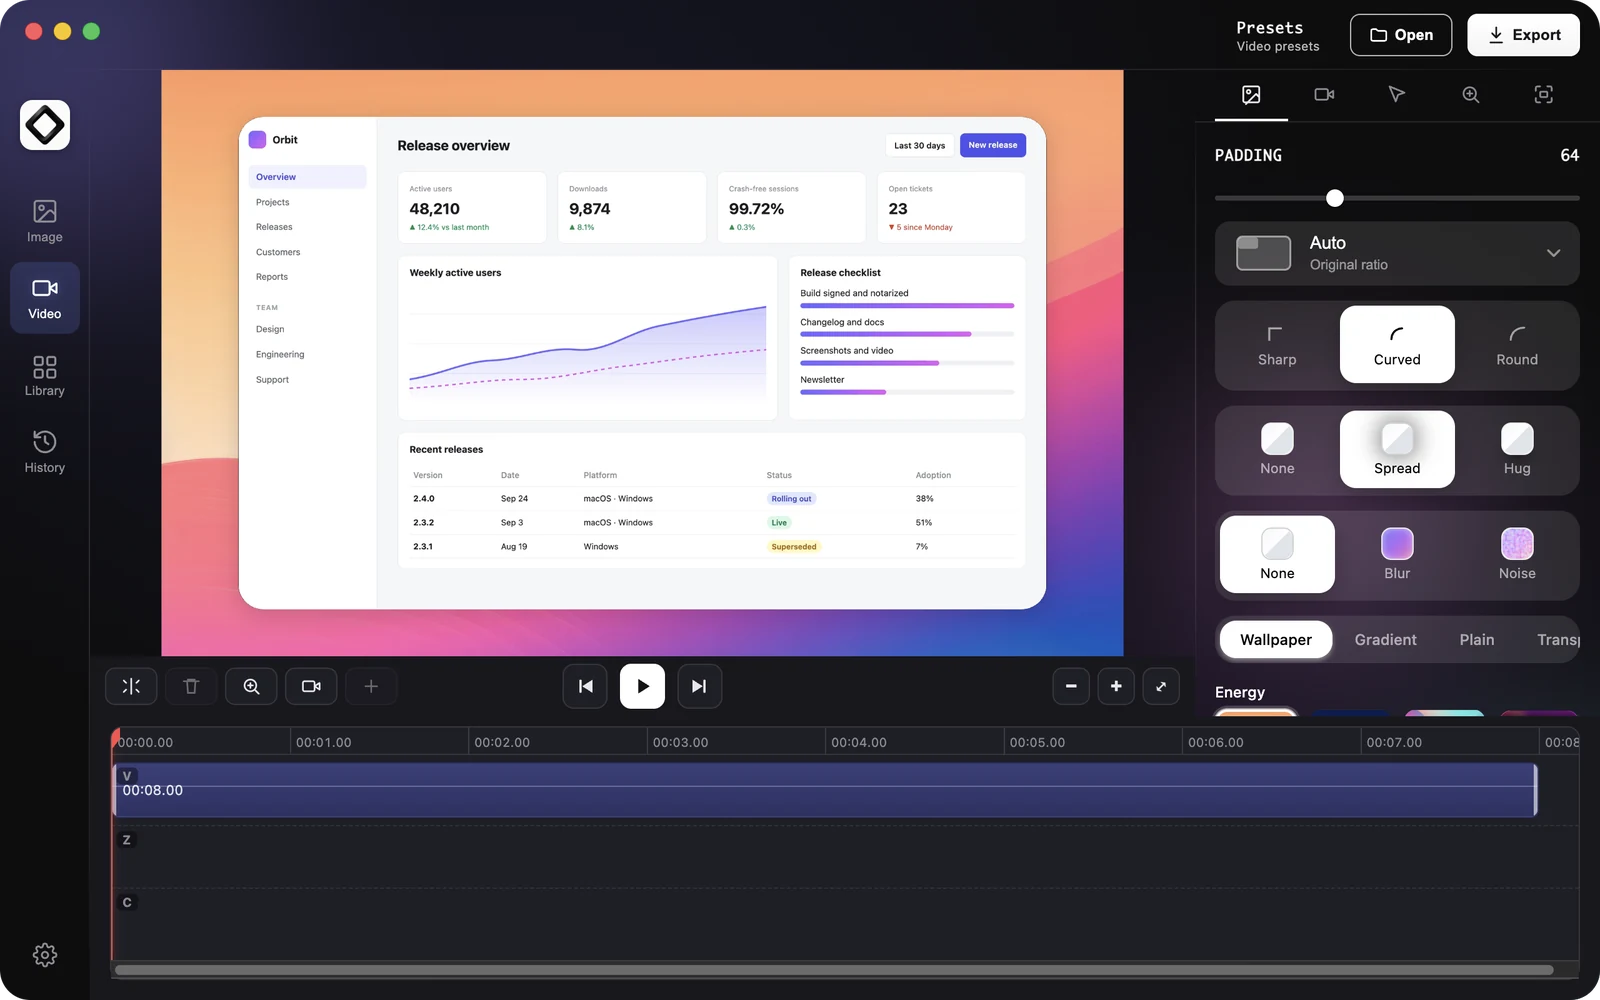
The ScreenSnap Pro video editor on a Mac: a recording framed on a sunset wallpaper, with the Background settings open on the right

How it works

How to screen record on Mac with ScreenSnap Pro

Allow one permission once, record, then edit or share. No driver to install, no Audio MIDI Setup.

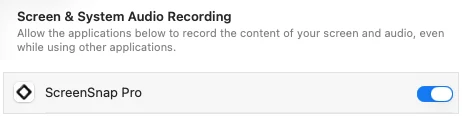
  1. The macOS Screen & System Audio Recording list in System Settings with ScreenSnap Pro switched on

    Allow

    The first time you record, macOS asks for screen access. Switch ScreenSnap Pro on under System Settings > Privacy & Security > “Screen & System Audio Recording”, then quit and reopen the app. That one permission covers system audio too.

  2. The ScreenSnap Pro Screen Recording bar with the Video menu, Display and Area buttons, and the camera, microphone and system audio buttons

    Record

    Click the menu bar icon and choose “Record Screen”. Pick a camera, a microphone and “System audio”, then click “Display” or “Area”. After a 3-second countdown you are recording; the red square stops and saves.

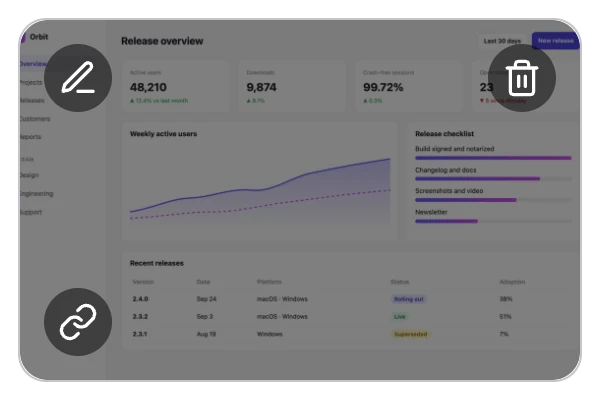
  3. The Quick Preview thumbnail of a finished recording with buttons to open the video editor, delete the recording and create a link

    Edit or share

    Click “Open Video Editor” on the Quick Preview thumbnail to add zooms, trim and export MP4 or GIF. Or click “Create Link” to upload an MP4 and paste an unlisted link into a chat, a ticket or an email.

System audio

Record system audio on Mac without BlackHole

Before macOS 27, QuickTime and Cmd+Shift+5 record your microphone but not the sound your Mac plays. The usual workaround is BlackHole: a virtual audio driver, a Multi-Output Device in Audio MIDI Setup, and switching your output back afterwards. ScreenSnap Pro records system audio on macOS 15 and later with one button.

System audio · no driver

One button for the sound your Mac plays

Click “System audio” in the recording bar before you start. It is covered by the Screen & System Audio Recording permission, so there is no driver to install and no microphone permission to grant, and it records even when your speakers are muted. Your microphone is saved as its own track.

  1. Turn on System audio
  2. Pick your microphone
  3. Record a display or an area

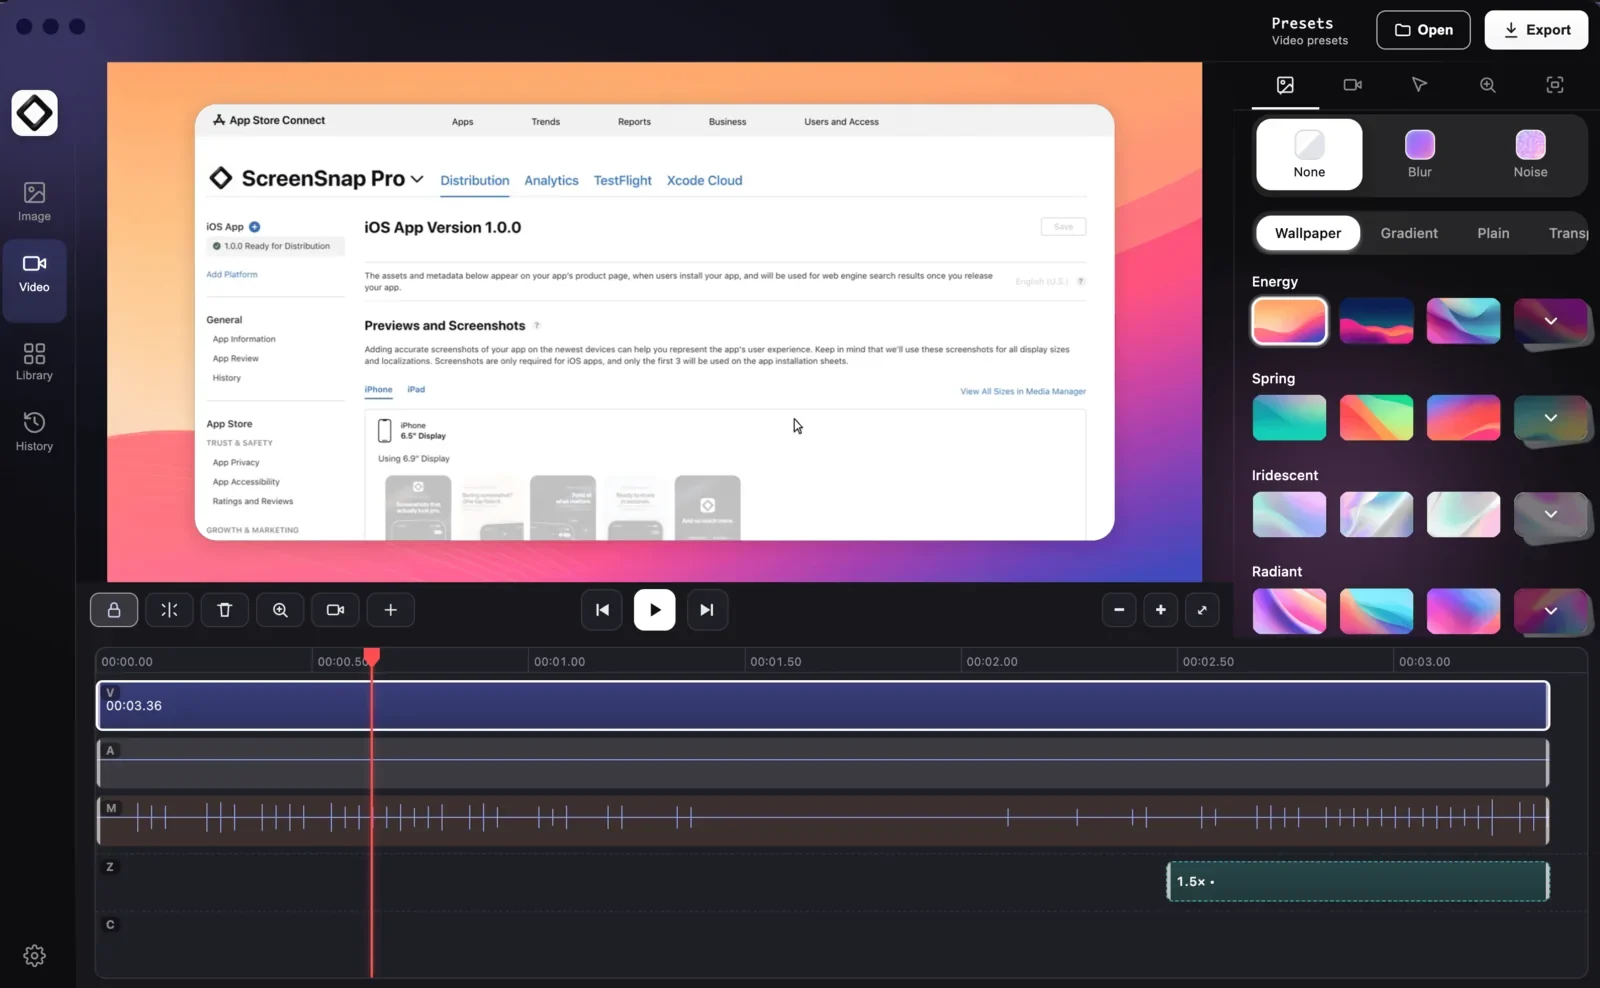
In the editor, right-click the clip and choose “Split into video & audio tracks”: system audio moves to the A lane and your voice to the M lane, each with its own volume. “Enhance mic (Studio Sound)” cleans up your voice. Turn on System audio before you start; it can’t be switched on mid-recording.

Audio and webcam setupEvery way to record Mac audio

The ScreenSnap Pro video editor with a recording on a wallpaper and a timeline split into video, system audio (A), microphone (M), zoom (Z) and camera (C) lanes

Webcam

Your face in a round overlay, or full screen

Pick a camera and a small self view shows your framing while you record, without ending up in the video. The webcam is saved as its own track, so in the editor you can move it to one of nine spots, resize it, change its shape or hide it.

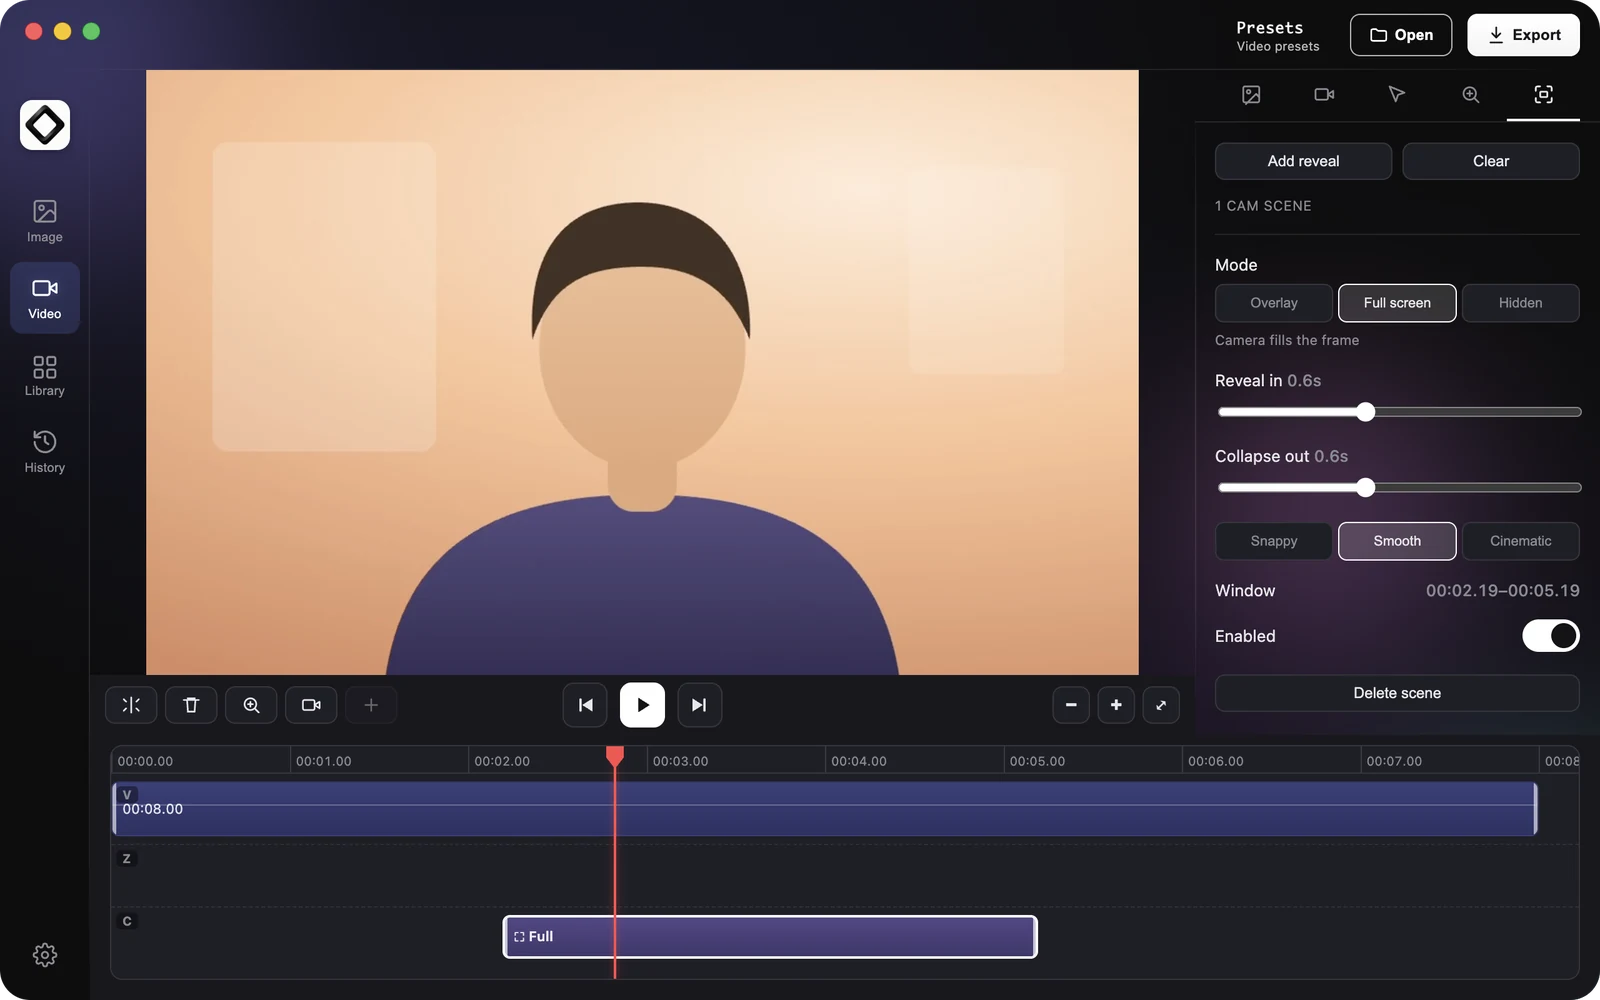
Cam scenes switch the camera to full screen for an intro or an outro, then back to the corner, with “Snappy”, “Smooth” or “Cinematic” transitions. Camera access is optional; macOS asks for it the first time you use a camera.

Webcam and cam scenes guideTest your webcam

The ScreenSnap Pro video editor Camera tab with a round webcam overlay in the bottom right corner of a recording

Record

Record a display or any area of your Mac screen

Record a whole display or an area you drag, as video at up to 60 fps or as a GIF. ScreenSnap Pro doesn't record single windows: to record one app, drag an area around it.

Recording controls

Small controls that stay out of the video

While you record, a small bar shows the timer. Click the red square or the timer to stop and save, pause and resume, restart from zero or delete the take. The bar itself is never part of the recording.

Recording shortcuts start unassigned. Set your own “Record Screen”, “Record Area” and “Record Display” keys in Settings > Shortcuts, and pick keys macOS doesn’t use: Cmd+Shift+5 belongs to the macOS toolbar. Press Record Screen again to stop and save.

Screen recording guideSet your shortcuts

The ScreenSnap Pro recording controls on a Mac: a red dot with the timer, then the stop, pause, restart and delete buttons
  • Pick a display

    With more than one monitor, click “Display”, then click the screen you want to record.

  • Or drag an area

    Everything outside the area is dimmed so you see what is captured. The dimming is not part of your video.

  • Countdown

    A 3-second countdown, on by default. Click it or press Esc to start right away.

  • Hide desktop icons

    Clears the Finder desktop icons while you record and brings them back when you stop. Mac only.

  • Pause, restart, delete

    Pause and resume, start over without the bad take, or stop and discard the recording.

  • Recording Recovered

    If the app or your Mac quits mid-recording, the footage comes back on the next launch.

Edit

A screen recording app for Mac with the editor built in

Stop recording and the video editor is one click away, in the same app. Your edits never touch the original tracks, so you can rework a video at any time.

Video editor

Zoom in, cut the dead air, frame it

The first time you open a recording, auto zoom has already placed zoom-ins where your pointer worked. Trim, split with S, speed up slow parts and cut quiet stretches with “Remove silence”, then frame the video on a wallpaper. On a Mac the pointer is recorded separately, so you can resize or restyle it later.

  • Auto zoom
  • Manual zoom 1× to 4×
  • Trim & split
  • Speed 0.25× to 2×
  • Remove silence
  • Backgrounds & padding
  • Cursor size & style
  • Presets

Video editor basicsZoom-ins guideBackgrounds and frame

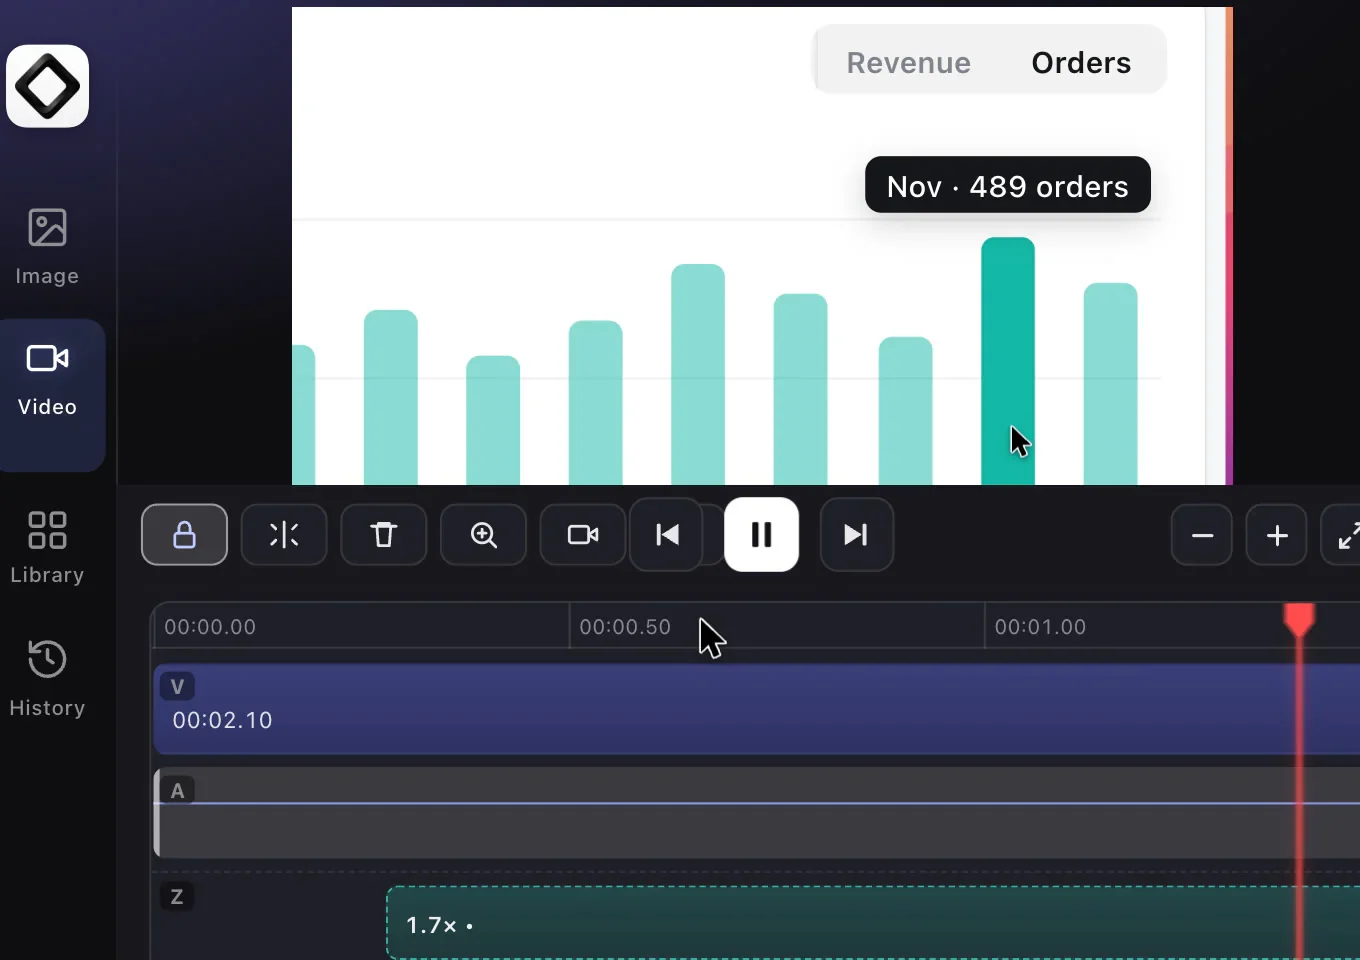
The ScreenSnap Pro video editor with an orders chart zoomed in and a 1.7x zoom region on the Z lane of the timeline

Export & share

Export MP4 or GIF and share a link

Save a polished file or paste a link. Either way, the recording project stays on your Mac, ready to edit again.

MP4 · GIF · Create Link

MP4 with sound, GIF without, or a link

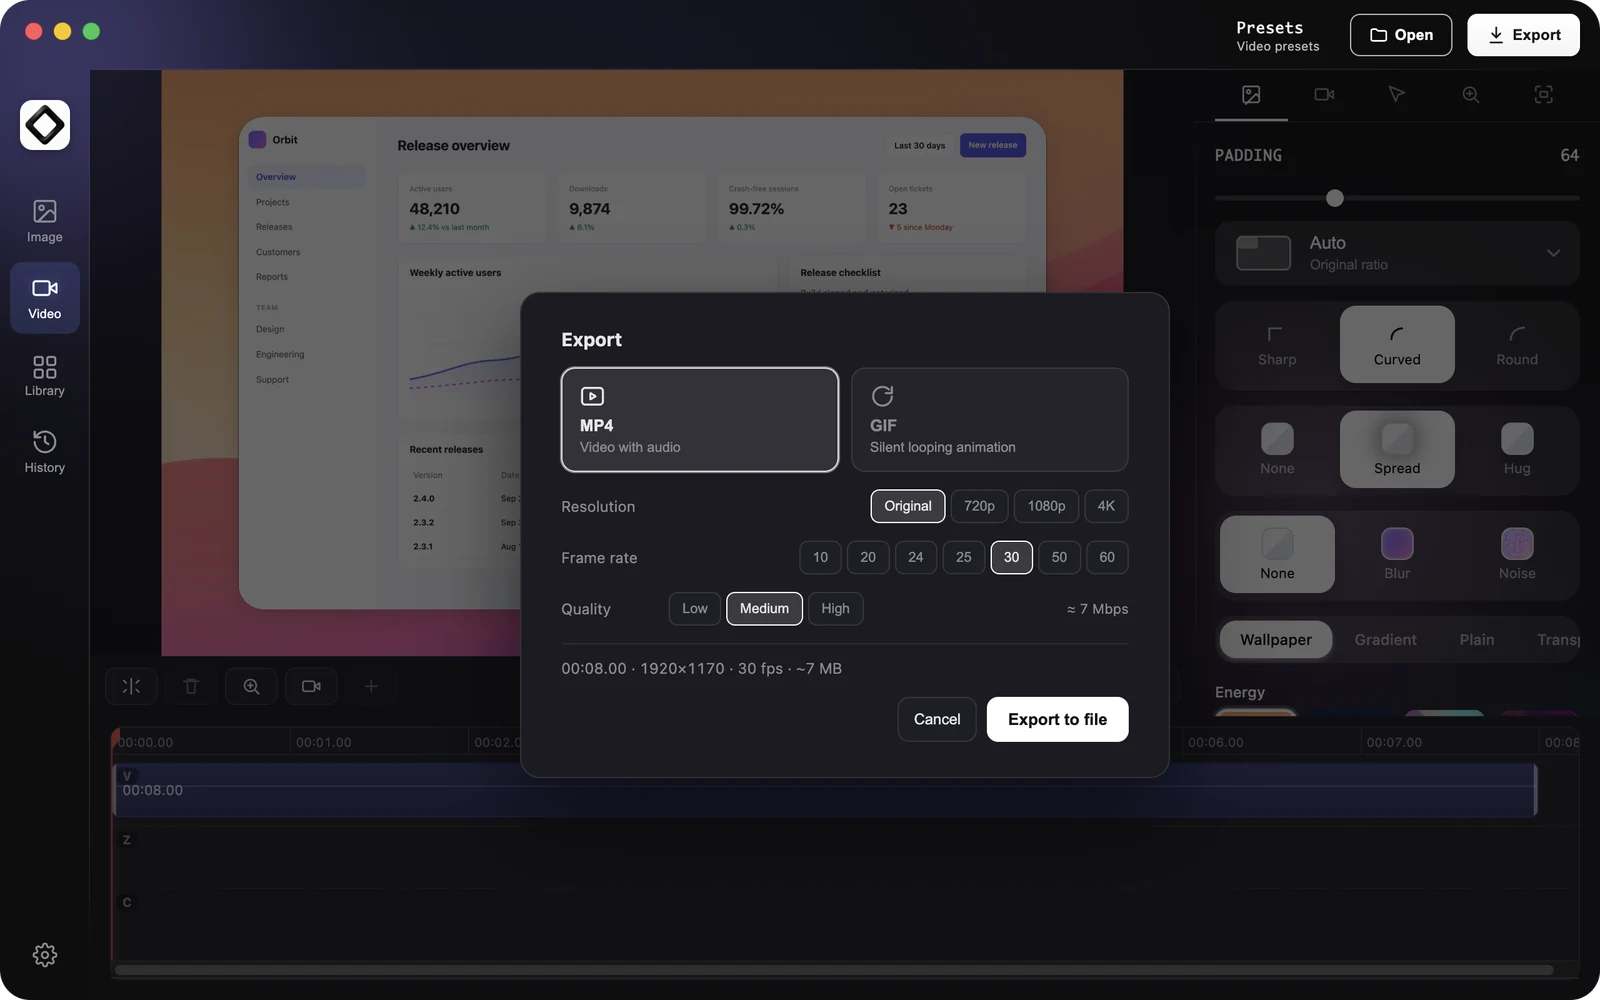
Click “Export” and choose MP4 (“Video with audio”) at its original size, 1080p or 720p, at 10 to 60 fps, or a looping GIF from 480p to 1080p. Zooms, background, webcam and audio levels all come along. For a quick share, “Create Link” uploads an MP4 and copies an unlisted link for a chat, a ticket or an email.

Anyone with the link can open it, and it isn’t listed anywhere. Delete the upload and the link stops working. If the Quick Preview closes without an action, a plain MP4 is saved next to the project anyway.

Export guideShare links

The ScreenSnap Pro Export dialog with MP4 and GIF, resolution, frame rate and quality options and a summary with the estimated file size

GIF recording

Record a GIF in one go

Switch the format menu to “GIF” for a short, silent loop for a pull request or a bug report. GIF recordings run up to 1 minute at 12 fps and at most 1200 px, include the pointer and skip the camera and audio. Need a longer GIF, zooms or a background? Record a video and export it as a GIF.

  1. Choose GIF
  2. Record up to 1 minute
  3. Drag it into the ticket

GIF recording guideRecord GIFs on a Mac

The ScreenSnap Pro recording bar with GIF chosen in the format menu and the camera, microphone and system audio buttons grayed out

Setup

Set up on macOS: permissions, Apple Silicon and Intel

What your Mac needs, and the one permission that matters for recording with sound.

  • macOS 15 Sequoia or later

    Works on macOS 15 Sequoia, macOS 26 Tahoe and later versions.

  • Apple Silicon or Intel

    There is a download for each. In the Apple menu, open About This Mac: “Chip” means Apple Silicon, “Processor” means Intel.

  • Screen & System Audio Recording

    Switch ScreenSnap Pro on in System Settings > Privacy & Security, then quit and reopen it. This one permission covers system audio.

  • Settings > Permissions

    Shows Screen Recording, Accessibility, Microphone and Camera as “Granted” or “Not granted”, with a button for any that is missing. Mic and camera are optional.

Recording on a PC too? The same license covers the screen recorder for Windows, and the screen recorder with audio overview covers both. Step-by-step fixes are in the permissions guide.

Who it's for

What Mac users record with it

Recordings that need the right sound: the app you are showing, your voice, or both.

  • Demos and tutorials

    Auto zoom follows your pointer, your webcam sits in a round overlay and Remove silence cuts the pauses. Save the look as a preset so every video in a series matches.

    Make a tutorial videoScreen Studio alternatives

  • Bug reports and QA

    Record the repro with the app's sounds and your narration, or a silent GIF for the ticket. Drag the file into Jira or Linear, or paste an unlisted link.

    Bug report templateExploratory testing

  • Calls with both voices

    System audio records the other side of a FaceTime, Zoom or Meet call and your mic records you, on separate tracks. Always tell everyone on the call and get their consent before you record.

    Record a FaceTime callRecord a Zoom meeting

  • Async updates

    Walk through a design or a pull request instead of booking a meeting. Click Create Link and paste the link into Slack or an email, with no per-seat subscription.

    Loom alternatives for Mac

Compare

ScreenSnap Pro vs QuickTime, OBS, Screen Studio and CleanShot X

The built-in tools are fine for a quick clip. Here is how the main screen recording apps for Mac compare once you need system audio, a webcam and an editor.

Feature comparison of ScreenSnap Pro, QuickTime Player, macOS Screenshot, OBS Studio, Loom, Screen Studio, CleanShot X and Camtasia on a Mac
FeatureScreenSnap ProQuickTime PlayermacOS ScreenshotOBS StudioLoomScreen StudioCleanShot XCamtasia
Price$34 onceFree, built inFree, built inFree, open sourceFree plan; paid from $15/user/mo, billed yearly$9/mo yearly or $29/mo$35 once + $19/yr for updatesFrom $39/yr; $179.88/yr without watermark
RequiresmacOS 15+Built inBuilt inmacOS 13+macOS 12.3+macOS 13.1+macOS 13+macOS 14+
Also on WindowsYes, one license for 2 computersNoNoYesYesNoNoYes
Full screen, window, areaFull screen, areaFull screen, areaYes, window on macOS 26+Yes, area by croppingYesYesYesYes
System audioYes, no extra driverYes, on macOS 27+Yes, on macOS 27+Yes, on macOS 13+YesYesYesYes
Webcam overlayYes, with full-screen scenesNoNoYes, as a scene sourceYesYesYesYes
Video editorYes, timeline: trim, split, speedTrim and splitTrim onlyNoTrim and stitch on BusinessYes, timelineYes, trim and zoomsYes, multitrack timeline
Auto zoomYes, from pointer activityNoNoNoNoYesSmart Zooms follow the cursorYes, SmartFocus
Silence removalYesNoNoNoBusiness + AI planYes, plus filler wordsNot listedYes, Essentials and up
GIF exportYesNoNoNoThumbnails onlyYes, up to 1080pYesYes
Share linkYes, unlisted linkNoNoNoYesYes, videos up to 30 minYesYes, 25 videos on most plans

Competitor details checked on their websites in October 2026. Prices in USD.

Which screen recorder for Mac should you choose?

  • A quick clip on macOS 27 or later: the built-in toolbar (Cmd+Shift+5), which now includes system audio, or QuickTime Player.
  • Free, with scenes and live streaming: OBS Studio.
  • Video messages for a whole team: Loom, on a per-user subscription.
  • Polished product demos on a Mac, with a subscription: Screen Studio.
  • Long courses on a multitrack timeline: Camtasia (annual plan).
  • Screenshots and recordings on a Mac only: CleanShot X.
  • System audio with no driver, auto zoom and a timeline editor, on Mac and Windows, for one payment: ScreenSnap Pro.

The basics

What is screen recording software for Mac?

Screen recording software for Mac captures what happens on your screen as a video, usually with your voice from the microphone and, in better tools, the sound your Mac plays. Many add a webcam overlay, an editor for trims and zooms, GIF output and a share link.

  • Built into macOS

    Cmd+Shift+5 and QuickTime Player record the screen and your mic for free, with a simple trim. System audio arrived in macOS 27.

    QuickTime recordingMac shortcuts

  • Free and open source

    OBS Studio, Kap and Cap. OBS handles scenes and streaming but takes setup. Kap is a light recorder for clips and GIFs, and Cap is free for personal use, with paid plans for work and cloud sharing.

    OBS alternativesKap reviewCap review

  • Recorder + editor

    Screen Studio, ScreenFlow and Camtasia pair the recorder with a timeline editor for polished demos and courses. Screen Studio and Camtasia are subscriptions.

    Screen Studio alternativesCamtasia alternatives

  • Record and share, all in one

    ScreenSnap Pro, Loom and CleanShot X record, then hand you a link. ScreenSnap Pro and CleanShot X take screenshots too, and ScreenSnap Pro also runs on Windows.

    Loom alternativesvs CleanShot X

Screen recording shortcuts on a Mac

macOS built in

Cmd+Shift+5
Open the Screenshot toolbar to record the entire screen or a selected portion
Cmd+Ctrl+Esc
Stop the recording
Cmd+Ctrl+N
QuickTime Player: New Screen Recording

Built-in recordings are saved to the Desktop as .mov files unless you change Options in the toolbar. All Mac recording shortcuts

ScreenSnap Pro

Record Screen
Your key: records the display under your pointer right away. Press it again to stop and save.
Record Area
Your key: drag an area, then recording starts.
Record Display
Your key: records a whole display, after you pick one.
Esc
Skip the countdown, or cancel while you pick an area or a display.

None of the three has a default key. Set them in Settings > Shortcuts with keys macOS doesn’t use. They reuse your last format, camera and audio choices. Shortcuts guide

Get ScreenSnap Pro

Record your Mac with the sound on

One license for two computers, Mac or PC, with the recorder, the video editor and every future update included. See what you get on the pricing page.

  • System audio, no BlackHole
  • Apple Silicon & Intel
  • macOS 15 or later
  • 2 seats, Mac or PC
  • 30-day money-back

FAQ

Mac screen recorder FAQ

Does macOS have a built-in screen recorder?

Yes. Press Cmd+Shift+5 to open the Screenshot toolbar and record the entire screen or a selected portion, or choose File > New Screen Recording in QuickTime Player. Both record your microphone, let you trim the clip and save a .mov file to your Desktop. System audio needs macOS 27 or later, and neither adds a webcam overlay, zooms or a timeline editor.

QuickTime screen recordingMac recording shortcuts

Can you record your Mac screen with sound?

Yes. The built-in tools record your microphone, and macOS 27 adds an Include System Audio option. On macOS 15 and 26, recording the sound your Mac plays usually means installing BlackHole and setting up a Multi-Output Device in Audio MIDI Setup. In ScreenSnap Pro you click System audio before you start, with no driver, and your mic is saved on its own track.

Every way to record Mac audioRecording has no sound?

Which screen recording app is best for Mac?

It depends on the job. ScreenSnap Pro records system audio, mic and webcam, adds auto zoom and a timeline editor, and costs $34 once. For a quick clip, the built-in Cmd+Shift+5 toolbar is enough, and OBS Studio is the strongest free choice for streaming and complex scenes. Screen Studio makes polished demos on a subscription, and Loom suits team video messages.

Best screen recorders for Mac

What is the best free screen recorder for Mac?

The best free options are already on your Mac, QuickTime Player and the Cmd+Shift+5 toolbar, plus OBS Studio, the most capable free download. Kap is a simpler open-source recorder for short clips and GIFs. ScreenSnap Pro is not free: it is a one-time $34 purchase with no free version or trial, backed by a 30-day money-back guarantee.

OBS alternatives for MacKap review

How do I make a screen recording on my Mac?

Press Cmd+Shift+5, choose Record Entire Screen or Record Selected Portion and click Record. With ScreenSnap Pro, click the menu bar icon, choose Record Screen, turn on a camera, a microphone or System audio if you want them, then click Display or Area. After a 3-second countdown it records; click the red square to stop and save.

How to screen record on a MacBook

How do I stop a screen recording on Mac?

For a built-in recording, press Cmd+Ctrl+Esc or click the Stop button in the menu bar. In ScreenSnap Pro, click the red square or the timer in the recording controls, or press your Record Screen shortcut again if you set one. Pause lets you resume later, and Delete discards the take. GIF recordings stop on their own at 1 minute.

Every way to stop a recording

Why won't my Mac allow screen recording?

Usually the permission is off or hasn't taken effect yet. Open System Settings > Privacy & Security > Screen & System Audio Recording, switch the app on, then quit and reopen it, because macOS applies the change after a restart. If it is already on but still blocked, remove the app with the minus button, add it again from Applications and restart it.

Permissions guide

Where did my Mac screen recording go?

Built-in recordings are saved to your Desktop unless you changed Options in the Screenshot toolbar. ScreenSnap Pro saves each recording as a project in its save folder, a ScreenSnap Pro folder on your Desktop by default, plus a plain MP4 next to it if the Quick Preview closes without an action. Choose Open Screenshots Folder from the menu bar icon to find it.

Which is the safest screen recorder app?

Look for one that keeps recordings on your Mac and asks before anything leaves it. ScreenSnap Pro saves every recording locally, and video recordings are never uploaded automatically: a video leaves your Mac only when you click Create Link or a link button. Shared links are unlisted, and deleting an upload turns its link off. macOS permissions stay under your control in System Settings.

Can ScreenSnap Pro record a single window?

No. ScreenSnap Pro records a whole display or an area you drag, not a single window. To record one app, drag an Area around its window; everything outside is dimmed while you record, and the dimming is not part of the video. Hide desktop icons keeps the Finder desktop clean behind it. Capture Window exists for screenshots only.

Does ScreenSnap Pro work on Apple Silicon and Intel Macs?

Yes. ScreenSnap Pro runs on Apple Silicon (M1 and newer) and Intel Macs with macOS 15 Sequoia or later, including macOS 26 Tahoe, with a separate download for each. To check yours, open the Apple menu, choose About This Mac and look at the first line: Chip means Apple Silicon, Processor means Intel. The same license also works on Windows.

Is ScreenSnap Pro a subscription?

No. ScreenSnap Pro is a one-time $34 purchase with lifetime updates and no monthly or yearly fee. One license works on two computers, in any mix of Mac and Windows, and screen recording is included. There is no free trial; instead, every purchase has a 30-day money-back guarantee if it doesn't fit your workflow.