How to Convert Images to GIF — PNG, JPG & More (2026)
An image to GIF conversion turns a series of still images into a looping animation. You pick the frames. You set the speed. The result is a lightweight animation that plays everywhere — no video player needed. If your frames come from screen captures, a tool like ScreenSnap Pro keeps the resolution and crop consistent across the set.
GIFs work in email, Slack, GitHub, docs, and social media. They're perfect for quick tutorials, product demos, and reaction images. Here's how to make them from PNG, JPG, or any photo format.
What is an image-to-GIF conversion?
A GIF (Graphics Interchange Format) can hold multiple image frames in one file. Each frame displays for a set duration. The result is a simple animation that loops automatically.
When you convert images to GIF, you're doing this:
- Selecting multiple images (PNG, JPG, or other formats)
- Setting the order and timing for each frame
- Combining them into a single
.giffile
The GIF format limits colors to 256 per frame. This keeps file sizes small but means photos lose some color detail. For screenshots, diagrams, and simple graphics, the quality is excellent. For photo-heavy animations, consider using video formats or optimizing carefully.
Common use cases for image-to-GIF conversion:
- Product feature demos (show 3-5 screenshots in sequence)
- Before/after comparisons
- Step-by-step tutorials
- Social media content
- Documentation and how-to guides
- Memes and reaction images
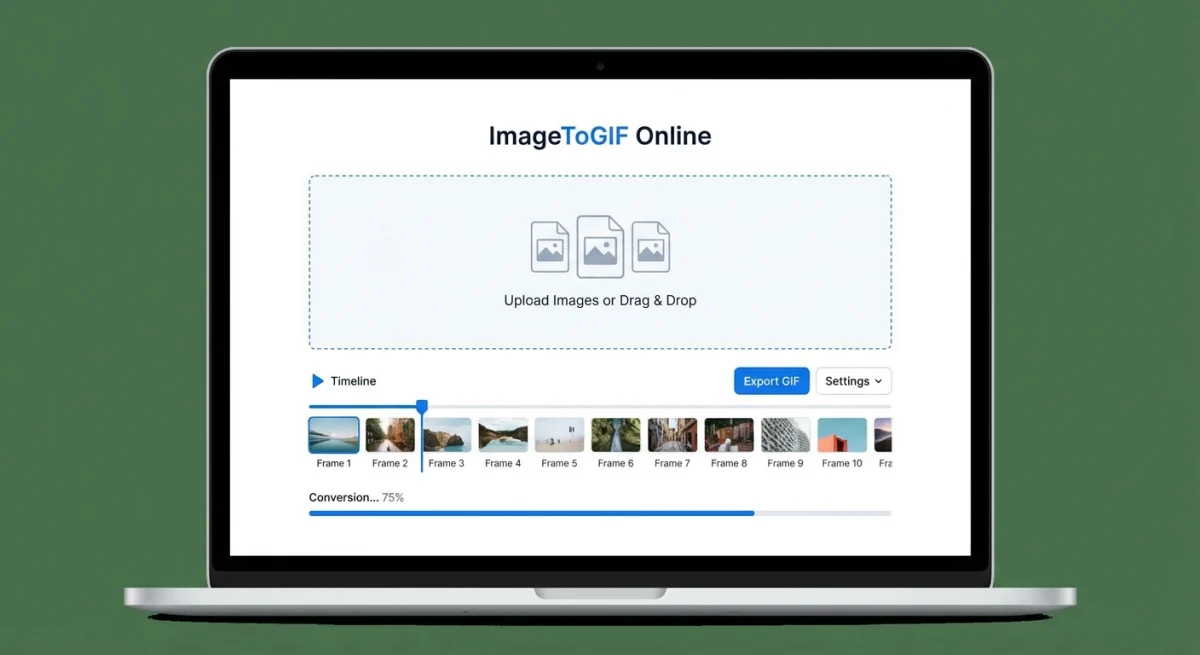
Quick method: use our free Image to GIF tool
The fastest way to convert images to GIF. No signup. No install.
- Open our free Image to GIF converter.
- Upload your images (PNG, JPG, WebP — any format works).
- Drag to reorder the frames.
- Set the delay between frames (default is 500ms).
- Click Create GIF and download.
Everything runs in your browser. Your images never leave your device. This works on Mac, Windows, phones — anywhere you have a browser.
For quick screen captures that skip the conversion step entirely, ScreenSnap Pro records your screen directly to GIF format. No need to take screenshots first and combine them later.
Convert images to GIF on Mac
Mac has several built-in and free options.
Method 1: Shortcuts app
The Shortcuts app (built into macOS Monterey and later) can create GIFs:
- Open Shortcuts and create a new shortcut.
- Add the action Make GIF from images.
- Set the time per frame (seconds).
- Add a Save File action to save the output.
- Select your images and run the shortcut.
You can also add this shortcut to your right-click menu. Select images in Finder, right-click, and create a GIF instantly.
Method 2: command line with ImageMagick
Install ImageMagick first: brew install imagemagick
# Basic conversion — 500ms between frames
magick frame1.png frame2.png frame3.png -delay 50 -loop 0 output.gif

# From all PNGs in a folder (sorted alphabetically)
magick *.png -delay 50 -loop 0 animation.gif

# With resize for smaller file size
magick *.jpg -delay 30 -resize 800x -loop 0 animation.gif
The -delay value is in hundredths of a second. So -delay 50 = 500ms per frame. The -loop 0 flag makes it loop forever.
Method 3: command line with ffmpeg
If you have ffmpeg installed (brew install ffmpeg):
# From numbered frames (frame001.png, frame002.png, etc.)
ffmpeg -framerate 2 -i frame%03d.png -vf "fps=10,scale=800:-1" output.gif

# From specific images
ffmpeg -framerate 1 -pattern_type glob -i '*.jpg' output.gif
The -framerate flag controls how many input images show per second. Lower = slower animation.
Method 4: record directly to GIF
Instead of converting still images, you can capture your screen as a GIF directly. This skips the multi-step process entirely.
ScreenSnap Pro records any part of your screen as an animated GIF. Select a region, hit record, stop when done. The GIF is ready to share.
For other GIF recording options on Mac, our guide covers the best GIF recorders available.
Convert images to GIF on Windows
ShareX (free)
ShareX includes a GIF editor:
- Open ShareX and go to Tools → Image Editor.
- Add your images as frames.
- Set timing for each frame.
- Export as GIF.
ShareX can also record screen captures as GIF. It's the most versatile free tool on Windows.
GIMP (free, cross-platform)
GIMP creates GIFs from layers:
- Open GIMP. Go to File → Open as Layers.
- Select all your images. Each becomes a layer.
- Order the layers (bottom = first frame).
- Go to Filters → Animation → Playback to preview.
- Export as GIF: File → Export As → choose
.gif. - Check As animation in the export dialog.
- Set the delay between frames (in milliseconds).
- Click Export.
Tip: Name each layer with the timing. For example: Frame 1 (200ms). GIMP uses this to set per-frame delays.
Microsoft Clipchamp
Windows 11 includes Clipchamp. Import your images, arrange them on the timeline, and export as GIF. It's simple but limited to basic frame sequencing.
Command line on Windows
Install ImageMagick for Windows from imagemagick.org. Then use the same commands as Mac:
# Combine images into GIF
magick frame1.png frame2.png frame3.png -delay 50 -loop 0 output.gif

# All images in a folder
magick *.png -delay 50 -loop 0 animation.gif
If you have ffmpeg installed (via Chocolatey or Scoop), it works identically on Windows. The command-line approach is the most reliable for batch operations and consistent results across platforms.
Best online image to GIF converters
If you don't want to install anything, these web tools work well:
| Tool | Free tier | Max frames | Custom timing | Watermark |
|---|---|---|---|---|
| ScreenSnap Image to GIF | Unlimited | Unlimited | ✅ | ❌ |
| Ezgif | Unlimited | 2000 | ✅ | ❌ |
| Kapwing | 3 exports/month | Unlimited | ✅ | ✅ (free tier) |
| Canva | 5 exports/month | Limited | ✅ | ❌ |
| Adobe Express | Limited | Limited | ✅ | ❌ |
Ezgif is the power user's choice. It offers advanced controls like frame reordering, cropping, adding text, and optimization — all free with no watermarks. The interface is dated but functional.
Kapwing has the cleanest UI but limits free users to 3 exports per month. The watermark on free exports is a dealbreaker for professional use.
For most people, our Image to GIF tool is the simplest option. No limits. No watermarks. No account required.
Tired of plain screenshots? Try ScreenSnap Pro.
Beautiful backgrounds, pro annotations, GIF recording, and instant cloud sharing — all in one app. Pay $39 once, own it forever.
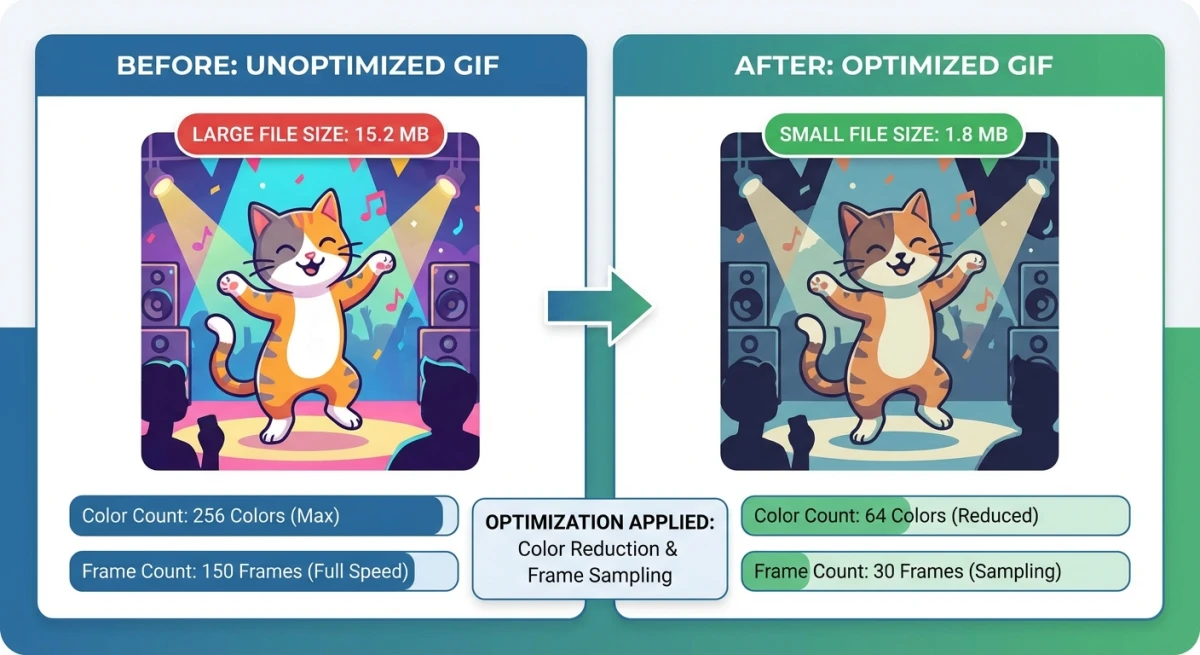
See what it doesHow to optimize GIF file size
GIFs can get large fast. A 20-frame animation at 1920×1080 can easily hit 10+ MB. Here's how to keep sizes manageable.
Reduce dimensions
The single biggest factor in GIF size. Resize before creating the GIF:
- Slack/Discord: 480px wide is plenty
- Blog posts: 800px wide works well
- Email: Keep under 600px wide
- Social media: Check platform specs (usually 480-1080px)
Reduce colors
GIFs support up to 256 colors per frame. Reducing to 128 or 64 colors shrinks the file significantly. For screenshots and diagrams, 128 colors usually looks identical. For photos, you might notice banding.
# ImageMagick — limit to 128 colors
magick input.gif -colors 128 output.gif
Reduce frame count
More frames = bigger file. Ask yourself: do you really need 30 frames? Often 10-15 frames tell the same story. Remove redundant frames that show minimal change.
Use lossy GIF compression
Run your GIF through a compressor after creating it. Our GIF compressor reduces file size by 30-60% without visible quality loss. For command-line users, gifsicle is excellent:
# Install
brew install gifsicle

# Optimize with lossy compression
gifsicle -O3 --lossy=80 input.gif -o output.gif
Target file sizes
- Slack: Under 15 MB (but aim for 2-5 MB for fast loading)
- Email: Under 1 MB (many clients block large GIFs)
- GitHub: Under 10 MB
- Discord: Under 8 MB
- Twitter/X: Under 15 MB
Troubleshooting common GIF issues
Colors look wrong or banded
GIF supports only 256 colors per frame. Photos with smooth gradients often show "banding" — visible steps between color shades instead of smooth transitions.
Fix: Use a dithering option when creating the GIF. Dithering adds a noise pattern that makes color transitions look smoother:
# ImageMagick — add dithering
magick *.png -dither FloydSteinberg -colors 256 -delay 50 -loop 0 output.gif
If the banding is still bad, your content might be better as an MP4 video. Use our GIF to MP4 converter if you already made the GIF.
Animation speed is wrong
Frame timing issues are the most common GIF problem. The animation plays too fast or too slow.
Fix: Check your delay values. In ImageMagick, -delay 50 means 500ms (half a second) per frame. Common mistake: setting -delay 5 and getting a GIF that races through frames in a blur.
Quick reference for delay values:
-delay 100= 1 second per frame (slow, good for reading text)-delay 50= 0.5 seconds (standard speed)-delay 20= 0.2 seconds (fast, good for smooth motion)-delay 10= 0.1 seconds (very fast, near-video speed)
GIF shows a white flash between frames
This happens when frames have different sizes or when transparency isn't handled correctly.
Fix: Make sure all source images are the same size. If they're not, resize them first:
# Resize all images to 800px wide before combining
magick mogrify -resize 800x *.png
Also set the disposal method to prevent leftover pixels from previous frames:
magick *.png -delay 50 -loop 0 -dispose Background output.gifTransparency looks jagged
GIF only supports binary transparency — a pixel is either fully see-through or fully solid. There's no partial transparency like PNG offers. This makes edges around transparent areas look rough and jagged.
Fix: Place your content on a solid background before converting. If you need smooth edges on a transparent background, GIF isn't the right format. Use APNG or WebP instead.
GIF won't play in email
Many email clients (Outlook desktop, older Gmail) show only the first frame of a GIF instead of playing the animation.
Fix: Make sure your first frame is meaningful — it should work as a static image too. Don't put important info only in later frames. Test in the email clients your audience uses. Outlook on the web and mobile Gmail both play GIFs.
PNG vs JPG to GIF: does the source format matter?
Short answer: Not much. The GIF format converts everything to its own 256-color palette regardless of input format.
Longer answer: There are some practical differences:
| Factor | PNG source | JPG source |
|---|---|---|
| Color accuracy | Slightly better (lossless input) | Already compressed — minor artifacts may carry over |
| Transparency | Preserved if GIF supports it | No transparency data to preserve |
| File handling | Larger source files to upload | Smaller source files, faster upload |
| Best for | Screenshots, graphics, UI elements | Photos, complex images |
If your source images are screenshots, they're probably already PNG. That's the Mac default. Keep them as PNG — our PNG vs JPG guide explains why screenshots are better in lossless formats.
If you're working with photos, JPG sources work fine. The GIF's 256-color limit is a much bigger quality factor than the input format.
Pro tip: For the best GIF quality from photos, start with the highest-resolution source you have. Resize during GIF creation, not before. This gives the GIF encoder more data to work with when choosing colors.
Converting screenshots to GIF
Screenshots are the most common source for tutorial GIFs. Here's the ideal workflow:
- Take your screenshots using Mac shortcuts or the Snipping Tool on Windows.
- Crop each screenshot to show only the relevant area. Smaller frames = smaller GIFs.
- Annotate if needed — add arrows, highlights, or step numbers.
- Name the files in order:
step-01.png,step-02.png, etc. - Combine into a GIF using any method above.
This produces clean, professional tutorial GIFs. The MOV to GIF conversion is another option if you already have a screen recording.
When to use GIF vs video
GIFs aren't always the best choice. Here's when to pick each:
Use GIF when:
- The animation is under 15 seconds
- You need it to autoplay and loop
- It goes in email, Slack, docs, or GitHub
- File size is under 5 MB
- No audio is needed
Use video (MP4/WebM) when:
- The clip is longer than 15 seconds
- You need audio
- Quality matters more than compatibility
- File size needs to stay small for longer content
If you have GIFs that are too large, converting to MP4 often reduces size by 80-90%. Our GIF to MP4 converter handles this instantly.
For screen recordings that need to be shared quickly, recording directly to GIF is faster than recording video and converting. Tools like ScreenSnap Pro and Giphy Capture alternatives specialize in this workflow.
Tips for better animated GIFs
Consistent frame sizes. Make sure all source images are the same dimensions. Mismatched sizes cause jarring jumps. Crop or resize images before combining.
Logical frame order. For tutorials, follow the natural click sequence. For product demos, show the most impressive feature first.
Appropriate timing. Text-heavy frames need longer display times (1-2 seconds). Action frames can be faster (200-500ms). Vary the timing to match content.
Add a pause on the first frame. Set a longer delay on frame 1 so viewers see the starting state before the animation begins.
Test on multiple platforms. A GIF that looks great on desktop might load slowly on mobile. Test where your audience will see it.
If you need to edit screenshots before combining them into a GIF — like adding annotations, cropping, or blurring sensitive info — do that first. It's much harder to edit individual frames after creating the GIF.
Frequently Asked Questions
Morgan
Indie DeveloperIndie developer, founder of ScreenSnap Pro. A decade of shipping consumer Mac apps and developer tools. Read full bio
@m_0_r_g_a_n_