How to Convert Screenshots to PDF on Mac (2026)
Converting a screenshot to PDF on Mac takes just a few clicks. Use built-in tools like Preview or Quick Actions in Finder. You can also combine multiple screenshots into a single PDF. It's perfect for documentation, reports, or professional sharing — and capture apps like ScreenSnap Pro get you cleaner source images to start with.
Need to save a single screenshot as a PDF? Or merge several images into one document? macOS has you covered — no extra apps needed. And if you want batch conversion or annotations, third-party tools can help.
Why Convert Screenshots to PDF?
Before the how-to, here's why PDF beats raw screenshots:
- Works everywhere: PDFs open on any device. No format issues.
- Looks professional: Cleaner than attaching multiple images to emails.
- Combine images: Merge several screenshots into one neat document.
- Saves space: PDFs compress images while staying readable.
- Add security: Lock with a password if needed.
- Keeps quality: Unlike JPEG, no quality loss over time.
- Make text searchable: Some tools add OCR to find text in images.
- Ready to print: PDFs print exactly as you see them.
Creating technical documentation or sharing bug reports? PDF is the way to go.
Common use cases for screenshot PDFs
Software documentation: Capture steps, error messages, or UI states. Turn them into a clean PDF guide. Share easily with clients or teammates.
Bug reports: Show what went wrong with annotated screenshots. One PDF tells the whole story. Much better than sending separate images.
Educational materials: Teachers capture each step of a process. The PDF becomes a tutorial students can follow offline.
Legal records: Save conversations or transactions as official records. PDF format is formal. Courts and companies accept it widely.
Proposals and pitches: Combine mockups into one polished document. Clients see everything in order. No hunting through attachments.
Method 1: Using Preview (Built-in, Free)
Preview is Mac's default image and PDF viewer. It handles screenshot-to-PDF conversion beautifully — no downloads required.
For a single screenshot:
- Open your screenshot in Preview (double-click the file)
- Go to File → Export as PDF
- Choose your save location
- Click Save
That's it. Your screenshot is now a PDF.
For multiple screenshots:
- Select all screenshots in Finder (hold
⌘and click each one, or⌘ + Ato select all) - Right-click and choose Open With → Preview
- In Preview's sidebar, drag thumbnails to reorder pages as needed
- Go to File → Print (or press
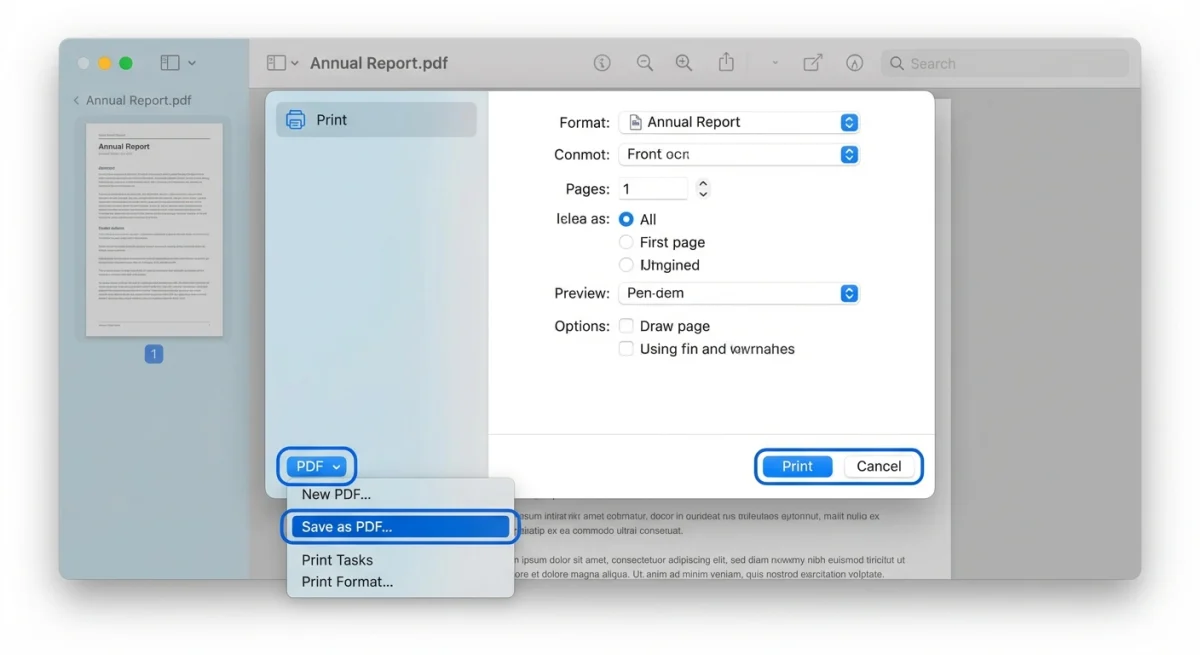
⌘ + P) - Click the PDF dropdown in the bottom-left corner
- Select Save as PDF
- Name your file and save
Pro tip: Don't see the sidebar in Preview? Press ⌘ + Option + 2 to show thumbnails. This makes reordering much easier.
Preview works great for basic conversions. But it lacks margin control or batch automation. If you take screenshots frequently, you might want something more powerful.
Method 2: Quick Actions in Finder
This is the fastest method for converting screenshots to PDF. Most Mac users don't even know it exists.
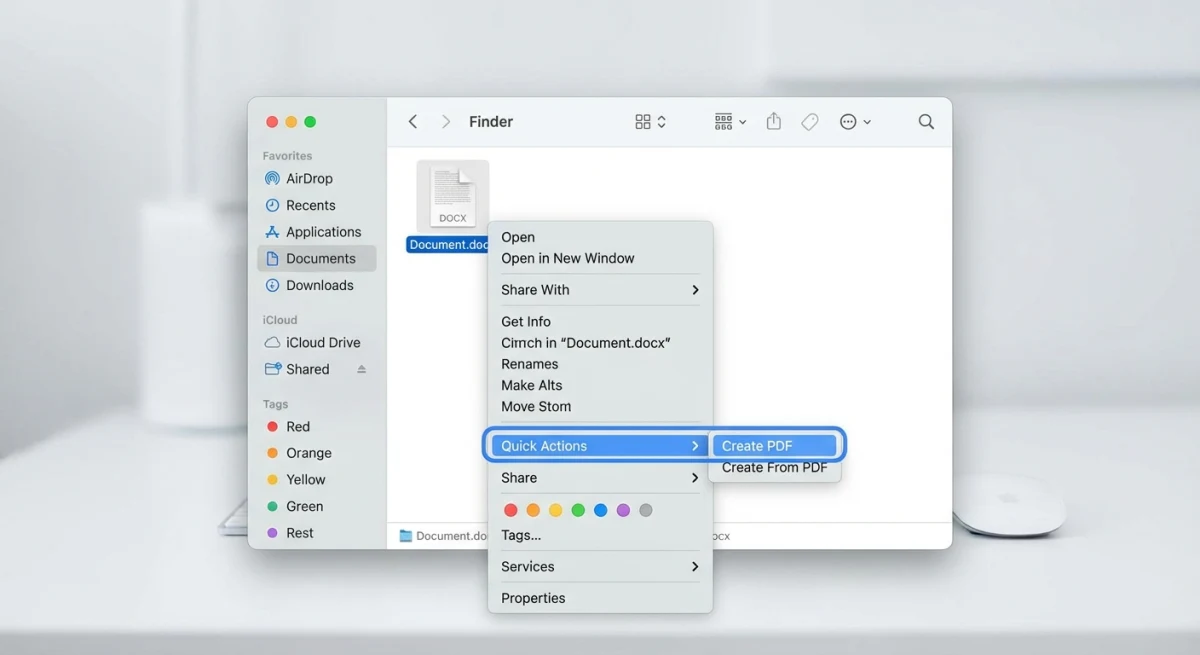
Steps:
- Select your screenshot(s) in Finder
- Right-click (or Control-click) the selection
- Hover over Quick Actions
- Click Create PDF
Done. Finder creates a PDF in the same folder as your screenshots.
If you don't see "Create PDF" in Quick Actions:
The feature might be hidden. Here's how to enable it:
- Open System Settings → Privacy & Security → Extensions
- Click Finder
- Make sure Create PDF is checked
Quick Actions is perfect for fast, no-fuss conversion. The PDF gets created instantly. No apps needed.
Method 3: Using ScreenSnap Pro
If you regularly convert screenshots to PDF, a dedicated tool can streamline your workflow.
ScreenSnap Pro captures screenshots with built-in annotation tools. Add arrows, shapes, text, blur, and more. Prepare images for your PDF before exporting. This is especially useful for:
- Bug reports with highlighted issues
- Tutorial documentation with numbered steps
- Professional presentations with polished visuals
Workflow with ScreenSnap Pro:
- Capture your screenshot with
⌘ + Shift + 4(or use ScreenSnap Pro's capture) - Add annotations directly in the editor
- Export the annotated screenshot
- Convert to PDF using Preview or Quick Actions
The advantage? Your screenshots are already polished before they become a PDF. No separate editing needed.
ScreenSnap Pro also includes OCR text extraction. It lets you copy text from screenshots. Handy when you need both the image and text from what you captured.
Method 4: Online Tools (Browser-Based)
Don't want to use any software? Browser-based converters work right in your web browser.

Popular online options:
| Tool | Best For | Free Tier |
|---|---|---|
| iLovePDF | Batch conversion, easy interface | Yes, with limits |
| SmallPDF | Quick single-file conversion | Yes, 2 tasks/day |
| PDF24 | Unlimited free conversions | Yes |
| Adobe Acrobat Online | Integration with Adobe ecosystem | Yes, limited |
How to use (example with iLovePDF):
- Go to ilovepdf.com/jpg_to_pdf
- Upload your screenshot(s)
- Drag to reorder if needed
- Click Convert to PDF
- Download your file
When to use online tools:
- You're on a shared or work computer
- Quick one-off conversion
- You don't want to install anything
When to avoid online tools:
- Sensitive screenshots — files get uploaded to external servers
- Large batches — free tiers have limits
- Slow internet — local tools work faster
- Privacy concerns — especially with confidential docs
For anything sensitive, stick with Preview or Quick Actions. They process everything locally. Our free image to PDF converter also processes files entirely in your browser — your images never leave your device.
Tired of plain screenshots? Try ScreenSnap Pro.
Beautiful backgrounds, pro annotations, GIF recording, and instant cloud sharing — all in one app. Pay $39 once, own it forever.
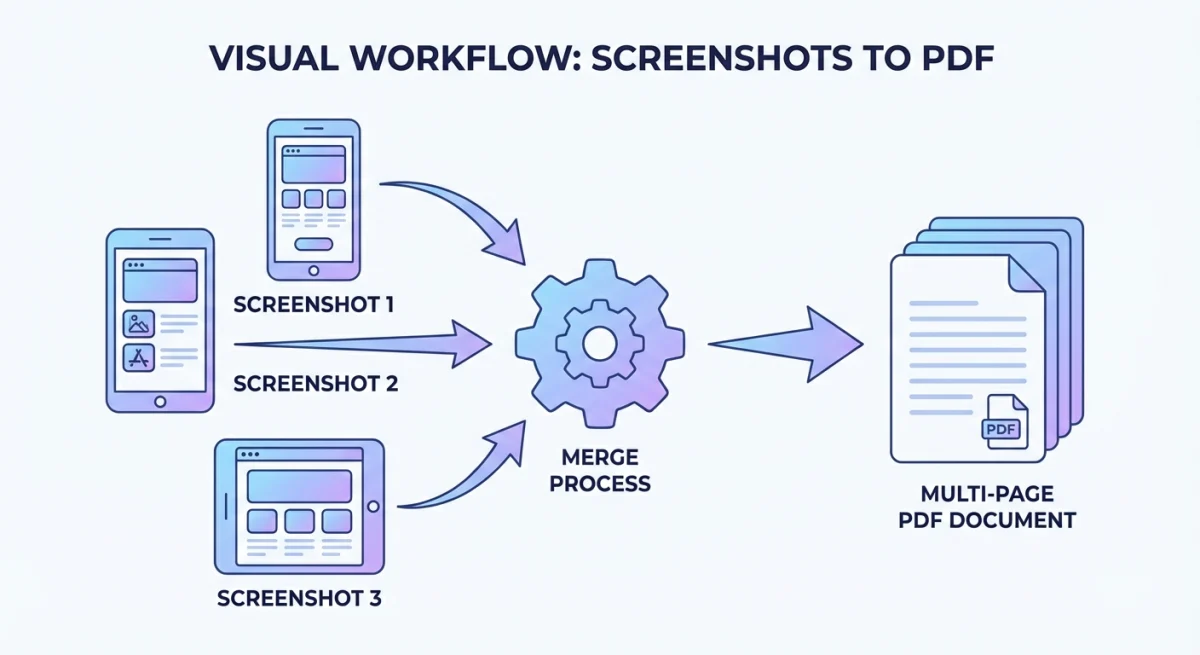
See what it doesHow to Combine Multiple Screenshots into One PDF
Creating a multi-page PDF from several screenshots is a common need for documentation, reports, and tutorials.
Method A: Preview (Best Control)
- Open all screenshots in Preview (select them in Finder, right-click, Open With → Preview)
- In the sidebar, drag thumbnails to arrange the order
- Select all thumbnails (
⌘ + A) - Go to File → Print
- Click PDF → Save as PDF
Method B: Quick Actions (Fastest)
- Select all screenshots in Finder
- Right-click → Quick Actions → Create PDF
Quick Actions combines them in alphabetical order by filename. Want a specific order? Rename files with numbers first:
01-intro.png02-setup.png03-finish.png
Method C: Automator (For Power Users)
If you do this frequently, create a reusable Automator workflow:
- Open Automator (from Applications)
- Choose Quick Action
- Set "Workflow receives" to image files in Finder
- Add the action: New PDF from Images
- Save as "Convert to PDF"
Now this option appears in your right-click menu whenever you select images.
Tips for Better PDF Quality
1. Start with high-quality screenshots
Your PDF can only be as good as the source. Use proper screenshot techniques for crisp images.
Mac screenshots save as PNG by default. PNG keeps quality perfect. Don't convert to JPEG first — you'll lose sharpness.
Pro tip: On Retina Macs, screenshots are double the visible size. This gives you more detail to work with.
2. Choose the right page orientation
Preview's Print dialog lets you switch between Portrait and Landscape:
- Portrait: Vertical screenshots (mobile apps, documents)
- Landscape: Wide captures (full desktop, presentations)
Match the orientation to your screenshot shape. Mismatched settings waste space.
3. Balance file size vs. quality
Emailing the PDF? Size matters. Preview's default keeps full quality — files get big.
For smaller files, use Quartz Filter:
- Go to File → Print
- Click PDF → Save as PDF
- Click Quartz Filter
- Choose Reduce File Size
Warning: This compresses images. Clarity drops. Test before sending important docs.
4. Add margins for a polished look
Preview exports images edge-to-edge. Want white margins around your screenshots?
Options:
- In Print dialog, lower the "Scale" to 85-90%
- Use a tool like PDF Expert for margin controls
- Add padding to screenshots before converting
Margins make PDFs feel more professional. Especially for client docs.
5. Use smart naming for batch work
Quick Actions orders pages alphabetically. Name files with numbers:
01-login-screen.png02-dashboard-view.png03-settings-panel.png
Pages appear in the right order. No manual sorting needed.
6. Match polish to your audience
Think about who'll view this PDF:
- Clients or executives: Annotate. Blur sensitive info. Make it shine.
- Dev team: Raw screenshots work fine. Speed matters more.
- Legal/compliance: Full screens with visible timestamps.
For internal sharing, go fast. For client work, take time to annotate first.
7. Check accessibility
Making PDFs for a broad audience? Consider these:
- Add alt text for screen readers (use Acrobat for this)
- Ensure text in screenshots is large enough to read
- Use high contrast annotations
It's extra effort. But it makes your docs usable by everyone.
8. Test on different devices
Before sending, open the PDF on:
- Another Mac (Preview)
- iPhone/iPad (Files app)
- Windows (if your recipient uses it)
What looks good on your screen might break elsewhere. A quick test saves headaches.
Troubleshooting Common Issues
PDF file is too large
High-resolution screenshots create big PDFs. Combining many images makes it worse.
Quick fixes:
- Use Preview's Quartz Filter → "Reduce File Size"
- Resize screenshots first (Tools → Adjust Size)
- Convert PNG to JPEG before combining
Apple's Preview docs confirm Quartz Filter cuts size a lot. Quality stays fine for screens.
Screenshots appear blurry in PDF
Images got scaled wrong. That's the usual cause.
Fixes:
- Check "Scale to Fit" isn't shrinking images
- Export at 100% scale in Print dialog
- Use PNG files, not already-compressed JPEGs
Quick Actions "Create PDF" is missing
Can't find this option in the right-click menu?
Enable it:
- Open System Settings → Privacy & Security → Extensions
- Click Finder Extensions
- Turn on Create PDF
Older macOS (pre-Ventura): System Preferences → Extensions → Finder.
Pages are in wrong order
The order depends on your method:
- Quick Actions: Alphabetical by filename
- Preview: Same order you selected in Finder
Need exact control? Open in Preview. Drag thumbnails to reorder.
PDF won't open on recipient's device
Rare, but it happens. Usually a compatibility issue.
Try these:
- Resave with "PDF/A" format for max compatibility
- Check you didn't use Preview-specific features
- Use Adobe Acrobat online to test the file
Text looks pixelated or jagged
The source screenshot is too small. Or it got compressed.
Solutions:
- Retake screenshots at higher resolution
- Use Retina/HiDPI display for captures
- Avoid JPEG → PNG → PDF chains (stick with PNG)
Comparison: Which Method Should You Use?
| Method | Speed | Batch Support | Quality Control | Privacy | Best For |
|---|---|---|---|---|---|
| Preview | Medium | Yes | Good | Local | Most users |
| Quick Actions | Fastest | Yes | Basic | Local | Quick conversions |
| ScreenSnap Pro | Medium | Yes | Excellent | Local | Annotated screenshots |
| Online Tools | Varies | Limited | Varies | Uploaded | One-off conversions |
The bottom line: Quick Actions is fastest for simple conversions. Use Preview when you need control over page order or quality. Choose dedicated screenshot apps when you need annotations or advanced workflows.
Frequently Asked Questions
- Open the PDF in Preview
- Go to File → Export
- Under Quartz Filter, select Reduce File Size
Wrapping Up
Converting screenshots to PDF on Mac is straightforward once you know your options. For most situations, Quick Actions gets it done in two clicks. Need more control? Preview handles page reordering, quality adjustments, and batch combining beautifully.
Creating documentation regularly? Tools like ScreenSnap Pro save significant time. You get quick capture, built-in editing, and easy export. The whole workflow becomes smoother.
Whatever method you choose, remember this: good screenshots make good PDFs. Capture exactly what you need. The conversion is the easy part.
Morgan
Indie DeveloperIndie developer, founder of ScreenSnap Pro. A decade of shipping consumer Mac apps and developer tools. Read full bio
@m_0_r_g_a_n_