How to Convert Images to GIF on Mac (5 Methods) 2026
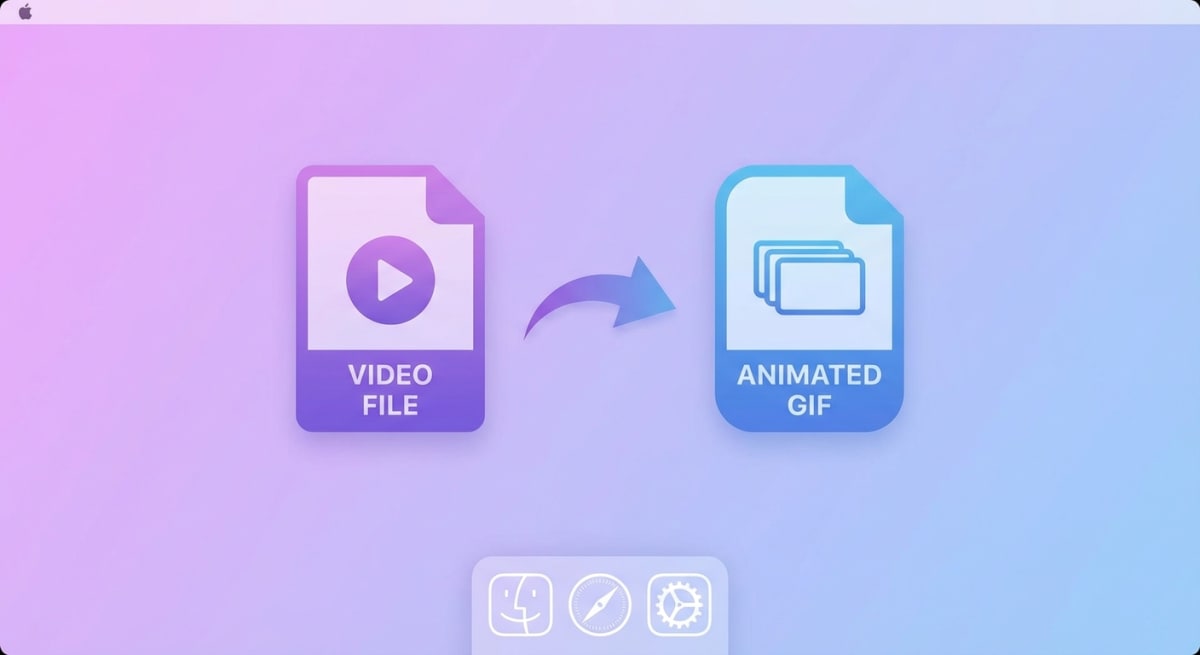
An images to GIF converter takes a series of static pictures and stitches them into a looping animated GIF. Photos, screenshots, illustrations — any image works. Unlike screen-recording GIFs (which apps like ScreenSnap Pro handle in a single click), you start with files you already have. That makes it perfect for slideshows, product demos, and tutorials.
TL;DR: The fastest free way to convert images to GIF on Mac is Apple Shortcuts. Create a shortcut with "Select Photos" → "Make GIF" → "Save File." No install needed, works from your menu bar. For more control, use ImageMagick in Terminal or PicGIF Lite from the App Store.
Whether you're a content creator or a developer documenting a UI flow, this guide covers five ways to create a GIF from pictures on your Mac.
Why convert images to GIF?
Before picking a tool, it helps to know when a photo GIF maker approach beats video or static images:
- Tutorials and how-tos — Show a sequence of steps without recording your screen. Great for combining multiple screenshots into one visual.
- Social media content — Animated posts grab more attention than static images on Twitter, LinkedIn, and Slack.
- Product demos — Loop through feature highlights or before/after comparisons without hosting video.
- Email campaigns — GIFs play inline in most email clients; video doesn't.
- Memes and reactions — Turn a burst of photos into something shareable.
The key advantage over video? GIFs auto-play everywhere, need no player, and loop infinitely. Apple's Preview app supports a wide range of image formats. Any of them can serve as source material for your GIFs.
Method 1: Preview + Automator (built-in, free)
Your Mac already has everything you need. Preview handles image viewing and basic edits, while Automator can batch-process files into a GIF.
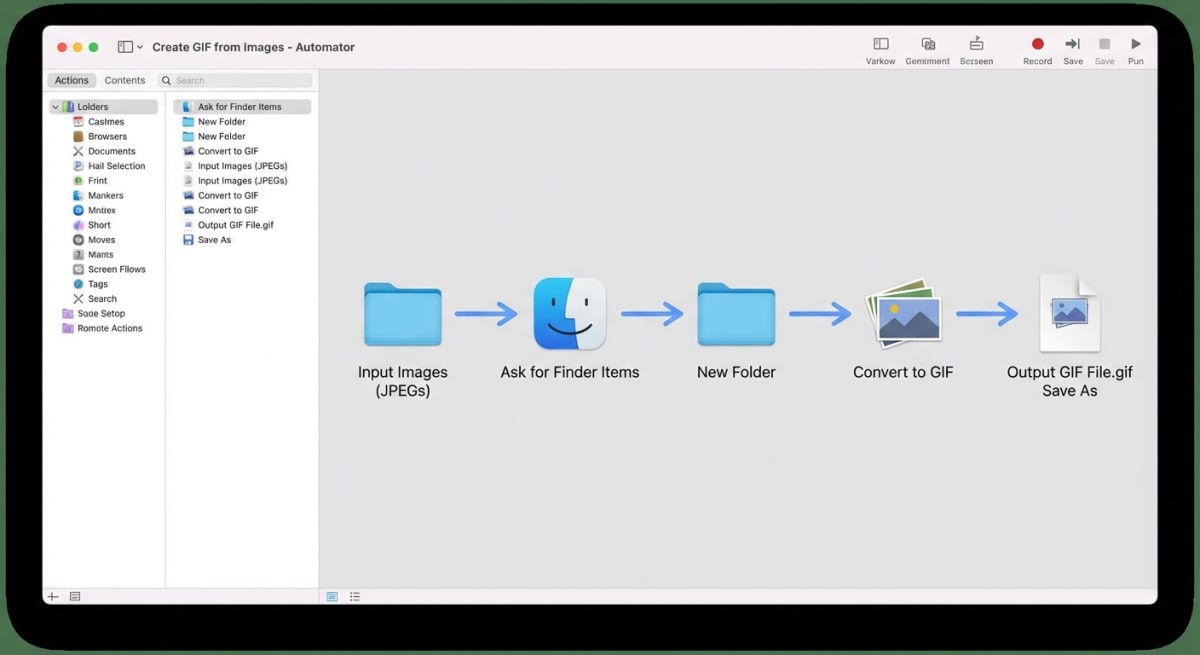
Setting up the Automator workflow
- Open Automator from your Applications folder (or Spotlight:
⌘ + Space, type "Automator"). - Choose Quick Action as the document type.
- Set "Workflow receives current" to image files in Finder.
- Search the action library for "Encode Media" and drag it into the workflow area.
- Set the output format to Animated GIF.
- Adjust the frame rate — 0.5 seconds per frame works well for most slideshows.
- Save the workflow with a memorable name like "Create GIF from Images."
Using the workflow
- Select the images you want in Finder (hold
⌘to pick multiple). - Right-click → Quick Actions → Create GIF from Images.
- Automator processes the files and saves the GIF to the same folder.
Pro tip: Name your images in order (01.png, 02.png, etc.) so frames appear in the right sequence. Automator processes files alphabetically.
Limitations: Automator's GIF output doesn't let you preview before saving, and fine-tuning frame timing requires editing the workflow. For more control, try the methods below.
Best for: Users who want a free, no-install solution with decent results.
Method 2: PicGIF Lite (Mac App Store, free)
PicGIF Lite is a dedicated GIF maker from photos with more control than Automator. You get frame reordering, speed adjustments, and size options.
How to create a GIF from pictures with PicGIF Lite
- Download PicGIF Lite from the Mac App Store.
- Launch the app and click Add Photos.
- Select your images — drag to reorder them in the timeline.
- Set the frame delay (0.2–0.5s is typical for slideshows).
- Choose your output size: Original, 320px, 480px, or 640px wide.
- Click Create GIF and save.
PicGIF Lite tips
- Frame order matters. Drag frames in the timeline to rearrange — no need to rename files.
- Keep it small. For web use, 480px or 640px width keeps file sizes manageable. You can always compress the GIF afterward.
- Loop settings. The free version loops infinitely by default, which is usually what you want.
Best for: Quick slideshow GIFs with simple drag-and-drop controls.
Method 3: Online tools (ezgif and Kapwing)
No install needed — just a browser. Online images to GIF converters work on any Mac.
ezgif.com
- Go to ezgif.com/maker.
- Click Choose Files and select your images (up to 2000 files).
- Click Upload and make a GIF.
- Set delay time, loop count, and frame order.
- Click Make a GIF → download the result.
ezgif also lets you resize, crop, and optimize the GIF before downloading. It's one of the most full-featured free options available.
Kapwing
- Visit kapwing.com and start a new project.
- Upload your images to the timeline.
- Adjust duration per frame and arrange the order.
- Export as GIF.
Kapwing adds a watermark on the free tier. But the editor is more visual and modern than ezgif. It also supports collaboration, so your team can edit the same project.
Privacy note: Online tools upload your images to external servers. Working with sensitive screenshots? Stick with local methods like Automator, PicGIF, Terminal, or Shortcuts. Our free image to GIF converter processes everything in your browser with no server uploads.
Best for: One-off GIFs when you don't want to install anything. Also useful if you need to convert image formats before creating the GIF.
Tired of plain screenshots? Try ScreenSnap Pro.
Beautiful backgrounds, pro annotations, GIF recording, and instant cloud sharing — all in one app. Pay $29 once, own it forever.
See what it doesMethod 4: Terminal with ImageMagick or ffmpeg (for developers)
Comfortable with the command line? ImageMagick and ffmpeg offer the most control over PNG to GIF and JPG to GIF conversions.
ImageMagick
Install via Homebrew:
brew install imagemagickCreate a GIF from images:
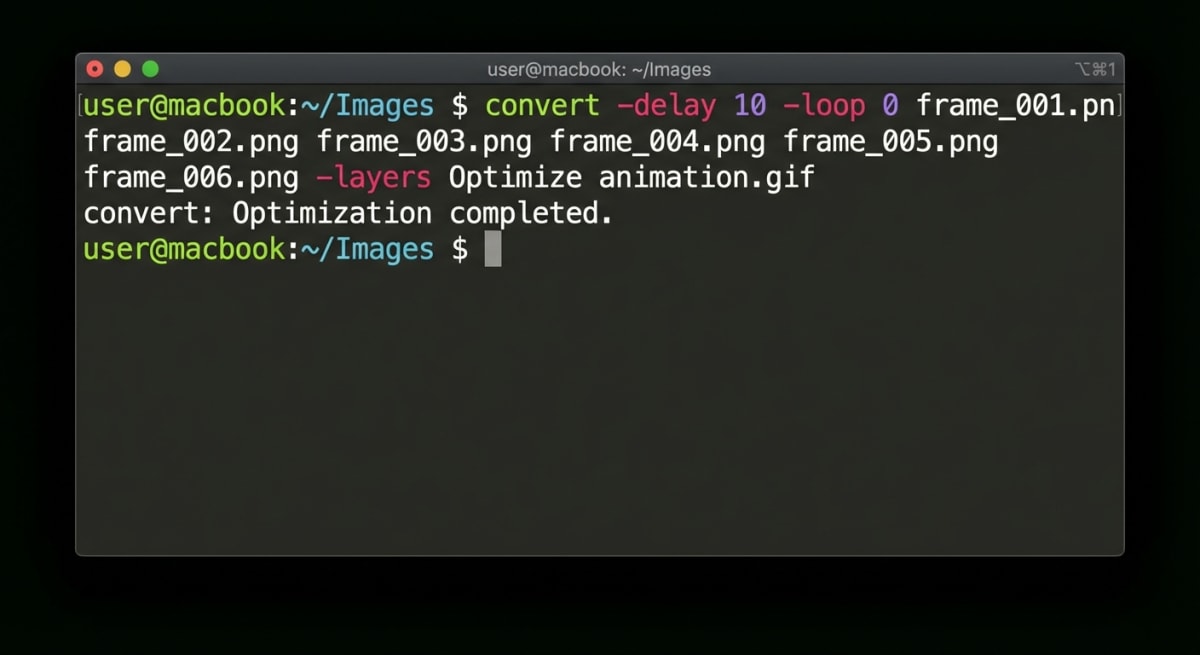
convert -delay 50 -loop 0 frame1.png frame2.png frame3.png output.gif-delay 50sets 0.5 seconds between frames (delay is in hundredths of a second).-loop 0means infinite looping.- List files in the order you want them to appear.
For a folder of sequentially named images:
convert -delay 30 -loop 0 -resize 640x frames/*.png slideshow.gifffmpeg
Install via Homebrew:
brew install ffmpegCreate a GIF from a folder of images:
ffmpeg -framerate 2 -pattern_type glob -i '*.png' -vf "scale=640:-1" output.gif-framerate 2shows 2 frames per second.scale=640:-1resizes to 640px wide, maintaining aspect ratio.
Optimizing CLI output
GIFs from ImageMagick can be large. Add optimization:
convert -delay 50 -loop 0 frames/*.png -layers Optimize output.gifOr use gifsicle for further compression:
brew install gifsicle
gifsicle -O3 --lossy=80 output.gif -o optimized.gif
Pro tip: Combine ImageMagick with a shell script to automate GIF creation. Capture a sequence of annotated screenshots, then convert them into a tutorial GIF with a single command.
Best for: Developers, automation scripts, and batch processing. Also great for CI pipelines that generate documentation GIFs automatically.
Method 5: Apple Shortcuts (automation)
Apple Shortcuts lets you build a reusable GIF maker workflow that lives in your menu bar or right-click menu.
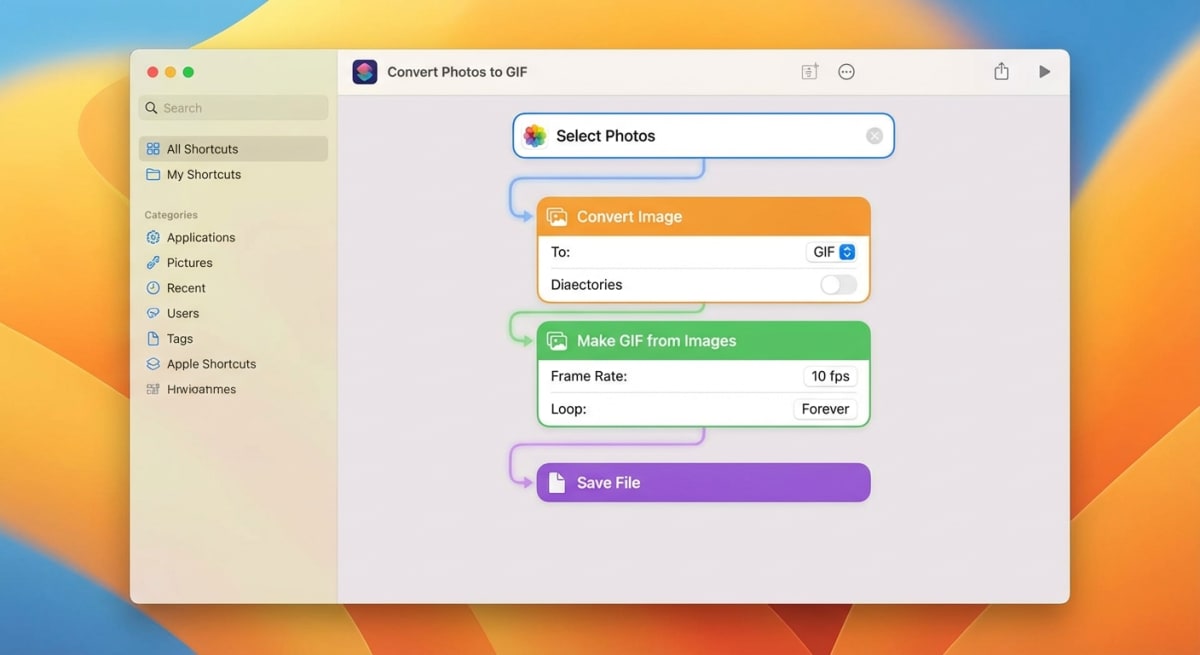
Building the shortcut
- Open Shortcuts (comes pre-installed on macOS Monterey and later).
- Click the + button to create a new shortcut.
- Add these actions in order:
- Select Photos (set to "Select Multiple")
- Make GIF (set seconds per photo — try 0.5)
- Save File (choose Desktop or a specific folder)
- Name it "Images to GIF" and add it to your menu bar.
Using the shortcut
- Click the shortcut from the menu bar, select your photos, and the GIF saves automatically.
- You can also trigger it from Finder: right-click selected images → Quick Actions → Images to GIF.
Advanced: Add to Finder right-click menu
- In the shortcut settings, enable Use as Quick Action and check Finder.
- Now select images in Finder → right-click → Quick Actions → Images to GIF.
Pro tip: Chain Shortcuts with other actions. Add a "Resize Image" step before "Make GIF" to scale images down automatically. Or add "Copy to Clipboard" at the end so the GIF is ready to paste into Slack or Messages.
Best for: Repeat workflows. Build it once, use it from your menu bar or right-click menu forever.
Optimizing your GIF for the web
Raw GIFs from any tool can be huge. We're talking 10MB+ for just a handful of high-res photos. Here's how to keep file sizes reasonable:
| Optimization | How | Impact |
|---|---|---|
| Reduce dimensions | Resize to 640px or 480px wide | Major size reduction |
| Lower frame count | Remove redundant frames | Fewer frames = smaller file |
| Increase compression | Use lossy optimization (gifsicle) | 40-60% smaller |
| Limit colors | Reduce from 256 to 128 or 64 colors | Noticeable savings |
| Shorten duration | Keep GIFs under 5 seconds | Less data overall |
Aim for under 5MB for web use and under 1MB for email. Most social platforms accept up to 15MB. But smaller loads faster and plays smoother.
For quick compression without installing anything, try our free GIF compressor tool — just drag, drop, and download.
If your GIF is still too large for your use case, consider converting it to MP4 for platforms that support video autoplay.
Best tool for your use case
| Method | Ease of Use | Quality Control | Best For |
|---|---|---|---|
| Automator | ⭐⭐⭐ | ⭐⭐ | Quick, no-install solution |
| PicGIF Lite | ⭐⭐⭐⭐⭐ | ⭐⭐⭐ | Visual drag-and-drop |
| Online tools | ⭐⭐⭐⭐ | ⭐⭐⭐ | One-off GIFs, no install |
| Terminal (CLI) | ⭐⭐ | ⭐⭐⭐⭐⭐ | Developers, batch automation |
| Shortcuts | ⭐⭐⭐⭐ | ⭐⭐⭐ | Repeatable workflows |
Our recommendation: Start with Shortcuts if you'll make GIFs regularly — it's built-in, fast, and reusable. Use ImageMagick if you need precise control or automation. Try PicGIF Lite for a one-time visual editor.
For GIFs captured from your screen (demos, tutorials, bug reports), a dedicated tool like ScreenSnap Pro records directly to GIF — no conversion step needed. Check out our guide on how to record GIFs on Mac for that workflow.
Frequently Asked Questions
Morgan
Indie DeveloperIndie developer, founder of ScreenSnap Pro. A decade of shipping consumer Mac apps and developer tools. Read full bio
@m_0_r_g_a_n_