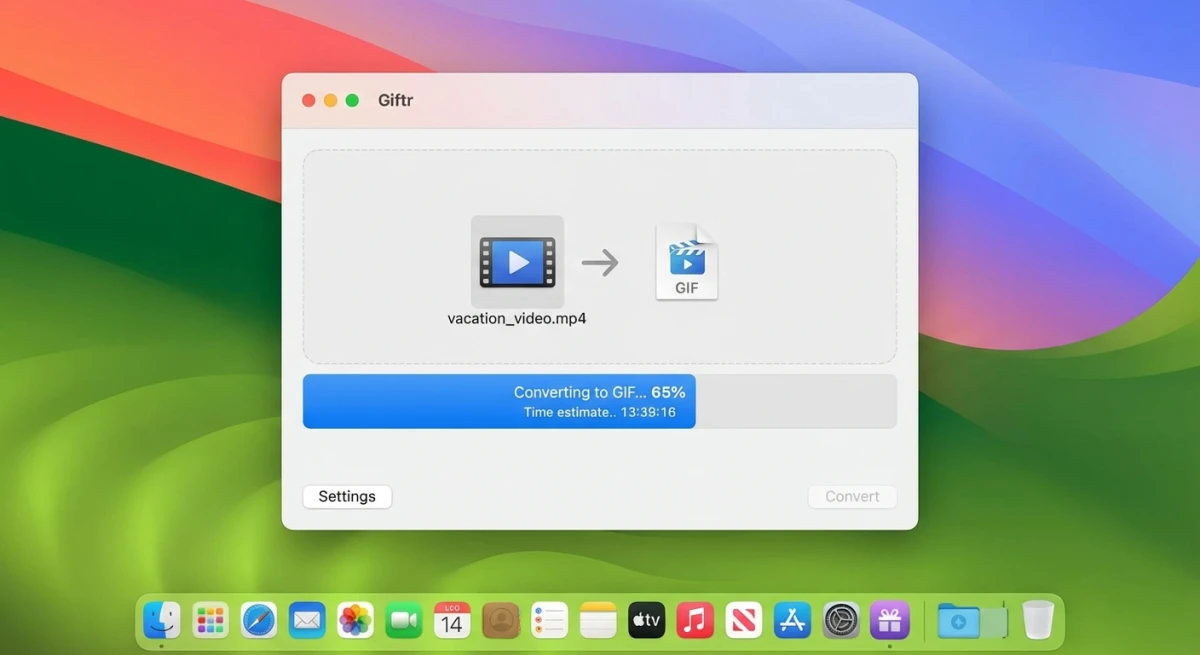
How to Convert Video to GIF on Mac (5 Methods) | 2026
Need to convert video to GIF on your Mac? GIFs are perfect for tutorials, Slack reactions, and GitHub demos. They loop, play anywhere, and need no video player. Tools like ScreenSnap Pro skip the conversion altogether by recording the screen straight to GIF.
This guide shows five ways to turn MP4, MOV, AVI, or WebM into a GIF. We'll start with free built-in tools. Then we'll cover the best apps. Finally, we'll show a smarter way that skips conversion.
Why Convert Video to GIF?
GIFs beat video files in several ways:
- Universal playback: GIFs play inline in Slack, Discord, GitHub, email, and websites. No player needed.
- Auto-looping: Great for showing actions or reactions on repeat
- Smaller file sizes: When optimized with a GIF compressor, GIFs are often smaller than video clips
- No sound required: Ideal for tutorials and demos that don't need audio
Common use cases include:
- Bug reports and feature demos on GitHub
- Quick tutorials in documentation
- Reactions and memes for team chat
- Product demonstrations for social media
- Design mockups and animations
If you're new to capturing content on Mac, start with our complete screenshot guide for the basics.
Method 1: macOS Shortcuts App (Free, Built-In)
The easiest way needs no downloads. It's built into macOS.
Step-by-Step Instructions
- Open the Shortcuts app (search with Spotlight:
⌘ + Space, type "Shortcuts") - Click the + button to create a new shortcut
- Search for "Make GIF" in the actions panel
- Add these actions in order:
- Get Selected Files or Select File
- Make GIF from Video
- Save File (or Copy to Clipboard)
- Run the shortcut and select your video file
Customization Options
The "Make GIF from Video" action lets you adjust:
- Seconds per photo: Controls frame rate (lower = smoother but larger file)
- Auto size: Toggles automatic dimension scaling
- Loop forever: Enables continuous looping
Pros: Free, no installation, native macOS integration
Cons: Limited control over quality, basic output options
Pro Tip: Create a Quick Action
Add your GIF shortcut to Finder's right-click menu:
- In Shortcuts, click the shortcut's name
- Click Shortcut Details (ⓘ icon)
- Enable Use as Quick Action and Finder
- Now right-click any video in Finder → Quick Actions → Your shortcut
Now you have a one-click video to gif converter in Finder. No app needed.
Method 2: Gifski (Free, Best Quality)
Gifski is a free Mac app that makes the best GIFs possible. It uses smart color handling across frames. The result? GIFs with rich colors that other tools can't match.
How to Use Gifski
- Download Gifski from the Mac App Store (free)
- Drag and drop your video file onto the app window
- Trim the video to the section you want using the timeline
- Adjust settings:
- Dimensions: Width and height in pixels
- Frame rate: 10-30 FPS (higher = smoother but larger)
- Quality: Slider from smallest file to best quality
- Loop: Choose how many times the GIF loops
- Click Convert and save your GIF
Supported Formats
Gifski supports all video formats that macOS can play:
- MP4 (H.264, HEVC)
- MOV (ProRes, H.264)
- AVI
- WebM
Pros: Best quality, drag-and-drop, precise control, free
Cons: macOS 14+ required for latest version
Why Gifski Produces Better GIFs
Most GIF tools use one color palette for all frames. That limits colors to 256. Gifski is smarter. It adapts colors for each frame. It also smooths transitions between frames.
The result? GIFs that look almost as good as the source video. Colors are accurate. Gradients are smooth.
Gifski Advanced Features
- Bounce mode: Creates yo-yo GIFs that play forward then backward
- Share extension: Convert videos directly from other apps
- System service: Right-click any video file to convert
- Keyboard shortcuts:
⌘+Cto copy,⌘+Sto save after conversion
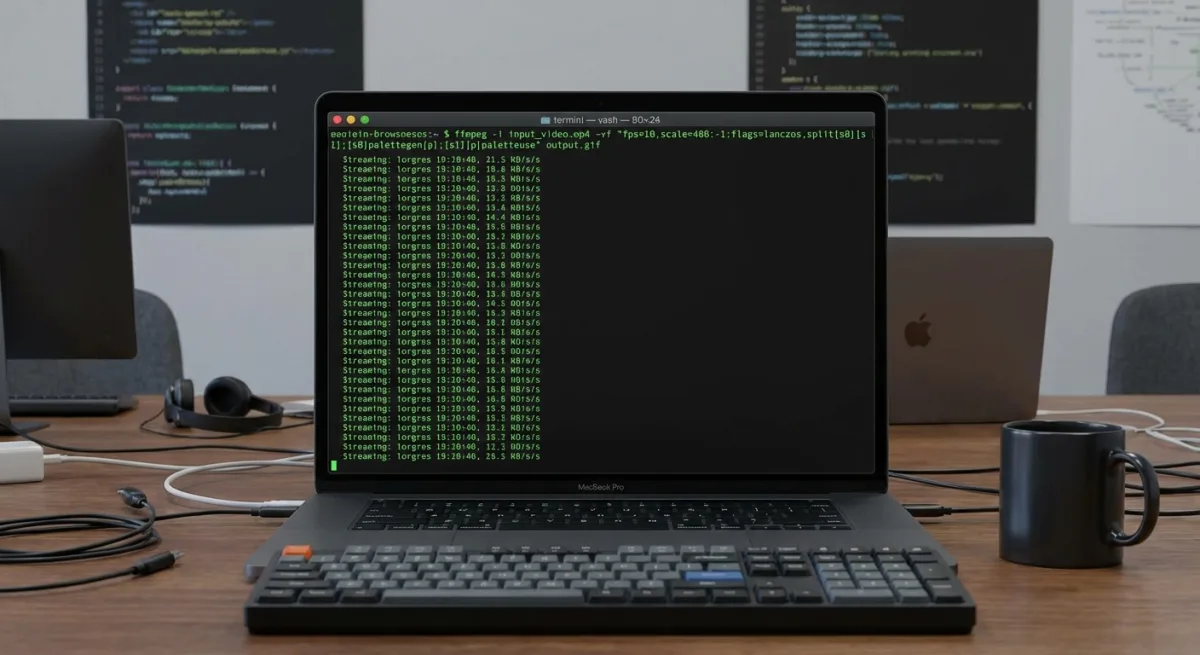
Method 3: FFmpeg Command Line (For Developers)
Love the Terminal? FFmpeg gives you full control over your mp4 to gif conversion. It's great for batch jobs and scripts.
Install FFmpeg
# Using Homebrew
brew install ffmpeg
Basic Conversion
# Convert entire video to GIF
ffmpeg -i input.mp4 output.gif
High-Quality Conversion (Recommended)
# Generate color palette for better quality
ffmpeg -i input.mp4 -vf "fps=15,scale=480:-1:flags=lanczos,palettegen" palette.png

# Apply palette to create GIF
ffmpeg -i input.mp4 -i palette.png -lavfi "fps=15,scale=480:-1:flags=lanczos [x]; [x][1:v] paletteuse" output.gif
This two-step method gives you better colors than the basic command.
Useful FFmpeg Flags
| Flag | Description | Example |
|---|---|---|
-t | Duration in seconds | -t 5 (5-second clip) |
-ss | Start time | -ss 00:00:10 (start at 10s) |
fps= | Frame rate | fps=15 |
scale= | Dimensions | scale=640:-1 (640px width, auto height) |
Pros: Maximum control, scriptable, batch processing, free
Cons: Command line required, steeper learning curve
Batch Converting Multiple Videos
FFmpeg shines at batch work. Here's a script to convert all MP4 files in a folder:
#!/bin/bash
# batch-to-gif.sh - Convert all MP4s in current folder to GIF

for video in *.mp4; do
    # Get filename without extension
    name="${video%.mp4}"

    # Generate palette
    ffmpeg -i "$video" -vf "fps=12,scale=480:-1:flags=lanczos,palettegen" -y palette.png

    # Create GIF
    ffmpeg -i "$video" -i palette.png -lavfi "fps=12,scale=480:-1:flags=lanczos [x]; [x][1:v] paletteuse" -y "${name}.gif"

    echo "Converted: $video → ${name}.gif"
done

# Cleanup
rm -f palette.png
Save this as batch-to-gif.sh. Make it runnable with chmod +x batch-to-gif.sh. Then run it in any folder with MP4 files.
FFmpeg One-Liner for Quick Conversions
Want a quick one-liner? Skip the palette step (faster, but lower quality):
ffmpeg -i input.mp4 -vf "fps=12,scale=480:-1" -gifflags +transdiff output.gifThe -gifflags +transdiff option saves space. It only stores changes between frames.
Method 4: Online Converters (No Installation)
Need a quick video to gif converter with no install? Online tools work right in your browser.
Best Free Online Tools
| Tool | Max File Size | Features |
|---|---|---|
| ezgif.com | 100MB | Trim, resize, optimize |
| CloudConvert | 100MB | Batch conversion, API |
| Kapwing | 250MB | Trim, captions, effects |
When to Use Online Tools
- Quick, one-off conversions
- No software installation allowed
- Simple videos without privacy concerns
Pros: No installation, works on any Mac, free
Cons: File size limits, upload required, privacy concerns, slower
Step-by-Step: Using ezgif.com
- Go to ezgif.com/video-to-gif
- Click Choose File and select your video (or paste a URL)
- Click Upload video
- Use the timeline to trim the clip to your desired section
- Set output options:
- Start time and End time for precise trimming
- Size: Auto, original, or custom width
- Frame rate: 10-25 FPS
- Click Convert to GIF
- Download your finished GIF
Privacy Considerations
When using online tools, your video goes to their servers. For private content, use offline methods like Gifski or ffmpeg instead.
Method 5: Record GIFs Directly (Skip Conversion)
Here's a smarter way: skip the video step. Record as GIF from the start.
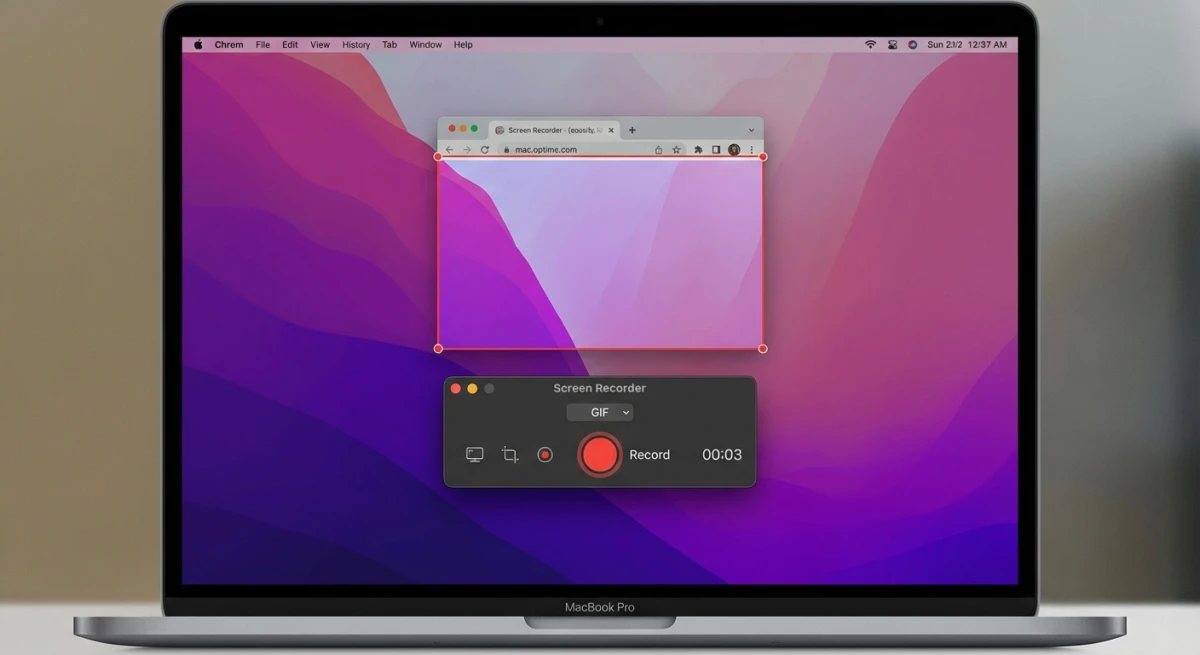
Tools like ScreenSnap Pro let you capture any screen area as a GIF. The perks:
- Skip conversion—record once, share right away
- Set frame rate while recording for smaller files
- Instant sharing via cloud links
- Add arrows and highlights before sharing
This works great for recording GIFs on Mac. Perfect for docs, bug reports, or tutorials. Why convert when you can capture direct?
When Direct Recording Makes Sense
Choose direct GIF recording when:
- You're capturing screen content (not existing video files)
- You need to share quickly without post-processing
- You want to add annotations or highlights
- You're creating tutorials or bug reports
Choose video-to-GIF conversion when:
- You already have a video file to work with
- You're extracting clips from longer recordings
- You're working with downloaded content
- You need specific sections from existing footage
Tired of plain screenshots? Try ScreenSnap Pro.
Beautiful backgrounds, pro annotations, GIF recording, and instant cloud sharing — all in one app. Pay $39 once, own it forever.
See what it doesBest Video to GIF Settings
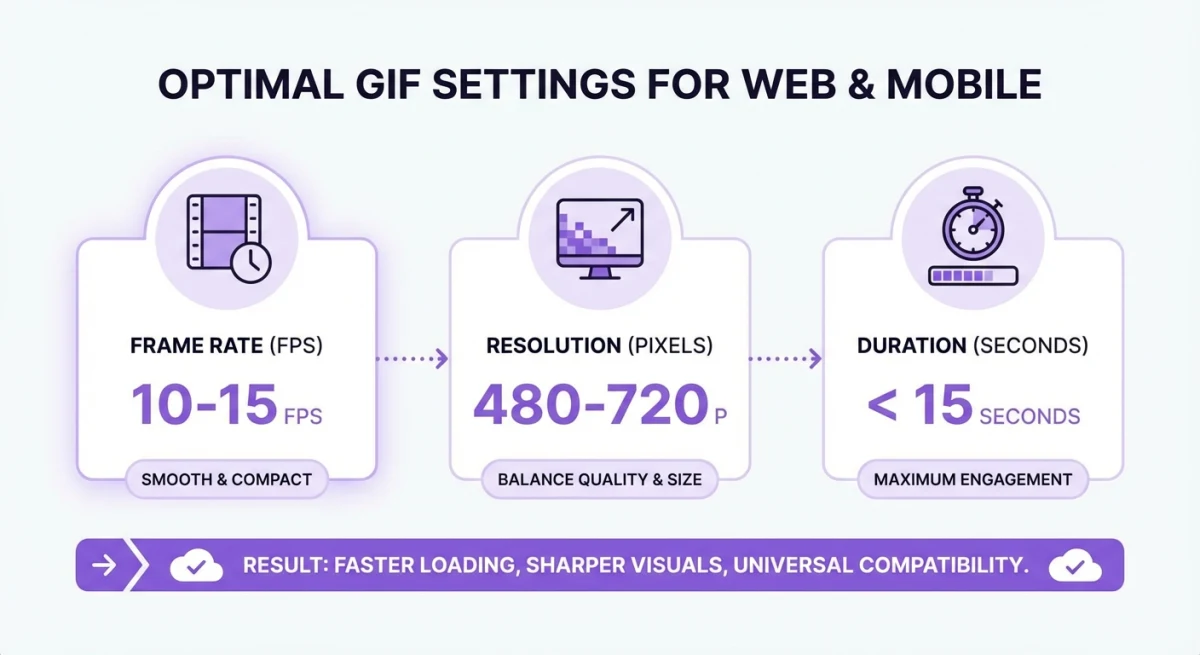
Balance quality and file size with these settings:
Frame Rate
- 10-15 FPS: Best for most use cases (tutorials, demos)
- 20-30 FPS: For smooth animations (design work, gaming clips)
- 5-10 FPS: For smaller files when smoothness isn't critical
Resolution
- 480px width: Good for Slack, Discord, documentation
- 640px width: Better for GitHub, websites
- 720px width: High quality for presentations
Duration
- Under 15 seconds: Keeps file size manageable
- 5-10 seconds: Ideal for reaction GIFs
- 10-30 seconds: Maximum for tutorials
Platform-Specific Limits
| Platform | Max Size | Recommended |
|---|---|---|
| Discord | 8-25 MB (tier dependent) | Under 8 MB |
| Slack | 100 MB | Under 10 MB |
| GitHub | 10 MB | Under 5 MB |
| Twitter/X | 15 MB | Under 5 MB |
| 10 MB | Under 2 MB |
How to Optimize GIF File Size
Big GIFs are hard to share. Here's how to shrink them:
- Reduce size: 480px width works for most uses
- Lower frame rate: 10-15 FPS is enough
- Shorten clips: Cut extra frames
- Reduce colors: 128-256 colors still looks good
- Use lossy compression: gifsicle helps a lot
Working with existing GIFs? Check our guide on how to reduce GIF file size.
Using gifsicle for Lossy Compression
After making your GIF, shrink it more with gifsicle:
# Install gifsicle
brew install gifsicle

# Optimize existing GIF (lossless)
gifsicle -O3 input.gif -o optimized.gif

# Lossy compression (--lossy=30 to --lossy=200)
gifsicle -O3 --lossy=80 input.gif -o smaller.gif
A lossy value of 80 cuts file size by 30-50%. Quality loss is minor.
Real-World Optimization Example
Starting with a 15-second screen recording:
| Settings | File Size | Quality |
|---|---|---|
| 720p, 30 FPS | 12 MB | Excellent |
| 480p, 15 FPS | 3.5 MB | Great |
| 480p, 10 FPS + lossy | 1.8 MB | Good |
| 320p, 10 FPS + lossy | 0.9 MB | Acceptable |
For Discord (8 MB limit) or email, use 480p at 15 FPS. For GitHub (10 MB limit), you have more room.
Comparison: All Methods at a Glance
| Method | Best For | Quality | Ease | Cost |
|---|---|---|---|---|
| macOS Shortcuts | Quick conversions | ★★★☆☆ | ★★★★★ | Free |
| Gifski | Best quality | ★★★★★ | ★★★★☆ | Free |
| FFmpeg | Developers, batch | ★★★★★ | ★★☆☆☆ | Free |
| Online Tools | Quick, no install | ★★★☆☆ | ★★★★★ | Free |
| Direct Recording | Skip conversion | ★★★★☆ | ★★★★★ | Varies |
When to Use MOV vs MP4 for GIF Conversion
Starting with a MOV file (common from QuickTime)? Both MOV and MP4 convert to GIF just fine. Key differences:
- MOV: Native Mac format, larger files, ProRes support
- MP4: Works everywhere, smaller files, widely supported
For MOV-specific steps, see our guide on converting MOV to GIF on Mac. Need to edit your recording first? Check our guide on editing screen recordings on Mac.
Troubleshooting Common Issues
GIF is too large
- Lower resolution (try 480px width)
- Drop frame rate to 10-12 FPS
- Shorten the clip
- Use Gifski's quality slider
Colors look wrong
- Use Gifski (best color handling)
- With ffmpeg, use the two-step palette method
- Stick to 256 colors for support
GIF is choppy
- Raise frame rate to 15-20 FPS
- Make sure source video is smooth
- Check that your tool isn't dropping frames
Conversion fails
- Try a different method
- Check that the format is supported
- For MOV files, convert to MP4 first
- Make sure you have disk space for temp files
GIF won't loop
- Check the loop setting in your tool
- Some tools default to single-play. Look for "loop forever."
- In ffmpeg, add
-loop 0for endless looping
Audio not included
This is normal. GIFs don't support audio. If you need sound:
- Keep the video as MP4/WebM
- Link to the full video next to the GIF
- Use video platforms that play inline
Alternatives to GIF Format
GIFs work everywhere. But newer formats offer better quality and smaller files:
WebP Animation
- Pros: Smaller files, better colors, works in most browsers
- Cons: Less universal, some email apps don't show it
- Convert:
ffmpeg -i input.mp4 -vf "fps=15,scale=480:-1" output.webp
APNG (Animated PNG)
- Pros: Full colors (24-bit), transparency, smaller than GIF
- Cons: Limited support, larger than WebP
- Best for: High-quality see-through animations
Short Video (MP4/WebM)
- Pros: Tiny files, great quality, audio works
- Cons: Needs a player, won't auto-play everywhere
- Best for: Social media, modern websites
For max support, stick with GIF. For modern web apps, try WebP.
Frequently Asked Questions
Conclusion
Converting video to gif on Mac is easy with these five methods:
- macOS Shortcuts: Quick, free, built-in
- Gifski: Best quality, still free
- FFmpeg: Full control for devs
- Online tools: No install needed
- Direct GIF recording: Skip conversion
For most people, Gifski gives the best mix of quality and ease. Convert videos often? Try recording as GIF from the start. It's faster and makes smaller files.
Need to record your screen? See our guide on screen recording with audio on Mac. Or try how to record GIFs on Mac for the direct way.
For keyboard shortcuts, our Mac screenshot shortcuts guide covers built-in methods. Want pro-looking outputs? See how to annotate screenshots on Mac.
Morgan
Indie DeveloperIndie developer, founder of ScreenSnap Pro. A decade of shipping consumer Mac apps and developer tools. Read full bio
@m_0_r_g_a_n_