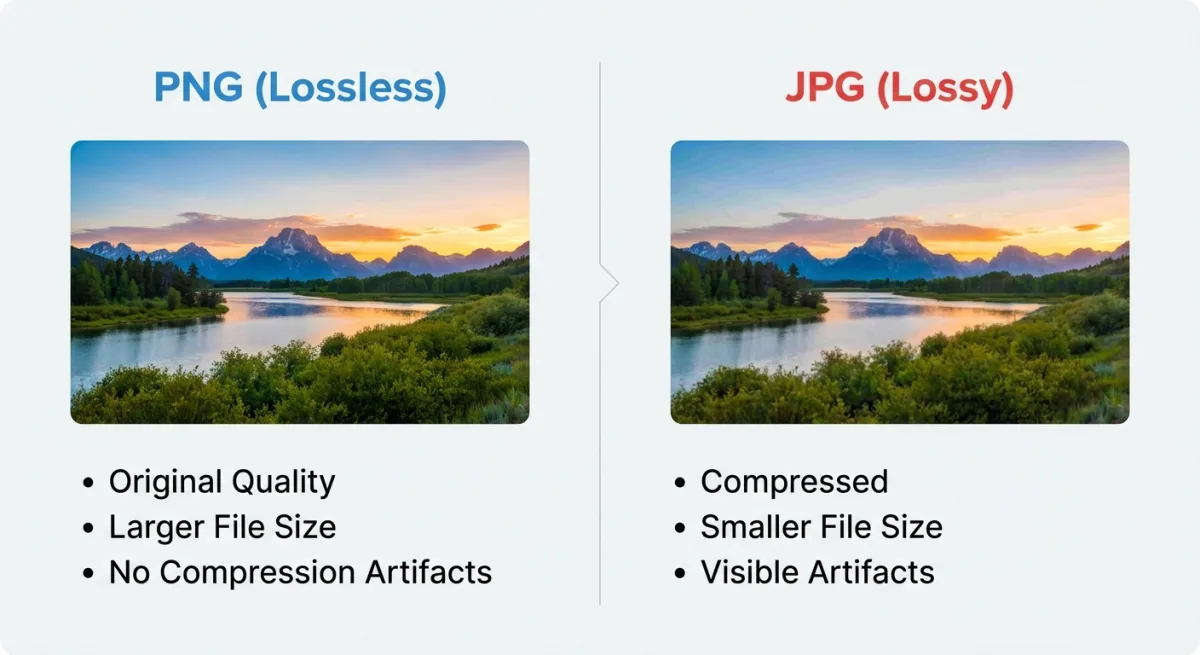
How to Censor Image Files: Best Blur & Pixelate Tools (2026)
Need to censor image files before sharing them? Maybe you want to hide a face in a photo. Or blur out private text in a screenshot. Or pixelate a license plate. The right tool makes this fast and easy. This guide covers 8 of the best ways to censor an image — free online tools and Mac apps like ScreenSnap Pro — so you can protect privacy in seconds.
Why You Need to Censor Image Files Before Sharing
Privacy matters more than ever. Every time you share a photo or screenshot, you risk exposing private info. Here's why you should censor image files before posting them anywhere:
- Legal rules — GDPR and CCPA say you must hide personal info in shared images. Break these rules and you could face big fines.
- Social media safety — Photos with visible addresses, plates, or faces can lead to doxxing. It's not worth the risk.
- Work screenshots — Dashboards, emails, and Slack chats often show data that should stay private. Always censor before sharing with clients or in bug reports.
- Blog and news content — Writers and journalists often need to hide graphic or private content while still telling the story.
The good news? You can censor an image in just a few seconds with the right tool.
How to Censor Image Content: 4 Main Methods
Before you pick a tool, know the four main ways to censor an image. Each one works best in different situations.
Blur
Blur smooths out details so faces and text become unreadable. It looks natural. Most tools let you set how strong the blur is. Use heavier blur for text and lighter blur for background faces.
Best for: Faces in group photos, background details, natural-looking edits.
Pixelate
Pixelation swaps an area with big colored blocks. It's the classic "censored" look. It's harder to reverse than light blur. People can tell right away that something was hidden on purpose.
Best for: License plates, private text, screenshots with personal data.
Solid color overlay
A black bar or colored box covers the area completely. Nothing to reverse. This is the most secure way to censor image content. You see it in legal docs and government files.
Best for: Full redaction, legal documents, top security.
Emoji or sticker overlay
Covering faces with emojis adds a fun, casual feel. This works great on social media. You hide a face without making the photo feel heavy.
Best for: Social media posts, fun content, kids' faces.
What to Censor in Your Images (Checklist)
Not sure what to hide? Here's a quick list of things you should always censor before sharing:
- Faces — Anyone who didn't consent to being in the photo. This includes strangers in the background.
- Email addresses — Even partial emails can be used for spam or phishing.
- Phone numbers — Both personal and work numbers should stay hidden.
- Home addresses — Check mail, packages, and signs visible in photos.
- License plates — Easy to trace back to an owner.
- Account numbers — Bank info, order numbers, or user IDs.
- API keys and passwords — Common in developer screenshots. Always censor these.
- Location data — Street signs, business names, and GPS tags in EXIF data.
When in doubt, censor it. It takes seconds and saves headaches later. You can also strip EXIF metadata from your images to remove hidden location and camera data.
Best Free Online Tools to Censor Image Files
Online tools run in your browser. No install needed. They're great for quick, one-off tasks.
1. Fotor
Fotor gives you blur, pixelation, and solid bars in one editor. The interface is clean. You drag a slider to set how strong the effect is. It also has a set of censor bar graphics you can drop onto images.
Pros:
- Multiple censoring methods (blur, pixelate, black bar)
- Adjustable intensity
- Library of censor bar stickers
- No signup required for basic edits
Cons:
- Watermark on free exports (removable with account)
- Can feel slow with large images
- Requires internet connection
Best for: Quick censoring with multiple method options.
2. Ezgif
Ezgif stands out because it can censor animated GIFs. Most tools can't do this. Upload your file, draw a box over what you want to hide, and pick blur, pixelate, or solid fill. It also works with JPG, PNG, and WebP.
Pros:
- Works with animated GIFs, WebP, and APNG
- Simple drag-to-select interface
- Adjustable pixel size and blur radius
- No signup, completely free
Cons:
- Basic interface (no design polish)
- 200MB file size limit
- One selection area at a time
Best for: Censoring animated GIFs and quick one-off edits.
3. PineTools
PineTools does one thing well — blur or pixelate an area. No accounts. No frills. Pick a region, choose your method, and download the result.
Pros:
- No signup, no ads (mostly)
- Fast processing
- Precise coordinate input option
Cons:
- Very basic UI
- No drag-to-select (coordinate-based)
- Limited to one area per operation
Best for: Technical users who want fast, no-nonsense censoring.
4. Pixelied
Pixelied is a full design editor that includes blur and pixelate. If you need to censor a photo and add text, resize, or make other edits, it does it all in one place.
Pros:
- Full design editor with censoring features
- Batch export options
- Templates for social media
Cons:
- Censoring is buried in editing tools (not the primary focus)
- Free plan has limited exports
- Slower load times than dedicated tools
Best for: Users who need censoring as part of a larger editing workflow.
Best Mac Apps to Censor Image Files Locally
Desktop apps give you more control and faster speed. They also keep your files on your Mac — no uploading to a server. If you censor images often, a Mac app saves real time.
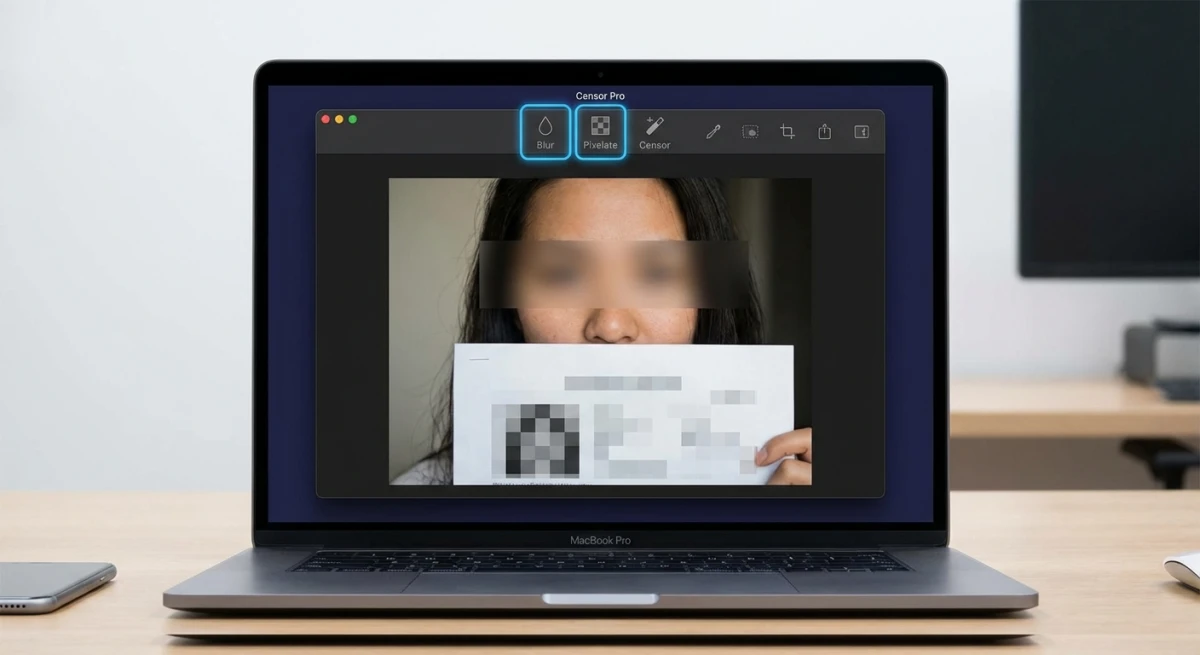
5. ScreenSnap Pro
If you take screenshots and need to censor them before sharing, ScreenSnap Pro does both in one step. Capture, blur or pixelate, then share. No app switching needed.
Key features:
- Blur and pixelate with adjustable strength
- Capture → censor → share in one app
- Output is always flattened (no one can undo the censoring)
- One-time purchase — no monthly fees
The flattened output matters a lot. Some tools save blur as an editable layer. That means someone could remove it. ScreenSnap Pro bakes the blur right into the pixels. The original data is gone for good.
Best for: Mac users who regularly capture and censor screenshots.
6. Preview (built-in workaround)
macOS Preview has no blur or pixelate tool. But you can use shapes to cover things up. Draw a black rectangle over what you want to hide and save.
How to do it:
- Open the image in Preview
- Click the Markup toolbar (pen icon)
- Select the rectangle shape tool
- Draw over the area to censor
- Set fill color to black and border to none
- Save the image
Pros:
- Already installed on every Mac
- No downloads needed
Cons:
- No blur or pixelate — only solid color blocks
- Shape layers might be removable if saved as PDF
- Tedious for multiple areas
If you need more control than solid rectangles, check out our guide on how to blur or pixelate sensitive information on Mac for better options.
7. Shottr
Shottr is a free screenshot tool for Mac that includes basic blur and pixelate annotation tools. It's lightweight and fast, though it doesn't offer as many annotation options as some paid alternatives.
Pros:
- Free
- Fast and lightweight
- Basic blur/pixelate included
Cons:
- Limited censoring controls (no intensity adjustment)
- Fewer annotation tools overall
- No cloud sharing
Best for: Users who want a free, basic censoring option on Mac.
Tired of plain screenshots? Try ScreenSnap Pro.
Beautiful backgrounds, pro annotations, GIF recording, and instant cloud sharing — all in one app. Pay $39 once, own it forever.
See what it doesBest mobile apps for censoring
Sometimes you need to censor a photo right from your phone before sharing it on social media or messaging apps.
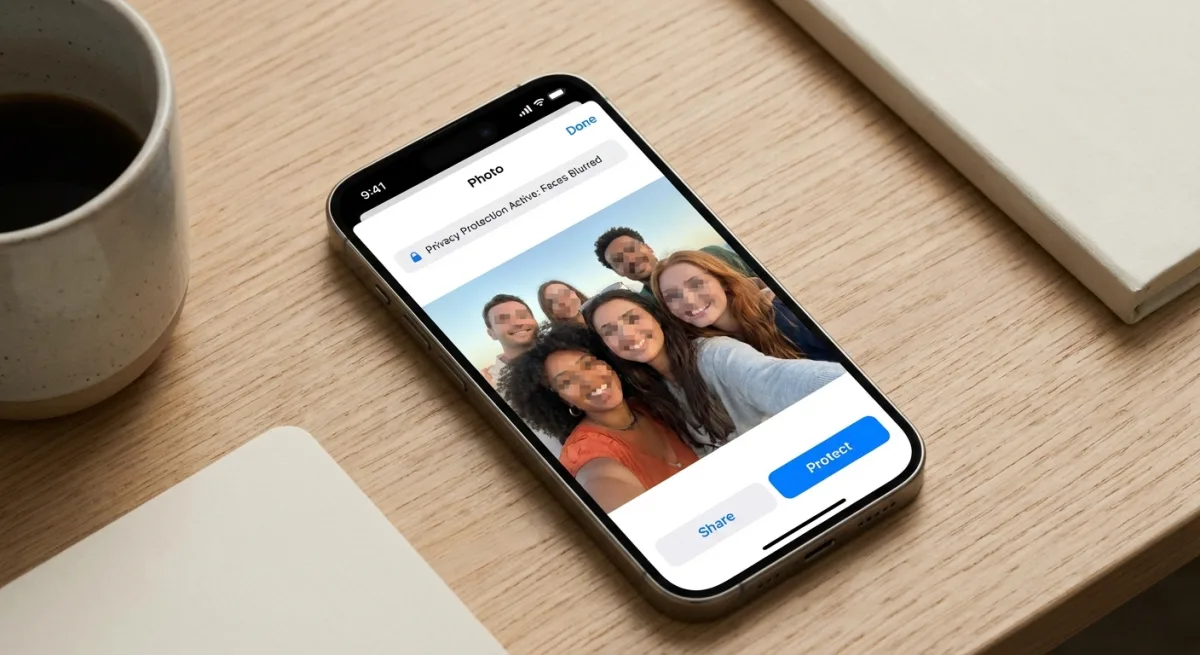
8. Censor: Blur & Pixelate Photos (iOS)
Censor app is a dedicated iOS app for blurring and pixelating photos. It's designed specifically for censoring, so the interface is streamlined — pick blur or pixelate, paint over the area with your finger, and export.
Pros:
- Purpose-built for censoring
- Finger painting interface (intuitive on mobile)
- Multiple blur/pixelate styles
- Affordable one-time purchase
Cons:
- iOS only
- Limited editing beyond censoring
- No batch processing
Best for: iPhone users who frequently censor photos before sharing.
Android alternative: Point Blur offers similar functionality for Android with a finger-painting blur interface.
Best for GIF censoring
Most tools only handle still images. Need to censor an animated GIF? Your options are limited.
Ezgif is the best free option here. It applies blur or pixelate to every frame of your GIF. No other free tool does this well.
Why GIF censoring is different:
A GIF has dozens or hundreds of frames. You need the censored area on every single frame. Here's what to know:
- The censor effect must apply to all frames, not just the first
- Moving subjects may need frame-by-frame tracking
- File sizes often grow after you censor a GIF
For most cases — like hiding a name in a screen recording — a static box works fine. You only need frame tracking if the subject moves around.
Mac users who record GIFs can use ScreenSnap Pro to annotate screenshots before or after capture. For frame-by-frame GIF work, Ezgif is more practical.
If you're working with GIFs regularly, you might also find our GIF compressor useful for reducing file sizes after censoring.
How to Censor an Image Step by Step
No matter which tool you pick, the basic steps are the same. Here's how to censor an image in under a minute:
- Open your image — Upload it to an online tool or open it in a Mac app.
- Pick your method — Choose blur, pixelate, or solid color. Use blur for faces. Use pixelate or solid bars for text.
- Select the area — Draw a box or paint over what you want to hide. Be generous — better to hide too much than too little.
- Set the strength — Crank up the blur or pixelation. Light effects can sometimes be reversed. Go heavy.
- Check the result — Zoom in on the censored area. Can you still read any text? If yes, go stronger.
- Export as a flat image — Save as PNG or JPG. Avoid PSD or layered formats that let someone undo the effect.
- Strip metadata — Remove EXIF data (GPS, timestamps) before sharing.
That's it. The whole process takes 30–60 seconds once you know the tool.
Security Tips: Not All Censoring Is Equal
Most guides skip this part. Not all censoring is equally safe. If you handle truly private data, read this.

Flattened vs. layered output
Some tools save the blur as a separate layer. This is risky. Someone can open the file in Photoshop and delete the layer. The original content appears right away.
Safe tools flatten the output. They change the pixels for good. The old data is gone.
How to check: Open your censored image in a photo editor. Try to select the blur area. If you can move it, it's a layer — not safe.
Light blur can be reversed
Studies from University of Texas show that light blur can sometimes be reversed. This is especially true for text. If you're hiding passwords, API keys, or account numbers, use heavy blur. Or better yet, use a solid color bar.
Pro tip: For max safety, use two methods. First pixelate the area. Then cover it with a black box. This makes it nearly impossible to reverse.
Metadata matters
Even after you censor the image, it may still hold EXIF metadata. This includes GPS location, camera model, and timestamps. Always strip metadata before sharing. You can check what data your images hold with our image metadata viewer.
Batch censoring considerations
Got a bunch of images to censor? Online tools make you upload and download each one. Desktop apps like ScreenSnap Pro let you work locally. No upload delays. This adds up fast when you have 10+ images.
For teams, make a simple checklist. The most missed items are: faces, email addresses, phone numbers, account IDs, and location data.
Quick comparison table
| Tool | Type | Blur | Pixelate | Solid bar | GIF support | Price |
|---|---|---|---|---|---|---|
| Fotor | Online | ✅ | ✅ | ✅ | ❌ | Free (watermark) |
| Ezgif | Online | ✅ | ✅ | ✅ | ✅ | Free |
| PineTools | Online | ✅ | ✅ | ❌ | ❌ | Free |
| Pixelied | Online | ✅ | ✅ | ❌ | ❌ | Freemium |
| ScreenSnap Pro | Mac app | ✅ | ✅ | ✅ | ❌ | One-time purchase |
| Preview | Mac (built-in) | ❌ | ❌ | ✅ | ❌ | Free |
| Shottr | Mac app | ✅ | ✅ | ❌ | ❌ | Free |
| Censor app | iOS | ✅ | ✅ | ❌ | ❌ | Paid |
Which tool should you use?
The best censoring tool depends on your workflow:
- Quick one-off censoring → Use Fotor or Ezgif (online, no install needed)
- Regular screenshot censoring on Mac → ScreenSnap Pro gives you capture + censor in one step
- Animated GIF censoring → Ezgif is the only reliable free option
- Maximum security → Use any tool that flattens output + solid color overlay
- Mobile censoring → Censor app (iOS) or Point Blur (Android)
- Free Mac option → Shottr for basic blur/pixelate
- Already have Preview open → Black rectangle overlay works in a pinch
If you take screenshots often on Mac, a local tool like ScreenSnap Pro or Shottr saves a lot of time. No uploading. No waiting. Just censor and share.
Want more tips? Check out our guides on editing screenshots on Mac and copying text from screenshots using OCR. You can also blur sensitive info on Mac with a step-by-step walkthrough, or — for stripping logos rather than hiding them — see our best free watermark removers comparison.
Frequently Asked Questions
Morgan
Indie DeveloperIndie developer, founder of ScreenSnap Pro. A decade of shipping consumer Mac apps and developer tools. Read full bio
@m_0_r_g_a_n_