Screenshot to Text: Extract Text from Screenshots (2026)
Screenshot to text conversion lets you copy editable text from any image. Also known as OCR, it turns locked content into something you can edit, search, and share. Grabbing text from a PDF? Extracting code from an error message? Copying a quote from a social post? OCR makes it instant — and pairing it with a capture tool like ScreenSnap Pro gives you a clean source image to feed into the OCR engine.
In this guide, you'll learn four reliable methods to extract text from screenshots on Mac. We cover built-in tools and dedicated apps that handle handwriting and code.
What Is Screenshot-to-Text (OCR)?
OCR stands for Optical Character Recognition. It scans an image, identifies letter shapes, and converts them into editable text. Then you just copy and paste.
An OCR screenshot converter works in three stages:
- Preprocessing: The image gets cleaned up. Contrast is enhanced, skew corrected, noise removed.
- Character recognition: Algorithms analyze pixel patterns. They match them against known letter forms.
- Post-processing: The recognized text is refined for accuracy. Language dictionaries help catch errors.
Modern OCR can recognize:
- Printed text (documents, books, signs)
- Screen content (app interfaces, web pages)
- Code snippets and terminal output
- Handwritten notes (with varying accuracy)
- Multiple languages (including non-Latin scripts)
The best OCR tools process images in seconds. They maintain high accuracy even with imperfect image quality. Need to copy text from image content? Extract data from scanned documents? OCR makes it all editable.
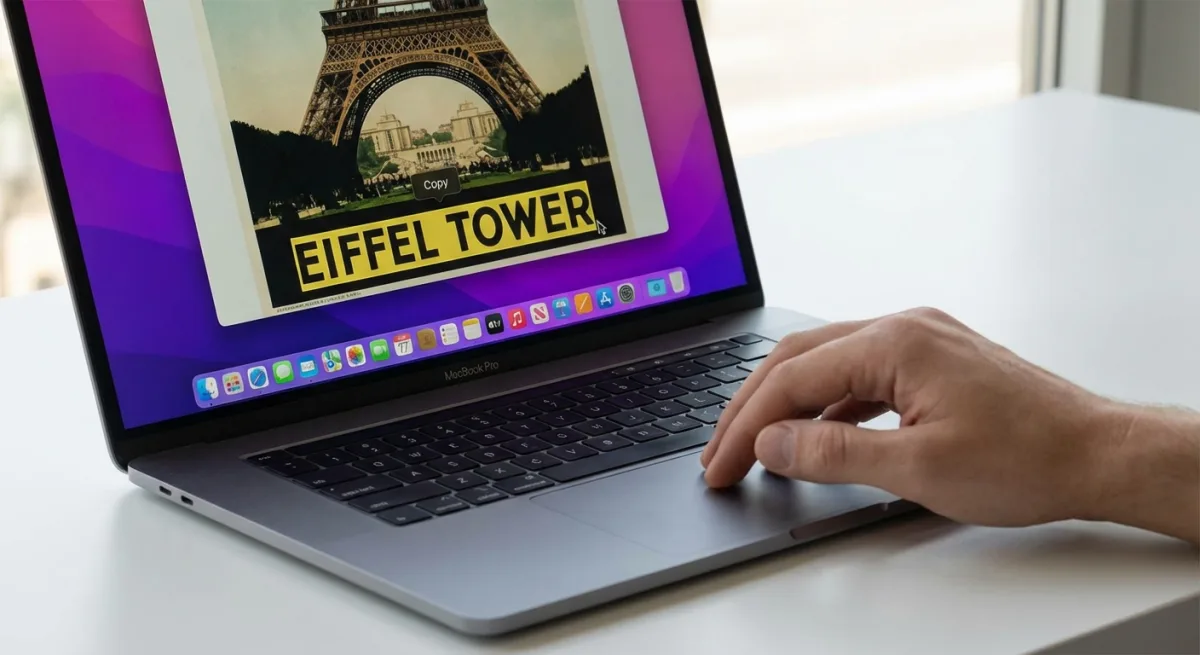
Method 1: Live Text on Mac (Built-in, Free)
Running macOS Monterey (12.0) or later? Live Text is built right into your Mac. It works in Preview, Photos, Quick Look, and Safari. No setup needed.
How to use Live Text
- Take a screenshot using keyboard shortcuts (
⌘ + Shift + 4) - Open the screenshot in Preview or Quick Look (press Space in Finder)
- Hover over any text in the image—your cursor changes to an I-beam
- Click and drag to select text, then
⌘ + Cto copy
Live Text pros and cons
Pros:
- Free and built into macOS
- Works automatically, no extra steps
- Handles most printed text accurately
- Available in Photos app for your photo library
Cons:
- Can't process images in bulk
- Struggles with handwriting and stylized fonts
- No way to copy all text at once
- Requires macOS Monterey or newer
Live Text is perfect for occasional use. Need to copy text from screenshots regularly? A dedicated OCR tool will save you time.
Live Text keyboard shortcut
Live Text doesn't have a dedicated shortcut. But you can speed up the workflow:
- Use
⌘ + Shift + 4to capture a screenshot - Press Space bar in Finder to Quick Look the image
- Immediately select and copy the text
Want even faster extraction? A screenshot text recognition tool copies directly to your clipboard. No files to save.
Method 2: ScreenSnap Pro Instant OCR
ScreenSnap Pro combines screenshot capture with instant text extraction. No need to take a screenshot, open it, then select text. You extract text directly during capture.
How it works
- Press the OCR shortcut
- Draw a selection around the text you want
- Text is instantly copied to your clipboard
No file saved. No extra apps to open. The text is ready to paste.
This is especially useful when you're:
- Copying error messages from apps that don't allow text selection
- Grabbing code snippets from documentation screenshots
- Extracting data from charts or locked PDFs
- Working with legacy software that doesn't support copy/paste
ScreenSnap Pro handles OCR entirely on your Mac. No cloud upload required. Your content stays private.
When instant OCR saves time
Think about how often you extract text. If it's:
- Daily: You'll save 20+ minutes per week with one-step OCR
- Weekly: Built-in Live Text probably suffices
- For specific tasks (like copying code): A dedicated tool pays off quickly
The difference adds up fast. "Screenshot → open → select → copy" versus just "select → copied." Developers, writers, and researchers notice the time savings quickly.
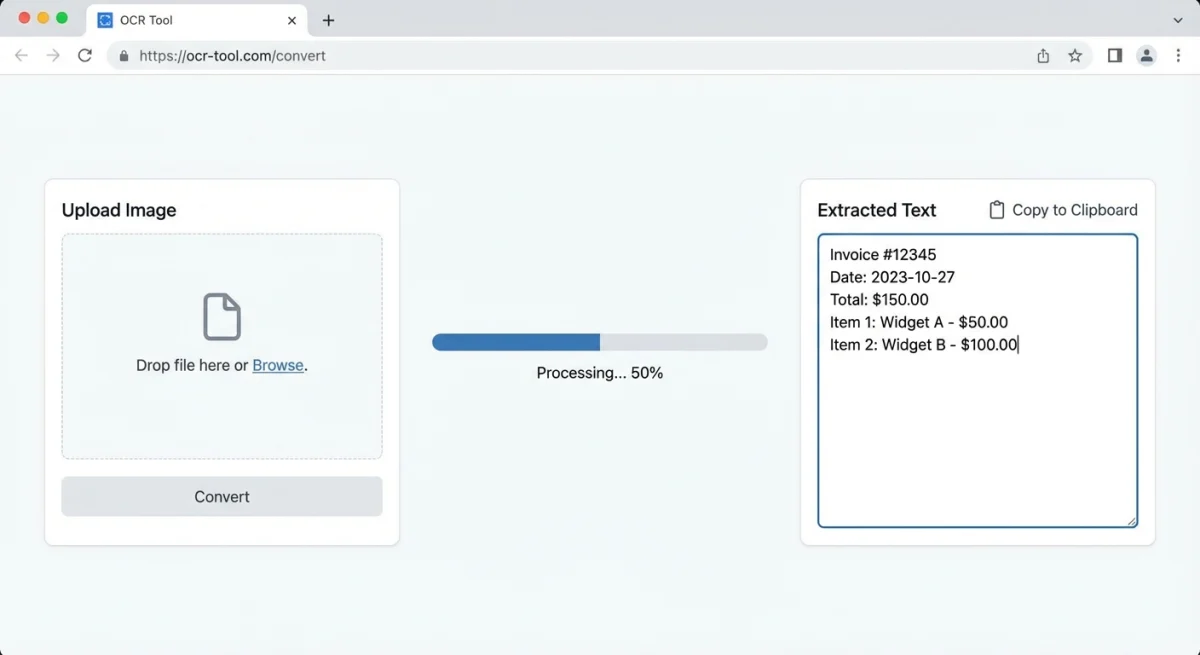
Method 3: Online Screenshot to Text Converters
No software to install? Online OCR tools run in your browser. They're free (with limits) and give you text in many formats.
Popular free options
| Tool | Max File Size | Output Formats | Languages |
|---|---|---|---|
| OnlineOCR.net | 15 MB | Word, Excel, TXT | 40+ |
| ImageToText.cc | 7 MB | TXT, PDF, Word | 100+ |
| Google Drive | 2 MB | Google Docs | 200+ |
How to use online OCR
- Upload your screenshot to the converter
- Select the source language
- Choose your output format (plain text is fastest)
- Download or copy the extracted text
You can also use our free OCR text extraction tool in your browser. No upload to external servers required.
Online OCR pros and cons
Pros:
- No installation needed
- Works on any device with a browser
- Often supports multiple output formats
- Good for one-off conversions
Cons:
- Requires uploading images (privacy concern)
- Slower than desktop apps
- File size limits on free tiers
- Needs internet connection
Got sensitive documents? Local OCR is safer. Live Text and ScreenSnap Pro keep images on your Mac.
Tired of plain screenshots? Try ScreenSnap Pro.
Beautiful backgrounds, pro annotations, GIF recording, and instant cloud sharing — all in one app. Pay $39 once, own it forever.
See what it doesMethod 4: Google Lens
Google Lens turns your phone into an OCR scanner. It works great for paper documents. It's also handy when you're away from your Mac.

How to use Google Lens for screenshots
On iPhone:
- Open the Google app
- Tap the camera icon (Lens)
- Select an existing screenshot from your camera roll
- Tap "Text" and select what you want to copy
On Android:
- Open Google Photos
- Select your screenshot
- Tap the Lens icon at the bottom
- Select text and copy
Google Lens is great at reading handwriting. It can also translate text in real-time. Very useful for text in other languages.
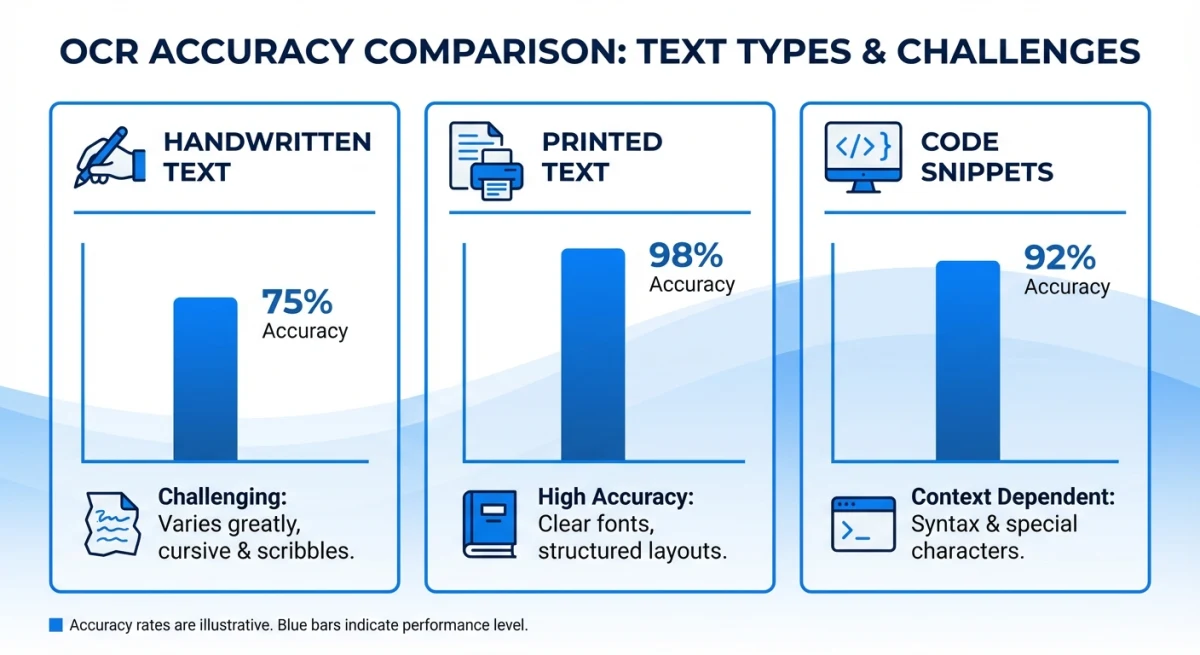
Tips for Better OCR Accuracy
OCR accuracy depends on image quality. Here's how to get better results from your scans.
Improve your screenshots
- Use high resolution: Retina screenshots work better than small images
- Keep good contrast: Dark text on light backgrounds is ideal
- Avoid JPEG: PNG keeps text sharper than JPEG
- Keep text straight: Angled text drops accuracy fast
Working with a blurry image? Try editing the screenshot first. Boost the contrast and sharpen it before running OCR.
Handle edge cases
Handwriting:
- Google Lens often beats desktop OCR for handwriting
- Print-style letters work better than cursive
- For key notes, type them rather than relying on OCR
Code and technical content:
- Use monospace font detection if you can
- Watch for mix-ups:
0vsO,1vsl - Always check extracted code before running it
Tables and data:
- Some OCR tools can export to Excel directly
- For complex tables, Adobe Acrobat works better
Multi-column layouts:
- OCR can jumble newspaper-style columns
- Crop to one column first for clean results
- Or pick tools that detect page layouts
Mixed content (text + images):
- Simple OCR can get confused by graphics
- Crop the screenshot to just the text area
- Use annotation tools to mark up complex images
Common Use Cases for Screenshot OCR
Extracting text from PDFs
Many PDFs lock text selection. Scanned docs are the worst. OCR makes them copyable. Just screenshot the part you need and run OCR.
Copying code snippets
Code in image form is common in tutorials and slides. OCR grabs it fast. For best results, crop the screenshot to just the code block.
Digitizing handwritten notes
Meeting notes and whiteboard photos take ages to retype. OCR does it in seconds. Google Lens gives the best results for handwriting.
Translating foreign text
Screenshot text in a foreign language. Paste it into Google Translate. Or use Google Lens's built-in translation for instant results.
Saving text from social media
Some posts don't allow copy/paste. Instagram stories and tweets as images are common examples. Screenshot and OCR lets you save the text.
Archiving receipts and documents
Digital receipts often come as PDFs or images. Use OCR to pull out the text. Paste it into a spreadsheet for tracking. Great for orders and travel bookings.
Creating searchable notes from images
Got lots of whiteboard photos or lecture slides? Batch OCR makes them searchable. You may need some cleanup. But it's much faster than retyping.
Accessibility
OCR helps people who use screen readers. Pulling text from images makes visual content usable. Apple's accessibility guide highlights the need for text versions of images.
Which Method Should You Use?
| If you need... | Use this |
|---|---|
| Occasional quick extraction | Live Text (built-in) |
| Fast workflow with keyboard shortcuts | ScreenSnap Pro |
| One-off conversion without installing anything | Online tools |
| Handwriting or translation | Google Lens |
| Batch processing multiple images | Adobe Acrobat or specialized OCR software |
For most Mac users, Live Text handles casual needs, while a dedicated OCR tool like ScreenSnap Pro saves significant time if you extract text regularly.
Combining OCR with other screenshot features
The best workflows combine OCR with other screenshot features:
- Capture + OCR + share: Screenshot, extract text, share via cloud link. All in one tool.
- OCR + annotation: Copy text from an image. Then add annotations to highlight the source.
- Long documents + OCR: For pages that don't fit one screen, take multiple screenshots. Then run OCR on each section.
Pick the combo that fits your workflow. The right tool handles multiple tasks without app-switching.
Frequently Asked Questions
Start Extracting Text Faster
Converting screenshots to text doesn't have to be tedious. Live Text handles the basics for free. Google Lens excels at handwriting and translation. ScreenSnap Pro makes the process nearly instant.
Want to capture and extract text in a single step? Try ScreenSnap Pro. It's a one-time purchase with no subscription. OCR is included.
Morgan
Indie DeveloperIndie developer, founder of ScreenSnap Pro. A decade of shipping consumer Mac apps and developer tools. Read full bio
@m_0_r_g_a_n_