How to Keep a Window Always on Top on Windows
Keeping a window always on top on Windows means pinning it so it stays visible above every other window — no matter what you click. Windows doesn't ship a universal toggle for this, but Microsoft PowerToys adds one for free with a single keyboard shortcut.
Whether you want chat floating over your work, a video call pinned during research, or notes visible while coding, this guide shows the fastest way to pin any window on top in 2026.
Why Windows has no built-in always-on-top toggle
Windows 10 and Windows 11 don't have a single menu or shortcut to pin any window. A few apps (like VLC and Calculator) ship their own toggles, but the OS itself doesn't offer a universal option.
The good news: Microsoft fills that gap with PowerToys, a free suite of power-user utilities. It adds a global Always on Top shortcut that works with any window — no scripts or paid apps needed.
If you want more control, AutoHotkey and DeskPins are strong free alternatives. We'll cover all of them below.
Method 1: PowerToys Always on Top (best for most users)
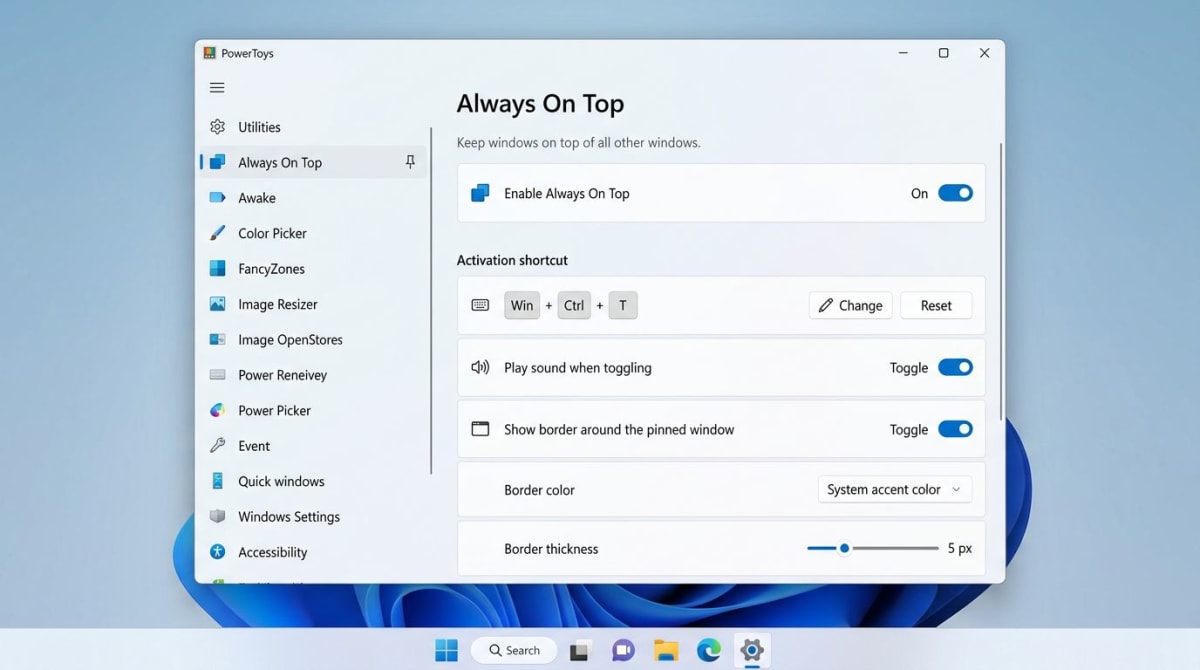
Microsoft PowerToys is the fastest way to pin any window on top on Windows 10 or 11. It's free, made by Microsoft, and adds a global shortcut: Win + Ctrl + T.
Press the shortcut on any focused window, and it stays above every other window until you toggle it off. This is the powertoys always on top shortcut most guides point to for a reason — it just works.
How to set it up:
- Open the Microsoft Store and search for PowerToys (or download from the official GitHub page)
- Install and launch PowerToys
- In the sidebar, click Always on Top
- Toggle Enable Always on Top to On
- Focus any window you want to pin
- Press
Win + Ctrl + T
A thin blue border appears around the pinned window. Press Win + Ctrl + T again to unpin it. You can also play a quick sound when a window pins if you want audio feedback.
What you can customize:
- The activation shortcut (change from
Win + Ctrl + Tto anything else) - Border color and thickness
- Opacity of the pinned window
- Apps excluded from the shortcut
Pros: Free, made by Microsoft, one shortcut works everywhere, easy to install.
Cons: Needs PowerToys installed (about 200 MB), the border can feel busy on some setups.
Best for: Anyone who wants a fast, free, set-and-forget way to pin windows. This is the method we recommend first.
Method 2: AutoHotkey one-liner script
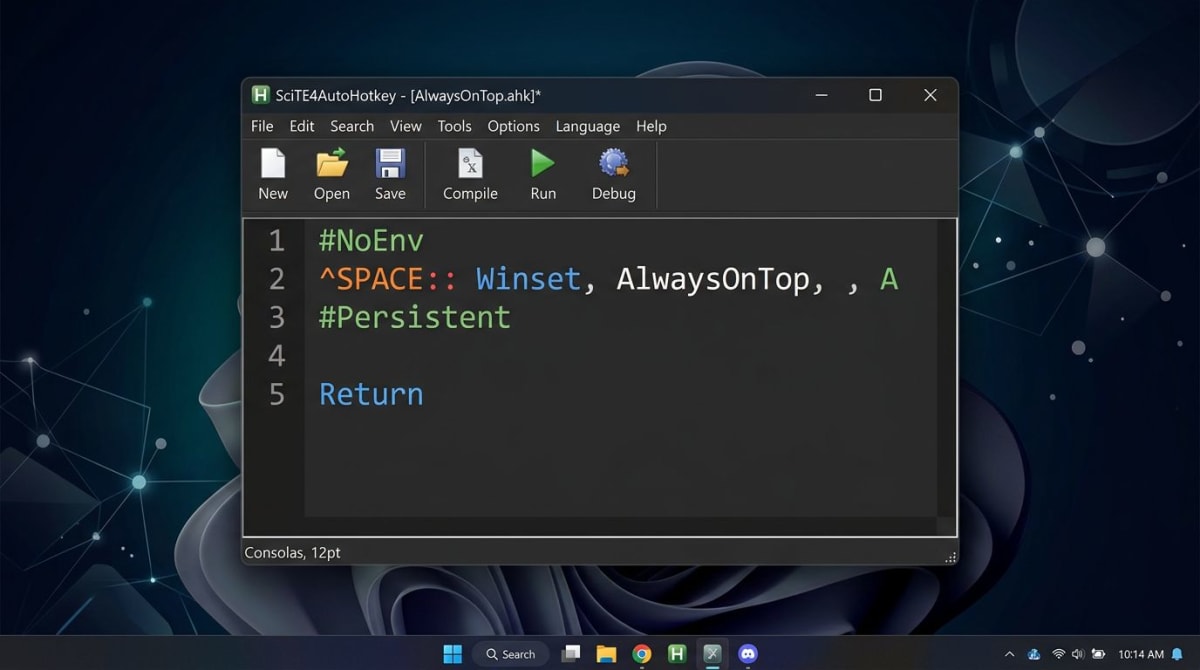
If you want a tiny standalone tool with no extra features, AutoHotkey can do the job with a single line of code. It's free, open source, and the script is under 50 bytes.
How to set it up:
- Download AutoHotkey v2 and install it
- Right-click your desktop → New → AutoHotkey Script
- Name it
AlwaysOnTop.ahkand open it in Notepad - Paste this line at the bottom:
^SPACE::WinSetAlwaysOnTop(-1, "A")- Save the file and double-click to run it
Now press Ctrl + Space on any focused window to pin it on top. Press again to unpin. The script uses about 2 MB of RAM and runs silently in the system tray.
Pros: Tiny footprint, full control over the shortcut, easy to extend with more keys.
Cons: Needs AutoHotkey installed, a small learning curve if you've never scripted before.
Best for: Power users who like a minimal tool and might want to script other shortcuts later.
Method 3: DeskPins (free classic utility)
DeskPins is a lightweight utility that's been around since the Windows XP era. It adds a thumbtack icon to your system tray — click it, then click any window to pin it.
How to use DeskPins:
- Download DeskPins from efotinis.neocities.org
- Install and launch it
- Click the pin icon in the system tray
- Click the window you want to pin
- A small red pin icon appears on the window's title bar
- Click the pin icon again to unpin
You can pin as many windows as you like, and each gets its own pin you can click to remove. DeskPins uses almost no memory and runs on Windows 7, 10, and 11.
Pros: Very small (under 500 KB), no setup, works on older Windows versions.
Cons: No keyboard shortcut by default (click-based), last major update was years ago.
Best for: Older PCs or users who prefer clicking over keyboard shortcuts.
Tired of plain screenshots? Try ScreenSnap Pro.
Beautiful backgrounds, pro annotations, GIF recording, and instant cloud sharing — all in one app. Pay $29 once, own it forever.
See what it doesMethod 4: TurboTop (tray menu for pinning)
TurboTop is another small freeware utility that gives you a tray menu of every open window. Click a window name to pin it, click again to unpin.
How to use TurboTop:
- Download TurboTop from the official site
- Launch the app (it goes straight to the tray)
- Right-click the TurboTop icon
- Click any window name in the menu to pin it
- Pinned windows get a checkmark — click again to unpin
TurboTop is handy if you like to see every open window at once and pick from a list. It's less popular than PowerToys, but it's a clean option if you want no shortcuts at all.
Pros: Zero setup, small download, list view of all windows.
Cons: No keyboard shortcut, menu list gets long with many windows.
Best for: Users with a few apps open who prefer a tray menu over shortcuts.
Built-in always-on-top in specific apps
Some Windows apps have their own always-on-top toggle built in. If you only need to pin one of these, you can skip any third-party tool.
Apps with built-in pin on top:
- VLC Media Player — Video menu → Always on Top
- Calculator (Windows 11) — click the pin icon in the top-left
- Windows Media Player — Organize → Options → Player → Keep window always on top
- Notepad++ — View menu → Always on Top
- Task Manager — Options menu → Always on Top
- Firefox (with add-on) — install the "Always on Top" extension
- Microsoft Edge (picture-in-picture) — right-click a video twice → Picture in Picture
These built-in toggles are free, need no setup, and stay pinned between sessions. For anything else, use PowerToys or one of the alternatives above.
Method 5: Pin a screenshot on top with ScreenSnap Pro
If you really just need a reference image visible while you work — design specs, a wiring diagram, a code snippet, a color palette — you can pin a screenshot instead of a full window.
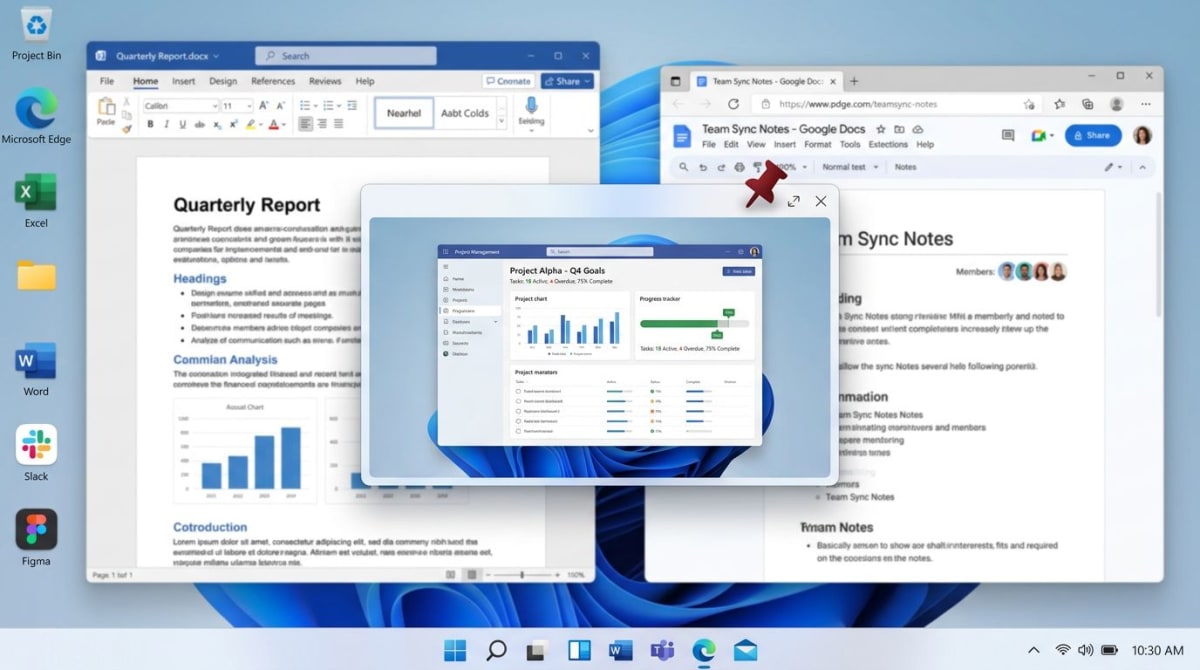
ScreenSnap Pro has a Pin Screenshot feature that captures any area of your screen and keeps it floating above every window. It also runs on Windows AND Mac, so your setup works on both machines.
How it works:
- Take a screenshot with ScreenSnap Pro (
Ctrl + Shift + 1for area capture) - Click the Pin button in the capture overlay
- The screenshot floats above all windows
- Drag it anywhere, resize it, or close it when done
This is great when you want to keep a single piece of info visible — a figma spec, a chart, a bug report — without juggling full app windows. You can also mark up the screenshot with arrows or text before pinning it.
Pros: Pins any on-screen content (not just full apps), no window juggling, one-time $29 purchase, no subscription.
Cons: Pins a static image, not a live window — great for reference, not for live content.
Best for: Developers and designers who need reference material visible while they work.
Keyboard shortcuts cheat sheet
Here are the fastest ways to pin a window on top on Windows, in one place.
| Method | Shortcut | Cost | Needs install? |
|---|---|---|---|
| PowerToys Always on Top | Win + Ctrl + T | Free | Yes (PowerToys) |
| AutoHotkey script | Ctrl + Space (custom) | Free | Yes (AutoHotkey) |
| DeskPins | Click pin, click window | Free | Yes |
| TurboTop | Tray menu click | Free | Yes |
| VLC | Video menu → Always on Top | Free | No (in-app) |
| Calculator | Pin icon (top-left) | Free | No (built-in) |
| ScreenSnap Pro Pin | Capture → Pin button | $29 one-time | Yes |
Which method should you pick?
- Most users → PowerToys. It's free, made by Microsoft, and one shortcut works everywhere.
- Minimal footprint → AutoHotkey. A 50-byte script does the job if you like small tools.
- Older PCs → DeskPins. Still works on Windows 7 and uses almost no memory.
- Reference images → ScreenSnap Pro. Great when you just need a floating snapshot, not a full window.
If you want a true always-on-top window on any app, PowerToys is the winner. If you mainly need reference images visible while you work on the best screenshot tools for Windows, ScreenSnap Pro's Pin Screenshot gets you there in one click.
Working on both platforms? Check our companion guide on how to keep a window always on top on Mac — most tips there mirror the Windows options here.
You can also use our free image annotation tool to mark up any reference image before pinning it to your screen. It takes seconds and needs no install.
Frequently Asked Questions
Morgan
Indie DeveloperIndie developer, founder of ScreenSnap Pro. A decade of shipping consumer Mac apps and developer tools. Read full bio
@m_0_r_g_a_n_