How to Convert JPG to PNG (and When You Actually Should): 5 Methods for Mac & Windows in 2026
Converting JPG to PNG gives you lossless quality and transparency support that JPG can't offer. Whether you need a transparent background for a logo, sharper text in a screenshot from ScreenSnap Pro, or a format that won't degrade when you edit it — PNG is the answer.
Here are five free ways to convert JPG to PNG on any platform, plus how to handle the transparency question that trips most people up.
Why convert JPG to PNG?
JPG and PNG serve different purposes. Here's when converting makes sense:
- You need transparency. JPG doesn't support it. Period. If you want a logo or graphic on a transparent background, you need PNG.
- You're going to edit the image. Every time you save a JPG, it re-compresses and loses quality. PNG doesn't have this problem — save it a hundred times with zero degradation.
- Your image has text or sharp edges. JPG compression creates visible artifacts around text and line art. PNG keeps every pixel crisp.
- You need pixel-perfect accuracy. Screenshots, UI mockups, and diagrams belong in PNG format.
If you're deciding between the two formats more broadly, our PNG vs JPG comparison breaks down every difference.
Method 1: free online converter
The fastest option — no software to install.
- Open our free JPG to PNG converter in your browser.
- Drag and drop your JPG file (or click to browse).
- The tool converts it to PNG instantly.
- Click Download to save the PNG file.
This works on any device — Mac, Windows, Linux, even your phone. Your files stay in your browser and aren't uploaded to any server.
For quick one-off conversions, this is the easiest method. No accounts, no downloads, no limits.
Method 2: Mac Preview
Mac has a built-in JPG to PNG converter hiding in Preview.
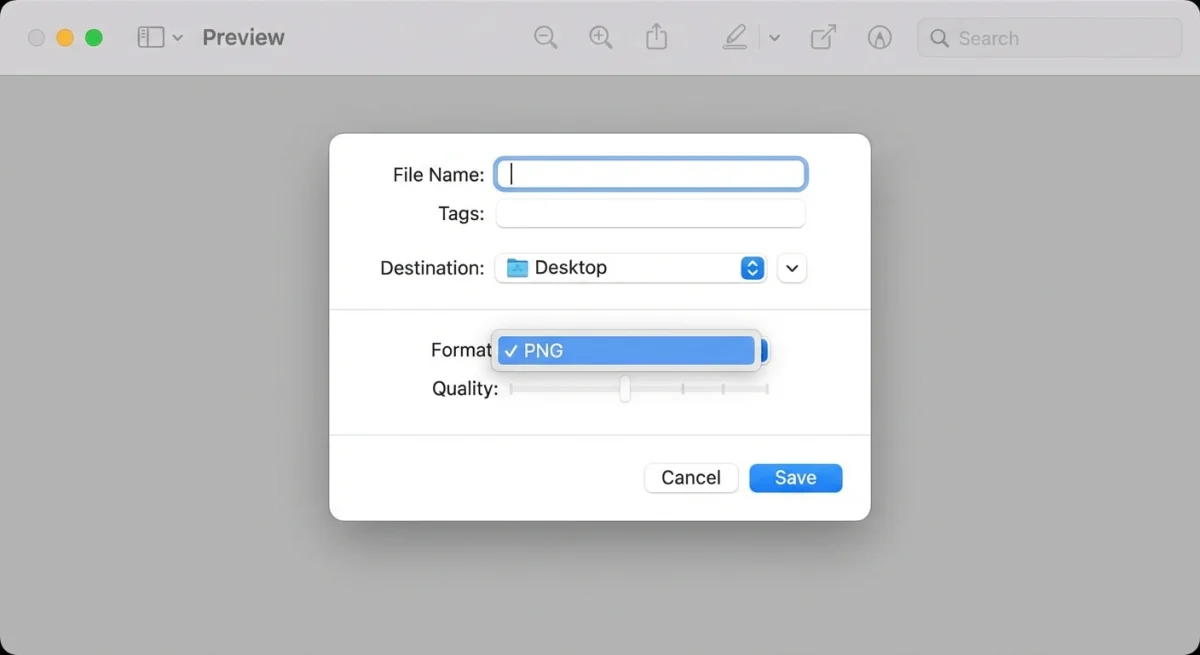
- Double-click the JPG file to open it in Preview.
- Go to File → Export (or press
⌘ + Shift + S). - Click the Format dropdown and select PNG.
- Choose where to save it.
- Click Save.
That's it. Preview handles the conversion perfectly and preserves full image quality.
Quick tip: You can also drag a JPG onto the Preview icon in the Dock, then export. If you take lots of Mac screenshots, they're already in PNG format by default — you can change this in Mac screenshot settings.
Convert with Quick Actions (even faster)
On macOS Monterey and later, right-click any JPG file, hover over Quick Actions, and look for Convert Image. Select PNG as the output format and it converts in place.
Method 3: Windows Paint
Every Windows PC has Paint built in. It handles JPG to PNG conversions without any extra software.
- Right-click the JPG file and select Open with → Paint.
- Go to File → Save as → PNG picture.
- Choose your save location and click Save.
In Paint 3D (available on Windows 10 and 11):
- Open the JPG in Paint 3D.
- Click Menu → Save as → Image.
- Change the file type to PNG (image).
- Click Save.
Both methods preserve the original image quality. The PNG file will be larger than the JPG — that's normal and expected.
Method 4: GIMP (free, with transparency support)
GIMP is a free image editor that works on Mac, Windows, and Linux. It's a solid free option when you need to add transparency during the conversion.
- Open GIMP and go to File → Open to load your JPG.
- Go to File → Export As (or press
⌘ + Shift + Eon Mac /Ctrl + Shift + Eon Windows). - Change the file extension to
.pngin the filename. - Click Export, then Export again in the PNG options dialog.
Adding transparency in GIMP
If you want to convert JPG to PNG with a transparent background:
- Open the JPG in GIMP.
- Go to Image → Flatten Image (if needed).
- Go to Layer → Transparency → Add Alpha Channel.
- Use the Fuzzy Select tool (magic wand) to click on the background you want to remove.
- Press Delete to make the selection transparent.
- Export as PNG.
This is the go-to method for making JPG backgrounds transparent — the most searched question around this topic.
Method 5: command line
For developers and power users, the command line is the fastest method — especially for batch conversions.
Mac (using sips)
macOS includes sips (Scriptable Image Processing System) — no installation needed:
# Convert a single file
sips -s format png photo.jpg --out photo.png

# Convert all JPGs in the current folder
for file in *.jpg; do
  sips -s format png "$file" --out "${file%.jpg}.png"
done
Any platform (using ImageMagick)
Install ImageMagick first, then:
# Single file
magick photo.jpg photo.png
# Batch convert
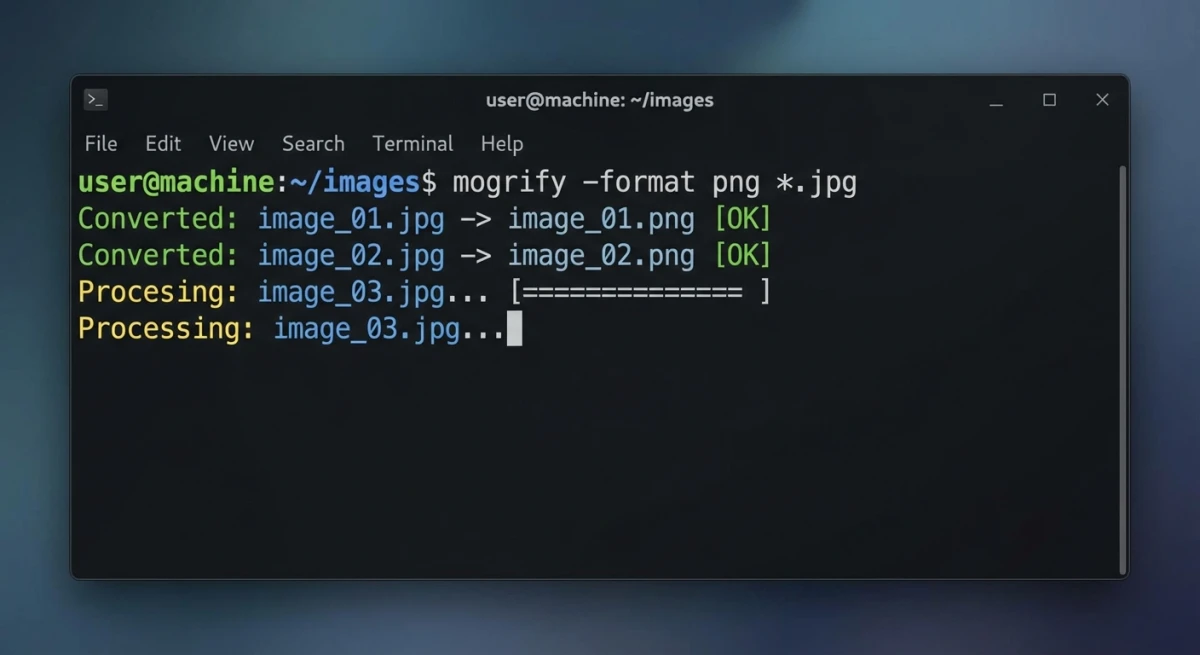
magick mogrify -format png *.jpgUsing ffmpeg
If you already have ffmpeg installed:
ffmpeg -i photo.jpg photo.pngCommand-line tools are perfect for scripting and automation. You can add these to shell scripts, Makefiles, or CI pipelines to convert images automatically as part of your workflow.
Pro tip: If you regularly work with screenshots on Mac, they're already saved as PNG by default. But if you've changed your Mac screenshot settings to JPG for smaller files, the sips command is the fastest way to convert specific captures back to PNG when you need lossless quality.
If you regularly process images, check out our guide on extracting text from screenshots — another task that benefits from automation.
Tired of plain screenshots? Try ScreenSnap Pro.
Beautiful backgrounds, pro annotations, GIF recording, and instant cloud sharing — all in one app. Pay $39 once, own it forever.
See what it doesMaking JPG backgrounds transparent
This is the number one reason people search for "JPG to PNG transparent" — and it's important to understand what's actually happening.
JPG does not support transparency. Converting a JPG to PNG doesn't magically make the background transparent. It just changes the container format. The white (or colored) background stays.

To get a transparent background, you need to:
- Convert the JPG to PNG (to enable transparency support).
- Remove the background using an editing tool.
The easiest free options:
- GIMP — Use the Fuzzy Select tool (method shown above)
- Our transparent background maker — AI-powered, one-click background removal
- Mac Preview — Use Instant Alpha (
⌘ + clickon the background in the markup toolbar) - Photoshop — Select Subject → Delete Background
For simple backgrounds (solid white, solid color), Preview's Instant Alpha works surprisingly well. For complex backgrounds with gradients or detailed edges (like hair), AI tools give the best results.
Common transparent PNG use cases
Knowing when you need a transparent PNG helps you plan ahead:
- Company logos. Place your logo on any colored header, footer, or background without a visible rectangle around it.
- Product photos for e-commerce. Amazon, Shopify, and most marketplaces prefer product images on transparent or white backgrounds.
- Watermarks. Semi-transparent PNGs overlay nicely on photos without blocking the underlying image.
- App icons and UI elements. Buttons, icons, and overlays need transparency to blend into different interface themes.
- Presentation slides. Drop graphics onto slide backgrounds without ugly white boxes around them.
If you annotate screenshots regularly, working in PNG from the start means your annotations, arrows, and callouts can sit on transparent layers — making them easy to composite later.
Batch converting multiple JPGs to PNG
When you have dozens or hundreds of files to convert, doing them one by one isn't practical.
Mac Automator (built-in)
- Open Automator and create a new Quick Action.
- Set "Workflow receives current" to Image files in Finder.
- Add the action Change Type of Images.
- Select PNG as the output type.
- Save the workflow.
Now you can select multiple JPGs in Finder, right-click, and convert them all at once through Quick Actions.
Command line batch conversion
The sips and magick commands shown in Method 5 already handle batch conversion. For a folder full of JPGs:
# Mac
for file in ~/Desktop/photos/*.jpg; do
  sips -s format png "$file" --out "${file%.jpg}.png"
done

# ImageMagick (any platform)
cd ~/Desktop/photos
magick mogrify -format png *.jpg
Choosing the right PNG settings
When exporting to PNG, most tools offer a few options worth understanding:
Bit depth. PNG supports 8-bit (256 colors) and 24-bit (16.7 million colors) modes. For photos converted from JPG, always use 24-bit to preserve the full color range. For simple graphics or icons, 8-bit PNG produces much smaller files.
Interlacing. Interlaced PNGs load progressively in web browsers — a low-resolution preview appears first, then sharpens as the file downloads. This improves perceived load speed for large images on the web. For files you won't display online, leave interlacing off to save a few bytes.
Compression level. PNG compression is always lossless (unlike JPG), but you can control how aggressively the algorithm searches for patterns. Higher compression means smaller files but slower exports. The visual quality is identical at any compression level — it's just a speed-vs-size tradeoff.
If your converted PNGs are too large for web use, run them through our image compressor to optimize without visible quality loss.
JPG to PNG: will quality change?
Converting JPG to PNG does not restore lost quality. Here's why:
When a photo is saved as JPG, some image data is permanently removed by lossy compression. Converting to PNG preserves what's left — it won't degrade further — but it can't bring back the pixels that were already thrown away.
Think of it like photocopying a photocopy. Converting to PNG stops further degradation, but the original JPG compression damage stays.
What PNG conversion does protect:
- No further quality loss on re-saves
- Perfect pixel accuracy going forward
- Transparency support (if you add it)
What it doesn't fix:
- JPG compression artifacts (blocky edges, fuzzy text)
- Color banding from heavy JPG compression
- Detail already removed by lossy compression
If quality matters, start with PNG or RAW from the beginning. For screenshots on Mac, the default PNG format already gives you the best quality.
When NOT to convert JPG to PNG
Converting isn't always the right move:
Photos staying as photos. If you're not adding transparency or editing repeatedly, keep photos as JPG. Converting a 500 KB JPG photo to PNG produces a 3-5 MB file with zero visual improvement.
Web images where speed matters. PNG files are much larger. For web pages where load speed matters, JPG or WebP is usually the better choice.
Social media uploads. Platforms like Instagram and Twitter re-compress everything anyway. Uploading a large PNG just wastes bandwidth — the platform converts it to JPG on their end.
Storage-limited situations. If disk space is tight, PNG's larger file sizes add up quickly. A folder of 100 vacation photos at 4 MB each (PNG) versus 400 KB each (JPG) is the difference between 400 MB and 40 MB.
For a deeper breakdown of when each format makes sense, see our PNG vs JPG comparison guide.
If you work with screenshots regularly, tools like ScreenSnap Pro capture directly in PNG with built-in annotation — so you can add arrows, blur sensitive info, and share without worrying about format conversion at all.
Troubleshooting common conversion issues
Converted PNG looks the same as the JPG
That's expected. Converting formats doesn't change how the image looks — it changes how the data is stored. The PNG version preserves the current quality and prevents further degradation on re-saves. If you were expecting sharper text or cleaner edges, the JPG compression damage is permanent.
PNG file is much larger than expected
PNG files are typically 5-10x larger than equivalent JPGs for photographic content. If the file is too large, you have a few options:
- Use 8-bit PNG instead of 24-bit (if the image has fewer than 256 colors)
- Compress the PNG with tools like our image compressor — lossless optimization can shave 20-40% off file size
- Consider whether you actually need PNG — if there's no transparency or editing planned, JPG might be the better format
Transparency not showing after conversion
If you converted a JPG to PNG but the background is still white, that's because the conversion only changes the format — it doesn't remove existing pixels. You need to actively delete the background using GIMP, Preview's Instant Alpha, or a background removal tool.
Colors look different after converting
This occasionally happens due to color profile differences. JPG files sometimes embed an sRGB profile that gets interpreted differently when saved as PNG. In Preview, go to Tools → Assign Profile and select sRGB IEC61966-2.1 to match the original appearance.
Frequently Asked Questions
Morgan
Indie DeveloperIndie developer, founder of ScreenSnap Pro. A decade of shipping consumer Mac apps and developer tools. Read full bio
@m_0_r_g_a_n_