How to Record Gameplay on PC: Best Free Methods (2026)
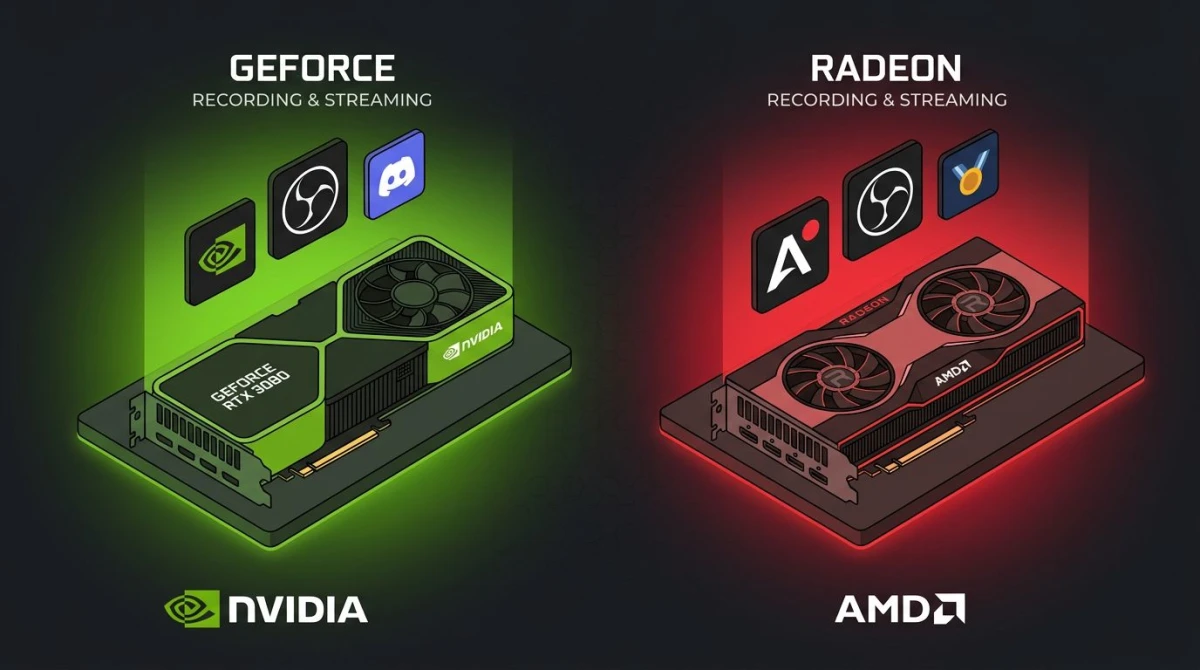
To record gameplay pc users have five solid free options: Xbox Game Bar (built into Windows), NVIDIA ShadowPlay (now in the NVIDIA App), AMD ReLive (inside Adrenalin), OBS Studio, and browser-based capture tools. Pick based on your GPU. NVIDIA and AMD cards have near-zero performance hit when you use their native tools. Everyone else should start with Game Bar or OBS.
Here's the catch most guides miss. Your graphics card decides which recorder runs smoothest. A quick 60-second hardware check saves hours of choppy footage and lost frames.
Quick answer: which recorder should you use?
Match the tool to your hardware first. Then tune settings.
| Your GPU | Best free recorder | Why |
|---|---|---|
| NVIDIA RTX / GTX | NVIDIA ShadowPlay (NVIDIA App) | Uses NVENC, zero FPS drop |
| AMD Radeon | AMD ReLive (Adrenalin) | Uses AMF encoder, light load |
| Intel integrated | Xbox Game Bar or OBS | Quick Sync H.264 support |
| Any card | OBS Studio | Most control, bigger learning curve |
| Any card | Xbox Game Bar | Fastest one-shot, Win+Alt+R |
If you just want a clip for Discord in the next 30 seconds, press Win+Alt+R and move on. For YouTube or Twitch highlights, keep reading.
What matters when you record gameplay
Three things shape a gameplay recording. Get them right and your clips look pro.
Framerate. Match your game's framerate. Most PC games target 60fps. Record at 60fps too. Anything lower looks laggy during fast action. Anything higher wastes disk space.
Encoder. This is the hidden driver of quality. A GPU encoder (NVENC for NVIDIA, AMF for AMD, Quick Sync for Intel) handles the video work on dedicated silicon. Your game keeps running full speed. A CPU encoder (x264) gives slightly better quality but steals CPU cycles your game needs. For gameplay, always use GPU encoding.
Audio channels. Record game audio, your mic, and Discord on separate tracks. That way you can mute one later without redoing the clip. OBS handles this best. Game Bar mixes everything into one track.
Hardware check: find your GPU in 30 seconds
Before picking a tool, know what you have.
- Press
Ctrl+Shift+Escto open Task Manager. - Click the Performance tab.
- Look at the GPU 0 (and GPU 1 if present) entry on the left.
- The card model shows at the top right — "NVIDIA GeForce RTX 4060," "AMD Radeon RX 7800," or "Intel UHD Graphics."
If you see NVIDIA, download the NVIDIA App. If you see AMD, get Radeon Software Adrenalin. Intel users can skip ahead to Game Bar.
Method 1: Xbox Game Bar (Windows built-in)
Windows 10 and 11 both ship with Xbox Game Bar. It's the fastest way to start and the easiest to learn. No install, no login.
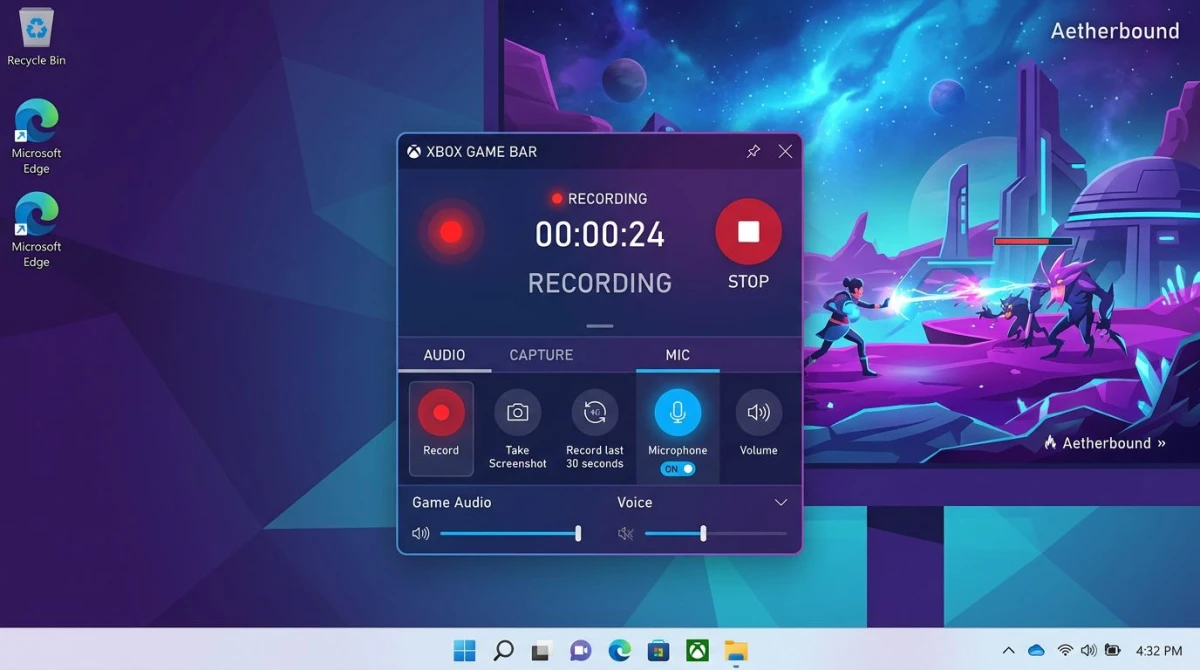
How to record with Xbox Game Bar
- Launch your game and wait until you're in it.
- Press
Win+Gto open the Game Bar overlay. - Click the Capture widget (camera icon).
- Hit the round record button — or skip steps 2–3 and press
Win+Alt+Rdirectly. - A timer appears in the corner. Play as normal.
- Press
Win+Alt+Ragain to stop. - Find the clip in
Videos/Capturesas an MP4 file.
Background recording (the killer feature)
Game Bar can record the last 30 seconds, 2 minutes, or 5 minutes automatically. Got a clutch moment? Hit Win+Alt+G after the fact and Windows saves what just happened.
Turn it on:
- Open Settings → Gaming → Captures.
- Toggle Record what happened.
- Set the window length (30 seconds to 10 minutes).
Heads up: background recording uses some CPU and GPU the whole time it's on. Disable it between sessions if your game feels sluggish.
Game Bar settings worth changing
Inside Settings → Gaming → Captures, set:
- Video frame rate: 60 fps
- Video quality: High
- Audio quality: 192 kbps
- Record this game's audio: On
- Microphone: On (for commentary)
Limitations
Game Bar is fast, but it has walls:
- Can't record the desktop or File Explorer
- Only captures one app window at a time
- No webcam overlay
- No separate audio tracks
- Caps at 4 hours per clip (long enough for most sessions)
If you run into problems, our Windows screen recorder guide covers fixes.
Method 2: NVIDIA ShadowPlay (NVIDIA App)
If you own a GeForce GTX or RTX card, ShadowPlay is a strong option for recording gameplay. It runs on the NVENC chip baked into your GPU. Your game doesn't even notice.
In 2026, NVIDIA rolled ShadowPlay into the new NVIDIA App (it replaced GeForce Experience). Same feature set, cleaner interface.
How to enable ShadowPlay
- Install the NVIDIA App.
- Open it and go to Settings → Overlay.
- Toggle In-Game Overlay on.
- Press
Alt+Zin any game to open the overlay. - Click Record → Start.
Instant Replay (NVIDIA's version of background recording)
Instant Replay keeps the last few minutes of gameplay in a rolling buffer. Hit Alt+F10 when something cool happens and NVIDIA saves it.
To set it up:
- Open the overlay with
Alt+Z. - Click Instant Replay → Turn On.
- Set the buffer length (up to 20 minutes).
- Choose resolution (match your monitor) and bitrate (50 Mbps is a good start).
When ShadowPlay wins
- You have a GeForce card
- You care about zero FPS drop
- You want simple hotkeys
- You stream or share lots of clips
One downside: ShadowPlay locks you to MP4 output and doesn't expose as many fine controls as OBS. For most gamers that's fine.
Method 3: AMD ReLive (Adrenalin)
Radeon users get the AMD equivalent, called ReLive, baked into AMD Software: Adrenalin Edition. It uses the AMF encoder on your GPU, so the frame-rate hit is tiny.
How to enable ReLive
- Install AMD Software: Adrenalin Edition.
- Open it and click the Record & Stream tab.
- Toggle Record Desktop on (yes, even for game-only use).
- Bind a hotkey for Start/Stop Recording (default
Ctrl+Shift+R). - Press the hotkey in-game to record.
Instant Replay on Radeon
Enable Instant Replay in the same tab. Set the buffer to 3–5 minutes and press Ctrl+Shift+S to save the last clip.
Quality settings
For 1080p60 YouTube uploads:
- Bitrate: 30 Mbps
- Codec: H.264 (or HEVC for smaller files if your editor supports it)
- Audio: 192 kbps, separate tracks when possible
- Encoding type: AVC (broad compatibility) or HEVC (smaller files)
Method 4: OBS Studio (the free powerhouse)
OBS Studio is a free, open-source recorder widely used by streamers and serious content creators. It runs on Windows, Mac, and Linux. The tradeoff is a steeper learning curve.
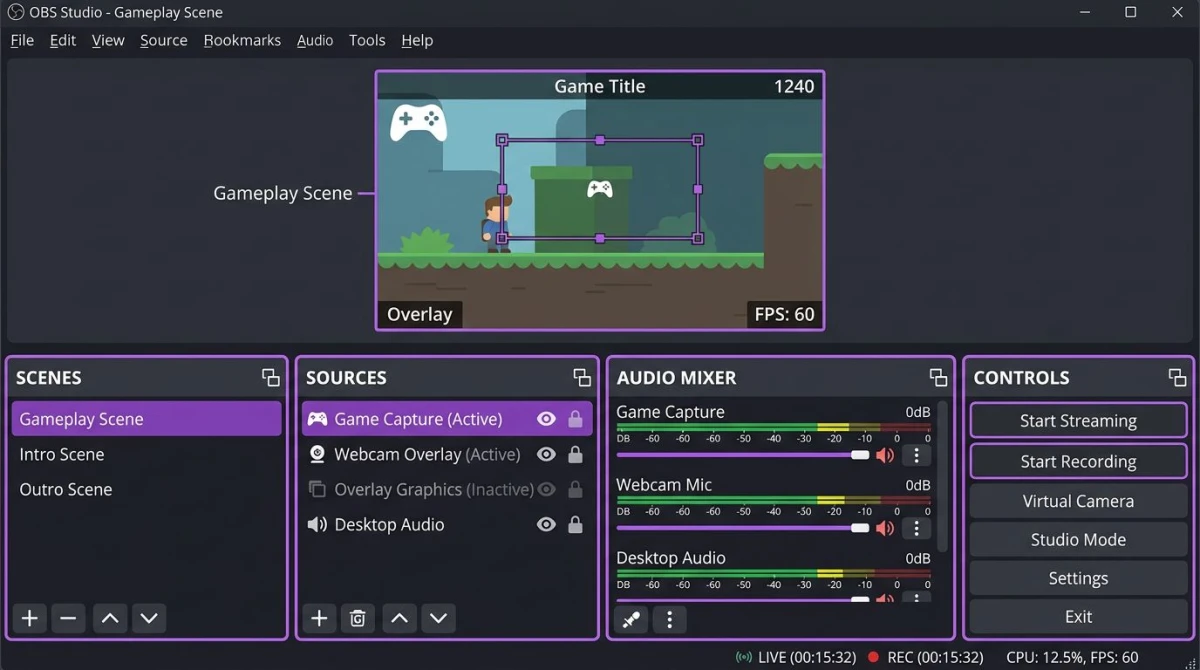
Quick OBS setup for gameplay
- Download OBS Studio and install.
- On first launch, run the Auto-Configuration Wizard. Pick Optimize for recording.
- In the main window, under Sources, click + → Game Capture.
- Set Mode to Capture specific window and pick your game.
- Click + again → Audio Input Capture to add your mic.
- Press
Ctrl+R(or your custom hotkey) to start recording.
Recommended OBS settings for 1080p60
Go to Settings → Output → Recording.
| Setting | Value |
|---|---|
| Type | Standard |
| Format | MKV (safer — survives crashes) |
| Encoder | NVIDIA NVENC H.264 / AMD AMF / Quick Sync |
| Rate Control | CBR |
| Bitrate | 30000 Kbps (30 Mbps) |
| Keyframe Interval | 2 |
| Preset | Quality |
Then go to Settings → Video:
| Setting | Value |
|---|---|
| Base Resolution | 1920x1080 |
| Output Resolution | 1920x1080 |
| FPS | 60 |
Record in MKV and remux to MP4 after. MKV won't corrupt if OBS crashes mid-record.
Hotkeys worth setting
In Settings → Hotkeys:
- Start Recording:
F9 - Stop Recording:
F10 - Pause Recording:
F11 - Save Replay Buffer:
F12
Turn on the Replay Buffer in Settings → Output to get ShadowPlay-style background recording for any GPU.
Tired of plain screenshots? Try ScreenSnap Pro.
Beautiful backgrounds, pro annotations, GIF recording, and instant cloud sharing — all in one app. Pay $39 once, own it forever.
See what it doesMethod 5: Lightweight paid alternatives
If the free options don't fit, three paid tools are worth a look. None are free, but they're simpler than OBS.
Action! Mirillis — Clean UI, live streaming built in. ~$30 one-time plus subscription tier.
Bandicam — Fast, reliable, popular with older hardware. ~$40 per year.
D3DGear — Tiny install, DirectX-aware. ~$35 one-time.
All three hit similar quality to OBS with fewer knobs. For most gamers, free options (OBS or your GPU's native tool) cover everything.
Method 6: ScreenSnap Pro for clips, GIFs, and tutorials
ScreenSnap Pro isn't a gaming-first recorder. It's built for developers, marketers, and creators who need short clips and GIFs — menu walkthroughs, bug reports, Discord-sized highlights, or tutorial snippets.
Where it fits in a gamer's workflow:
- Turning a game clip into a shareable GIF for Twitter or Discord
- Recording game menus and launcher setup for guides
- Capturing a bug mid-session for a dev report
- Grabbing a quick settings screenshot with annotations
ScreenSnap Pro costs $39 one-time, works on Mac and Windows, and includes 500+ backgrounds and 15 annotation tools. It won't replace OBS for hour-long Twitch sessions, but for the non-gameplay pieces of content, it's faster than editing in a heavier tool. If you also use Mac, check our guide on recording with audio.
Settings cheat sheet: 1080p60 for YouTube and Twitch
These numbers work for any recorder. Plug them in and you're ready to upload.
| Target | Resolution | FPS | Bitrate | Codec | Audio |
|---|---|---|---|---|---|
| YouTube 1080p60 | 1920x1080 | 60 | 20–30 Mbps | H.264 or HEVC | 192 kbps stereo |
| YouTube 1440p60 | 2560x1440 | 60 | 40–50 Mbps | H.264 or HEVC | 192 kbps stereo |
| YouTube 4K60 | 3840x2160 | 60 | 60–80 Mbps | HEVC | 192 kbps stereo |
| Twitch stream | 1920x1080 | 60 | 6 Mbps (Twitch cap) | H.264 | 160 kbps stereo |
| Discord clip | 1280x720 | 30 | 5 Mbps | H.264 | 128 kbps mono |
Bitrate note: higher = cleaner but bigger files. 30 Mbps at 1080p60 is a sweet spot for most uploads.
Performance tips: record gameplay without lag
Most FPS drops during recording come from three mistakes. Fix these first.
Use a GPU encoder, not CPU. In OBS, set Encoder to NVENC, AMF, or Quick Sync — never x264 for live gameplay. GPU encoders are purpose-built. They offload video work to silicon your game isn't using.
Don't capture the whole desktop. Use Game Capture mode in OBS (or pick the specific app in Game Bar). Full-screen desktop capture forces your GPU to composite extra layers.
Cap your in-game FPS. If your game runs at 200fps, cap it at 60 or 120. Uncapped framerates steal headroom your recorder needs. Use in-game V-Sync or the NVIDIA/AMD control panel.
Record to a different drive. If possible, save clips to an SSD that isn't hosting the game. Reading game assets and writing video from the same drive causes stutters.
Close background apps. Chrome with 40 tabs, Spotify, and a Discord call can all eat RAM and CPU. A lean system records smoother.
Recording with webcam facecam
Adding a webcam overlay makes content more personal. Here's the fastest way per tool.
NVIDIA App: Overlay → Camera → pick your webcam, set position and size.
AMD Adrenalin: Record & Stream → Scene → add Webcam source.
OBS Studio: Sources → + → Video Capture Device → pick your webcam. Drag and resize on the canvas.
Xbox Game Bar: Does not support webcam overlay. Use one of the above instead.
Position tip: bottom-right corner at 320x240 is standard. Keeps your face visible without blocking action.
Editing clips after you record
Gameplay rarely uploads raw. Trim dead time, add music, cut to highlights. Three free editors handle this well.
Shotcut — Cross-platform, lightweight, good for quick cuts.
DaVinci Resolve (free tier) — Hollywood-grade tool, free forever. Steep learning curve but handles 4K easily.
CapCut for PC — Simple, built for short-form. Great for TikTok or Shorts.
For just trimming, Windows 11's built-in Clipchamp cuts a clip in under a minute. No install needed.
If you end up with a GIF instead of video (for Twitter or Discord), our GIF screen capture on Windows guide covers that workflow. You can also convert GIFs to MP4 in the browser if a client needs video.
Common problems and quick fixes
A few issues come up again and again. Here's what to check before you blame your hardware.
"My clips have no sound." Game Bar, ShadowPlay, and OBS all have a separate audio toggle. Open the recorder's settings and confirm both system audio and microphone are on. If only one is missing, the fix is usually a single checkbox. For deeper audio issues, see our record screen with audio on Windows guide.
"Game Bar won't open in my game." Game Bar only recognizes some apps as games. If Win+G does nothing, open Settings → Gaming → Xbox Game Bar and toggle it on. Still stuck? Run the game in windowed or borderless mode instead of exclusive full-screen.
"OBS is black-screening my game capture." Switch Game Capture from "Capture any full-screen app" to "Capture specific window" and pick your game from the dropdown. If that still fails, run OBS as administrator — some anti-cheat systems block regular access.
"Clips are huge." Lower your bitrate or switch to HEVC (H.265). A 1080p60 clip at 20 Mbps is about 150 MB per minute. HEVC cuts that to roughly 90 MB at similar quality.
"Recordings are choppy even at 60fps." Your game is hitting V-Sync or frame pacing issues. Cap framerate with RTSS (RivaTuner Statistics Server) or the NVIDIA Control Panel. Lock at 60 or 120 and your recorder gets a stable signal.
Frequently Asked Questions
Final pick: record your way
There's no single "best" gameplay recorder. The right one depends on your hardware, your goals, and how much you want to tinker.
Just want clips on the fly? Xbox Game Bar. Press Win+Alt+R and you're done.
Got an NVIDIA or AMD card? Use your GPU's native tool. Zero FPS drop.
Serious about YouTube or Twitch? Learn OBS. The flexibility pays off.
Need quick GIFs or tutorial snippets? ScreenSnap Pro fits that niche — one-time $39, Mac and Windows. It's the quiet sidekick to your main recorder for the non-gameplay content: menus, bug reports, and Discord-ready clips. Our free screen recorder for Windows comparison covers more options if you want to explore.
Whatever tool you pick, match your settings to the target: 1080p60 at 20–30 Mbps covers almost every modern use case. Hit record, play well, and clip the good stuff.
Morgan
Indie DeveloperIndie developer, founder of ScreenSnap Pro. A decade of shipping consumer Mac apps and developer tools. Read full bio
@m_0_r_g_a_n_