How to Record a Teams Meeting on Windows (2026)
You can record a Teams meeting on Windows in five ways: Teams' built-in recorder (host or delegate only), Xbox Game Bar, OBS Studio, ScreenSnap Pro, or PowerPoint's hidden screen recorder. If you're an attendee without record rights, skip Teams' built-in option and jump straight to one of the four third-party tools — they all capture picture, mic, and system audio.
Below we walk through every method step by step, show you how to record as an attendee when the host hasn't enabled it, find your saved files, and answer the questions people ask most.
Quick comparison: 5 ways to record a Teams meeting on Windows
Here's how the methods stack up before we dig in:
| Method | Works for Attendees | System Audio | Webcam Overlay | Best For |
|---|---|---|---|---|
| Teams built-in | No (host only) | Yes | Auto | Hosts with admin approval |
| Xbox Game Bar | Yes | Yes | No | Quick, no-install captures |
| OBS Studio | Yes | Yes | Yes | Power users who want scenes |
| ScreenSnap Pro | Yes | Yes | Yes | Clean capture with mic + webcam |
| PowerPoint | Yes | Yes | No | People who already have Office |
Method 1: Teams built-in recording (admin-restricted)
Microsoft Teams has a native record button, but it comes with strings attached. Only the organizer, co-organizer, or a presenter from the same tenant can start recording. Attendees, external guests, and anonymous joiners cannot. Your IT admin can also turn the feature off company-wide.
How to record as the host
- Join your Teams meeting on Windows.
- Click the More actions button (the three-dot menu) in the meeting controls.
- Choose Record and transcribe > Start recording.
- Everyone in the meeting sees a banner announcing the recording has started.
- When you're done, open the same menu and click Stop recording.
The video is processed by Microsoft Stream and saved to the organizer's OneDrive (for non-channel meetings) or the channel's SharePoint site. Processing can take a few minutes for hour-long meetings.
For the latest tenant policies, Microsoft keeps official Teams recording docs up to date.
Why attendees need a plan B
If you've ever clicked More actions and the record option was greyed out — or missing entirely — you're probably an attendee, a guest, or your admin has locked it down. That's when the next four methods come in. All of them work regardless of your Teams role, because they capture what's on your screen, not what Teams lets you control.
Method 2: Record a Teams meeting with Xbox Game Bar
Xbox Game Bar is pre-installed on Windows 10 and Windows 11. It's free, it records system audio and your mic, and it doesn't care what app is on screen — Teams included.
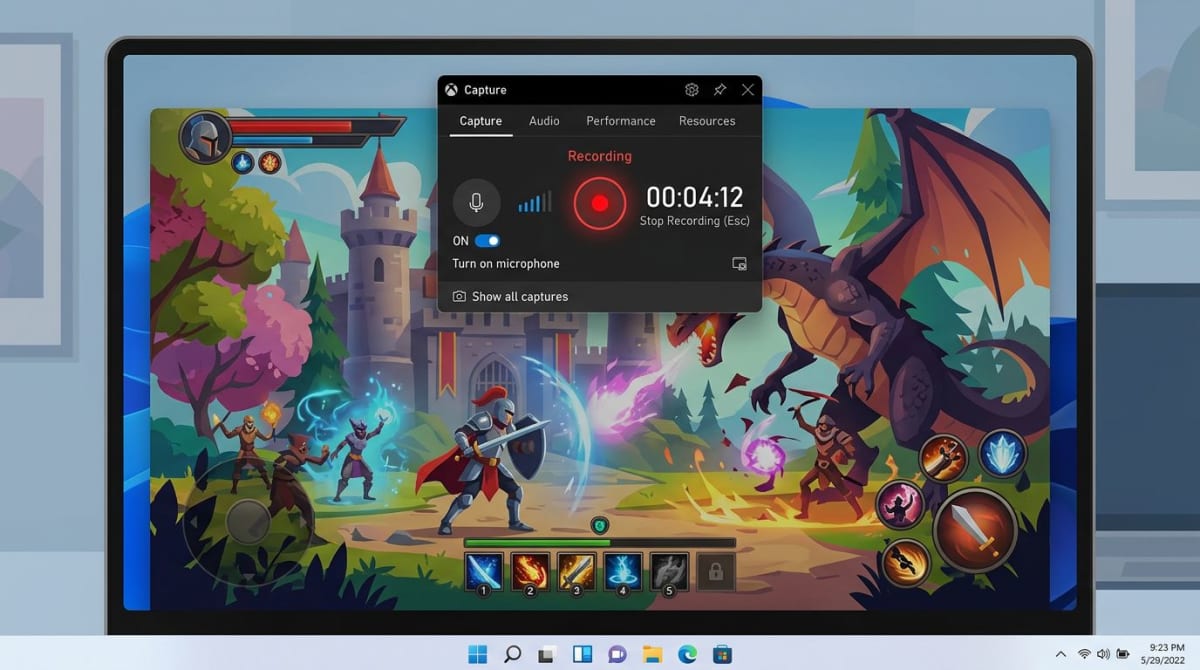
How to record Teams with Xbox Game Bar
- Join your Teams meeting and make sure the meeting window is active.
- Press
Win + Gto open the Game Bar overlay. - In the Capture widget, click the microphone icon if you want your voice captured too.
- Click the Record button (the filled circle) or press
Win + Alt + R. - A small timer floats in the corner of your screen.
- Press
Win + Alt + Ragain to stop when the meeting ends. - Your MP4 file lands in
C:\Users\[YourName]\Videos\Captures.
Xbox Game Bar catches and workarounds
Game Bar records the active window, not the full desktop. If you switch to another app mid-meeting, recording pauses. Keep Teams in focus the whole time.
It also can't do webcam overlay, and it won't record File Explorer. For a Teams call that's not a problem — but if you plan to switch to a browser mid-call, consider a more flexible tool. Our full Windows screen recording guide shows Game Bar's quirks in more detail.
Method 3: OBS Studio for advanced capture
OBS Studio is free, open source, and used by streamers to capture high-quality video. It's overkill for a quick standup, but it shines if you want webcam overlay, scene switching, or higher bitrates for playback on a big screen.
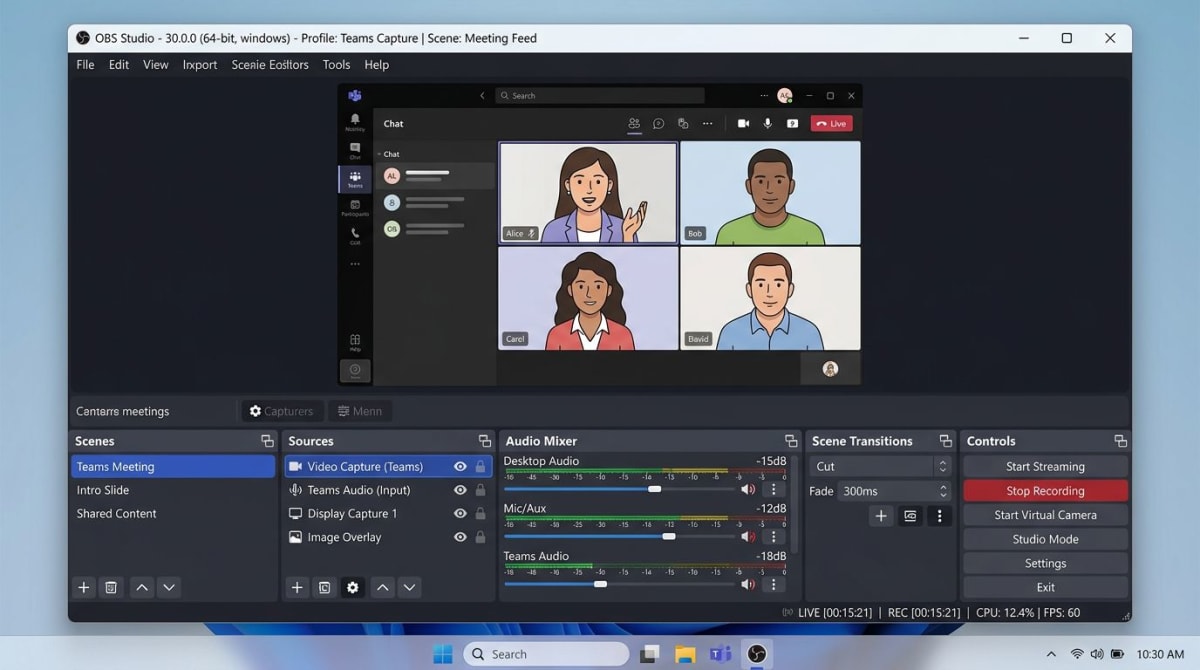
How to record Teams with OBS Studio
- Download OBS Studio from the official OBS site and install it.
- Open OBS. Under Sources, click
+and pick Display Capture (or Window Capture if you only want Teams). - Add a second source: Audio Output Capture to grab Teams' speaker audio.
- Add a third: Audio Input Capture for your microphone.
- Optional: add Video Capture Device to overlay your webcam.
- Click Start Recording in the bottom-right panel before you join the meeting.
- Click Stop Recording when finished. The file saves to your configured output folder — default is
C:\Users\[YourName]\Videos.
When OBS is the wrong call
OBS has a learning curve. Scenes, filters, and audio mixers reward tweaking, but for a one-off meeting capture, the setup time isn't worth it. If OBS feels like too much, look at our OBS Studio alternatives for Windows — the list includes lighter tools that still handle Teams calls well.
Method 4: ScreenSnap Pro (record screen + webcam + mic + system audio)
If you want a one-tool answer — record the Teams window, your mic, the other person's voice, and your webcam all at once — ScreenSnap Pro is built for it. It runs on Windows 10 and 11, costs $29 once, and won't nag you with subscription prompts.
How to record Teams with ScreenSnap Pro
- Open ScreenSnap Pro before you join the call.
- Click Record and choose Region to select just the Teams window, or Full Screen for everything.
- Toggle Microphone on to capture your voice.
- Toggle System Audio on so everyone else's voice is captured.
- Toggle Webcam if you want a picture-in-picture of yourself.
- Hit the red record button and join your meeting.
- Click stop when the call ends. The file saves as MP4 or MOV — your choice.
You also get 15 annotation tools for marking up screenshots you grab during the call (arrows, blur for sensitive info, and a counter for step-by-step tutorials). And because ScreenSnap Pro can record direct-to-GIF, you can clip a short moment from the meeting and share it without running it through a converter.
Tired of plain screenshots? Try ScreenSnap Pro.
Beautiful backgrounds, pro annotations, GIF recording, and instant cloud sharing — all in one app. Pay $29 once, own it forever.
See what it doesMethod 5: PowerPoint screen recorder (yes, it works)
If you already have Microsoft Office on your Windows PC, PowerPoint ships with a hidden screen recorder. No extra install, no sign-in hoops.
How to record Teams with PowerPoint
- Open PowerPoint and create a blank slide.
- Go to the Insert tab and click Screen Recording.
- A small toolbar appears. Click Select Area and drag around your Teams window.
- Confirm Audio and Record Pointer are toggled on.
- Click Record — you get a 3-second countdown.
- Join or return to your Teams meeting.
- Press
Win + Shift + Qto stop. The video is embedded in your PowerPoint slide. - Right-click the video and choose Save Media As to export it as an MP4.
It's clunky, but it works. PowerPoint is a good fit for people who need the recording inside a presentation anyway.
How to record Teams as an attendee
This is the question almost no Microsoft doc answers. If you're an attendee or external guest, the native record button won't show up for you. Here's the clean workflow:
- Pick any method from 2 through 5 above — they all bypass the attendee restriction.
- Before joining, tell the host you plan to record your own copy. Some countries (and most workplaces) require consent from everyone on the call.
- Start your recorder before joining the meeting so you don't miss the first minute.
- Keep Teams in focus during the call (Game Bar needs the active window).
- Stop recording after the meeting ends, not during — Teams can make a last-second announcement.
Worth saying out loud: recording a meeting without letting people know can break your company's policy and local wiretap law. A quick "hey, I'm recording this for my own notes" at the start covers you almost everywhere. If you want more tools to pick from, our best free screen recorders for Windows roundup covers another half-dozen options.
Recording Teams with audio from all participants
The #1 complaint with self-recording is missing one side of the audio. Here's how to make sure both sides are captured:
- Enable system audio in your recorder. In Xbox Game Bar it's on by default. In OBS, add Audio Output Capture. In ScreenSnap Pro, flip the System Audio toggle.
- Use headphones for your own voice, not the laptop mic. It gives a cleaner recording because your mic only picks up you, not the speakers.
- Turn off noise suppression inside Teams during the recording test run — it can dampen quiet speakers on the far end.
- Check your Windows audio output before the meeting. In Settings > System > Sound, make sure the right speakers are set as default. Your recorder captures whatever is playing through the default device.
- Test your setup in a short dry run. Our screen recording with audio on Windows guide has a 2-minute checklist for this.
If the audio is too quiet in the final file, a quick bump with free software like Audacity fixes it. That's for another day — but the source recording is what matters first.
Finding where Teams recordings save
Where your file lands depends on the method:
| Method | Default Save Location |
|---|---|
| Teams built-in | OneDrive (non-channel) or SharePoint (channel meeting) |
| Xbox Game Bar | C:\Users\[You]\Videos\Captures |
| OBS Studio | C:\Users\[You]\Videos (configurable) |
| ScreenSnap Pro | Desktop or custom folder (your choice) |
| PowerPoint | Inside the .pptx file — use Save Media As to export |
If you're looking for a Teams built-in recording and can't find it, check your OneDrive Recordings folder. Microsoft auto-creates it the first time you record. Admins can change this path, so ask IT if the folder is empty.
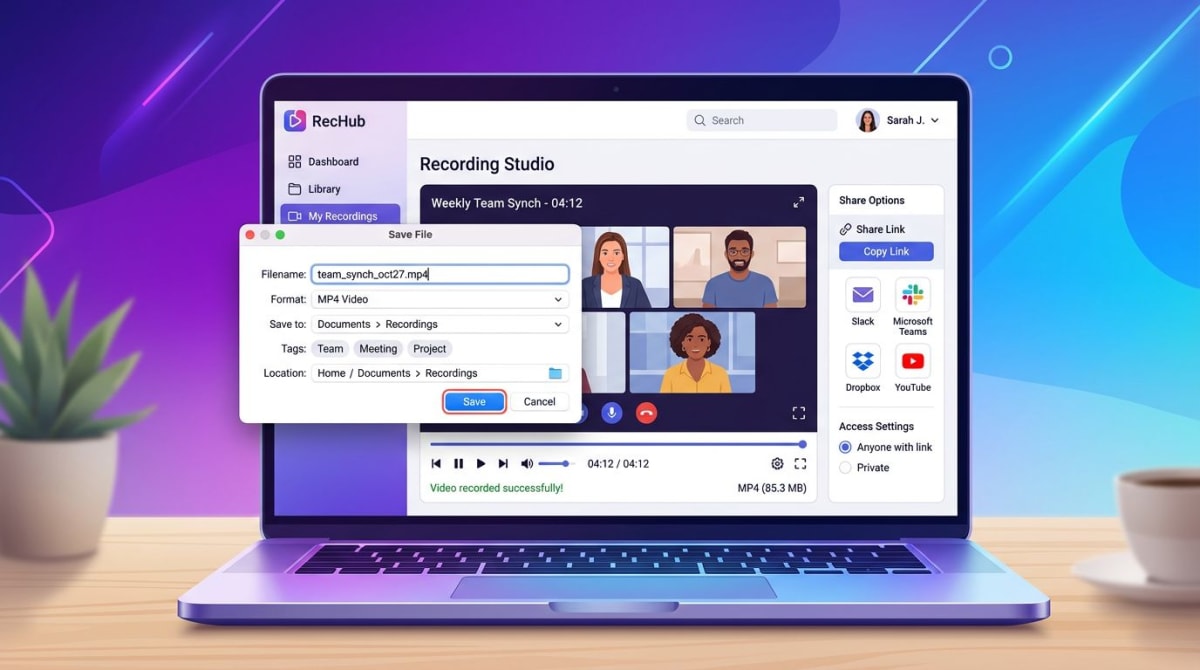
Editing and sharing Teams recordings
Once you've got the file, a few small steps make it easier to send or keep:
- Trim the dead time. Most meeting files have a few dead seconds at the start and end. Windows Photos has a built-in Trim tool — right-click the MP4, open with Photos, and drag the handles.
- Compress for email. Most email clients cap attachments at 25 MB. A 30-minute 1080p MP4 is often 500 MB+. Tools like HandBrake can cut that by 70% without visible quality loss.
- Grab a shareable link instead of attaching. OneDrive, Google Drive, or a cloud-linking recorder like ScreenSnap Pro will give you a URL you can paste into Slack or email.
- Convert to GIF for short moments. A 10-second clip works better as a GIF in chat than as a video. You can convert MP4 to GIF online with a free tool.
If you need to produce a polished recap video — not just a raw capture — Loom-style tools add captions, CTAs, and viewer analytics. We compare the best ones in our guide to Loom alternatives on Windows.
Which method should you pick?
Short answer:
- You're the host and IT allows it: use Teams' built-in recorder. The transcript is a nice bonus.
- You're an attendee and just need a copy: Xbox Game Bar. Free, fast, already installed.
- You want webcam overlay and clean audio: ScreenSnap Pro. One tool, no fiddling.
- You're a power user who records often: OBS Studio. More setup, more control.
- You already live in PowerPoint: use its screen recorder and export the MP4.
All five work on Windows 10 and 11. Pick one based on how often you'll use it — a daily recorder rewards setup time, a monthly recorder does not.
Frequently Asked Questions
Morgan
Indie DeveloperIndie developer, founder of ScreenSnap Pro. A decade of shipping consumer Mac apps and developer tools. Read full bio
@m_0_r_g_a_n_