How to Screenshot Excel Spreadsheets (5 Methods, 2026)
Taking a screenshot of your Excel spreadsheet sounds simple—until you try it. Gridlines everywhere, cells cut off mid-way, and that one column you forgot to hide. Whether you need to screenshot Excel data for a client deck, embed a table in a report, or share figures via Slack, getting a clean capture matters — and tools like ScreenSnap Pro make it easier to grab just the cells you need.
This guide covers five reliable methods to screenshot Excel spreadsheets on Mac, from quick keyboard shortcuts to Excel's built-in tools and dedicated screenshot apps that give you more control.
TL;DR: Use ⌘ + Shift + 4 for quick captures, or Excel's Copy as Picture feature for clean exports. For annotations and sharing, try a dedicated screenshot app.When You Actually Need Excel Screenshots
Before diving into methods, here's when an image beats a raw copy-paste:
- Email and Slack: People see your data right away. No files to open.
- Presentations: Static images keep their look on any computer.
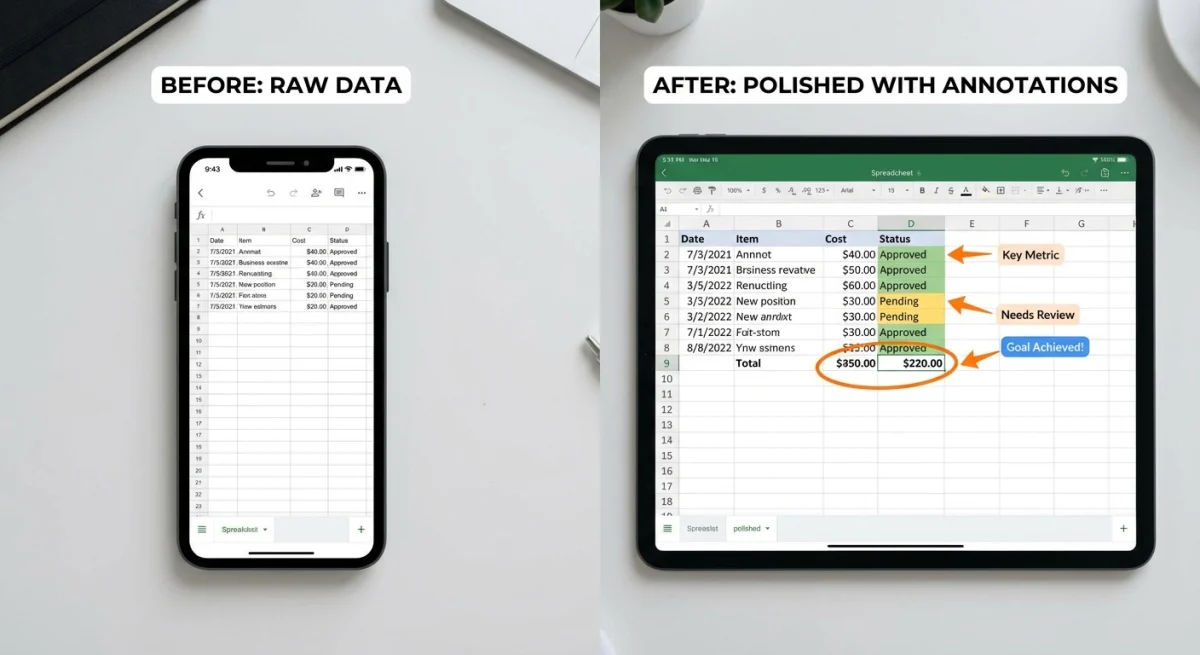
- Documentation: Add arrows and notes to explain the numbers.
- Client reports: Polished visuals with highlights and callouts.
- Social media: Share insights without exposing the full dataset.
Why not just copy cells? Images keep exact formatting. You can also add arrows, highlights, and notes.
Method 1: Mac Screenshot Shortcuts for Excel
The fastest way to capture Excel data is using Mac's built-in screenshot shortcuts. No extra apps needed.

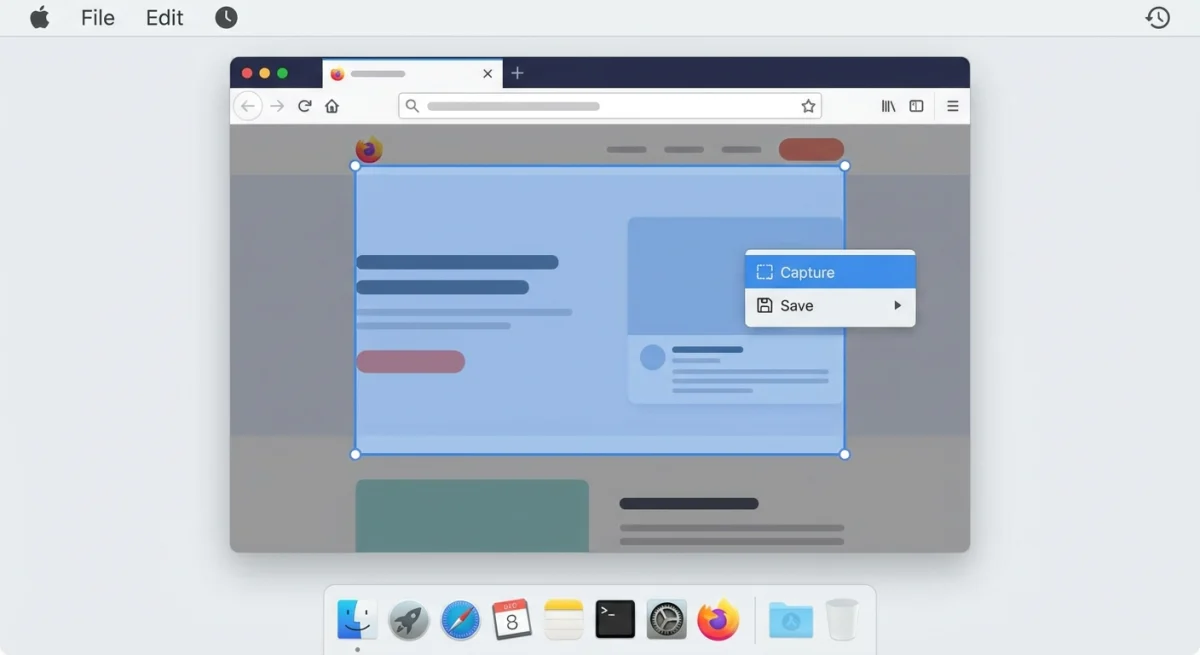
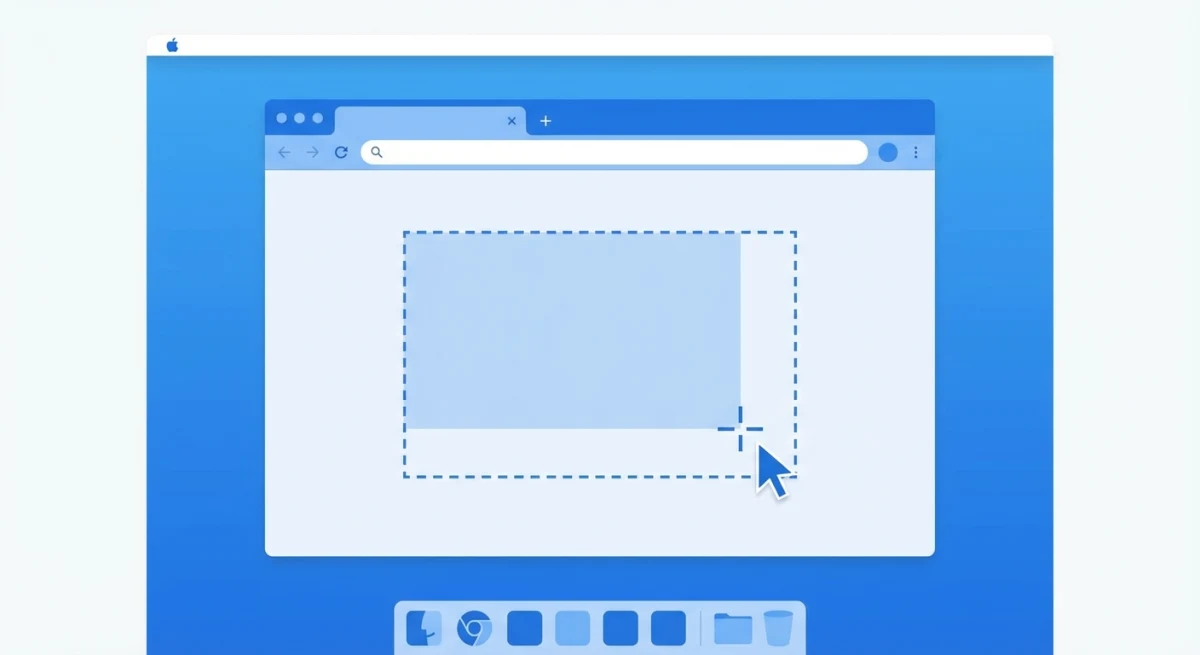
Capture a specific area
- Open your Excel spreadsheet and arrange the view
- Press
⌘ + Shift + 4 - Drag to select the cells you want to capture
- Release to save the screenshot to your desktop
Pro tip: Hold Space after pressing ⌘ + Shift + 4 to capture the entire Excel window with clean edges.
Copy directly to clipboard
Need to paste the screenshot right away into an email or document?
- Press
⌘ + Shift + Control + 4 - Select your area
- Paste with
⌘ + Vanywhere
This excel screenshot shortcut skips saving a file and puts the image right on your clipboard. Perfect for quick shares.
Limitations of basic screenshots
Mac's built-in tools work great for quick captures, but they fall short when you need to:
- Capture data that extends beyond one screen (scrolling spreadsheets)
- Add annotations like arrows, highlights, or text callouts
- Blur sensitive financial data before sharing
- Get a perfectly aligned capture without gridlines showing
For these situations, the methods below give you more control.
Method 2: Excel's Copy as Picture Feature
Excel has a hidden gem most people miss: Copy as Picture. It turns your selected cells into a clean image. You can paste it anywhere—no extra apps needed.
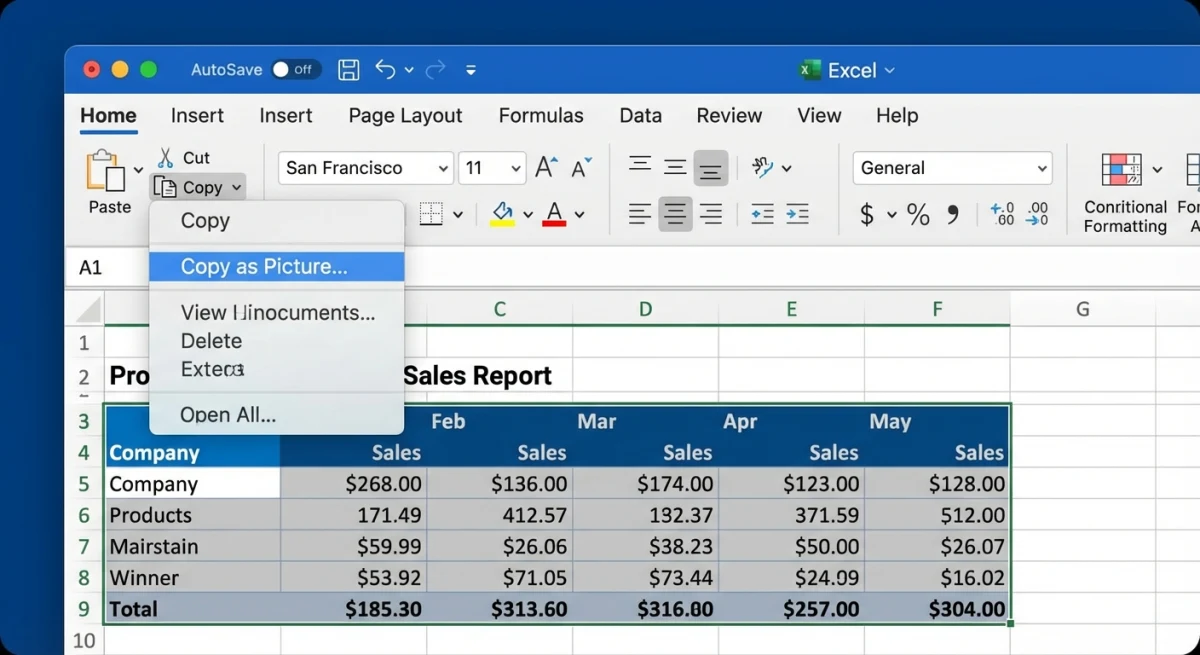
How to use Copy as Picture
- Select the cells you want to capture
- Go to Home → Copy dropdown → Copy as Picture
- Choose your options:
- As shown on screen: Captures exactly what you see
- As shown when printed: Uses print formatting
- Click OK
- Paste into any app with
⌘ + V
When to use each option
| Option | Best for |
|---|---|
| As shown on screen | Digital documents, email, Slack |
| As shown when printed | PDFs, formal reports, print materials |
| Bitmap | Small datasets, quick shares |
| Picture (Vector) | Large datasets, scaling without pixelation |
The As shown when printed option uses your print settings. Set up page breaks and margins first for the cleanest output.
Method 3: Excel's Camera Tool (Linked Screenshots)
The Camera tool is Excel's best-kept secret. It creates a live-linked image of your cells. When the source data changes, the image updates too. It's perfect for dashboards and summary sheets.
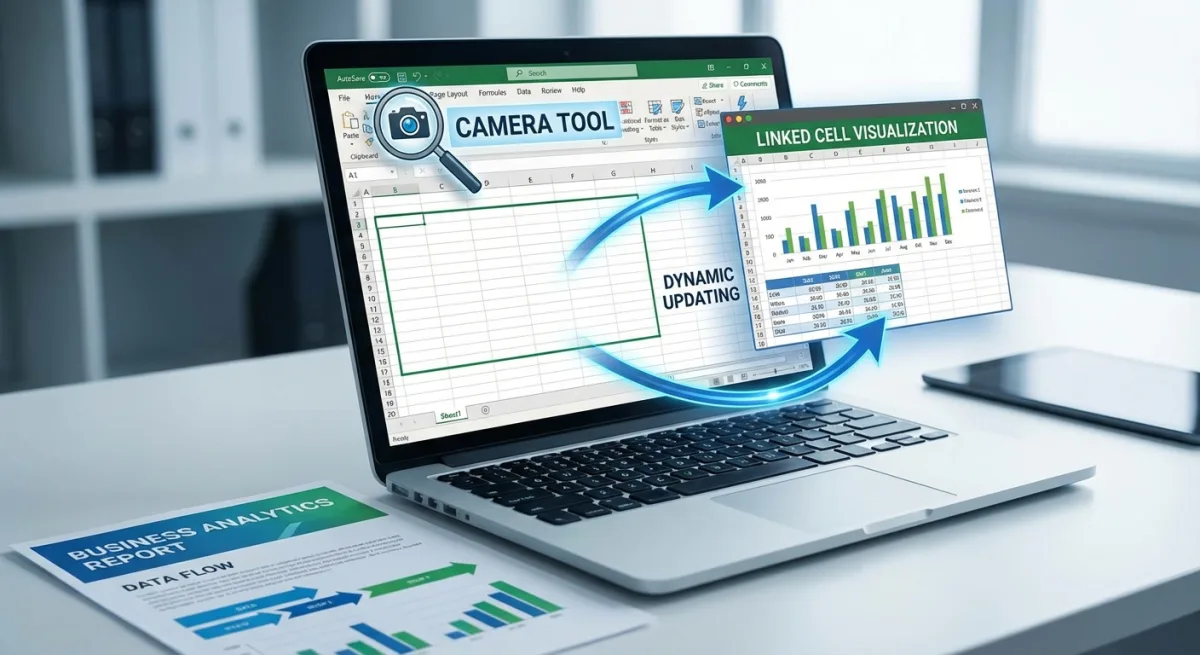
Enable the Camera tool
The Camera isn't visible by default. You need to add it first:
- Right-click the Ribbon. Select Customize the Ribbon.
- In the left dropdown, pick All Commands.
- Find Camera and add it to your toolbar.
- Click OK. Done.
Create a linked screenshot
- Select the cells you want to capture
- Click the Camera button in your toolbar
- Click anywhere to paste the linked image
Now whenever your source data changes, the image updates too. This is great for:
- Dashboard summary sections
- Report headers showing key metrics
- Multi-sheet workbooks where you need data from several tabs
Important: Camera images only stay linked inside Excel. Paste one outside the app and it becomes a static image.
Method 4: Excel's Screen Clipping Tool
Excel for Mac includes a built-in screen clipping feature that lets you capture anything on your screen and insert it directly into your spreadsheet.
How to use Screen Clipping
- Arrange the window you want to capture (can be any app, not just Excel)
- In Excel, go to Insert → Screenshot → Screen Clipping
- Your screen dims—drag to select the area
- The clipping inserts directly into your spreadsheet
This excel screen clipping tool is handy when you need to:
- Pull data from another app
- Insert charts or graphs from external sources
- Capture web data for comparison
The limitation? You're inserting into Excel, not exporting from it. For sharing Excel data externally, the other methods work better.
Tired of plain screenshots? Try ScreenSnap Pro.
Beautiful backgrounds, pro annotations, GIF recording, and instant cloud sharing — all in one app. Pay $39 once, own it forever.
See what it doesMethod 5: Dedicated Screenshot Apps
When you need more than basic captures—annotations, blur effects, instant sharing—a dedicated screenshot tool handles everything in one workflow.
What dedicated apps add
- Precise area capture: Pixel-perfect selection without guessing
- Annotation tools: Add arrows, highlights, text, and shapes
- Blur sensitive data: Hide private info before sharing
- Instant cloud sharing: Get a link instead of attaching files
- Custom backgrounds: Make screenshots look polished for presentations
For example, ScreenSnap Pro lets you capture a selection, add arrows, blur numbers, and share a link. All in about 10 seconds. For client reports, these extras save real time.
How to Screenshot Large or Scrolling Spreadsheets
What if your data extends beyond one screen? Standard screenshots can't capture scrolling content, but you have options.
Option 1: Zoom out
The simplest approach: reduce zoom level until everything fits.
- Go to View → Zoom
- Select a smaller percentage (75%, 50%, etc.)
- Take your screenshot
- Restore zoom to normal
Downside: Small text might become unreadable.
Option 2: Print to PDF, then screenshot
- Set up your print area: File → Print Area → Set Print Area
- Print to PDF: File → Print → Save as PDF
- Open the PDF and take scrolling screenshots
This gives you cleaner page breaks than manually scrolling.
Option 3: Use a scrolling capture tool
Some screenshot apps can scroll and stitch a full capture on their own. If you often screenshot data that spans multiple screens, this feature alone is worth it.
Tips for Clean Excel Screenshots
Before capturing, a few quick adjustments make your screenshots look professional:
Hide gridlines
Gridlines add visual noise. Remove them temporarily:
- Go to View tab
- Uncheck Gridlines
Take your screenshot, then turn them back on if needed.
Adjust column widths first
Nothing looks worse than #### in a screenshot because a column was too narrow. Double-click column borders to auto-fit, or manually widen columns before capturing.
Select your area before capturing
Don't try to drag-select cells in the screenshot tool. Instead:
- Select the exact cells in Excel first
- Use Copy as Picture or note the boundaries
- Then capture precisely
Use high resolution
For retina displays or print, capture at 2x resolution. Most screenshot apps offer this. The extra pixels help when your client zooms in on the numbers.
Consider the background
Adding a clean background can make your excel to image exports look more polished. This works great for slides and marketing materials. Adding backgrounds to screenshots turns raw captures into ready-to-use visuals.
Best Practices for Professional Spreadsheet Screenshots
Taking the screenshot is just step one. These best practices ensure your captures look polished and professional.
Match your destination format
Where will this screenshot end up? The answer affects your approach:
- Email/Slack: Standard resolution, PNG format, quick capture
- Presentations: Higher resolution, consider adding a subtle background
- Print documents: Use "As shown when printed" in Copy as Picture
- Social media: Crop tight, add context, consider annotations for clarity
Prepare your data first
Spend 30 seconds on prep to save 5 minutes of editing later:
- Widen columns so no data shows as
#### - Apply consistent number formatting
- Remove unnecessary columns temporarily
- Sort data in a logical order
- Freeze headers if they add context
Consider your audience
Not everyone reading your screenshot speaks spreadsheet fluently. Add context:
- Include column headers in your capture
- Add a title row if the data needs explanation
- Use annotations to highlight the key takeaway
- Consider whether gridlines help or hurt readability
Converting Excel Charts to Images
Charts work slightly differently than cell data. Here's the cleanest way to export them:
- Click the chart to select it
- Right-click → Copy (or
⌘ + C) - Open Preview or any image editor
- File → New from Clipboard
- Save as PNG
Or just right-click the chart and choose Save as Picture to export as an image file.
For multiple charts, export the whole sheet to PDF first, then grab the images you need.
Frequently Asked Questions
Wrapping Up
You have five solid methods for screenshotting Excel spreadsheets:
- Mac shortcuts (
⌘ + Shift + 4) — Quick and universal - Copy as Picture — Clean exports with format options
- Camera tool — Live-linked images within Excel
- Screen Clipping — Capture anything into Excel
- Dedicated apps — Full control with annotations and sharing
For quick internal shares, Mac's built-in shortcuts handle the job. For client-facing work where you need annotations, blur effects, or instant link sharing, a dedicated screenshot tool like ScreenSnap Pro streamlines the entire workflow.
The right choice depends on your use case. Experiment with each method and you'll quickly find which fits your daily needs.
Morgan
Indie DeveloperIndie developer, founder of ScreenSnap Pro. A decade of shipping consumer Mac apps and developer tools. Read full bio
@m_0_r_g_a_n_