How to Screenshot in Chrome: 5 Easy Methods (2026)
Taking a screenshot in Google Chrome lets you capture any webpage — a full page, a specific element, or a selected area — without installing anything extra. Chrome has built-in screenshot tools most people don't know about, plus your Mac's native shortcuts work perfectly alongside them — and dedicated apps like ScreenSnap Pro add annotations and one-click sharing on top.
Here's the quick version: press ⌘ + Shift + 4 to capture any part of your screen, or use Chrome DevTools (⌘ + Shift + I → Run command → "Screenshot") for full-page captures. Keep reading for all five methods with step-by-step instructions.
Use Mac keyboard shortcuts to capture Chrome
The fastest way to take a screenshot in Google Chrome on Mac is with keyboard shortcuts you already have. These work in any app, not just Chrome.
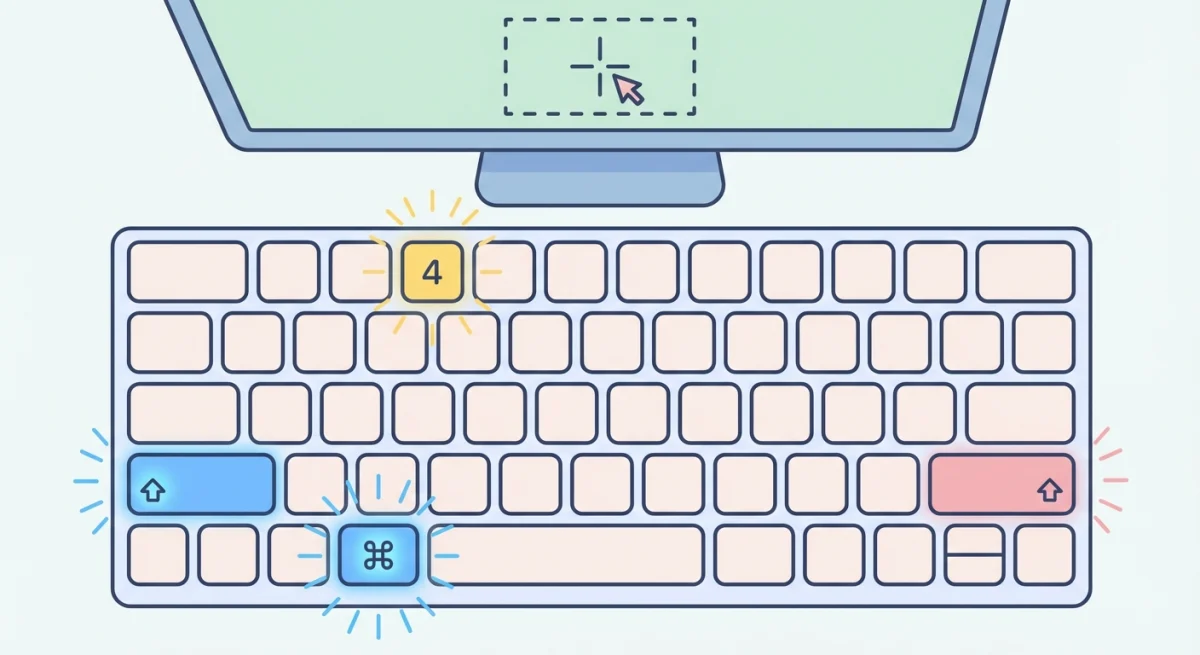
Capture a selected area
- Press
⌘ + Shift + 4. - Your cursor turns into a crosshair.
- Click and drag to select the area of the Chrome window you want to capture.
- Release to save the screenshot.
The image lands on your Desktop by default. You can change where screenshots go if you prefer a different folder.
Capture the entire Chrome window
- Press
⌘ + Shift + 4, then hitSpacebar. - Your cursor changes to a camera icon.
- Hover over the Chrome window and click.
This captures the window with a drop shadow. Hold Option while clicking to remove the shadow.
Capture the full screen
Press ⌘ + Shift + 3 to screenshot everything on your display, including Chrome and any other visible windows.
Pro tip: If you want to capture just a specific part of the screen, the area selection method gives you the most control.
How to screenshot in Chrome using DevTools (full-page capture)
Most screenshot methods only capture what's visible on screen. Chrome DevTools lets you capture an entire scrolling webpage — every pixel from top to bottom.
Full-page screenshot using the command menu
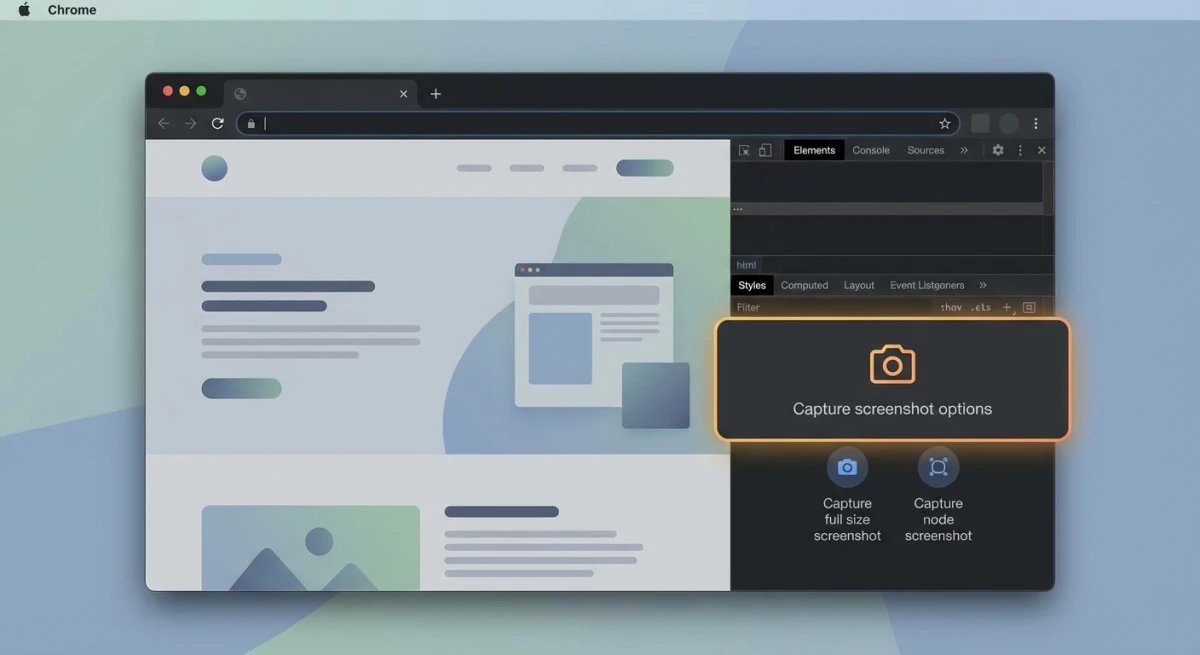
- Open DevTools with
⌘ + Option + I(or right-click → Inspect). - Press
⌘ + Shift + Pto open the Command Menu. - Type
screenshot— you'll see four options appear. - Select Capture full size screenshot.
Chrome saves the full-page image as a PNG to your Downloads folder. This works for pages of any length, even ones with hundreds of scrolling sections.
The file name follows Chrome's default pattern: screenshot-timestamp].png. If the page is very long, the image can be thousands of pixels tall — great for sharing with your team, but you may want to [crop it before using it in docs.
Capture just the visible area
Follow the same steps, but choose Capture screenshot instead. This grabs exactly what you see in the browser viewport — useful when you need a clean capture without the Mac window chrome.
Screenshot a specific HTML element
This is a hidden gem most guides skip:
- Open DevTools (
⌘ + Option + I). - Click the Select element tool (top-left arrow icon) or press
⌘ + Shift + C. - Click the element you want to capture on the page.
- In the Elements panel, right-click the highlighted element.
- Choose Capture node screenshot.
This captures that exact element — a button, an image, a card — with no extra whitespace. It's perfect for grabbing logos, UI components, or specific sections for design reviews or bug reports.
According to Chrome's official DevTools documentation, you can also screenshot nodes larger than the screen size, which is handy for long lists or expanded menus.
Capture a specific area with DevTools
There's also an area screenshot option in the Command Menu:
- Open the Command Menu (
⌘ + Shift + P). - Type
screenshotand select Capture area screenshot. - A crosshair appears — click and drag to select the area.
- Chrome saves the selected region as a PNG.
This is similar to the Mac ⌘ + Shift + 4 shortcut, but it only captures the webpage content — no browser toolbar, tabs, or bookmarks bar. Use it when you need a clean shot of the page itself without any browser UI in the frame.
DevTools screenshot tips
- Change the viewport first. Click the device toolbar icon (
⌘ + Shift + M) and pick a screen size like iPhone or iPad. Then take a full-page screenshot to get a mobile version of the page. - Disable CSS animations. Open the Animations panel in DevTools and pause all animations before capturing. This prevents half-rendered states in your screenshot.
- Use the console for batch captures. If you need screenshots of multiple pages, write a small script that navigates to each URL and calls the screenshot command. This saves time for QA and documentation tasks.
Use Chrome's built-in sharing and screenshot tool
Chrome has a lesser-known screenshot feature built right into the address bar — no DevTools required.
- Click the Share icon in Chrome's address bar (or go to the three-dot menu → More tools).
- Look for the Screenshot option.
- Select the area you want to capture.
- Chrome lets you copy the screenshot to your clipboard or save it.
This method is convenient for quick captures when you don't need the full power of DevTools. The captured image gets copied to your clipboard, so you can paste it directly into Slack, email, or a document.
Note: This feature may appear under different menu locations depending on your Chrome version. If you don't see it, make sure Chrome is updated to the latest version.
Tired of plain screenshots? Try ScreenSnap Pro.
Beautiful backgrounds, pro annotations, GIF recording, and instant cloud sharing — all in one app. Pay $39 once, own it forever.
See what it doesCapture and annotate Chrome screenshots with a dedicated tool
Mac shortcuts and DevTools handle basic captures well, but they lack annotation and sharing features. If you regularly screenshot Chrome pages for bug reports, documentation, or social media, a dedicated tool saves significant time.
ScreenSnap Pro captures any Chrome content and immediately lets you annotate with arrows, text, blur sensitive data, and add professional backgrounds to your screenshots. You can share via a cloud link in seconds — no saving, uploading, and pasting URLs separately.
Here's how the workflow looks:
- Use the keyboard shortcut to capture any Chrome area.
- The annotation overlay appears instantly — add arrows, highlight, or blur sensitive information.
- Click share to get a link, or save locally.
For technical documentation or editing screenshots on Mac, having annotation built into the capture flow makes a real difference versus screenshotting first and opening a separate image editor.
Use a Chrome extension for screenshots
If you prefer keeping everything inside the browser, Chrome extensions offer screenshot tools directly in your toolbar.
Here are the most popular options, with honest pros and cons:
GoFullPage
The simplest choice — click the icon and it scrolls the entire page, stitching everything into one tall image. It's free, lightweight, and does one thing well. The downside: no annotation tools. You get the raw image and have to edit it elsewhere.
- Price: Free
- Best for: Quick full-page captures with no fuss
Awesome Screenshot
A more complete toolkit that handles capture, annotation, and even screen recording. You can add arrows, text, and blur regions right inside Chrome. The free tier covers basic screenshots, but recording and cloud storage need a paid plan.
- Price: Free tier, Pro at $6/month
- Best for: Teams who want annotation without leaving the browser
- Read more: Awesome Screenshot for Mac: full review
Nimbus Screenshot
Offers scrolling capture, a built-in editor, and direct uploads to Google Drive or Slack. It's feature-rich but heavier than GoFullPage. Some users report it slows down Chrome on older machines.
- Price: Free tier, Pro at $5/month
- Best for: Users who need cloud integration and editing in one place
How to install a screenshot extension
- Visit the Chrome Web Store.
- Search for "screenshot."
- Click Add to Chrome on your preferred extension.
- Pin the extension to your toolbar for quick access.
The tradeoff: Extensions only work inside Chrome. Mac-native tools like keyboard shortcuts and ScreenSnap Pro work across all apps — Chrome, Safari, Finder, anything on your screen.
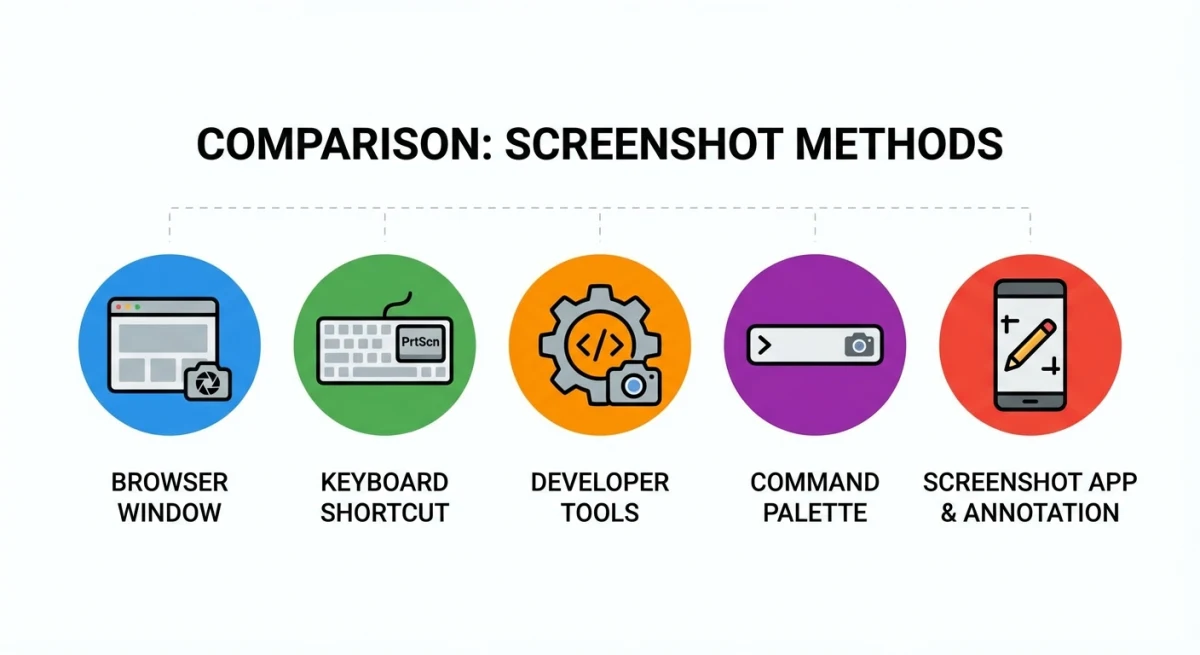
Comparison: which Chrome screenshot method should you use?
| Method | Full page | Annotation | Works outside Chrome | Speed |
|---|---|---|---|---|
| Mac keyboard shortcuts | ❌ | ❌ | ✅ | ⚡ Fastest |
| DevTools command menu | ✅ | ❌ | ❌ | Moderate |
| DevTools node capture | ❌ (element only) | ❌ | ❌ | Moderate |
| Chrome sharing tool | ❌ | Basic | ❌ | Fast |
| Chrome extension | ✅ | Varies | ❌ | Fast |
| ScreenSnap Pro | ❌ | ✅ Full toolkit | ✅ | ⚡ Fast |
Quick decision guide:
- Need a fast capture? →
⌘ + Shift + 4(Mac shortcut) - Need the entire page? → DevTools full-page screenshot
- Need to annotate and share? → ScreenSnap Pro or extension
- Need a specific element? → DevTools node screenshot
- Need to crop a screenshot after capture? → Mac Preview or ScreenSnap Pro
Tips for better Chrome screenshots
Remove clutter before capturing
Press ⌘ + Shift + F to toggle Chrome's full-screen mode, hiding the bookmark bar and tabs. This gives you a cleaner capture. You can also press F11 or use the View menu.
Capture at the right resolution
Chrome DevTools lets you simulate different screen sizes. Open DevTools, click the device toolbar icon (⌘ + Shift + M), and choose a resolution. Your full-page screenshot reflects that size — great for capturing mobile views of a website.
Save in the right format
Mac screenshots save as PNG by default, which is high quality but large. If you need smaller files for web use, you can convert the format or use our free image compressor to reduce file size without losing clarity.
Copy to clipboard instead of saving
Press ⌘ + Shift + 4 + Control to copy your screenshot directly to the clipboard instead of saving a file. Then paste with ⌘ + V wherever you need it. Learn more in our screenshot to clipboard guide.
Handle cookie banners and popups
Cookie consent banners ruin screenshots. Before capturing, either:
- Click "Accept" to dismiss the banner
- Open DevTools, find the banner element, and delete the node (right-click → Delete element)
- Use an extension like "I don't care about cookies" to auto-dismiss them
This makes a big difference for clean, professional captures — especially for technical documentation or client presentations.
Capture Chrome on a timer
Sometimes you need to screenshot a hover state, dropdown menu, or tooltip that disappears when you move your mouse. On Mac:
- Open the Screenshot app with
⌘ + Shift + 5. - Click Options and set a 5 or 10-second timer.
- During the countdown, hover over the element you want to capture.
- The screenshot fires automatically while the hover state is visible.
This trick works in Chrome and every other Mac app. It's also useful for capturing right-click context menus without the menu closing.
Use Chrome's Print to PDF as an alternative
If you need a full-page capture as a PDF rather than an image:
- Press
⌘ + Pto open the print dialog. - Set the destination to Save as PDF.
- Adjust margins and scale as needed.
- Click Save.
This gives you a vector-quality document of the page. It's better than a screenshot when you need the text to remain selectable — great for saving articles, receipts, or invoices. If you later need an image version, use our free PDF to image converter.
Frequently Asked Questions
Morgan
Indie DeveloperIndie developer, founder of ScreenSnap Pro. A decade of shipping consumer Mac apps and developer tools. Read full bio
@m_0_r_g_a_n_