Where Do Screenshots Go on Windows? All Locations (2026)
Short answer: Windows screenshots go to four different places depending on the shortcut. Win + PrtSc saves files to Pictures\Screenshots. Win + Shift + S and plain PrtSc only copy to the clipboard. Xbox Game Bar (Win + Alt + PrtSc) saves to Videos\Captures. Below is the full map — plus how to change every save location to a single folder so screenshots never disappear again.
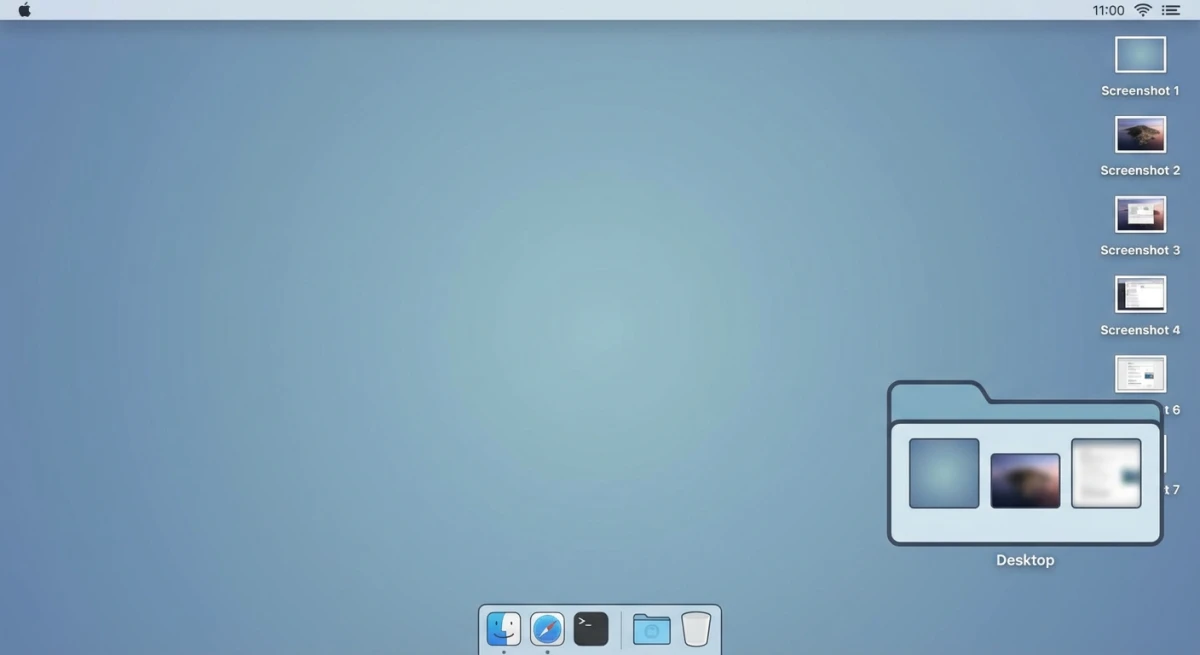
Unlike macOS (which saves every screenshot to the Desktop), Windows splits captures across the clipboard, the Pictures folder, and the Videos folder depending on the shortcut you pressed. Confusing? Yes. Below is every shortcut, exactly where each one saves, and how to change the defaults so you never lose a capture again.
Quick reference: every screenshot method and its save location
Before diving into details, here is a quick-reference table showing where screenshots are saved on Windows 10 and Windows 11.
| Shortcut | What It Captures | Where It Saves |
|---|---|---|
PrtSc (Print Screen) | Full screen | Clipboard only |
Alt + PrtSc | Active window | Clipboard only |
Win + Shift + S | Custom selection | Clipboard (+ Snipping Tool history) |
Win + PrtSc | Full screen | Pictures\Screenshots folder |
| Snipping Tool (manual save) | Custom selection | You choose the location |
Xbox Game Bar (Win + Alt + PrtSc) | Active window | Videos\Captures folder |
The key takeaway: if you pressed Print Screen by itself, your screenshot is on the clipboard and not saved as a file. You need to paste it somewhere first. The only shortcut that automatically saves a file to a folder is Win + PrtSc.
Print Screen screenshots go to the clipboard
The most common source of confusion: pressing PrtSc alone does not save a file anywhere. It copies the entire screen to your clipboard.
This is how print screen on Windows has worked since the earliest versions of the operating system. The key was originally designed to send screen contents to a printer, but today it copies them to the clipboard instead.
The print screen Windows shortcut has two main variants: PrtSc alone captures the full screen, while Alt + PrtSc captures only the active window. Both go to the clipboard.

How to use a Print Screen clipboard capture
- Press
PrtScto capture the full screen (orAlt + PrtScfor the active window) - Open any app that accepts images — Paint, Word, Slack, an email draft
- Press
Ctrl + Vto paste your screenshot - Save the file from that app if you need to keep it
The clipboard approach works well when you want to paste a screenshot directly into a chat message, email, or document. You skip the step of saving a file and then attaching it.
Pro tip: On Windows 11, you can also open Clipboard History with Win + V to see recent clipboard items, including screenshots you captured with Print Screen. This is especially helpful when you took multiple screenshots and need an earlier one.
What about laptops without a Print Screen key?
Many modern laptops — especially compact models — do not have a dedicated PrtSc key. In that case, look for it combined with the Fn key (you may need to press Fn + PrtSc).
On Microsoft Surface devices, the shortcut is Fn + Space. Some laptop manufacturers map it differently, so check your device manual if neither combination works.
Where are screenshots saved in Windows 11 with Print Screen?
In newer Windows 11 builds (23H2 and later), Microsoft changed the default behavior of the PrtSc key. Instead of copying to the clipboard silently, it now opens the Snipping Tool's selection overlay. If your Print Screen key opens a selection tool instead of copying the whole screen, this is why.
You can toggle this behavior in Settings > Accessibility > Keyboard and look for the "Use the Print Screen key to open Snipping Tool" toggle.
Win + Shift + S screenshots (Snipping Tool)
Pressing Win + Shift + S opens the Snipping Tool's selection overlay at the top of your screen. You can pick from rectangular, freeform, window, or fullscreen capture modes.
After you select an area, the screenshot goes to your clipboard and a notification pops up in the bottom-right corner. The file is not automatically saved to a folder.
How to save a Win + Shift + S capture as a file
- After capturing, click the notification that appears in the bottom-right corner
- The Snipping Tool editor opens with your screenshot
- Press
Ctrl + Sto open the Save dialog - Choose your preferred location, name, and format (PNG, JPG, or GIF)
If you miss the notification, open the Snipping Tool app from the Start menu. Your recent captures appear in the app's history, so you can still save them. Grabbed more of the screen than you meant to? See how to crop a screenshot on Windows to trim it down before saving.
Snipping Tool auto-save on Windows 11
Starting with Windows 11 version 22H2, the Snipping Tool gained an auto-save feature. Captured screenshots are stored in a temporary folder at:
C:\Users\[YourUsername]\AppData\Local\Packages\Microsoft.ScreenSketch_8wekyb3d8bbwe\TempState
These files are temporary and may be cleaned up by the system. If you want to keep a Snipping Tool capture permanently, always save it manually through the editor.
Where are screenshots saved in Windows 10 with this method? The same process applies — clipboard first, then manual save. Windows 10 uses Snip & Sketch instead of the Snipping Tool, but the behavior is identical.
Win + PrtSc saves screenshots automatically
This is the only built-in keyboard shortcut that saves a screenshot file automatically without any extra steps.
Where does Win + PrtSc save files?
When you press Win + PrtSc:
- Your screen dims briefly to confirm the capture
- A PNG file is saved to:
C:\Users\[YourUsername]\Pictures\Screenshots - Files are named
Screenshot (1).png,Screenshot (2).png, and so on
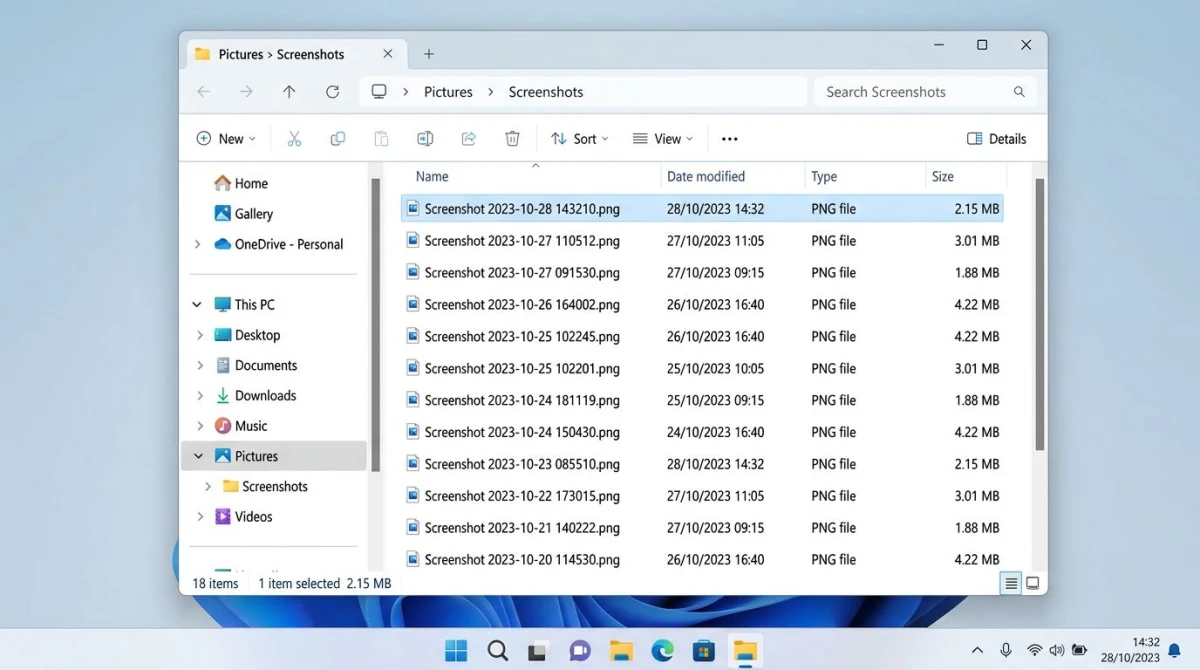
This is the method most people think of when they ask "where do screenshots go on Windows." The Pictures\Screenshots folder is created automatically the first time you use this shortcut.
Finding the Screenshots folder fast
- Open File Explorer (press
Win + E) - Click Pictures in the left sidebar
- Open the Screenshots folder
You can also type %USERPROFILE%\Pictures\Screenshots into the File Explorer address bar and press Enter to jump there instantly.
Pin the Screenshots folder for quick access
If you take screenshots frequently, pin the folder to Quick Access so it is always one click away:
- Navigate to
Pictures\Screenshots - Right-click the Screenshots folder
- Select Pin to Quick access
The folder now appears at the top of the File Explorer sidebar. This saves you from navigating through Pictures every time you need to grab a recent capture.
Xbox Game Bar captures go to the Videos folder
The Xbox Game Bar is a built-in Windows overlay designed for gaming, but it works for capturing any app. Its screenshots save to a completely different location than other methods.

Xbox Game Bar screenshot location
Screenshots taken with Xbox Game Bar (Win + Alt + PrtSc) save to:
C:\Users\[YourUsername]\Videos\Captures
You can also open the Game Bar with Win + G, then click the camera icon in the Capture widget. The save location is the same regardless of which method you use within Game Bar.
How to change the Xbox Game Bar save location
- Open Settings (
Win + I) - Go to Gaming > Captures
- Under "Captures Location," click Open folder to see the current location
- To change it, move the
Capturesfolder to your preferred location using File Explorer
Most competitors miss covering Xbox Game Bar entirely, but it is one of the most common capture methods for gamers and anyone recording their screen. For more on Windows screen recording options, Microsoft maintains an official Game Bar support page.
In-game screenshots are a separate case. Steam saves its F12 captures to a deeply nested userdata folder instead of your Pictures library, so they never show up next to your other screenshots. If you game on PC, see exactly where the Steam screenshot folder lives and how to change it.
Tired of plain screenshots? Try ScreenSnap Pro.
Beautiful backgrounds, pro annotations, GIF recording, and instant cloud sharing — all in one app. Pay $39 once, own it forever.
See what it doesHow to change the default screenshot folder on Windows
Tired of screenshots going to Pictures\Screenshots? You can move the default folder anywhere — an external drive, a cloud-synced directory, or a dedicated work folder.
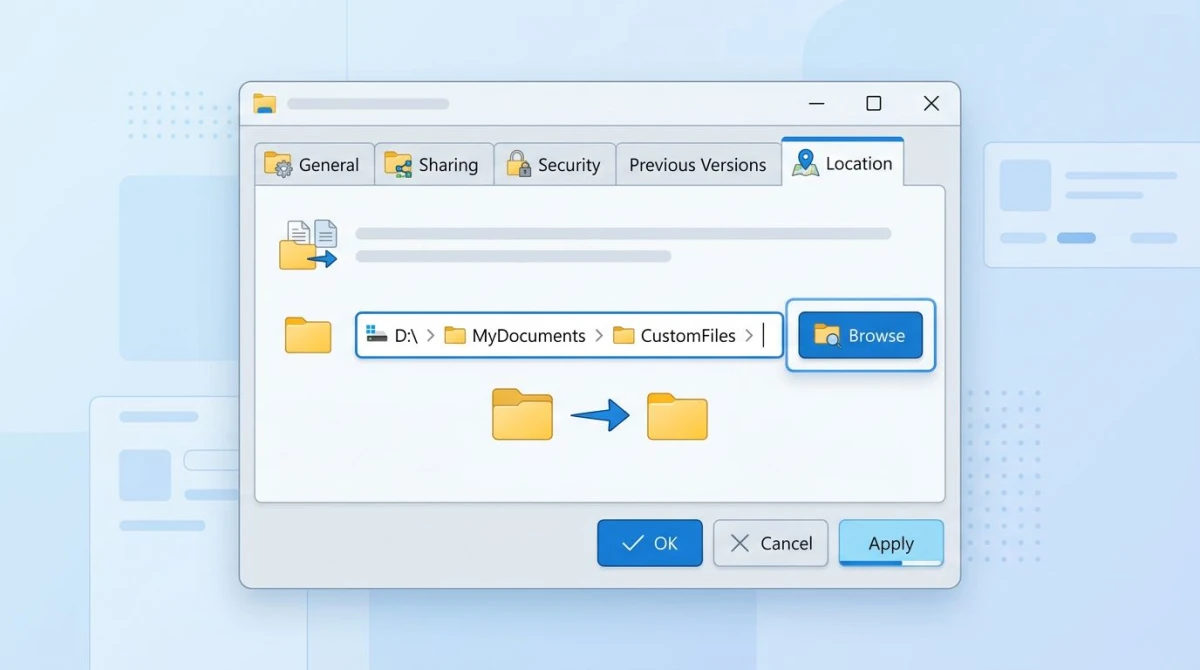
Move the Screenshots folder step by step
- Open File Explorer and navigate to
Pictures - Right-click the Screenshots folder and select Properties
- Click the Location tab
- Click Move and choose your new folder
- Click Select Folder, then Apply
- Windows asks if you want to move existing files — click Yes
From this point forward, every Win + PrtSc screenshot saves to your new location. The change persists across restarts.
Restore the default location
If you want to undo the change:
- Right-click the Screenshots folder > Properties > Location
- Click Restore Default
- Click Apply, then confirm
This resets the path back to C:\Users\[YourUsername]\Pictures\Screenshots.
Save screenshots to OneDrive automatically
If you use OneDrive, you can have Windows automatically save screenshots there. This is one of the best ways to make screenshots accessible across all your devices.
- Right-click the OneDrive icon in the system tray
- Click Settings (gear icon)
- Go to the Sync and backup tab
- Turn on Save screenshots I capture to OneDrive
Every PrtSc capture then goes straight to your OneDrive\Pictures\Screenshots folder, accessible from any device. This works with the regular Print Screen key — the screenshot gets saved as a file and synced to the cloud automatically.
Note: This only applies to PrtSc and Win + PrtSc captures. Snipping Tool and Xbox Game Bar captures are not affected by the OneDrive setting.
How to find lost screenshots on Windows
Can't find a screenshot you know you took? Here are four reliable ways to track it down.
Search by file name
- Open File Explorer (
Win + E) - Click in the search bar
- Type
screenshotand press Enter - Set the search scope to This PC to search all drives
Search by date
If you know roughly when you took the screenshot:
- In File Explorer's search bar, type
datemodified:today(ordatemodified:this week) - Filter by Type: Picture to narrow results
Check clipboard history
Press Win + V to open Clipboard History. If the feature is not enabled, go to Settings > System > Clipboard and turn it on. Once enabled, it stores your last several clipboard items — including screenshots.
Check the Recycle Bin
Screenshots that were deleted (intentionally or by accident) might still be in the Recycle Bin. Open it from the Desktop and look for PNG files with "Screenshot" in the name.
Screenshot on Windows 10 vs Windows 11: key differences
The core screenshot methods work the same on both operating systems, but there are a few things worth knowing.
| Feature | Windows 10 | Windows 11 |
|---|---|---|
PrtSc default behavior | Copies to clipboard | Can open Snipping Tool (optional) |
| Snip tool | Snip & Sketch | Snipping Tool (redesigned) |
Win + PrtSc save location | Pictures\Screenshots | Pictures\Screenshots |
| Game Bar captures | Videos\Captures | Videos\Captures |
| Clipboard history | Win + V | Win + V |
The biggest change is that Windows 11 can remap the Print Screen key to launch the Snipping Tool instead of just copying the screen. If you upgraded from Windows 10 and your PrtSc key behaves differently, check the accessibility keyboard settings mentioned earlier.
If you want to learn how to take a screenshot on Windows 10 using additional methods beyond Print Screen, Microsoft's official screenshot support page covers every option in detail.
For a detailed breakdown of screenshot workflows on macOS, see our companion guide on where screenshots go on Mac. If you are switching between platforms, our Print Screen on Mac guide explains how to translate your Windows screenshot muscle memory to macOS shortcuts.
Third-party screenshot tools that solve the save-location problem
The built-in Windows screenshot tools scatter files across different folders, require manual saving, or only copy to the clipboard. Third-party tools fix this by giving you one consistent save location for everything.
Here are a few popular options:
- ShareX — Free, open-source, and highly configurable. Saves to a custom folder and supports auto-upload. If you are switching from Windows to Mac, check out our ShareX for Mac alternatives guide.
- Greenshot — Lightweight and fast. Lets you define a default save folder on capture. Mac users looking for something similar can explore Greenshot for Mac alternatives.
- ScreenSnap Pro — Available for both Mac and Windows, ScreenSnap Pro saves every capture to a configurable folder and optionally uploads to the cloud with a shareable link. At $39 one-time (no subscription), it is a straightforward option if you want instant cloud screenshot sharing without the folder confusion.
If you frequently need to annotate your screenshots or add professional backgrounds, dedicated tools save significant time compared to pasting from the clipboard into Paint.
Bonus: save screenshots directly to a specific format
By default, Windows saves Win + PrtSc screenshots as PNG files. If you need JPG or WebP for smaller file sizes, you have two options:
- Use the Snipping Tool — After capturing with
Win + Shift + S, click the notification, then pressCtrl + Sand choose JPG from the format dropdown - Use a converter — Take your PNG screenshot and run it through a free image format converter to convert it to JPG, WebP, or any other format
If you are dealing with screenshots for a website or documentation, WebP typically produces files 25-50% smaller than PNG without visible quality loss.
Frequently Asked Questions
Keep your screenshots organized
The biggest pain point with Windows screenshots is that different methods scatter files across different locations — or don't save files at all. Now that you know exactly where each method saves, you can pick the one that fits your workflow best.
For most people, Win + PrtSc is the easiest method since it saves a file automatically. If you need more control over the area you capture, use Win + Shift + S and remember to save from the notification popup.
If you want one tool that handles capturing, saving, and sharing in a single step, ScreenSnap Pro gives you a consistent save location plus optional cloud upload — all for a one-time $39 purchase.
Morgan
Indie DeveloperIndie developer, founder of ScreenSnap Pro. A decade of shipping consumer Mac apps and developer tools. Read full bio
@m_0_r_g_a_n_