Create Step-by-Step Tutorials with Screenshots on Mac (2026)
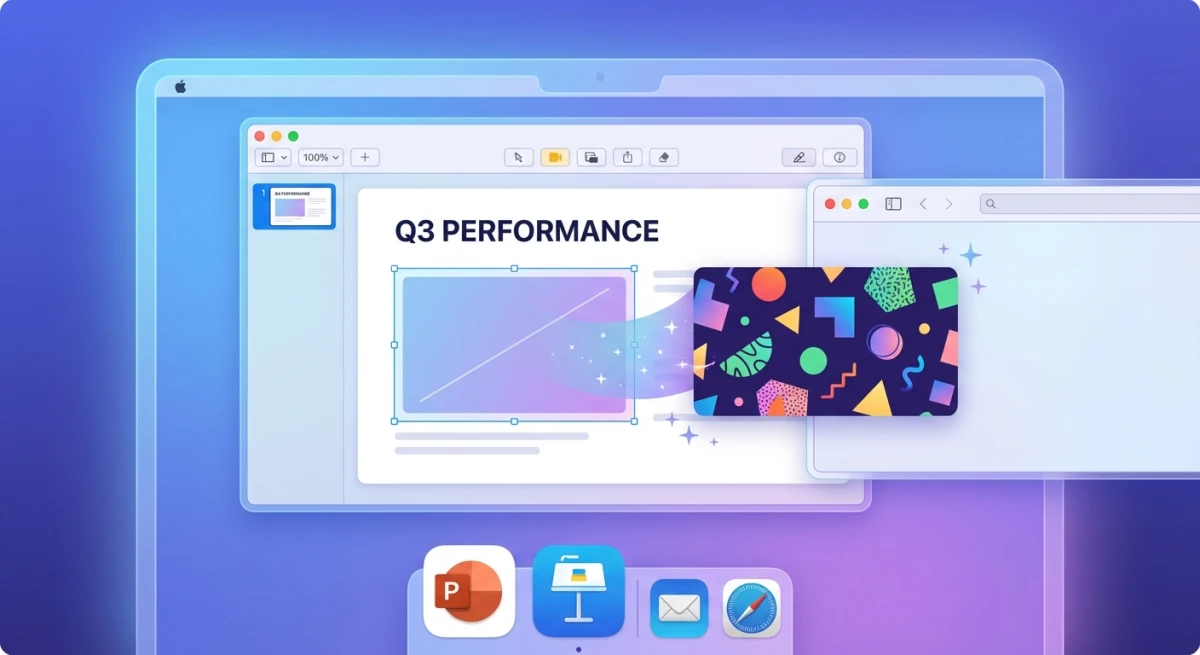
A step-by-step tutorial is a visual guide that walks someone through a process using numbered screenshots and clear instructions. It's one of the fastest ways to show "how to do X" without a meeting. Use them for software docs, team training, or help articles. Tools like ScreenSnap Pro cover the capture-and-annotate side so you can build the whole tutorial without leaving one app.
In this guide, you'll learn three methods for making visual tutorials on Mac. We'll cover static screenshots, animated GIFs, and a hybrid approach that uses both.
Why screenshot tutorials work better than text alone
Research confirms that visuals significantly boost learning and retention. A screenshot tutorial lets readers follow along at their own pace. That makes it more useful than video when someone needs a quick reference.
Here's why teams are switching to visual guides:
- Fewer support tickets. A clear tutorial answers questions before they're asked.
- Faster onboarding. New hires follow screenshots on their own. No need to shadow someone for hours.
- Works everywhere. Drop them into Notion, Confluence, Slack, email, or your help center.
- Easy to update. Swap one screenshot when the UI changes. No need to re-record a whole video.
If you already take screenshots on Mac, you're halfway there. The key is adding structure. That means numbered steps, arrows that point to the right buttons, and highlights that draw the eye.
What you need before starting
You don't need expensive enterprise software to create great tutorials. Here's the minimum setup:
| Tool | Purpose | Options |
|---|---|---|
| Screenshot tool | Capture each step | macOS built-in (⌘ + Shift + 4), ScreenSnap Pro |
| Annotation tool | Add numbers, arrows, highlights | Preview, ScreenSnap Pro |
| GIF recorder | Capture animated workflows | ScreenSnap Pro, other GIF tools |
| Sharing method | Distribute finished tutorials | Cloud link, docs, email |
The built-in macOS snipping tool handles basic captures. But for tutorials, you'll want a tool with a counter annotation (auto-numbering) and arrow tools. Without them, you're stuck adding numbers by hand in Preview. That gets old fast.
Method 1: static screenshots with numbered annotations
This is the most common approach and works for 80% of tutorials. Each step gets its own screenshot with a numbered annotation showing where to click or what to look at.
Step 1: plan your tutorial flow
Before you capture anything, walk through the process yourself. Note each action. A good rule: one action per screenshot.
Bad: "Open Settings, go to Display, and change the resolution" (three actions in one step).
Good: Three separate steps — open Settings, click Display, adjust resolution.
Write a quick outline with 5–15 steps. If it's longer, split it into sections.
Step 2: capture each action
Go through your process step by step. Capture a screenshot after each action. A few tips:
- Use window screenshots (
⌘ + Shift + 4, thenSpace) for clean, consistent results. - Close extra tabs and notifications first.
- Keep your desktop tidy — readers see everything on screen.
Need just part of the screen? Taking a partial screenshot lets you focus on what matters.
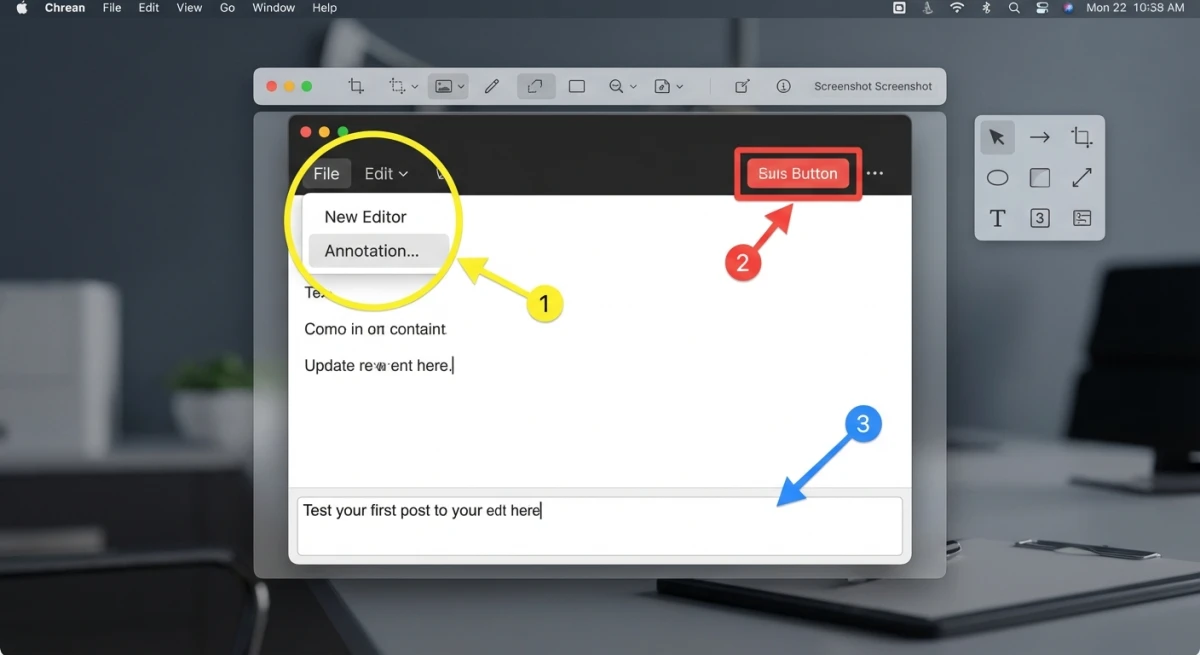
Step 3: add numbered annotations
This is where a good screenshot tool pays off. ScreenSnap Pro's counter tool adds numbers for you — tap once for "1", tap again for "2". No manual text boxes needed.
For each screenshot:
- Add a numbered circle on the element the reader should click.
- Add an arrow if the target isn't easy to spot.
- Use a highlight or box to call out key UI elements.
- Blur sensitive info like personal data or API keys.
Keep your style the same across all steps. Same colors, same circle size, same arrow style. That's what makes tutorials look polished.
Step 4: add context with text annotations
Numbers and arrows show readers where to look. Short text labels tell them what to do. Add labels like:
- "Click here"
- "Enter your email"
- "Select PNG format"
Keep labels to 3–5 words. Put longer details in the text below the image.
Step 5: organize and share
Once all screenshots are annotated, you have a few options:
- Combine into one image. Use our combine images tool to stitch steps into a single visual guide.
- Share individually. Upload each step and link them in sequence in your documentation.
- Cloud sharing. Tools like ScreenSnap Pro generate instant shareable links — paste them into Slack, email, or your wiki.
For sharing in documentation tools, check our guide on cloud screenshot sharing.
Method 2: animated GIF tutorials
Some workflows don't work well as still images. Drag-and-drop actions, cursor paths, or anything with timing is easier to show as a GIF.
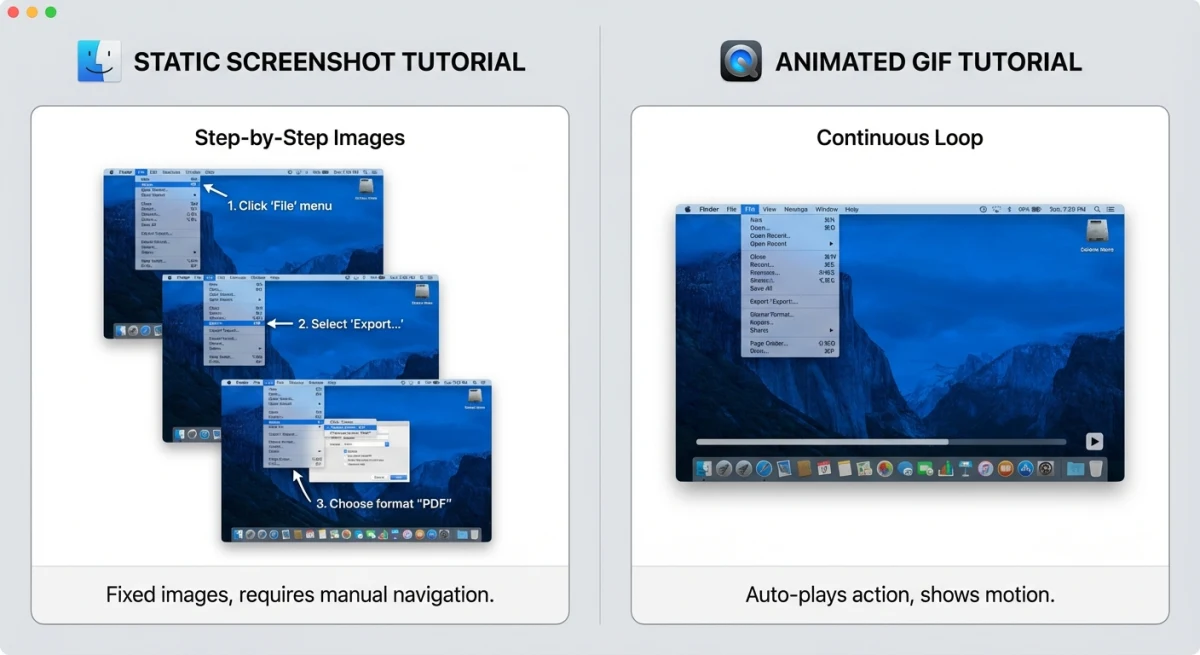
When to use GIFs instead of screenshots
| Use GIFs when... | Use screenshots when... |
|---|---|
| The action involves dragging or movement | Each step is a distinct click |
| Timing matters (hover states, animations) | The reader needs to reference specific details |
| The workflow has 2–3 rapid steps | The process has 5+ steps |
| You're showing a before/after transition | You need text annotations on specific elements |
Recording a step-by-step GIF
Recording GIFs on Mac is simple with the right tool. Here's how to make tutorial GIFs that work:
- Keep it short. Aim for 5–10 seconds. Longer GIFs lose attention.
- Record a small area. Capture only the part of the screen that matters.
- Slow down. Move your cursor with purpose. Viewers need to follow along.
- Pause on key clicks. Hold for 1–2 seconds so viewers can see what you did.
If the file is too large, convert your GIF to MP4 or use our GIF compressor to shrink it.
Method 3: hybrid approach (screenshots + GIFs)
The best tutorials mix both formats. Use screenshots for most steps. Add a GIF when an action is easier to show in motion.
Here's an example for a tutorial on "How to crop and export an image":
- Screenshot: Open the image in Preview (numbered annotation on the File menu).
- Screenshot: Select the Markup toolbar (arrow pointing to the toolbar icon).
- GIF: Drag to select the crop area (movement is easier to show animated).
- Screenshot: Click the Crop button (numbered annotation).
- Screenshot: Export settings dialog (annotated with recommended settings).
This gives readers the best of both worlds. Simple steps get scannable images. Complex steps get motion context.
Tired of plain screenshots? Try ScreenSnap Pro.
Beautiful backgrounds, pro annotations, GIF recording, and instant cloud sharing — all in one app. Pay $39 once, own it forever.
See what it doesPro tips for creating clear tutorials
These patterns make the biggest difference:
One action per screenshot
Don't cram multiple actions into one image. If a step has two clicks, use two screenshots. Readers get lost when one image has arrows pointing everywhere.
Use consistent styling
Pick one color for your circles (red or orange works well). Use the same arrow style throughout. If you're annotating screenshots, consistency is what makes them look pro.
Include context, not just the click target
Don't crop too tightly. Readers need enough of the UI to find their place. If you're showing a button in System Settings, include the sidebar so they know which section to look in.
Name your files descriptively
Instead of screenshot-2026-02-08.png, use step-3-click-export-button.png. This makes updates easier later. It's also better for accessibility if images don't load.
Keep tutorials up to date
Review your tutorials every few months. Old screenshots with outdated UI hurt trust fast. When editing screenshots, it's often quicker to retake the capture than to fix the old one.
Where to host and share your tutorials
Once your tutorial is complete, you need somewhere to put it:
- Internal wikis (Notion, Confluence) — Paste images inline with written steps.
- Help centers (Zendesk, Intercom) — Link tutorials in auto-responses to cut support tickets.
- Cloud links — ScreenSnap Pro makes shareable URLs. Drop them into Slack or email.
- Blog or knowledge base — Great for SEO if your users search "how to" guides.
- PDF exports — Convert screenshots to PDF for offline or print use.
For teams that share tutorials often, cloud links save time. Upload once, share the link everywhere.
Screenshot tutorial tools compared
Looking for the right tool? Here's how the main options compare:
| Feature | macOS Built-in | Preview | ScreenSnap Pro | Snagit |
|---|---|---|---|---|
| Screen capture | ✅ | ❌ | ✅ | ✅ |
| Numbered counter | ❌ | ❌ | ✅ | ✅ |
| Arrows & shapes | ❌ | ✅ (basic) | ✅ | ✅ |
| Blur/pixelate | ❌ | ❌ | ✅ | ✅ |
| GIF recording | ❌ | ❌ | ✅ | ✅ |
| Cloud sharing | ❌ | ❌ | ✅ | ✅ (subscription) |
| Pricing | Free | Free | One-time | $63 + annual fee |
The built-in tool works for basic captures. But once you need annotations or GIF recording, you'll want a dedicated app. The big choice is one-time purchase vs. subscription.
For regular tutorial creators, built-in counter annotations save the most time. Adding numbers by hand in Preview works, but it's slow.
Common mistakes that ruin tutorials
Avoid these pitfalls that make tutorials harder to follow:
- Too many steps per image. One action, one screenshot. Always.
- Mismatched numbering. Step 3 in the text must match step 3 in the image. Otherwise, readers get lost.
- Missing context. A tight crop of a button means nothing if readers can't find it on their screen.
- No annotations. Raw screenshots force readers to guess what to look at.
- Stale content. Old tutorials mislead people. That's worse than no tutorial at all.
- Huge file sizes. Use our image compressor if pages load slowly.
Accessibility tips for screenshot tutorials
Great tutorials work for everyone. These quick wins make a big difference:
- Add alt text to every image. Screen readers can't see arrows or circles. Describe what the screenshot shows.
- Use high-contrast colors. Red or orange on a white UI is easy to spot. Avoid light yellow or thin lines.
- Write out each action. Don't rely on the image alone. Below it, write: "Click the Export button in the top-right corner."
- Use big enough fonts. If your labels include text, check them at 100% zoom on a laptop — not a big monitor.
- Think about dark mode. Note which theme your screenshots use. The default theme works for most readers.
These small touches help more people use your tutorials. They also signal quality to everyone.
Frequently Asked Questions
Morgan
Indie DeveloperIndie developer, founder of ScreenSnap Pro. A decade of shipping consumer Mac apps and developer tools. Read full bio
@m_0_r_g_a_n_