Record a Discord Call on Windows (2026)
# How to Record a Discord Call on Windows (2026): 5 Free Methods
You want to record a Discord call on Windows — a podcast, a raid, a D&D game, an interview. You try your usual screen recorder, play it back, and only your own voice is in the file.
Discord has no built-in recorder, and its echo cancellation strips other voices out of most basic screen captures. This guide covers the five best ways to record discord audio and video on Windows in 2026 — from built-in tools to multi-track bot setups used by real podcasters.
TL;DR: For quick clips, press Win + G to open Xbox Game Bar — it records Discord with mic and system audio in one file. For podcasts needing separate tracks per speaker, use the Craig bot. For video calls with webcam plus clean system audio, ScreenSnap Pro or OBS Studio are the reliable picks. Always do a 30-second test call first.
Why recording Discord calls on Windows is tricky
Most apps record their own calls. Discord doesn't. Three quirks trip people up:
Echo cancellation eats other voices. Discord's echo filter means basic recorders often capture your mic but not your friends — or a muffled echo instead of clean voices.
Audio streams are separate. Your voice comes from your mic. Their voices come through your speakers. Windows treats these as two devices, so a single track captures only one unless you set it up on purpose.
Privacy rules matter. Some states and countries require everyone to consent. More on that later.
The fix: capture mic and system audio together, or record each speaker as a separate track. Every method below does one or both.
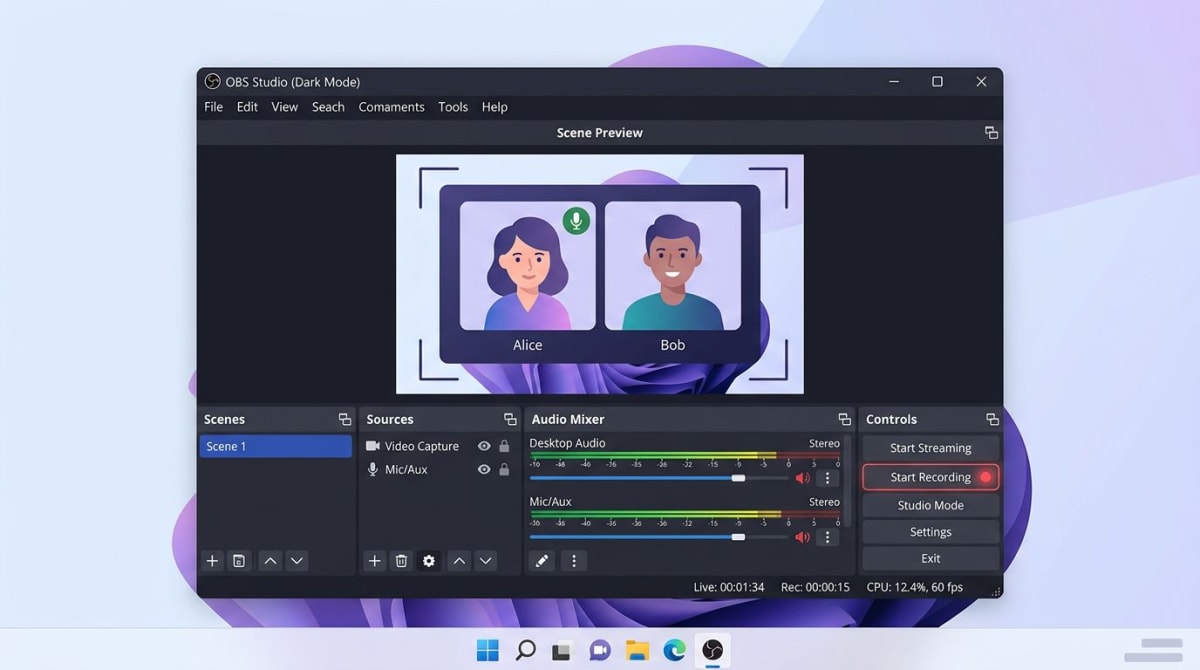
Method 1 — OBS Studio (free, split audio tracks)
OBS Studio is free, open-source, and what streamers and podcasters use. Setup takes 15 minutes the first time, but you get clean, separate audio tracks for your voice and your friends'.
How to record discord voice call audio and video with OBS:
- Download OBS Studio from the official site and install it.
- In the Sources panel, click the plus icon and add Window Capture. Pick the Discord window (or use Display Capture for the full desktop).
- Add an Audio Input Capture source for your microphone.
- Add an Audio Output Capture source for desktop audio.
- In Settings > Audio > Advanced, set Track 1 for your mic and Track 2 for desktop audio.
- In Settings > Output > Recording, set the format to MKV and enable both audio tracks.
- Join your Discord call, then click Start Recording in OBS.
- Click Stop Recording when done. Edit the MKV later in DaVinci Resolve to balance voices.
OBS wins on quality and flexibility. The downside is the learning curve. If OBS feels too heavy, see our picks for OBS alternatives for Windows that are simpler to set up.
Method 2 — Craig Bot (server-side, multi-track)
Craig is a Discord bot that records voice channels from the server side — the gold standard for podcasters. Every participant gets their own clean audio track, synced to the second, with no local setup and no cross-talk.
How to record a Discord call with Craig:
- Visit craig.chat and click Invite Craig. You need Manage Server permissions.
- Join the voice channel you want to record.
- Type
/joinin any text channel. Craig hops into the voice channel. - Start the conversation. Craig records until you type
/stop. - Craig DMs you a link with a ZIP of separate FLAC tracks, one per speaker, plus a mixed version.
- The link stays active for a week. Edit in Audacity, Reaper, or any DAW.
Craig only records audio — no video or screen shares — and you need bot permissions on the server. Ideal for a Discord community you own; for someone else's, ask them to install it first.
Method 3 — Xbox Game Bar (built into Windows)
Every Windows 10 and 11 PC ships with Xbox Game Bar. It was built for gameplay clips, but it records the Discord desktop app with mic and system audio on one track.
Game Bar is free and needs zero setup. The tradeoff: both voices end up mixed into one track, and it can't record more than one window at a time.
How to record discord screen share with Xbox Game Bar:
- Open the Discord desktop app and join your voice or video call.
- Click into the Discord window so it's the active window.
- Press Win + G to open Game Bar.
- In the Capture widget, click the round record button (or press Win + Alt + R).
- A small timer appears in the corner. Game Bar is now recording mic and system audio.
- To stop, press Win + Alt + R again or click the stop button in the capture bar.
- Find the MP4 in
C:\Users\[you]\Videos\Captures.
Common fixes if it goes wrong:
- No record button? Open Windows Settings, search "Game Bar," and flip it on. See the official Microsoft guide for more.
- No other voices in the file? Settings > Gaming > Captures > Audio to record — make sure "System" is turned on.
- Recording stops when you switch apps? That's a Game Bar limit. Keep Discord in focus, or jump to Method 4.
For a wider look at built-in options, see our full guide on how to screen record on Windows. Or browse the best free screen recorders for Windows if Game Bar feels too limited.
Method 4 — ScreenSnap Pro (easiest, records system + mic)
If you want the ease of Game Bar with the reliability of OBS, ScreenSnap Pro is built for this. It's a lightweight recorder for Windows and Mac that captures screen, webcam, mic, and system audio with one shortcut — no audio mixer to learn, no bot permissions, just a local MP4 you own.
How to record a Discord call with ScreenSnap Pro:
- Install ScreenSnap Pro and launch it.
- Open Discord and join your voice or video call.
- Press the record shortcut (default: Ctrl + Shift + 5).
- Pick your capture area — full screen, the Discord window, or a custom region.
- Toggle Mic, System Audio, and Webcam on.
- Click Start. A three-second countdown gives you time to tab back.
- Hit the shortcut again or click the stop button to end.
- Trim in the quick-edit preview, then save as MP4 or upload for a shareable link.
Mic and system audio merge into one synced track by default; you can also save them to separate WAV files for later editing. A one-time $29 purchase with lifetime updates beats most monthly recorders after month two.
It also handles Zoom, Teams, Google Meet, and Slack Huddles. On a Mac too? See our Discord screenshot guide for Mac. For the full audio walkthrough, see screen recording with audio on Windows.

Tired of plain screenshots? Try ScreenSnap Pro.
Beautiful backgrounds, pro annotations, GIF recording, and instant cloud sharing — all in one app. Pay $29 once, own it forever.
See what it doesMethod 5 — Audacity + VB-Cable (audio only)
If you only need audio, Audacity plus a free virtual cable is the classic pairing. VB-Cable is a virtual audio driver that routes Discord's output back into Audacity as an input.
How to record discord audio with Audacity and VB-Cable:
- Install Audacity and VB-Cable from their official sites. Reboot after VB-Cable.
- In Discord's Voice & Video settings, set Output to CABLE Input (VB-Audio Virtual Cable).
- In Audacity's device toolbar, set Input to CABLE Output (VB-Audio Virtual Cable), two channels.
- Click the red record button in Audacity. Start your Discord call.
- When done, click stop and File > Export > Export as WAV or MP3.
- To also record your mic, add a second Audacity track with its input set to your physical mic.
You get two clean tracks: friends on one, you on the other. Downside: no video, and it's easy to forget — leave VB-Cable set and your game sounds stop working until you switch back.
Recording voice calls vs video calls
The best method depends on the call type:
- Voice-only (podcasts, game sessions). Craig for multi-track, Audacity + VB-Cable for local control.
- Video calls with webcams. Game Bar for quick captures, ScreenSnap Pro for clean output, OBS for full control. Craig doesn't capture video.
- Screen shares. Any recorder works — just keep system audio on.
If the call mixes all three, OBS or ScreenSnap Pro handle screen, webcam, and audio in one file.
How to record Discord with separate tracks per speaker
For podcasts, separate tracks let you edit each voice on its own. Two ways:
Server-side with Craig. One FLAC file per speaker, synced to the second — the cleanest option, with no local audio setup and lossless files.
Local with Audacity + VB-Cable. Record your mic on one track and Discord audio on a second. Your friends stay mixed on that second track, but you can edit your voice apart from theirs. Good enough for solo-host shows.
For full per-speaker split without a bot, every participant records their own mic locally — the "double-ender" used in pro podcasting. Everyone sends their file to the host, who aligns them in Audacity or Reaper.
Best audio settings for clear voice
Video you can fix in post. Audio you can't. A few quick tweaks make a big difference:
- Use a headset, not speakers. Speakers create echo — your mic picks up the other voices a second time.
- Turn off Discord's echo cancellation with OBS or Audacity. Discord > User Settings > Voice & Video. Keep it on for Game Bar and ScreenSnap Pro.
- Pick 48 kHz, 16-bit in Windows Sound Settings (right-click your input device > Properties > Advanced). Matches Discord's sample rate.
- Set mic input to around 75% and watch the meter — peaks should stay under the red.
- Close Spotify, YouTube, and other voice apps. Anything playing ends up in the file.
A 30-second test call is the best habit you can build.
Legal reminder
Recording rules depend on where you live.
United States: 38 states and D.C. follow one-party consent. The other 12 (California, Florida, Illinois, Maryland, Massachusetts, Michigan, Montana, Nevada, New Hampshire, Pennsylvania, Washington, Connecticut) require all-party consent.
EU and UK: GDPR treats recordings as personal data. You usually need consent before recording identifiable voices.
Canada: One-party consent federally, with some provinces stricter.
Beyond the law, there's etiquette — ask first, even when you don't have to.
FAQ
Wrapping up
Discord skipped the built-in recorder, but Windows has you covered. Xbox Game Bar is the zero-setup pick for quick clips. OBS Studio is the free power option with split tracks. Craig Bot wins for podcasts. Audacity plus VB-Cable is a solid audio-only fallback. ScreenSnap Pro is the fastest all-in-one for a clean local MP4 with webcam and system audio in one shortcut.
Whichever you pick, do a 30-second test call first. Check both voices land in the file and levels sit under the red.
Morgan
Indie DeveloperIndie developer, founder of ScreenSnap Pro. A decade of shipping consumer Mac apps and developer tools. Read full bio
@m_0_r_g_a_n_