How to Record a FaceTime Call (2026)
Want to save a video chat with family, capture an interview, or keep a record of an online lesson? Here is how to record a FaceTime call on your Mac, with the audio from both sides. The quick version: macOS has built-in screen recording, but it does not grab the other person's voice on its own. You need one extra step for that. We will walk through every method below.
There is also a rule worth knowing first. FaceTime never tells the other person you are recording, so the responsibility is on you to ask. More on that in a moment.
Can you record a FaceTime call? (The short answer)
Yes. Apple does not put a "record" button inside FaceTime, but you can record the call window with a separate screen recorder. On a Mac you have three main routes:
- macOS screen recording (
Shift + Command + 5): captures video, but not the other person's audio by default. - System audio capture: adds a free audio driver so both voices are recorded.
- An all-in-one recorder: captures screen, system audio, your mic, and webcam in one click.
Here is how those options compare at a glance.
Quick comparison of FaceTime recording methods
| Method | Records both voices? | Setup effort | Cost | Best for |
|---|---|---|---|---|
| macOS Screen Recording (Shift+Cmd+5) | No (your mic only) | None | Free | Quick video, no other-side audio |
| QuickTime Player | No (your mic only) | None | Free | Same as above, with trim tools |
| Screen recording + BlackHole | Yes | Medium | Free | Full audio on a budget |
| ScreenSnap Pro | Yes | Low | $34 once | Both voices + instant share link |
| iPhone Screen Recording | Yes (with mic on) | None | Free | Recording on the phone instead |
The big gap most people hit is audio. The built-in Mac tools record what your microphone hears, which is your own voice plus a faint, echoey version of the other person. To get a clean recording of both sides, you need to capture system audio: the sound your Mac plays through its speakers. Two of the methods above do that for you.
First, the consent rule you should not skip
FaceTime gives no recording alert. The person you are talking to will not see a banner, a sound, or any sign that you hit record. That is different from apps like Snapchat, and it puts the responsibility on you.
In many U.S. states, one party needs to agree to a recording, and you count as that party. But "two-party consent" states, including California, Florida, Pennsylvania, and several others, require everyone on the call to agree first. Other countries have their own rules.
The safe move is simple: ask before you record. A quick "Hey, mind if I record this so I can look back at it?" covers you almost everywhere and is just good manners. If you are recording an interview or anything you plan to publish, get that yes on the record.
This matters more than it might seem. A recording you made without consent can be useless for anything official, and sharing it could land you in real trouble depending on where you and the other person live. When in doubt, treat consent as required rather than optional. It costs you nothing and protects you completely.
Pro tip: Start the recording, then ask for consent on camera. Now your permission is captured in the file itself.
Method 1: Record FaceTime with macOS screen recording
The fastest way to start is the built-in screen recording toolbar. It is already on every modern Mac, so there is nothing to install.
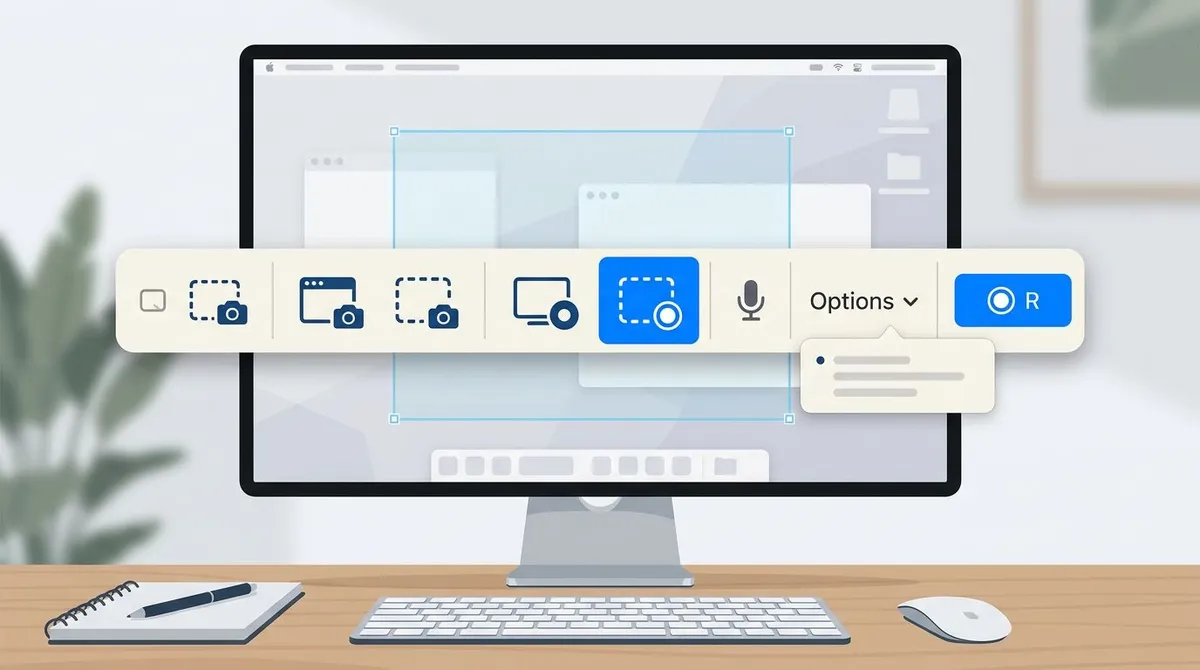
- Open FaceTime and start (or answer) your call.
- Press
Shift + Command + 5to bring up the recording toolbar. - Choose Record Entire Screen or Record Selected Portion to box in just the FaceTime window.
- Click Options and pick your microphone under the Microphone heading so your own voice is captured.
- Click Record. To stop, click the small stop icon in the menu bar or press
Command + Control + Esc.
Your recording lands on the Desktop as a .mov file by default. You can change where it saves from that same Options menu. For a full walkthrough of the toolbar and its settings, see our guide on how to screen record on a MacBook.
The catch: this method only records the audio from the microphone you selected. It captures your voice clearly, but the other person comes through faint and echoey, picked up by your mic from the speakers. For a real two-sided recording, keep reading.
You can also use QuickTime Player for the same job. Open it, choose File → New Screen Recording, pick your mic, and record. QuickTime has the same audio limit (it cannot grab system sound on its own), but it adds handy trim controls afterward. Our QuickTime screen recording guide covers it in detail.
Method 2: Record a FaceTime call with audio from both sides
To capture the other person's voice cleanly, you need to route your Mac's system audio into the recording. macOS blocks apps from grabbing system sound for privacy reasons, so the free workaround is a small virtual audio driver called BlackHole.
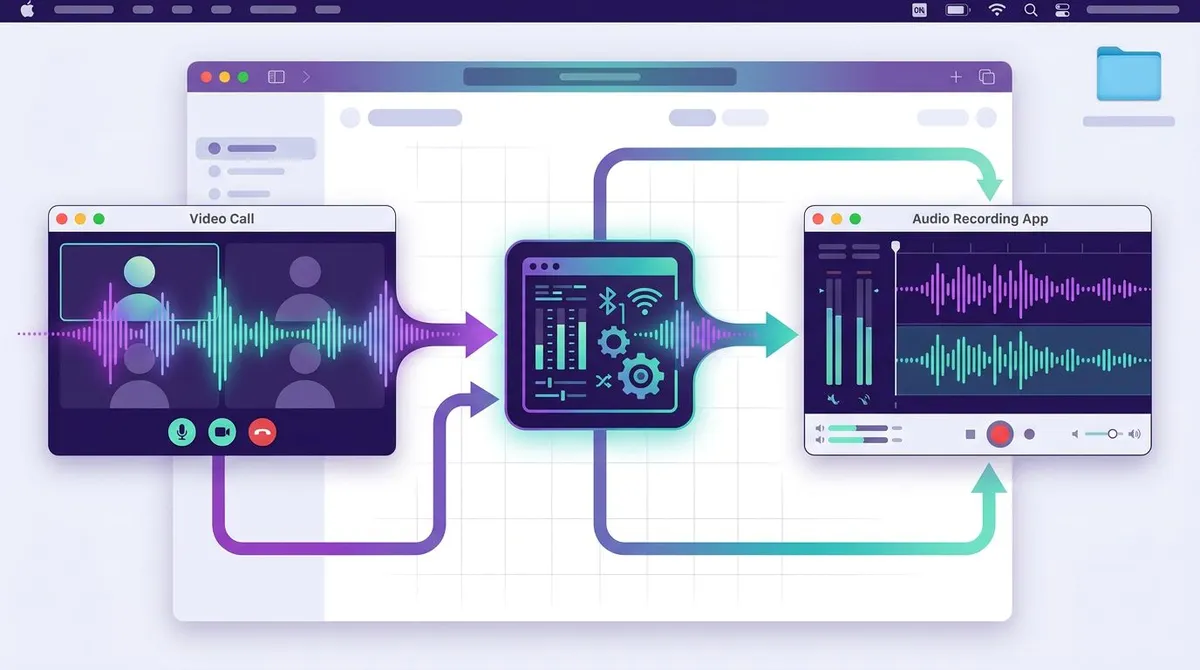
The short version of the setup:
- Install BlackHole (it is free and open source).
- Open the Audio MIDI Setup app and create a Multi-Output Device that sends sound to both your speakers and BlackHole.
- Set that Multi-Output Device as your Mac's output so you can still hear the call.
- In your screen recorder, pick BlackHole as the audio input. Now the other person's voice is recorded.
It works, and it costs nothing. The trade-off is fiddliness: you are juggling audio devices, and it is easy to end up with no sound or a silent recording if one setting is off. We break the whole process down step by step in how to screen record with audio on Mac, including how to mix in your own mic alongside system sound.
A couple of things trip people up here. First, once you switch to the Multi-Output Device, your Mac's volume keys stop working. That is normal for this kind of setup, so set your level before the call. Second, if you want both your voice and the other person's in one file, you have to create an Aggregate Device that combines your mic with BlackHole, then point your recorder at that. It is an extra layer, but it is the reason this route is free.
If you record calls often, that setup gets old fast. Which leads to the easiest route.

Tired of plain screenshots? Try ScreenSnap Pro.
Beautiful backgrounds, pro annotations, GIF recording, and instant cloud sharing, all in one app. Pay $34 once, own it forever.
See pricing and featuresMethod 3: Record FaceTime with both voices in one click
If you would rather skip the audio-driver juggling, a Mac screen recorder with system audio built in handles it for you. ScreenSnap Pro captures your screen, system audio (the other person's voice), your microphone, and your webcam at the same time: no BlackHole, no Audio MIDI Setup, no guessing whether sound made it into the file.

The flow looks like this:
- Open ScreenSnap Pro and start your FaceTime call.
- Choose the FaceTime window or full screen.
- Toggle on system audio and microphone so both sides are captured.
- Hit record. When you stop, you get a clean
.mp4ready to play or share.
Because system audio capture is built in, both voices land in the file with no extra setup. When the call ends, you can copy an instant share link instead of emailing a huge video file. That is handy when the recording is a few hundred megabytes. It is a one-time $34 purchase that works on Mac and Windows, so there is no subscription to think about.
After recording, you can also mark up the video. Circle a moment, add a text note, or blur something private before you send it. This is useful for interviews and tutorials where you want to point things out.
Method 4: Record a FaceTime call on iPhone
Sometimes the FaceTime call is on your phone, not your Mac. iPhone has a built-in Screen Recording control that handles this well, and it captures both voices as long as you turn the mic on.
- Add Screen Recording to Control Center via Settings → Control Center if it is not there already.
- Open Control Center and press and hold the round record button.
- Tap the Microphone icon so it turns red. This is what lets the other person's audio through.
- Tap Start Recording, return to FaceTime, and run your call.
- Stop from the red status bar at the top of the screen. The video saves to Photos.
The mic toggle is the part people miss. Without it, you get a silent or one-sided clip. Apple explains the screen recording feature in its official support article.
Troubleshooting: when the recording goes wrong
Even a simple recording can come out with no sound or a stuttering picture. Here are the common fixes.
The other person's voice is missing. This is the number one issue, and it almost always means system audio was not captured. The built-in Mac tools cannot grab it alone. You need BlackHole (Method 2) or a recorder with built-in system audio (Method 3). Double-check the audio input before a long call.
Only my voice is in the file. Same root cause. Your mic was recording, but system sound was not routed in. Confirm BlackHole or your recorder's system-audio toggle is active.
The video is choppy or laggy. Recording while video chatting is demanding. Close heavy apps and browser tabs, plug in your charger, and record a smaller area instead of the whole screen if you can.
There is no audio at all. Check that the right output device is selected in System Settings → Sound, and that your call is not muted. If you built a Multi-Output Device, make sure it is set as the active output.
The file is too big to send. Long recordings get heavy. Trim out dead air first, or use a tool that gives you a share link so you are not attaching a giant file. You can also edit your screen recording on Mac to cut it down before sharing.
Capturing a single moment instead of the whole call
Not every FaceTime memory needs to be a full video. If you only want one frame (a funny face, a whiteboard, a screen the other person is sharing), a screenshot is faster and lighter than a recording.
Press Shift + Command + 4 and drag a box, or Shift + Command + 3 for the whole screen. We cover the timing and the notification question in how to screenshot a FaceTime call on Mac. The same idea works for other apps too, like a Zoom meeting screenshot or any video call screenshot on Mac.
If you also use Windows: the steps above are Mac-only. On a PC the built-in Game Bar (Windows + G) and other tools handle this differently, and the audio routing is its own thing.Frequently Asked Questions
Recording FaceTime, the simple way
Recording a FaceTime call on a Mac comes down to one decision: do you need the other person's voice in the file? If not, Shift + Command + 5 does the job in seconds. If you do (and most people do), you need to capture system audio, either by setting up BlackHole for free or by using a recorder that handles it for you.
Whichever route you pick, ask before you hit record. FaceTime will not do it for you, and a five-second question saves a lot of trouble later.
If you record calls, interviews, or lessons regularly and want both voices, your webcam, and an instant share link without the audio-driver dance, ScreenSnap Pro handles it in one click for a one-time $34.

Morgan
Indie DeveloperIndie developer, founder of ScreenSnap Pro. A decade of shipping consumer Mac apps and developer tools. Read full bio
@m_0_r_g_a_n_