How to Screen Record on MacBook: 4 Methods (2026)
Want to know how to screen record on MacBook? Every MacBook running macOS Mojave or later has built-in tools for it, and dedicated apps like ScreenSnap Pro add markup and instant sharing on top. You can capture tutorials, presentations, bug reports, or app demos — no downloads needed for the basics.
This guide covers four methods to record your MacBook screen. We'll walk through the Screenshot toolbar, QuickTime Player, third-party recorders, and GIF capture. Each method has different strengths, and you'll find the right one for your workflow below.
Can you screen record on a MacBook?
Yes. Every MacBook Air and MacBook Pro running macOS Mojave (10.14) or later includes a built-in screen recorder. You don't need to install anything.
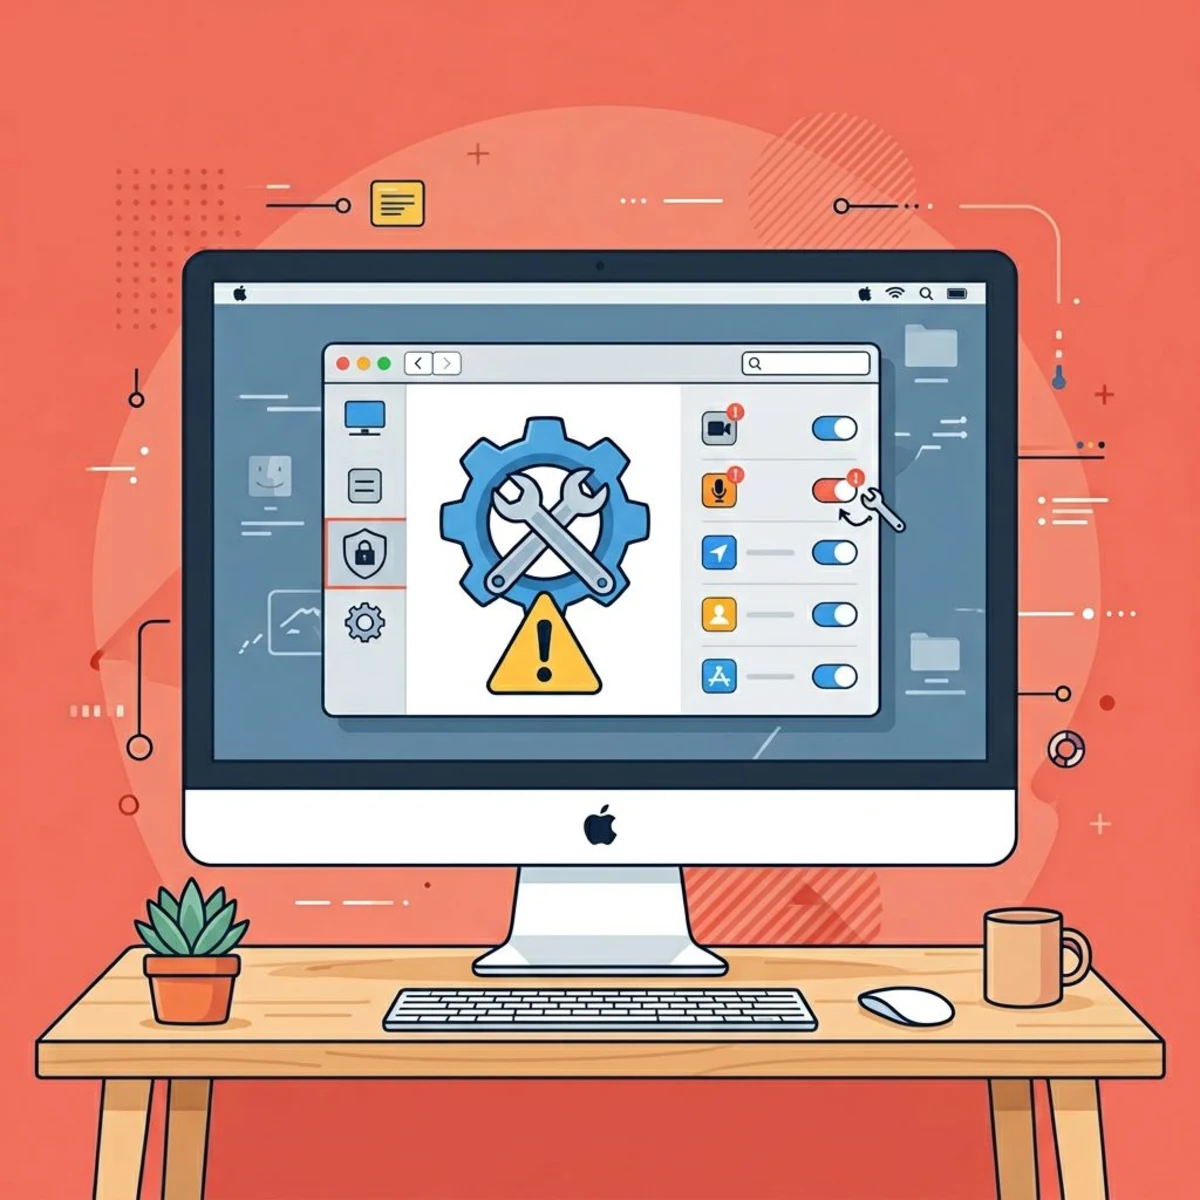
Before you record, you may need to grant screen recording permissions:
- Open System Settings → Privacy & Security → Screen Recording
- Toggle on the apps you want to use for recording
- Restart the app if prompted
Some apps (like Apple TV) block screen recording for copyright reasons, but most standard apps and websites work fine.
How to screen record on MacBook with the Screenshot toolbar
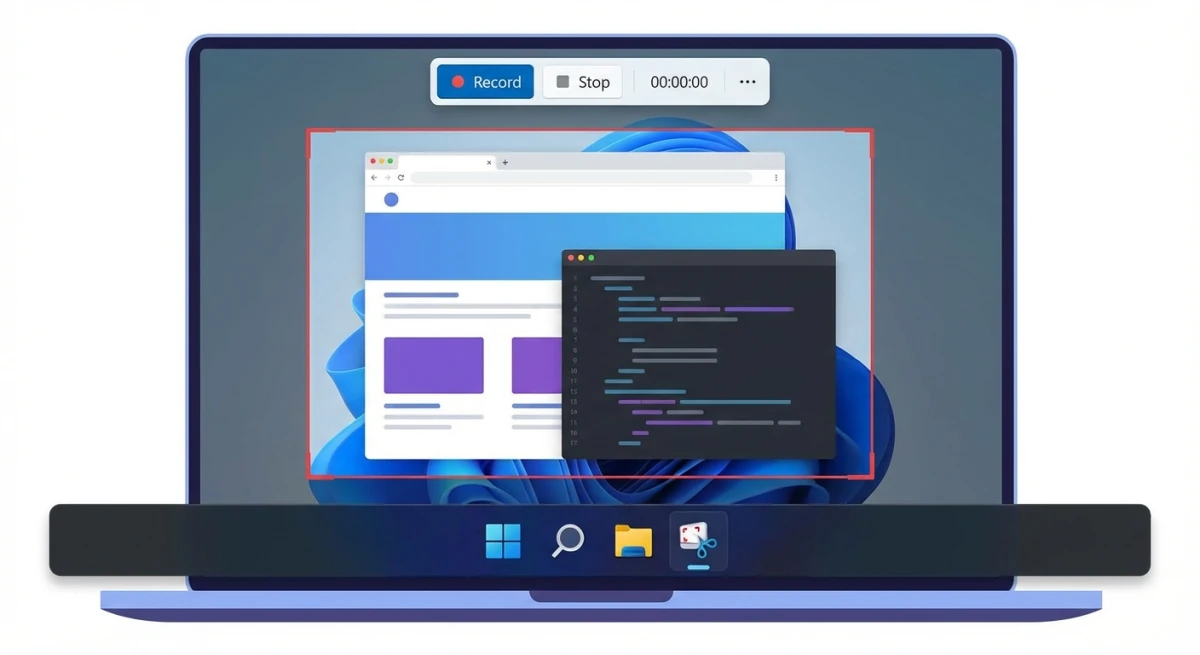
The Screenshot toolbar (⌘+Shift+5) is the fastest way to start a macbook screen recording. It's built into macOS and opens with a single keyboard shortcut. Apple backs this method. It works the same on MacBook Air and MacBook Pro.
How to record your full screen
- Press
⌘+Shift+5to open the Screenshot toolbar - Click the Record Entire Screen button (the screen icon with a circle)
- Click Record to start
- Click the Stop button in the menu bar (or press
⌘+Control+Esc) to finish
Your recording saves to the Desktop by default.
How to record a specific area
- Press
⌘+Shift+5 - Click the Record Selected Portion button
- Drag the borders to frame the area you want
- Click Record, then Stop when done
Recording with audio
Click Options in the toolbar before recording to select a microphone input. This captures your voice alongside the screen — useful for narrated tutorials and walkthroughs.
Note: The Screenshot toolbar records microphone audio only. It doesn't capture system or internal audio by default. For recording system audio on your MacBook, you'll need a third-party tool (covered in Method 3).
Adjusting recording settings
Before hitting Record, click Options to fine-tune your screen capture macbook settings. macOS saves each setting between sessions. You only need to set them up once:
- Save to: Change where recordings land (Desktop, Documents, or a custom folder)
- Timer: Add a 5 or 10-second countdown before recording starts
- Show Mouse Clicks: Adds a visual circle around each click — great for tutorials
- Capture format (macOS Tahoe 26+): Choose between SDR (H.264) for compatibility or HDR (HEVC) for better quality
Screenshot toolbar pros and cons
| Pros | Cons |
|---|---|
| Built-in, no download needed | No system audio capture |
| Quick keyboard shortcut | Exports only as .mov |
| Records full screen or selected area | No editing or annotation tools |
| Timer and microphone options | No scheduling |
The Screenshot toolbar is your best option for quick, no-fuss macbook screen recording. If you need more control, keep reading.
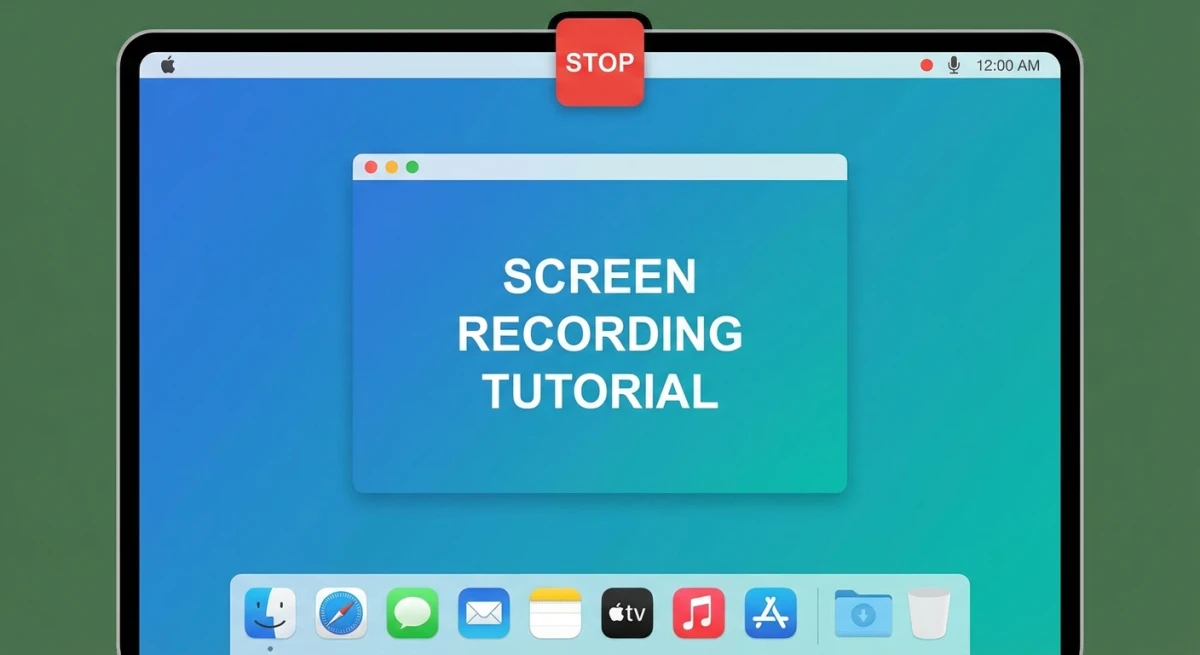
Method 2: QuickTime Player
QuickTime Player gives you the same screen recording macbook pro and MacBook Air features with a slightly different workflow. It's pre-installed on every Mac. QuickTime offers more control over your recordings after capture.
Step-by-step QuickTime screen recording
- Open QuickTime Player from the Applications folder
- Go to File → New Screen Recording (or press
Control+⌘+N) - On newer macOS versions, this opens the Screenshot toolbar. On older versions, you get QuickTime's own recording window
- Click the arrow next to the Record button to choose your microphone
- Click Record, then click anywhere to record the full screen — or drag to select a portion
- Click Stop in the menu bar or press
⌘+Control+Esc
QuickTime automatically opens the finished recording so you can trim, split, or rearrange clips before saving.
When to use QuickTime over the Screenshot toolbar
- You want to trim your recording immediately after capture
- You're on an older macOS that doesn't have the
⌘+Shift+5toolbar - You prefer a dedicated app window for managing recordings
- You need to combine multiple clips into one recording session
For detailed editing options after recording, check out our guide on how to edit screen recordings on Mac.
QuickTime pros and cons
| Pros | Cons |
|---|---|
| Pre-installed, no extra software | Limited editing (trim only) |
| Opens recording for immediate review | No system audio |
| Works on older macOS versions | .mov format only |
| Basic trim and split editing | No annotations |
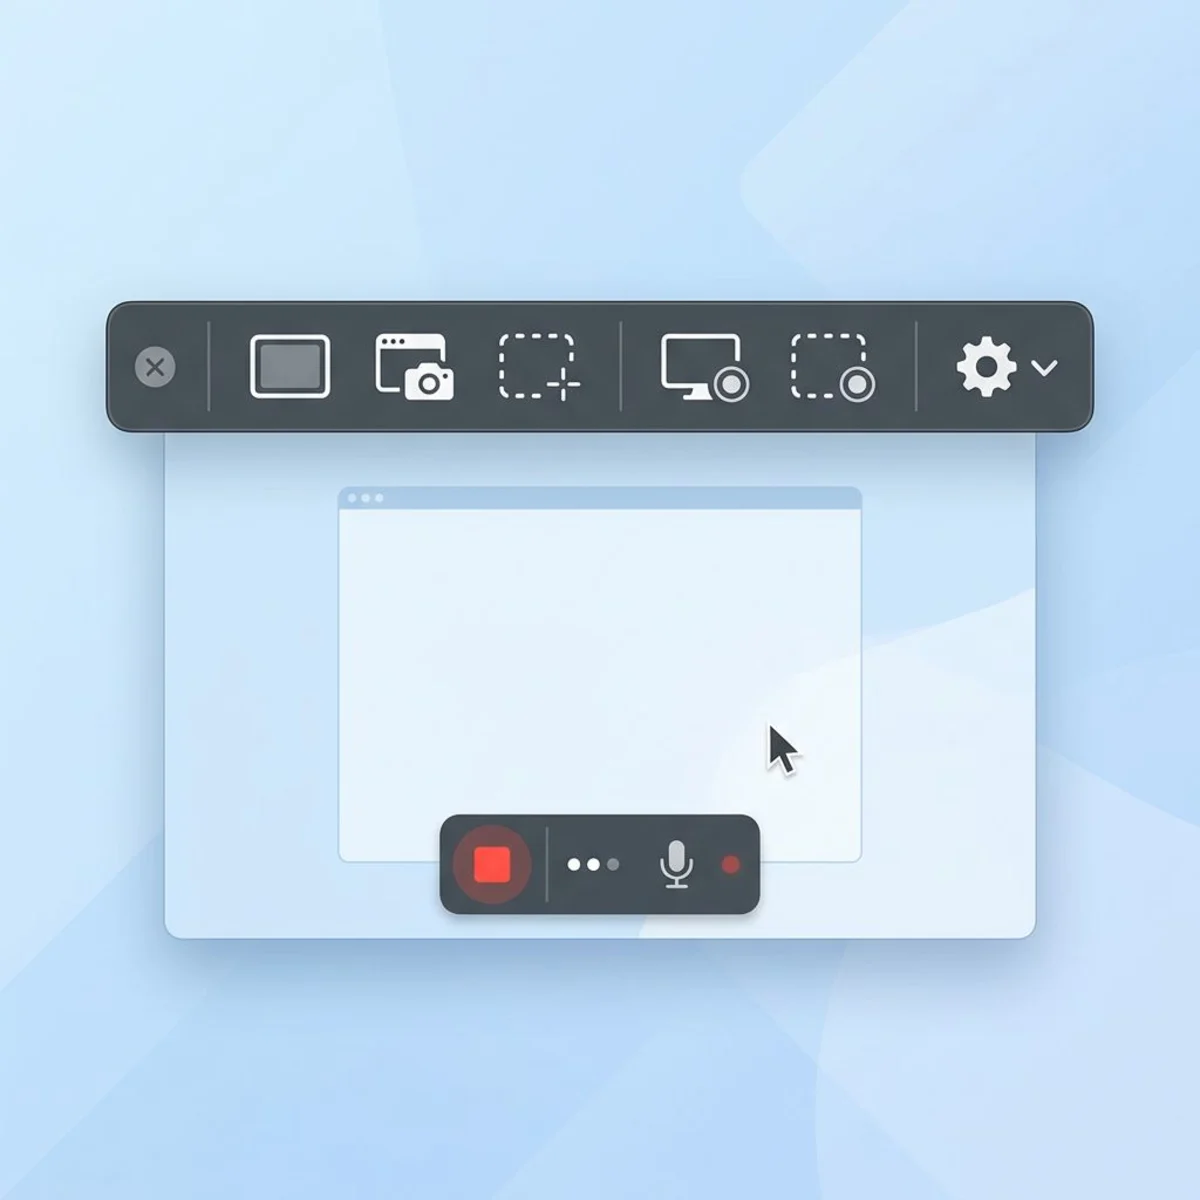
Method 3: Third-party screen recorders
When the built-in tools fall short, third-party screen recording macbook apps fill the gap. Maybe you need system audio, a webcam overlay, more export formats, or better editing. These tools shine if you record your screen often for work or content creation.
Here are the most popular options for MacBook screen recording:
OBS Studio (free, open-source)
OBS Studio is a powerful, free recorder used by streamers and content creators. It supports multiple audio sources, scene composition, and exports in various formats. The learning curve is steeper, but the flexibility is unmatched for free software.
Best for: Long-form recordings, streaming, multi-source setups.
Screen Studio (paid)
Screen Studio automatically adds smooth zoom animations and polished motion effects. It's built for creating professional product demos and tutorial videos.
Best for: Marketing videos, polished product demos.
Loom (freemium)
Loom combines screen recording with instant cloud sharing. Record your screen, get a shareable link immediately. The free plan has recording limits, and a subscription unlocks longer recordings and editing features.
Best for: Quick team communication, async video messages.
Which third-party recorder should you choose?
It depends on your use case:
- Need maximum control? OBS is free and powerful, though it takes more time to learn.
- Creating polished demos? Screen Studio's auto-zoom effects save hours of editing.
- Fastest path to sharing? Loom's cloud-first approach is hard to beat.
For most MacBook users recording tutorials or documentation, the built-in tools handle 80% of needs. Third-party tools cover the rest — system audio, webcam overlays, and professional editing.
For a deeper comparison of all the options, see our roundup of the best screen recorders for Mac.
Third-party recorder comparison
| Feature | OBS Studio | Screen Studio | Loom |
|---|---|---|---|
| Price | Free | $89 one-time | Free / $12.50/mo |
| System audio | ✅ | ✅ | ✅ |
| Webcam overlay | ✅ | ✅ | ✅ |
| Cloud sharing | ❌ | ❌ | ✅ |
| Export formats | Multiple | MP4, GIF | MP4 |
| Learning curve | Steep | Low | Low |
Method 4: Record as a GIF instead
Here's something most screen recording guides skip entirely: you might not need a video at all.
For short demos, bug reports, or quick UI walkthroughs, a GIF is often the better choice. GIFs are lighter and play on their own in browsers and chat apps. No video player needed.
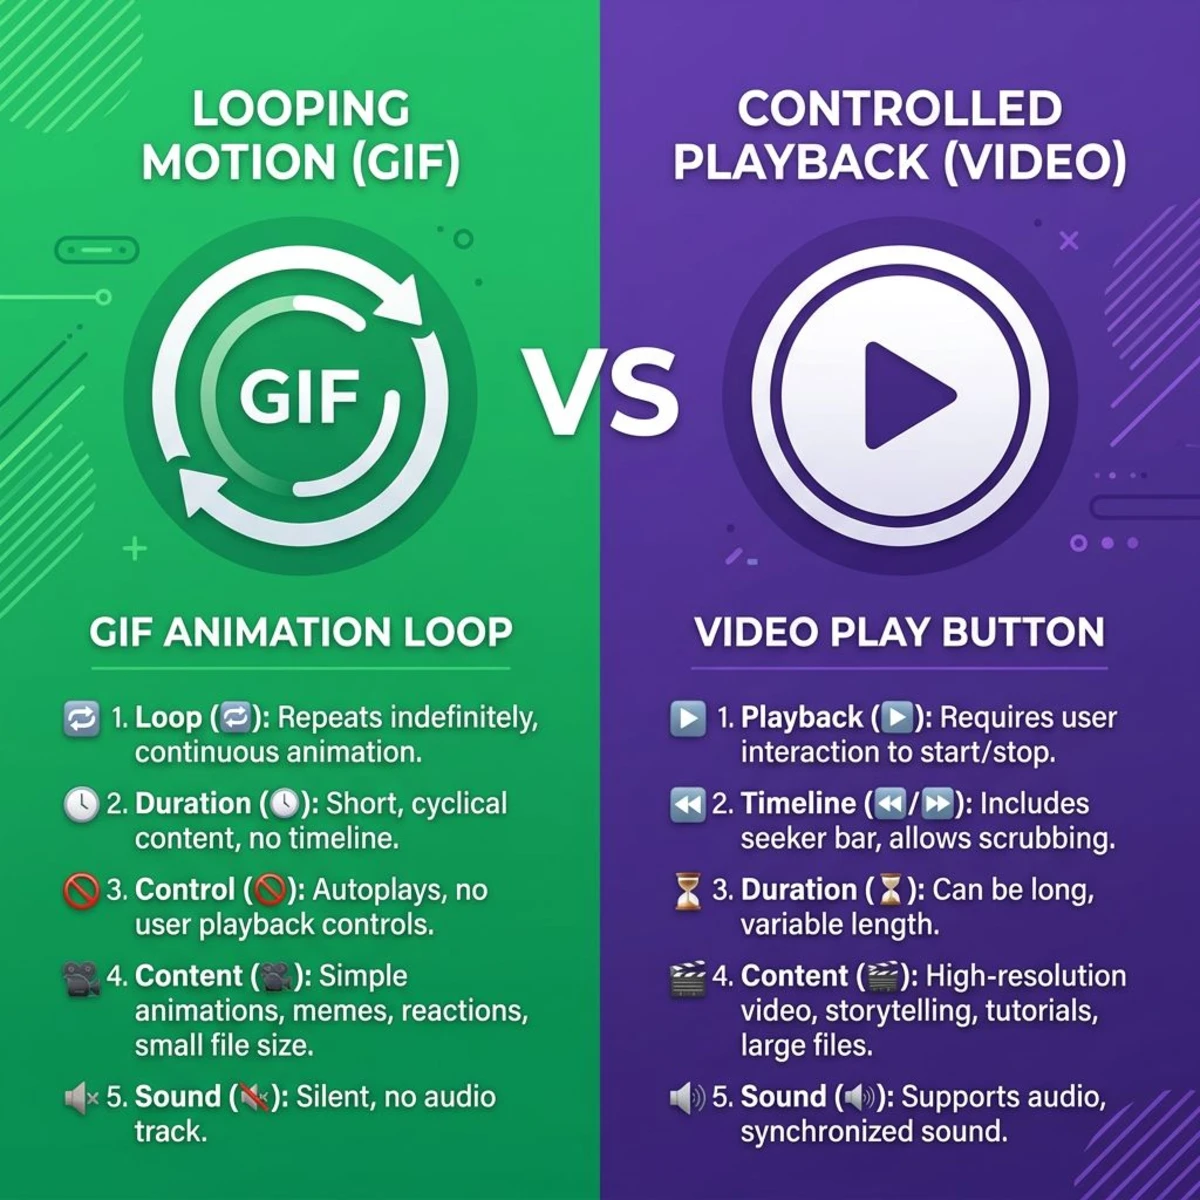
When GIF beats video
- Slack and Discord demos — GIFs autoplay inline, no clicking "play"
- GitHub issues and PRs — GIFs embed directly in markdown
- Quick bug reports — show the problem in 5-10 seconds
- Email and docs — GIFs work everywhere, videos often don't
How to record GIFs on Mac
You can record GIFs directly on Mac with tools like ScreenSnap Pro, which captures screen → GIF without converting from video. Record a region of your screen, and you get a GIF file ready to share — no video-to-GIF conversion step.
ScreenSnap Pro also lets you annotate your captures with arrows, text, blur, and counters. That makes it great for tutorial-style GIFs where you need to mark up key UI elements.
If you already have a .mov recording, you can convert MOV to GIF on Mac using various tools. Or if you have a series of screenshots you want to animate, our free GIF maker turns images into GIFs directly in your browser. Either way, GIF recording is a screen record shortcut mac users often overlook — it's the fastest path from "I need to show this" to "here's what it looks like."
GIF vs video: quick comparison
| GIF | Video (.mov) | |
|---|---|---|
| File size (10s clip) | 2-8 MB | 10-50 MB |
| Autoplay in chat | ✅ | ❌ |
| Audio | ❌ | ✅ |
| Quality | Good for UI | Better for long content |
| Embed in markdown | ✅ | Varies |
Tired of plain screenshots? Try ScreenSnap Pro.
Beautiful backgrounds, pro annotations, GIF recording, and instant cloud sharing — all in one app. Pay $29 once, own it forever.
See what it doesHow to record a specific area vs full screen
Both built-in methods support area recording. Here's a quick reference for each mode:
Full screen: Press ⌘+Shift+5, click the full-screen record icon, then click Record. This captures everything on your display, including the menu bar and Dock.
Selected portion: Press ⌘+Shift+5, click the selected-portion record icon, drag to frame your area, then click Record. You can resize the selection by dragging its edges.
Single window (macOS Tahoe 26+): Press ⌘+Shift+5, click the Record Selected Window button, then click the window you want to capture. The recording follows that window, even if you move it.
Pro tip: macOS remembers your last selection. Press ⌘+Shift+5 and your previous frame is already set — no need to redraw it every time.
Choosing the right recording mode
Pick the recording mode that matches your goal:
- Full screen works best for walkthroughs that involve multiple apps or switching between windows. Viewers see exactly what you see.
- Selected portion is ideal when you want to focus on one area. It keeps the recording clean and reduces file size since fewer pixels are captured.
- Single window strikes a balance. It captures one app without background clutter, and the recording stays focused even if other windows overlap.
For bug reports and quick demos, selected portion or single window usually works best. Tutorials that show full workflows benefit from full-screen recording.
Best settings for different use cases
The right screen recording settings depend on what you're creating. Here's a breakdown of the best setup for common scenarios:
Tutorials and how-to videos
- Mode: Full screen or selected portion
- Audio: Microphone on (use an external mic for better quality)
- Mouse clicks: Enabled — viewers need to see where you're clicking
- Timer: 5-second delay so you can prepare before recording starts
- Format: SDR (H.264) for maximum compatibility across platforms
Bug reports and issue tracking
- Mode: Selected portion (focus on the problem area)
- Audio: Optional — a short voiceover can add context. Text notes often work just as well though
- Mouse clicks: Enabled to show the steps that trigger the bug
- Timer: None — start immediately to capture the issue
- Alternative: Record as a GIF for short bugs. GIFs embed directly in GitHub issues and Jira tickets.
Presentations and pitch decks
- Mode: Full screen
- Audio: Microphone on with a quiet environment
- Mouse clicks: Disabled — click indicators can look distracting in polished videos
- Timer: 10-second delay to switch to your presentation app
- Format: HDR (HEVC) on macOS Tahoe 26+ for sharper visuals
Quick team updates (Slack, Discord)
- Mode: Selected portion or single window
- Audio: Optional — keep it under 30 seconds
- Format: GIF is often better here. GIFs autoplay in chat and don't need a video player. Use a tool like ScreenSnap Pro to capture GIFs directly without converting from video.
Screen recording shortcuts cheat sheet
| Action | Shortcut |
|---|---|
| Open Screenshot toolbar | ⌘+Shift+5 |
| Record entire screen | ⌘+Shift+5 → click Record Entire Screen → Record |
| Record selected portion | ⌘+Shift+5 → click Record Selected Portion → drag → Record |
| Stop recording | ⌘+Control+Esc or click Stop in menu bar |
| Open QuickTime recording | Control+⌘+N (in QuickTime) |
| Cancel recording | Esc before clicking Record |
| Take screenshot instead | ⌘+Shift+3 (full) or ⌘+Shift+4 (selection) |
Bookmark this table — it covers every screen record shortcut mac users need. For the complete screenshot shortcut reference, our Mac screenshot shortcuts guide has you covered.
Where do screen recordings save on Mac?
By default, macOS saves screen recordings to your Desktop. You can change this:
- Press
⌘+Shift+5to open the Screenshot toolbar - Click Options
- Under "Save to," pick a different location — Desktop, Documents, Clipboard, Mail, Messages, or a custom folder
The recording file is named Screen Recording [date] at [time].mov.
If you're looking for lost recordings, check the Desktop first. You can also search Finder for .mov files sorted by date — open Finder, press ⌘+F, search for kind "Movie," and sort by Date Modified.
For screenshots, we have a detailed guide on where screenshots go on Mac. The save location settings work the same way for both screenshots and recordings.
Want to change where all your screenshots save? That guide covers both screenshots and recordings.
Common screen recording problems and fixes
Screen recording not working
Check permissions first. Go to System Settings → Privacy & Security → Screen Recording. Make sure the app you're using is toggled on. Already on? Toggle it off, then back on. Restart the app after.
If the Screenshot toolbar won't open with ⌘+Shift+5, try restarting your MacBook. The shortcut can sometimes conflict with other apps. Check System Settings → Keyboard → Keyboard Shortcuts to verify.
For more fixes, see our full guide on Mac screenshot not working — most solutions apply to screen recording too.
No audio in screen recording
This is the most common issue. The built-in Screenshot toolbar and QuickTime only capture microphone audio. They can't record system audio — the sound playing through your speakers.
To record microphone audio:
- Open the Screenshot toolbar (
⌘+Shift+5) - Click Options
- Select your microphone under the Microphone section
To record system audio, you'll need either a third-party recorder (OBS, Screen Studio) or a virtual audio driver like BlackHole. For a complete walkthrough, check our guide on how to screen record with audio on Mac.
Recording file too large
Screen recordings in .mov format can get large fast. A 5-minute recording at Retina resolution might hit 500 MB+.
To reduce file size:
- Record a smaller area instead of full screen
- Keep recordings short (trim in QuickTime after)
- Use a third-party tool that offers H.265/HEVC compression
- For short clips, record as a GIF instead — 10x smaller files
- Convert your GIFs to MP4 for even smaller file sizes with the same visual quality
Recording stops unexpectedly
Check your available storage. macOS will stop recording when disk space runs low. Open Apple menu → About This Mac → Storage to verify. If space is tight, clear some files and try again.
Black screen in recording
Some apps with DRM protection (streaming services, Apple TV+) show a black screen in recordings. This is by design and can't be bypassed. If you see a black screen when recording non-DRM content, check your permissions. Restart the recording app after granting screen recording access.
Mouse cursor not visible
If your mouse clicks aren't showing in the recording, open the Screenshot toolbar (⌘+Shift+5), click Options, and enable Show Mouse Clicks. This adds a visual circle around each click, making tutorials much easier to follow.
Frequently Asked Questions
Morgan
Indie DeveloperIndie developer, founder of ScreenSnap Pro. A decade of shipping consumer Mac apps and developer tools. Read full bio
@m_0_r_g_a_n_