10 Best Tools to Annotate Images in 2026 (Free & Paid)
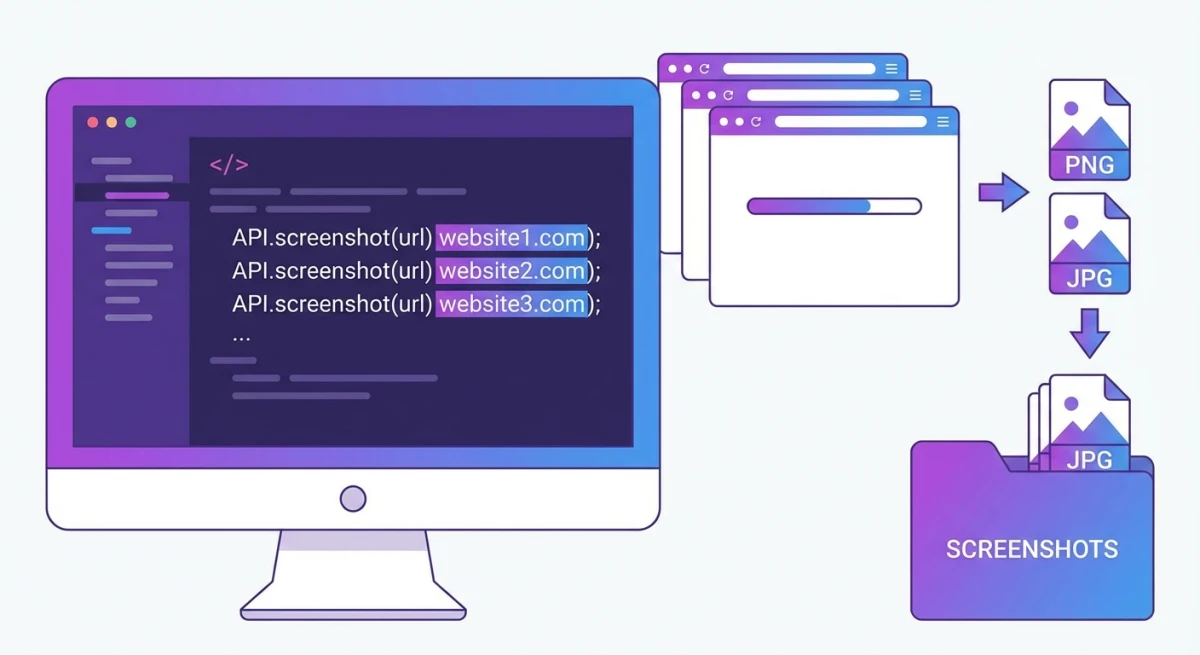
Looking for the best way to annotate images for bug reports, design feedback, or docs? You're not alone. Whether you need to mark up screenshots, add arrows to charts, or blur private info before sharing, the right tool — like ScreenSnap Pro — can save hours of back-and-forth.
Here's the thing: when you search for "image markup tool," most results show AI/ML data labeling platforms. That's not what you need. This guide focuses on visual markup tools — the kind that let you add text, arrows, shapes, and highlights to talk to humans, not train robots.
What is Image Markup (And Why It Matters)
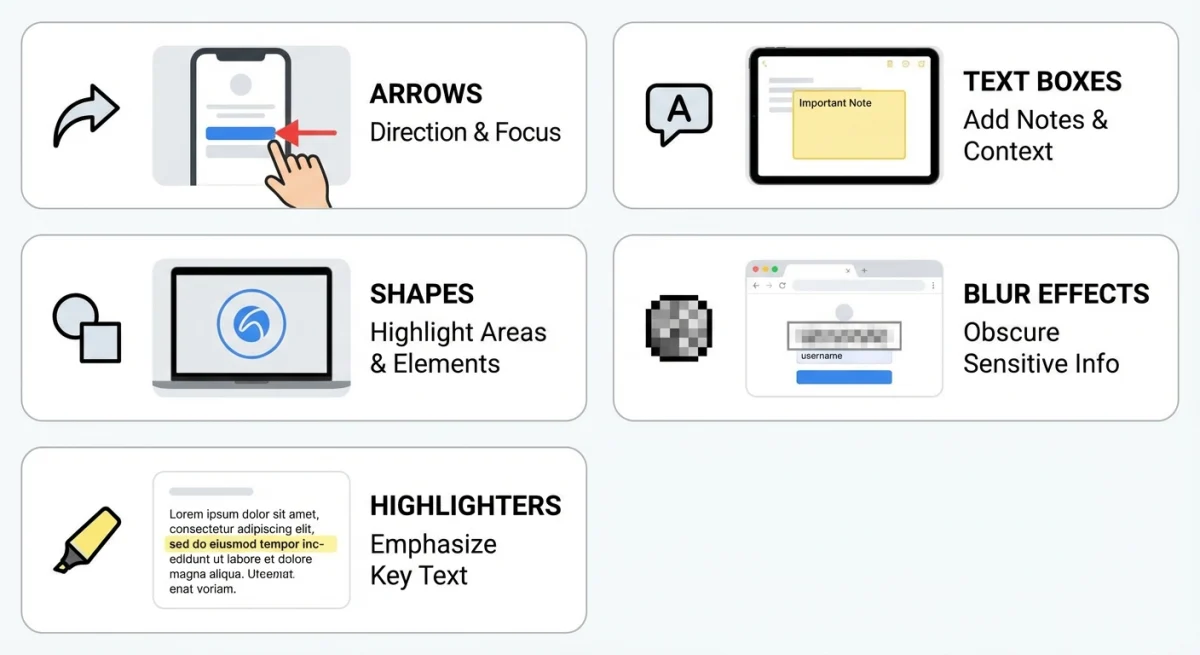
Image markup means adding visual bits to images to share info. For work and creative tasks, this includes:
- Arrows and lines pointing to key areas
- Text labels saying what needs fixing
- Shapes (circles, boxes) to highlight parts
- Blur or pixelate effects for private data
- Highlights to draw eyes to key content
- Numbers/counters for step-by-step guides
This is not AI labeling (bounding boxes for training models). We're talking about the screenshot markup tool you use to explain a bug, give design feedback, or make tutorials.
The impact is huge. A marked-up screenshot shows in seconds what might take paragraphs of text to explain. "See the red circle? That button should be blue" beats "In the header, the third button from the left on the nav bar..."
Why Visual Sharing Wins
Studies show that people process visuals faster than text. When you mark up images with arrows and highlights, you're tapping into that speed boost. A dev seeing a circled UI part knows exactly where to look. A designer seeing numbered callouts can fix things in order. A client seeing blurred parts trusts you with their data.
The best screenshot markup software removes friction from this flow. Instead of switching between capture, a separate edit app, and your sharing platform, you capture, mark up, and share in one go.
Common Use Cases for Image Markup
Before diving into tools, let's look at how people use image markup tools daily:
Bug Reports and QA Feedback
Devs and QA teams mark up screenshots to log issues clearly. A circled button, an arrow pointing to off-kilter text, a numbered list of problems — these visuals turn vague bug reports into clear tasks. The best tools for this include blur (for hiding test logins) and numbered markers (for pointing out many issues).
Design Review and Client Feedback
Designers use markup to gather and give feedback on mockups. Clients can circle areas they want changed without learning design software. Teams can mark approved parts green and change requests red. Tools with layered marks work best here.
Tech Docs and Tutorials
Tech writers mark up screenshots to make step-by-step guides. The counter/number tool is key — "Step 1: Click here, Step 2: Enter your info." Screenshot backgrounds add polish for public-facing docs.
Support and Customer Success
Support teams mark up screenshots to guide users through fixes. "Click the button I've circled" is clearer than paragraphs of text. Cloud sharing features help here — paste a link instead of attaching files.
Social Media and Content Creation
Creators mark up screenshots for social proof, reviews, and teaching content. Gradient backgrounds, clean fonts, and pro styling matter when the markup itself becomes content.
Quick Look: Best Image Markup Tools
| Tool | Price | Platform | Best For |
|---|---|---|---|
| ScreenSnap Pro | $29 one-time | Mac | Pro screenshots + GIFs |
| CleanShot X | $29 one-time | Mac | Mac power users |
| Snagit | $63 + yearly fee | Mac/Windows | Big teams |
| Greenshot | Free | Windows | Windows users on a budget |
| Markup Hero | Free/Premium | Web | Quick web-based markup |
| Annotely | Free | Web | No-signup markup |
| Preview | Free (built-in) | Mac | Basic needs |
| iOS Markup | Free (built-in) | iPhone/iPad | Mobile quick edits |
| Awesome Screenshot | Free/Premium | Browser | Browser screenshots |
| Nimbus Capture | Free/Premium | Browser | Screen recording + markup |
Best Desktop Markup Tools
Desktop apps offer the most power for anyone who marks up screenshots for work. Here are the top picks.
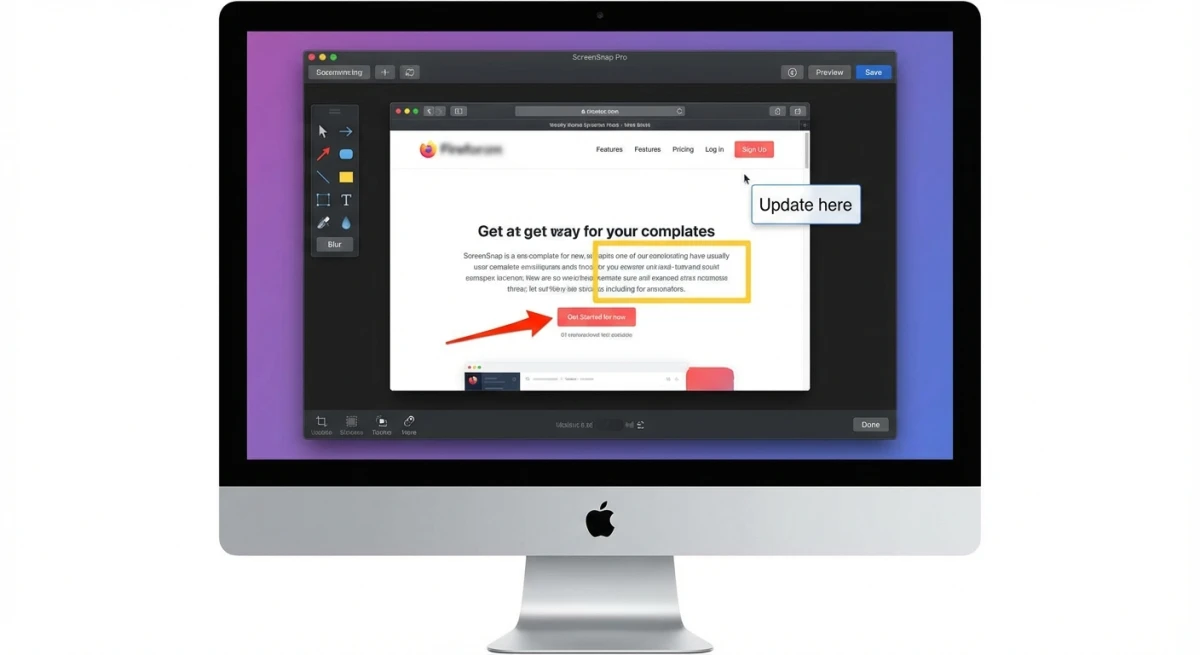
ScreenSnap Pro (Mac) — Best Overall for Mac
ScreenSnap Pro combines screenshot capture, GIF recording, screen recording, and pro markup in one app. The 15 markup tools cover every use case: arrows, shapes, text, blur, pixelate, highlighter, emojis, and a counter tool for numbered steps.
Key features:
- Capture screenshots with
⌘ + Shift + 4or custom shortcuts - Instant markup after capture (no extra steps)
- Blur private info with one click
- Cloud sharing for instant link making
- Pretty gradient backgrounds for polished screenshots
Pricing: $29 one-time (no monthly fee). That's the main edge — you own it forever while rivals charge monthly.
Best for: Devs, designers, and creators on Mac who need pro-grade markup without ongoing costs.
CleanShot X (Mac) — Feature-Rich Option
CleanShot X offers similar features with a slightly different spin. The markup suite includes standard tools plus scrolling capture and text reading.
Key features:
- Markup with arrows, text, shapes, blur
- Scrolling screenshots for long pages
- Quick access overlay
- Cloud storage (extra fee needed)
Pricing: $29 one-time for the app, cloud needs extra payment.
Best for: Mac users who want lots of screenshot options and don't mind paying more for cloud features. Check our CleanShot X options guide for more details.
Snagit (Mac/Windows) — Big Team Standard
Snagit has been a widely used image markup software for big teams since 2007. It's powerful but comes with big-team pricing to match.
Key features:
- Full markup toolkit
- Video recording
- Templates and stamps library
- Works with Microsoft Office, Google Drive
Pricing: $63 one-time + yearly fee for updates.
Best for: Big teams with budget for premium tools. See our Snagit options guide if you want similar features without the big-team pricing.
Greenshot (Windows) — Best Free for Windows
If you're on Windows and need a free screenshot markup tool, Greenshot delivers. It's open-source, light, and handles the basics well.
Key features:
- Capture with Print Screen shortcuts
- Mark up with arrows, text, shapes, blur
- Quick export to clipboard, file, or printer
- Plugin system for add-ons
Pricing: Fully free.
Best for: Windows users who need solid markup at no cost. Mac users looking for Greenshot-like features should check our Greenshot for Mac options.
Preview (Mac) — Built-In Basic Option
Every Mac includes Preview, and its Markup toolbar handles basic markup needs. If you're just getting started or only sometimes add text to screenshots, it's worth trying first.
Key features:
- Shapes, arrows, text
- Signature capture
- Color tweaks
- Works with PDFs too
Pricing: Free (comes with macOS).
Best for: Casual users with simple markup needs. When you outgrow it, apps like ScreenSnap Pro offer faster workflows and more tools.
Best Online Markup Tools
Sometimes you need to mark up images online without installing anything. These web-based tools work in any browser.
Markup Hero — Best for Shareable Links
Markup Hero lets you upload any image, mark it up, and make a shareable link. The free tier includes unlimited marks and storage.
Key features:
- Drag-and-drop upload
- Text, arrows, highlights, shapes
- Shareable links with no end date
- Screenshot capture via browser add-on
Pricing: Free tier ready; Premium for more features.
Best for: Teams sharing marked-up screenshots via links rather than file attachments.
Annotely — Best for Privacy
Annotely offers browser-based markup with a focus on privacy. No account needed, no content scanning — just upload, mark up, and download.
Key features:
- Zero install needed
- Multi-slide tutorial editor
- Works on any browser/device
- Privacy-first (no data tracking)
Pricing: Free to use.
Best for: Quick one-off marks when you don't want to create accounts or install software.
Google Photos / Apple Photos
Both major photo platforms include basic markup features. For mobile-first users already in these systems, they're handy options.
Key features:
- Drawing tools and text
- Ties into your photo library
- Auto sync across devices
Pricing: Free (with your Google/Apple account).
Best for: Marking up personal photos for sharing with friends and family.
Tired of plain screenshots? Try ScreenSnap Pro.
Beautiful backgrounds, pro annotations, GIF recording, and instant cloud sharing — all in one app. Pay $29 once, own it forever.
See what it doesBest Mobile Markup Tools
Need to mark up images on iPhone, iPad, or Android? These mobile options have you covered.
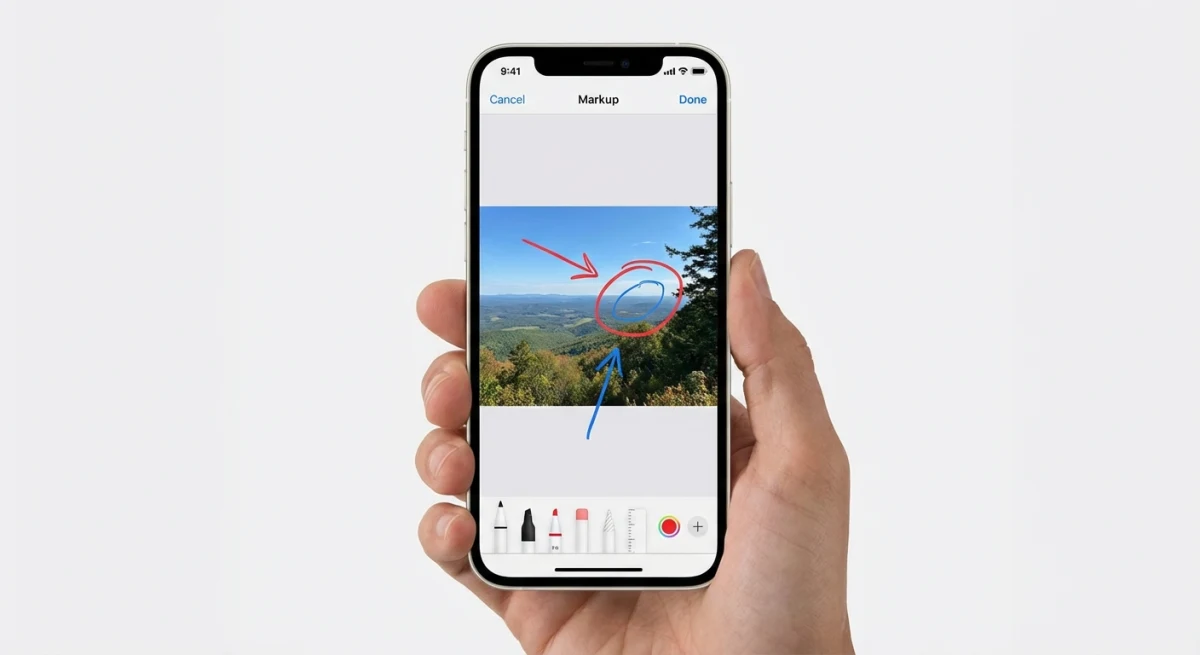
iOS Markup — Built Into Every iPhone/iPad
Apple's Markup tool is easy to reach from Photos, Files, Mail, and most apps that handle images. It's quite capable for quick mobile markup. Apple has a full guide to Markup covering all its features.
Key features:
- Drawing with finger or Apple Pencil
- Text and signature adding
- Magnifier tool for zooming details
- Shape fixing (draw rough shapes, get clean ones)
How to access: Open any image → tap Edit → tap Markup (pen icon).
Best for: iPhone/iPad users who need quick marks without extra apps.
Android Markup Options
Android doesn't have one markup tool like iOS, but Google Photos and Samsung's Gallery app include markup features.
Google Photos:
- Open photo → Edit → Markup
- Draw, add text, apply filters
Samsung Gallery:
- Open photo → Edit → Draw
- More options than stock Android
Best for: Android users already using these apps for photo handling.
Skitch (iOS/Android)
From the Evernote team, Skitch offers focused mobile markup with arrows, shapes, and text. While the desktop version was killed off, the mobile app lives on.
Pricing: Free.
Best for: Mobile users who want more markup tools than built-in options provide.
Best Browser Add-On Markup Tools
For marking up web pages and browser-based screenshots, add-ons tie right into your workflow. These are great for web designers, UX researchers, and anyone who often logs web pages.
Awesome Screenshot
Awesome Screenshot captures visible areas, full pages, or picked regions, then opens a markup editor. It's been popular since Chrome add-ons became a thing and keeps getting better.
Key features:
- Capture full-page screenshots (scrolling)
- Mark up with shapes, arrows, text, blur
- Record screen as video
- Direct sharing to cloud services
- Delayed capture for dropdown menus
Pricing: Free tier; Premium for more features.
Best for: Capturing and marking up web pages without leaving the browser. The scrolling capture is great for logging long pages that don't fit on one screen.
Nimbus Capture
Nimbus Capture combines screenshot capture with markup and screen recording. The markup tools include everything from arrows to numbered markers, making it handy for doc work.
Key features:
- Screenshot and video capture
- Full markup suite
- Cloud storage with shareable links
- Chrome, Firefox, and Edge support
- Webcam overlay for video recordings
Pricing: Free tier; Pro for more storage and features.
Best for: Users who need both static screenshots and video recordings with marks. The cross-browser support makes it easy to use no matter your browser.
Add-On Limits to Know
Browser add-ons have built-in limits versus desktop apps:
- No system-wide capture — only works inside the browser
- Speed varies — heavy add-ons can slow your browser
- Privacy risks — some add-ons access page content
- Fewer markup tools — usually less options than desktop apps
For quick web page marks, add-ons work well. For daily pro use, a desktop tool like ScreenSnap Pro or CleanShot X offers more power and speed.
How to Choose the Right Markup Tool
Not every image markup tool fits every workflow. Here's how to pick the right one:
Think About Your Platform
- Mac only? ScreenSnap Pro or CleanShot X offer the best native feel
- Windows? Greenshot (free) or Snagit (premium)
- Mixed team? Web-based tools like Markup Hero or Annotely
- Mobile-first? iOS Markup or a focused app like Skitch
Match Features to Needs
| If you need... | Look for... |
|---|---|
| Bug reports/feedback | Arrows, shapes, blur, text |
| Tutorials/docs | Numbered steps, highlights |
| Design review | Precise placing, layers |
| Quick shares | Cloud ties, shareable links |
| Private data handling | Blur/pixelate tools |
Think About Pricing Model
One-time buy tools (ScreenSnap Pro, CleanShot X) cost more upfront but save money over time. After a year of monthly fees, you've usually paid more for less.
Monthly fee tools make sense if you need big-team features, team controls, or assured ongoing updates.
Free tools work for light use but often lack polish, speed, or extra features.
Team Size Matters
- Solo users: Any tool works; tune it for your workflow
- Small teams (2-10): Shared cloud links and same tools help teamwork
- Large teams (10+): Look at big-team options with admin controls and tie-ins
Pro Tips for Better Image Markup
Once you've picked your photo markup app, these habits improve your marks:
Use steady colors. Pick one color for problems (red), one for ideas (blue), one for questions (yellow). Your team will learn the system. Most markup tools let you set default colors — set them once and save time on every screenshot.
Number your callouts. When marking many issues, use numbered markers so refs are clear: "See item #3 — the spacing is off." This is where a counter tool shines. ScreenSnap Pro includes this; most free tools don't.
Blur before you share. Any screenshot with personal data, API keys, or passwords should be blurred or pixelated before sharing. Get in the habit of scanning every screenshot for private content before hitting send.
Crop to focus. Don't send full-screen screenshots when the key area is one corner. Crop your screenshots to focus eyes. Smaller images load faster and share better.
Add backgrounds for polish. For docs or social sharing, gradient backgrounds make screenshots look pro. Learn how to add backgrounds. This turns a raw screenshot into show-ready content.
Use keyboard shortcuts. Every second saved on shortcuts adds up when you mark up dozens of screenshots daily. Learn your tool's shortcuts for the marks you use most — arrows, text, and blur tend to be the heavy hitters.
Match arrow styles to purpose. Thin arrows for subtle ideas. Thick arrows for key issues. Colored arrows to group feedback. Steady styling makes your marks easy to scan.
Save markup templates. If you often mark up the same type of content (bug reports, tutorials, client feedback), create templates with your standard colors, arrow styles, and text formatting. Some tools support this built-in; others need manual effort.
When to Use Built-In vs. Focused Tools
Built-in tools (Preview, iOS Markup) work for:
- Quick one-off marks
- Simple shapes and text
- Personal use cases
- Getting started before buying a paid tool
Focused tools are worth it when you:
- Mark up screenshots daily
- Need speed and keyboard shortcuts
- Require features like OCR, blur, or cloud sharing
- Want steady quality across your work
For pros who edit screenshots on Mac often, the time saved with a focused tool pays for itself within weeks.
Frequently Asked Questions
Final Thoughts
The best image markup tool is the one that fits your workflow. For Mac users who mark up screenshots often, ScreenSnap Pro offers the best mix of features and value with its one-time pricing. Windows users have Greenshot for free or Snagit for big team needs. Web-based tools like Markup Hero and Annotely work when you need cross-platform ease.
Whatever you choose, the goal is the same: share with visuals instead of words. A well-marked screenshot saves everyone time.
Looking for more screenshot tips? Check out our guides on the best screenshot apps for Mac or learn how to copy text from screenshots using OCR.
Morgan
Indie DeveloperIndie developer, founder of ScreenSnap Pro. A decade of shipping consumer Mac apps and developer tools. Read full bio
@m_0_r_g_a_n_