Extract a Frame from Video on Windows (2026)
Need to extract frame from video on Windows? Pause the video, press Shift + S in VLC, and you have a clean still image in under five seconds. No editing app. No sign-up. No loss of quality.
That's the fast answer. But the "right" method depends on your video file, your goal, and whether you care about full resolution. A YouTube thumbnail has different needs than a DRM-protected Netflix frame or a 4K drone clip.
Below are six free ways to save a video frame as an image on Windows 11 and Windows 10. You'll also learn how to beat the "black screen" problem that happens with protected video — and how to get the cleanest export possible.
Quick compare: which method to extract frame from video should you pick?
| Method | Best for | Quality | Speed |
|---|---|---|---|
| VLC snapshot | Any local file (MP4, MKV, AVI) | Full resolution | Fast |
| Windows Photos | Built-in, no install | Good | Medium |
| Snipping Tool | Streaming or browser video | Screen-dependent | Fastest |
| Ezgif online | No-install, small clips | Good | Medium |
| FFmpeg | Batch extraction, scripts | Perfect | Slow setup |
| ScreenSnap Pro | Clean, annotated exports | Screen-dependent | Fastest |
Let's walk through each one.
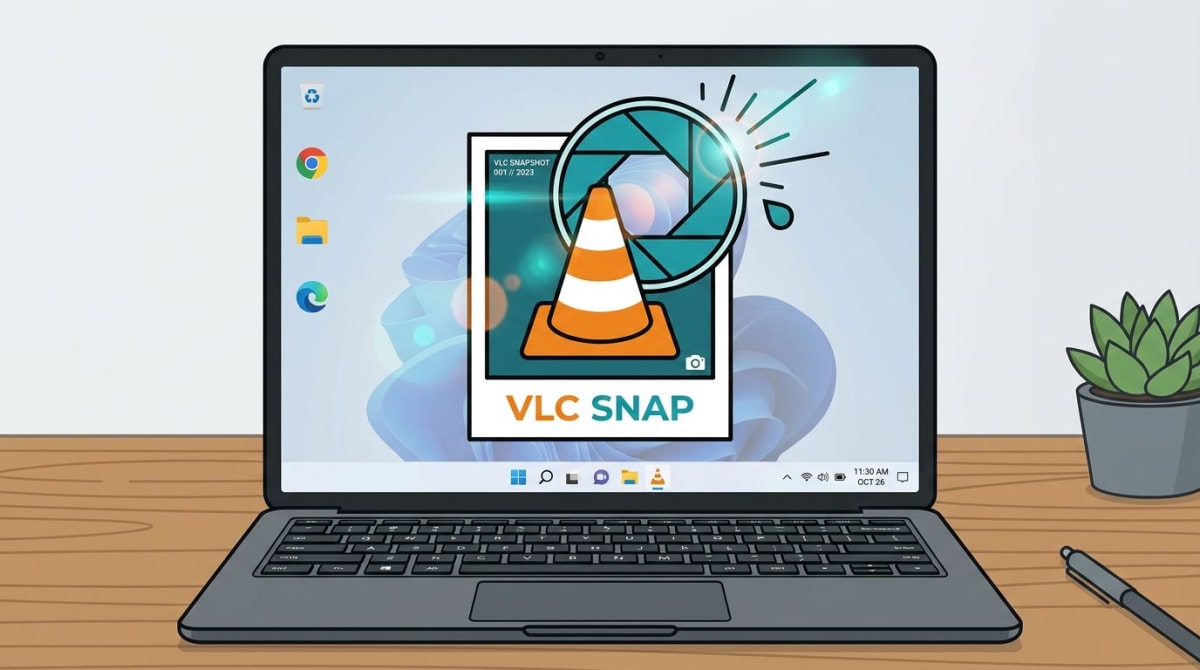
Method 1 — VLC's snapshot feature
VLC media player is free, open source, and reads nearly every video format. It's the most reliable way to save video frame data at full resolution on Windows.
Take a single snapshot
- Open your video in VLC
- Pause at the frame you want (or keep playing — your call)
- Press
Shift + S
VLC drops a PNG in your Pictures folder by default. The filename looks like vlc-snap-2026-04-22-...png.
Frame-by-frame for pixel-perfect timing
Fast scenes move by in a blur. Use E to step forward one frame at a time, pause, then press Shift + S. This is how film fans grab the "perfect moment" that lasts only two frames.
Change the save folder or file type
Go to Tools → Preferences → Video → Video snapshots. You can switch from PNG to JPG (smaller files) and point VLC at any folder — Desktop, OneDrive, wherever. The official VLC snapshot docs cover the full option list.
Tip: PNG stays crisp. JPG is smaller but loses a little detail. Pick PNG for text-heavy frames (like code or charts) and JPG for photos.
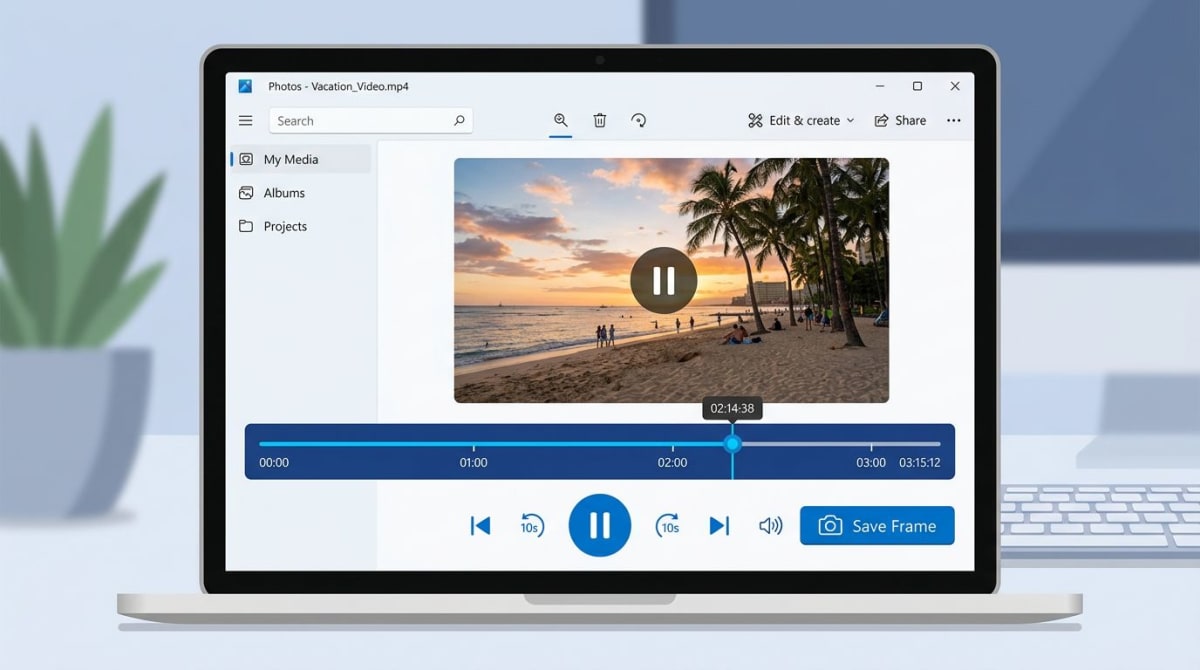
Method 2 — Windows Photos app
No install needed. The built-in Photos app on Windows 11 can save a video frame as an image — and most people don't know it.
- Right-click the video file in File Explorer
- Pick Open with → Photos
- Move to the frame you want using the scrub bar
- Click Edit & Create → Save photos
Photos saves the frame as a JPG next to the source video.
Two catches to know about
The button location shifts slightly between Photos builds, so look for "Save photos" or "Save frame" under the Edit menu. Also, Photos only works on local files — not streaming video. For YouTube or Netflix, skip to Method 3.
Method 3 — Snipping Tool pause-and-capture
The Snipping Tool can't read video files, but it can grab anything on your screen. That makes it the go-to for streaming video — YouTube, Twitch, Netflix, Disney+, Vimeo, anything.
- Pause the video at the right frame
- Press
Win + Shift + S - Drag a rectangle around the video
- Paste with
Ctrl + Vinto any image editor, or find the file in your Screenshots folder
Get the sharpest snippet
Before capturing, press F for full-screen (or the theater-mode button). A bigger video window means a sharper snip. For a deeper walkthrough, see our guide on how to screenshot on Windows 11.
If Win + Shift + S doesn't open the overlay, check our fix for Win + Shift + S not working on Windows.
Heads up: Snipping Tool captures your screen, not the source video. If the video plays at 720p in a 1080p window, you'll get 720p data upscaled. For full-resolution frames from YouTube, see the next section.
Method 4 — Online tools (Ezgif video-to-JPG)
Ezgif's video-to-JPG converter runs in your browser. Upload a short clip, pick a frame rate, and it spits out every frame as a JPG zip. No sign-up, no install.
- Go to ezgif.com/video-to-jpg
- Upload your video (up to 100 MB)
- Set the frame interval — "every frame" or "one every 10 frames"
- Click Convert, then download the zip
When to use an online tool
- You need every frame, not just one (great for film study)
- You're on a work machine with no admin rights
- The video is already on your phone or cloud drive
When to skip it
Files over 100 MB, anything private or confidential, and slow uploads. Big clips take forever on home Wi-Fi.
Tired of plain screenshots? Try ScreenSnap Pro.
Beautiful backgrounds, pro annotations, GIF recording, and instant cloud sharing — all in one app. Pay $29 once, own it forever.
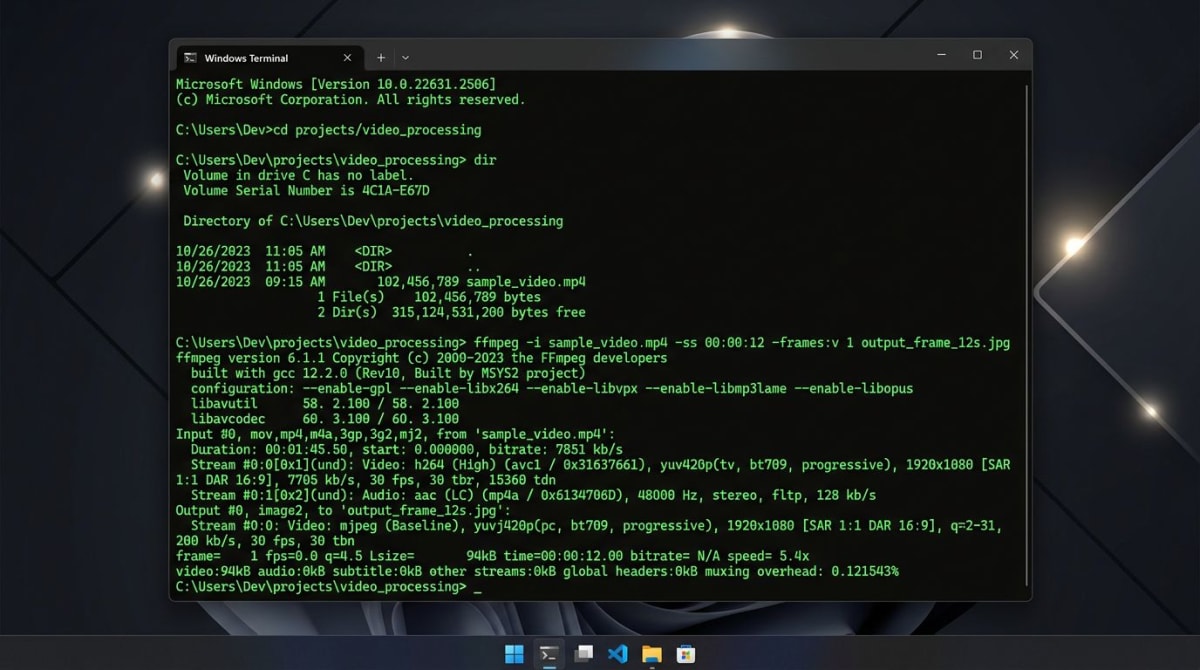
See what it doesMethod 5 — FFmpeg one-liner
FFmpeg is a command-line video tool loved by developers. It's perfect for batch work — say, pulling one frame every second from a two-hour lecture.
Install and extract
- Download FFmpeg from the official site
- Add it to your PATH (Windows Settings → Environment Variables)
- Open Command Prompt and run:
ffmpeg -i input.mp4 -ss 00:01:30 -frames:v 1 frame.pngThat pulls one frame at the 1:30 mark and saves it as frame.png.
Grab many frames at once
Want one frame per second across a full video?
ffmpeg -i input.mp4 -vf fps=1 frame_%04d.pngYou'll get frame_0001.png, frame_0002.png, and so on. Swap fps=1 for fps=0.1 to get one frame every 10 seconds instead.
FFmpeg is overkill for a single screenshot but unbeatable for scripts and automation.
Method 6 — ScreenSnap Pro (video frame to clean screenshot)
If you want a frame and a polished image to share — with a background, annotation, or a pinned note — ScreenSnap Pro is built for that. Capture the paused video with the region shortcut, pin it on top of your desktop, add arrows or blurs, then save or share.
- Pause the video
- Open ScreenSnap Pro and press the region shortcut
- Drag around the video area
- Use the 15 built-in annotation tools to mark up the frame
- Drop it on a gradient background (150+ included) or copy the cloud link
It's a one-time $29 purchase — no subscription, no watermarks. If you mostly care about turning frames into tutorial images or social posts, it replaces four or five separate apps. If you only need a raw file, VLC is plenty.
Getting the highest-quality export
A screenshot video frame only looks as good as the source pixels behind it. A few rules help:
- Play at native resolution. If the video is 4K, set your player to 4K before capturing. Windowed playback downscales.
- Pause, don't screenshot during playback. Moving frames have motion blur.
- Use
Shift + Sin VLC, not Print Screen. VLC reads the raw video buffer. Print Screen grabs your display — which has its own compression. - Save as PNG for text, JPG for photos. PNG is lossless; JPG wins on file size.
- Full-screen the player. More pixels equals more detail.
If you need to convert the file type afterward, our free image format converter handles PNG, JPG, and WebP in one click.
How to screenshot video while paused without black screen (DRM)
Netflix, Disney+, HBO Max, and Amazon Prime often show a black screen when you try to screenshot. That's DRM — digital rights management — blocking the capture. The fix depends on your browser and player.
What to try first
- Firefox often works. Try the same video in Firefox. DRM behavior differs across browsers.
- Use an HDMI capture device. A cheap USB capture dongle can record the HDMI output — fully legal for personal use in most regions.
- Try the desktop app, not the browser. Some streaming apps let you screenshot while the browser version blocks it.
- Disable hardware acceleration. In Chrome:
Settings → System → Use hardware acceleration when available → off. Restart. Try again.
What won't work
Browser extensions that claim to bypass DRM often get your account flagged. Stick to legit routes.
For non-protected content — your own screen recordings, webinars, family videos — none of this matters. Use any method from Methods 1 to 6.
Related Windows guides
Going deeper? These guides cover adjacent workflows:
- How to screenshot YouTube videos — includes the right-click "Copy video frame" trick for Chrome and Edge
- How to crop screenshots on Windows — clean up your frame after extraction
- Edit screenshots on Windows — add arrows, blur, or text
- Best screenshot tools for Windows — compare every capture app
- Using a Mac too? Our VLC screenshot guide for Mac covers the same workflow on macOS
Frequently Asked Questions
Morgan
Indie DeveloperIndie developer, founder of ScreenSnap Pro. A decade of shipping consumer Mac apps and developer tools. Read full bio
@m_0_r_g_a_n_