Screen Record Shortcut Mac: Start, Stop & Custom Keys (2026)
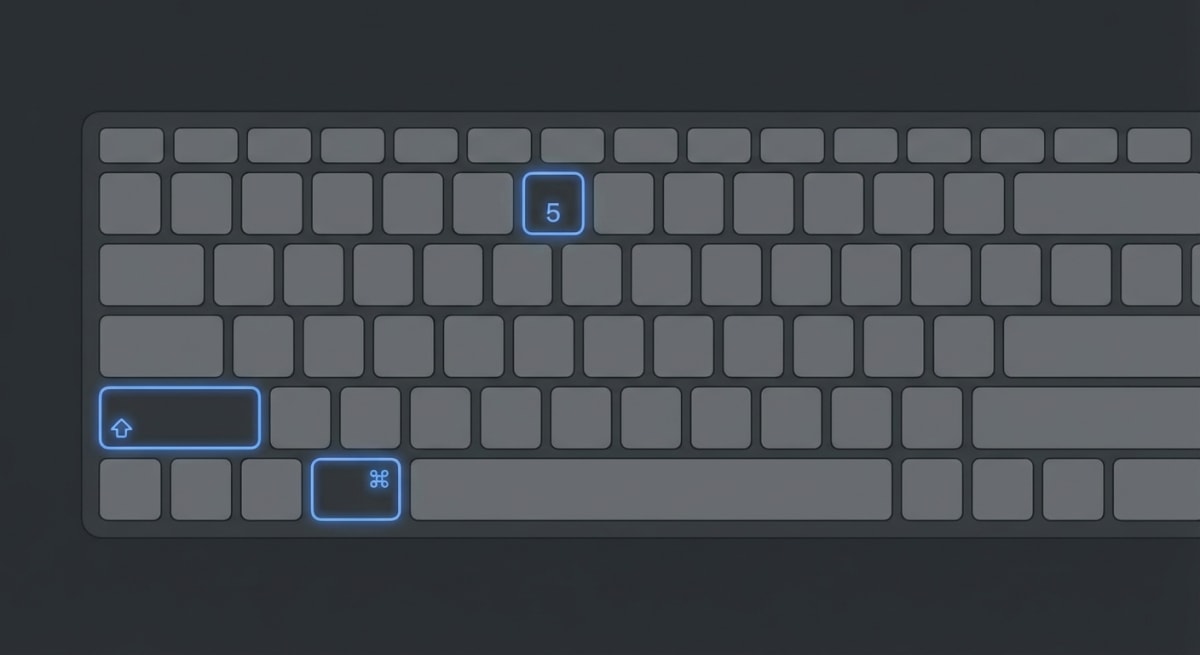
The screen record shortcut on Mac is ⌘ + Shift + 5. It opens the Screenshot toolbar where you can record your full screen or just one area. To stop, press ⌘ + Control + Esc. These two shortcuts cover most screen recording needs on Mac, and third-party tools like ScreenSnap Pro let you remap them to anything you want.
But there's more to it than start and stop. You can set custom keys, use QuickTime shortcuts, and set up hotkeys in third-party apps too.
Here's every screen recording keyboard shortcut you need to know.
The main screen recording shortcut: `⌘ + Shift + 5`
Press ⌘ + Shift + 5 and a toolbar pops up at the bottom of your screen. This is how all built-in screen recording works on macOS Mojave (10.14) and later.
You get two recording modes:
- Record Entire Screen — captures everything on your display
- Record Selected Portion — lets you drag a rectangle to record a specific area
On macOS Tahoe 26, Apple added a third mode: Record Selected Window. This grabs a single app window on its own.
Before you hit Record, click Options to configure:
- Microphone — choose an audio input for voiceovers
- Save to — pick where your recording lands (Desktop, Documents, or a custom folder)
- Timer — add a 5 or 10-second countdown before recording starts
- Show Mouse Clicks — displays a dark circle around your cursor when you click
If you've ever wondered where your recordings go on Mac, this is where you set it.
How to stop screen recording on Mac
This trips up a lot of people. Here are three ways to do it:
1. Click the Stop button in the menu bar
Look for the small square ⏹ icon in the top-right menu bar. Click it to stop recording instantly.
2. Press `⌘ + Control + Esc`
This is the keyboard shortcut to stop screen recording on Mac. It works whether you started the recording from the Screenshot toolbar or QuickTime Player.
Note: Older macOS versions used Control + ⌘ + Esc instead. Both orders work the same way.
3. Press `⌘ + Shift + 5` again
Opening the toolbar while recording shows a Stop button. Handy if you want to see the toolbar before you stop.
QuickTime Player screen recording shortcuts
QuickTime Player has its own set of shortcuts for screen recording:
| Shortcut | Action |
|---|---|
Control + ⌘ + N | Start new screen recording |
⌘ + Control + Esc | Stop recording |
Esc | Cancel before recording starts |
Press Control + ⌘ + N to start a QuickTime recording. On newer macOS, this opens the same toolbar as ⌘ + Shift + 5. On older versions, it opens QuickTime's own window.
QuickTime saves recordings as .mov files. If you need to turn those into GIFs, there are easy ways to do it.
Complete Mac screen recording shortcut reference
Here's every screen recording shortcut in one place:
| Shortcut | What it does |
|---|---|
⌘ + Shift + 5 | Open Screenshot toolbar |
⌘ + Control + Esc | Stop current recording |
Esc | Cancel recording or close toolbar |
Control + ⌘ + N | New screen recording (QuickTime) |
Space | Toggle between region and full screen (while toolbar is open) |
⌘ + Shift + 5 → Options | Access recording settings |
Keep this table bookmarked — it covers every built-in screen recording keyboard shortcut on macOS.
How to customize screen recording shortcuts on Mac
You can't remap ⌘ + Shift + 5 itself, but you can make custom shortcuts for menu commands in any app.

Using System Settings
- Open System Settings → Keyboard → Keyboard Shortcuts
- Click App Shortcuts in the sidebar
- Click the + button to add a new shortcut
- Select the app (or choose "All Applications")
- Type the exact menu command name
- Press your desired key combination
This works for QuickTime's "New Screen Recording" command. You can set any key combo you want instead of Control + ⌘ + N.
Using Automator or Shortcuts app
For more flexibility, create a Quick Action in Automator:
- Open Automator → choose Quick Action
- Add a "Run AppleScript" action
- Use this script to start screen recording:
tell application "QuickTime Player"
    activate
    new screen recording
end tell- Save it, then assign a keyboard shortcut in System Settings → Keyboard → Keyboard Shortcuts → Services
Third-party app screen recording shortcuts
If you use third-party recording tools, here are their default shortcuts:
OBS Studio
| Shortcut | Action |
|---|---|
| Not set by default | Start/Stop recording |
⌘ + Shift + 1 | Common custom binding |
OBS has no default recording hotkey. Set your own in Settings → Hotkeys. Many users pick ⌘ + Shift + 1.
ScreenFlow
| Shortcut | Action |
|---|---|
⌘ + Shift + 2 | Start recording (default) |
⌘ + Shift + 2 | Stop recording (same shortcut toggles) |
Loom
Loom uses ⌘ + Shift + L to open its recording interface.
For quick GIF recordings instead of video, ScreenSnap Pro lets you capture your screen directly to GIF format — no conversion step needed.
Tired of plain screenshots? Try ScreenSnap Pro.
Beautiful backgrounds, pro annotations, GIF recording, and instant cloud sharing — all in one app. Pay $29 once, own it forever.
See what it doesTroubleshooting screen recording shortcuts
`⌘ + Shift + 5` not working
If the screenshot toolbar doesn't appear:
- Check your macOS version. This shortcut requires macOS Mojave (10.14) or later. Older versions need QuickTime Player instead.
- Reset keyboard shortcuts. Go to System Settings → Keyboard → Keyboard Shortcuts → Restore Defaults.
- Check for conflicts. Third-party apps might grab the same shortcut. Disable apps one by one to find the conflict.
- Restart the SystemUIServer. Open Terminal and run:
killall SystemUIServerThis is similar to fixing screenshot shortcuts that stop working.
`⌘ + Control + Esc` not stopping recording
In macOS Sequoia 15, Apple changed how this shortcut works. If it opens Siri or another function instead:
- Open System Settings → Keyboard → Keyboard Shortcuts
- Check if
⌘ + Control + Escis assigned to something else - Reassign or use the menu bar Stop button instead
Recording has no audio
The screen recording shortcut captures video only by default. To include audio:
- Press
⌘ + Shift + 5 - Click Options
- Under Microphone, select your audio input
- Start recording
macOS doesn't capture system audio natively. You'll need a virtual audio driver like BlackHole for that. For a deeper guide, check our article on screen recording with audio on Mac.

Screen recording shortcuts by macOS version
Not every shortcut works on every macOS version. Here's what changed:
| macOS Version | Screenshot Toolbar (⌘+Shift+5) | Stop Shortcut | QuickTime Shortcut |
|---|---|---|---|
| Mojave 10.14 | ✅ Introduced | ⌘+Control+Esc | Control+⌘+N |
| Catalina 10.15 | ✅ | ⌘+Control+Esc | Control+⌘+N |
| Big Sur 11 | ✅ | ⌘+Control+Esc | Opens Screenshot toolbar |
| Monterey 12 | ✅ | ⌘+Control+Esc | Opens Screenshot toolbar |
| Ventura 13 | ✅ | ⌘+Control+Esc | Opens Screenshot toolbar |
| Sonoma 14 | ✅ | ⌘+Control+Esc | Opens Screenshot toolbar |
| Sequoia 15 | ✅ | ⌘+Control+Esc (may conflict) | Opens Screenshot toolbar |
| Tahoe 26 | ✅ + Record Selected Window | ⌘+Control+Esc | Opens Screenshot toolbar |
Starting with Big Sur, QuickTime's Control + ⌘ + N opens the Screenshot toolbar instead of its own window. It works the same way — Apple just put it all in one place.
If your Mac is older than Mojave, your only way to record the screen with a shortcut is through QuickTime. Open it from Applications and go to File → New Screen Recording. For more on what each macOS version can do, see Apple's macOS page.
How to record part of your screen on Mac
You don't always need to record the full screen. Here's how to grab just one area:
- Press
⌘ + Shift + 5to open the toolbar. - Click the Record Selected Portion button (it looks like a dashed rectangle).
- Drag the edges to cover the area you want.
- Click Record.
This is great for:
- Focused tutorials that show just one app
- Bug reports where you want to zoom in on the issue
- Keeping file sizes small (less screen = smaller file)
- Hiding private info on other parts of the screen
You can move the selection box by clicking and dragging the center. Resize it by pulling the edges or corners.
For help with cropping after you record, see our guide.
Recording your screen with audio
By default, ⌘ + Shift + 5 records video only — no sound. To add your voice:
- Press
⌘ + Shift + 5. - Click Options.
- Under Microphone, pick your mic (built-in or external).
- Click Record.
Your voice records along with the video. But Mac won't capture system sounds (like music or app audio) with this shortcut. For that, you need extra tools.
How to capture system audio with BlackHole
BlackHole is a free virtual audio driver that routes system sounds into your recording. Here's how to set it up:
- Download and install BlackHole 2ch from the official site.
- Open Audio MIDI Setup (search for it in Spotlight).
- Click the + button at the bottom-left and choose Create Multi-Output Device.
- Check both your regular speakers (or headphones) and BlackHole 2ch.
- Set this Multi-Output Device as your system output in System Settings → Sound → Output.
- Press
⌘ + Shift + 5, click Options, and select BlackHole 2ch as your microphone. - Start recording — your screen recording now captures system audio.
Tip: To record both your mic and system audio at the same time, create an Aggregate Device in Audio MIDI Setup that combines your microphone and BlackHole. Select that as the input in the recording Options.
After you finish, switch your sound output back to your regular speakers. Otherwise you won't hear anything through BlackHole alone.
Check our full guide on screen recording with audio on Mac for all the details. Apple's screen recording support page also covers the basics.
Built-in vs third-party screen recording
The ⌘ + Shift + 5 shortcut handles basic recording well, but it has limits. Here's how it stacks up against dedicated tools:
| Feature | Built-in (⌘+Shift+5) | OBS Studio | ScreenFlow |
|---|---|---|---|
| Price | Free | Free | $169 |
| System audio | ❌ Needs BlackHole | ✅ Built-in | ✅ Built-in |
| Webcam overlay | ❌ | ✅ | ✅ |
| Live streaming | ❌ | ✅ | ❌ |
| Video editing | Trim only | ❌ | ✅ Full editor |
| Output formats | .mov only | .mp4, .mkv, .mov | .mp4, .mov, .gif |
| Custom hotkeys | Limited | Fully customizable | Fully customizable |
| Annotations | ❌ | ❌ | ✅ |
When built-in is enough: Quick demos, simple tutorials, bug reports, or any time you just need a fast recording without extra software.
When you need more: If you record often, need system audio, want webcam overlays, or need to edit before sharing, a third-party tool saves time. OBS is the best free option. ScreenFlow is worth it if you edit recordings regularly.
For quick screen captures that loop automatically, ScreenSnap Pro records straight to GIF — perfect for Slack messages and docs where a video player would be overkill.
When to use screen recording vs. GIF capture
Screen recordings save as .mov video files. They're great for long tutorials and talks. But for quick demos, bug reports, or Slack messages, a GIF is often the better pick.
GIFs play on their own, need no video player, and are smaller for short clips. If you share quick screen grabs often, ScreenSnap Pro records right to GIF format — no conversion needed. You can even mark up your captures before sharing.
For longer recordings that need audio, stick with ⌘ + Shift + 5 or see our list of the best screen recorders for Mac. You might also want to check out free screen recording tools if you're on a budget.
Tips for faster screen recording workflows
Use a timer. Set a 5-second delay in Options so you have time to arrange windows before recording starts.
Pin your recordings. After recording, the thumbnail appears in the corner. Click it immediately to trim, share, or delete without opening Finder.
Learn the screenshot shortcuts too. The ⌘ + Shift + 5 toolbar handles both screenshots and recordings, so knowing all the modes saves time.
Set a default save location. Change it once in Options, and every future recording goes to the right folder automatically. No more cluttered desktops.
Edit recordings in QuickTime. Press ⌘ + T in QuickTime to trim recordings without downloading extra software. For more editing options, see our guide on editing screen recordings on Mac.
Frequently Asked Questions
Morgan
Indie DeveloperIndie developer, founder of ScreenSnap Pro. A decade of shipping consumer Mac apps and developer tools. Read full bio
@m_0_r_g_a_n_