Presets
Save your screenshot styling (background, padding, corners, shadow, aspect ratio) as a preset in ScreenSnap Pro and apply it in one click.
What a preset saves
A preset stores the styling from the editor sidebar so you can reuse it: Padding, Inset (its size and whether the color is auto-detected or custom), the corner radius, the shadow style (None, Spread or Hug) and its Opacity, the background effect (None, Blur or Noise) and its Intensity, the aspect ratio, and the background (Wallpaper, Gradient, Plain or Transparent, with the wallpaper, gradient or color you picked).
Annotations are not part of a preset.
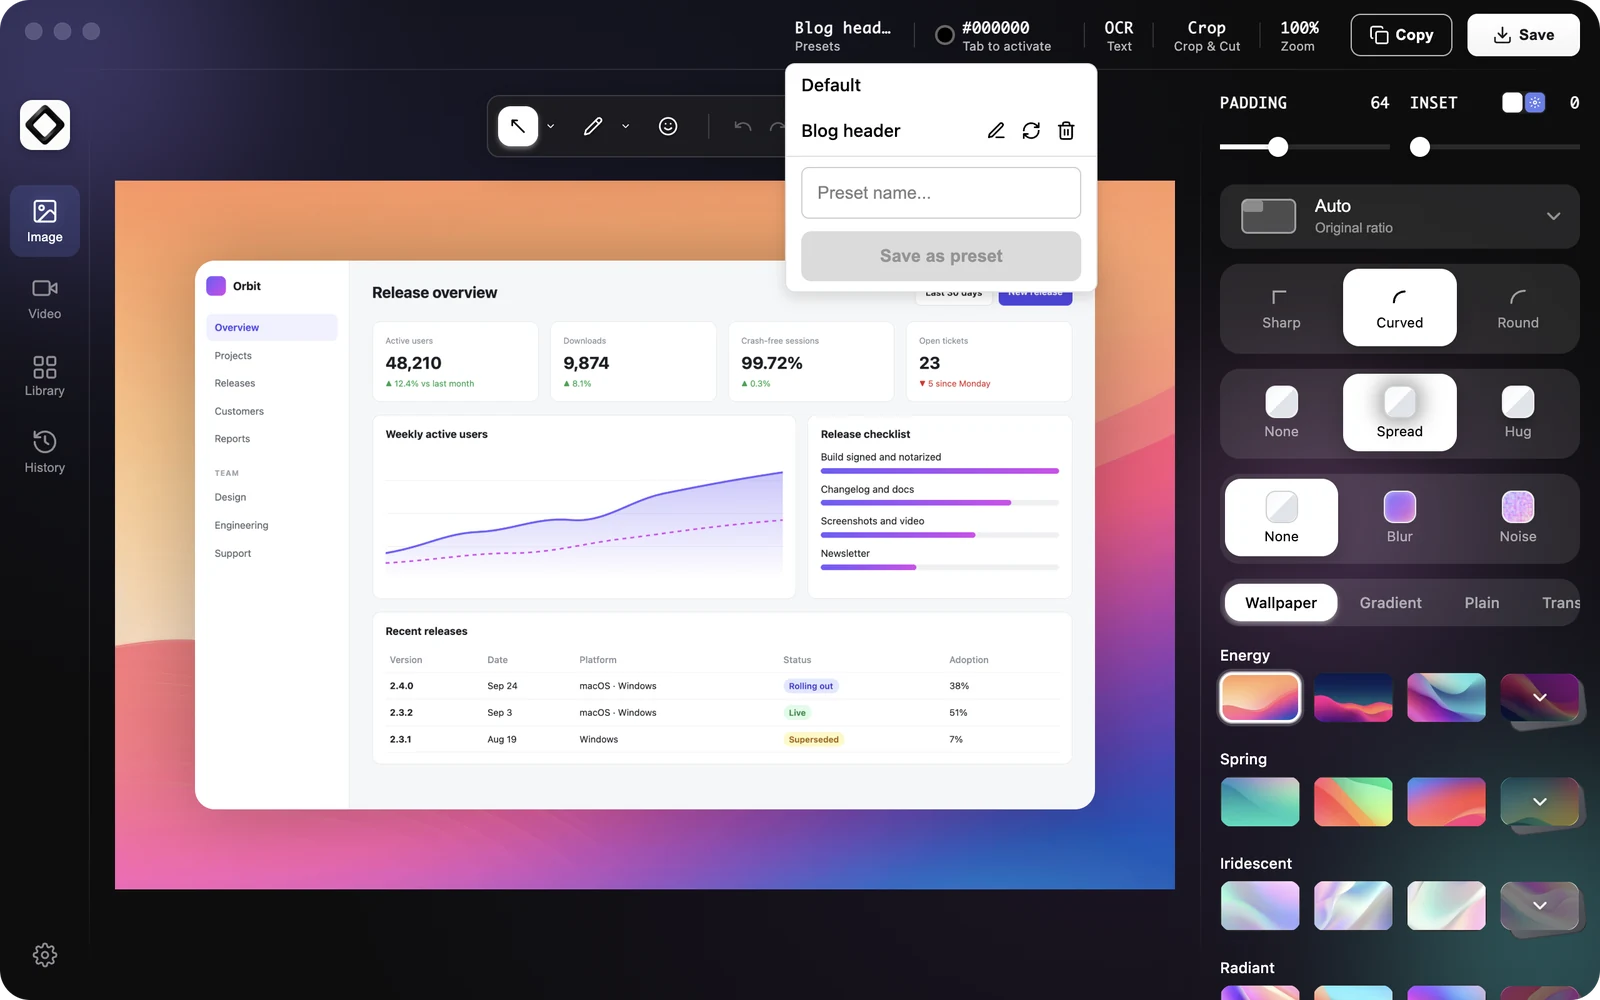
Save a preset
Save the look of the current screenshot so you can apply it to other screenshots in one click.
- 1Style a screenshot the way you like in the editor sidebar. See Style a Screenshot.
- 2Click
Presetsin the top bar. It shows the name of the current preset above the wordPresets. - 3Type a name into the
Preset name...field (up to 20 characters). Give each preset its own name. - 4Click
Save as presetor pressEnter. The new preset becomes the active one.
Apply a preset
Click Presets in the top bar and click a preset's name. The sidebar switches to its settings immediately. ScreenSnap Pro remembers the last preset you applied and uses it again when the editor opens.
Make one preset per project, client or platform, for example a transparent one for docs and a wallpaper one for social posts, and switch between them in one click.
Update, rename or delete a preset
Each preset you created has three buttons in the Presets menu:
- 1Rename (pencil icon): edit the name in place, then press
Enterto save orEscto cancel. - 2Update (circular arrows icon): replaces the preset's saved settings with the editor's current settings. You are asked to confirm, because this cannot be undone.
- 3Delete (trash icon): removes the preset right away, without asking. If it was the active preset, the editor switches back to
Default.
The Default preset
Default is built in and always listed first. It cannot be renamed, updated or deleted, so you can always return to the standard look. Your own presets are stored on this computer.
Video presets are separate
The video editor has its own Presets menu for background, camera and cursor styles of recordings. Image presets and video presets do not mix.