Preferences & Settings
What every ScreenSnap Pro setting does: general options, screenshots, toolbar, recording, Quick Preview, history, cloud and macOS permissions.
Open Settings
Settings are split into tabs: General, Shortcuts, Screenshots, Screen Recording, Quick Preview, History, Cloud and, on Mac only, Permissions. Changes save automatically, so there is no Save button.
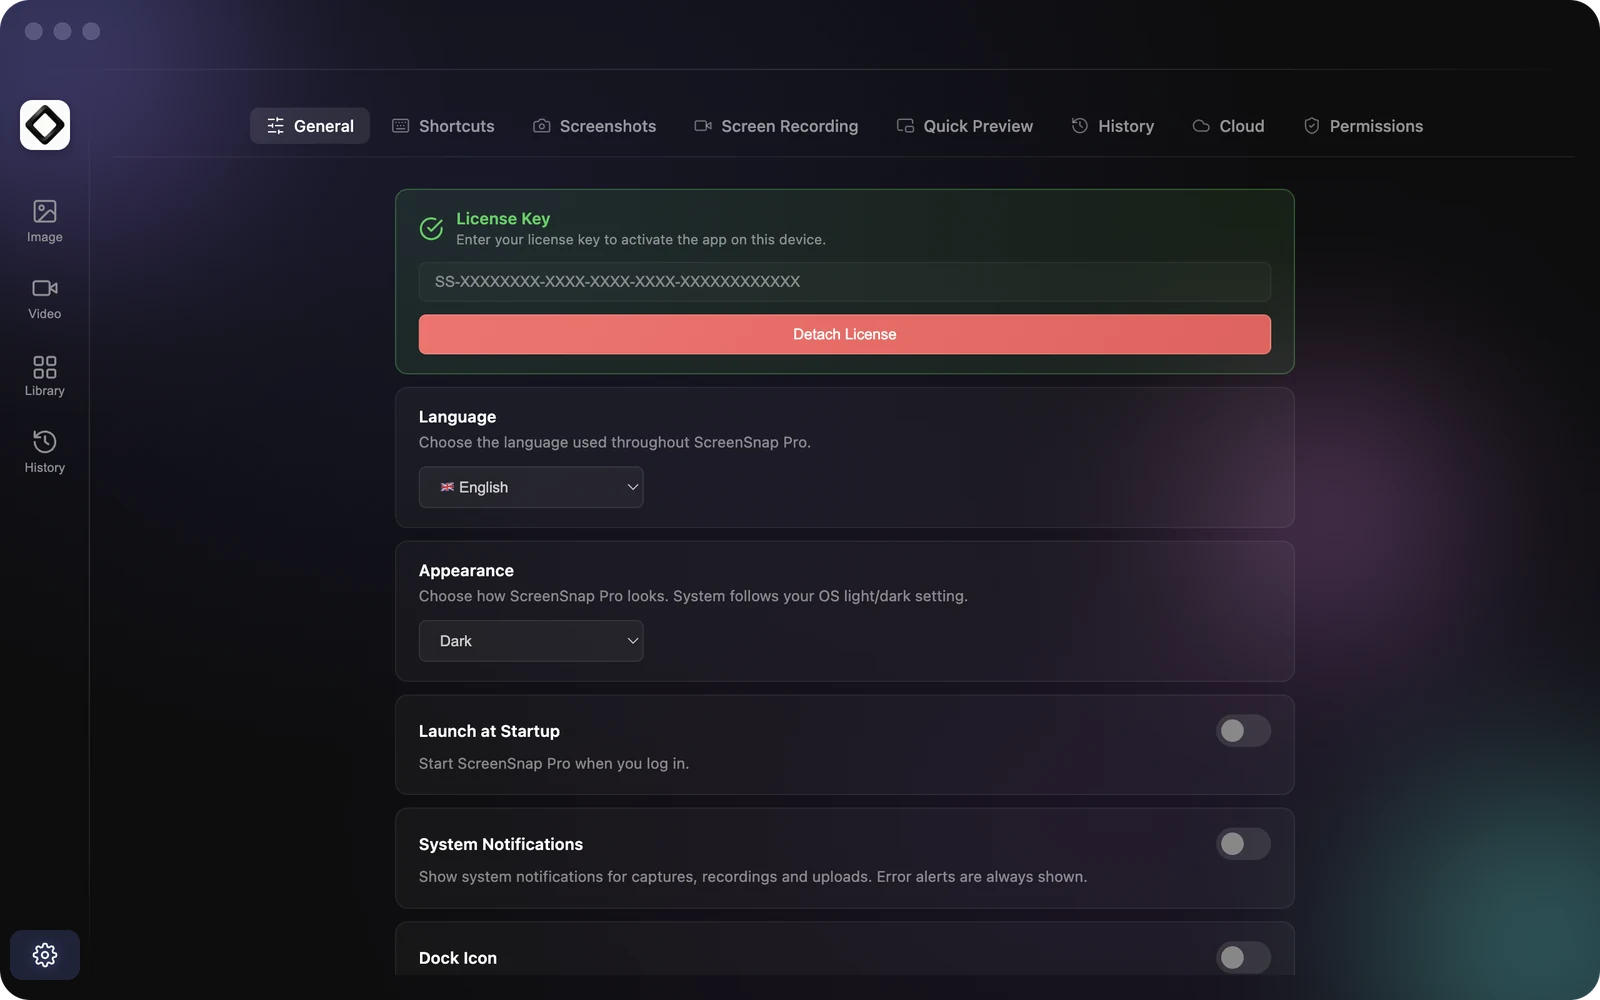
- 1In the editor, click the gear icon at the bottom of the left sidebar.
- 2Or choose
Settings...from the ScreenSnap Pro menu: click the icon in the menu bar on Mac, or right-click the icon in the system tray on Windows.
General
App-wide options. Some only appear on one platform, as noted below. The bottom of this tab shows your ScreenSnap Pro version, which is useful when you contact support.
- 1
License Key: paste your key and clickActivate License. Once the key is active, the button changes toDetach License, which frees this computer's seat. See Activating Your License. - 2
Language: the language of the whole app. See Language & Appearance. - 3
Appearance:System,LightorDark. Dark is the default. - 4
Launch at Startup: start ScreenSnap Pro when you log in. On by default. - 5
Open Editor on App Launch(Windows only): open the editor when you click the ScreenSnap Pro desktop, Start menu or taskbar icon. On by default. When the app starts at login, it stays in the tray. - 6
Tray Icon Left-Click(Windows only): what a left-click on the tray icon does:Capture Area (Editor)(default),Capture Area,Show tray menuorDo nothing. Right-click always opens the full menu. - 7
System Notifications: show system notifications for captures, recordings and uploads. Off by default. Error alerts always appear. - 8
Dock Icon(Mac only): show the app icon in the Dock while the editor window is open. Off by default, so ScreenSnap Pro stays in the menu bar. - 9
Save Folder: where screenshots are saved, aScreenSnap Profolder on your Desktop by default. ClickBrowseto choose another folder. - 10
File Name Pattern: how saved screenshots and edited image exports are named. The default isScreenSnapPro-{{datetime}}, and you can use the variables{{datetime}}and{{UUID}}. Details in Save Folder, File Names and Formats.
Screenshots
Options for what happens when you take a screenshot. More about each capture mode in Capturing Screenshots.
- 1
Display Quick Preview: show the Quick Preview window after each screenshot. On by default. - 2
Hide Editor After Copying: hide the editor after you copy the screenshot to the clipboard. Off by default. - 3
Capture Delay: wait a few seconds before each screenshot is taken. Off by default. When you turn it on, choose 1, 2, 3, 5, 7 or 10 seconds (3 by default).Capture Area with Delayuses the same number of seconds and always waits, even when this switch is off. You can also change both from theCapture Delaysubmenu of the menu bar or tray icon. - 4
Freeze Screen(Mac only): freeze the display under the pointer while you select an area. Timed captures and screen recordings stay live. Capture may start slightly slower. Off by default. - 5
Copy to Clipboard: copy each screenshot to the clipboard automatically. On by default. - 6
Default Screenshot Format:PNG(default) keeps maximum quality and transparency,JPEGmakes smaller files without transparency,WebPbalances size and quality with transparency, andAVIFgives the smallest high-quality files but is less widely supported.
Toolbar
The Toolbar section at the bottom of the Screenshots tab arranges the editor's tool panel, with a Live preview above the options. Under Default Tools, choose which tool the Shapes and Text group buttons start with (Shapes default tool and Text default tool, Arrow and Pencil out of the box). Under Additional Tools, pin up to 4 tools as one-click buttons. Emoji is pinned by default, and you can remove it. See Annotation Tools.
Screen Recording
Two options for recordings. The recording controls themselves are covered in Screen Recording.
- 1
Dim Recording Display Only: apply the dark recording mask only to the display being recorded, leaving other displays unchanged. Off by default. - 2
Keep Recordings: recording projects in the app's library that you haven't opened or edited for 30, 60 or 90 days are moved to the Trash, where you can still recover them. The default isForever. Projects you saved to your own folders are never touched.
Quick Preview
Controls the preview window that appears after a capture. What you can do with the preview itself is covered in Quick Access Overlay (Quick Preview).
- 1
Position:Bottom Right(default),Bottom Left,Top RightorTop Left. - 2
Size:Extra small,Small,Medium (default),LargeorExtra large. - 3
Auto-close: when on, the preview disappears after the chosenIntervalof 1, 3, 5, 7, 9 or 11 seconds (5 by default). When off, it stays until you swipe it away or close it. On by default. - 4
Close after dragging: dismiss the preview once you drop the screenshot somewhere else, like a folder or a chat. On by default. - 5
Move to active screen: show the preview on the display where your pointer is. When off, it always appears on the primary display. On by default.
History
Keep history for sets how long Capture History keeps a private copy of your captures: None (disabled), 1 day, 3 days, 1 week (default) or 1 month. Clear history now deletes every stored copy after you confirm. Files in your Save Folder are never affected.
Cloud
Cloud Upload lets you upload captures and get a share link for quick sharing. It needs an active license and is off by default. When it is on, Auto Upload appears below it: turn that on to upload each screenshot right after capture. When an upload finishes, the link is copied to your clipboard. See Share a Link to a Screenshot or Recording and Auto Upload.
Permissions (Mac)
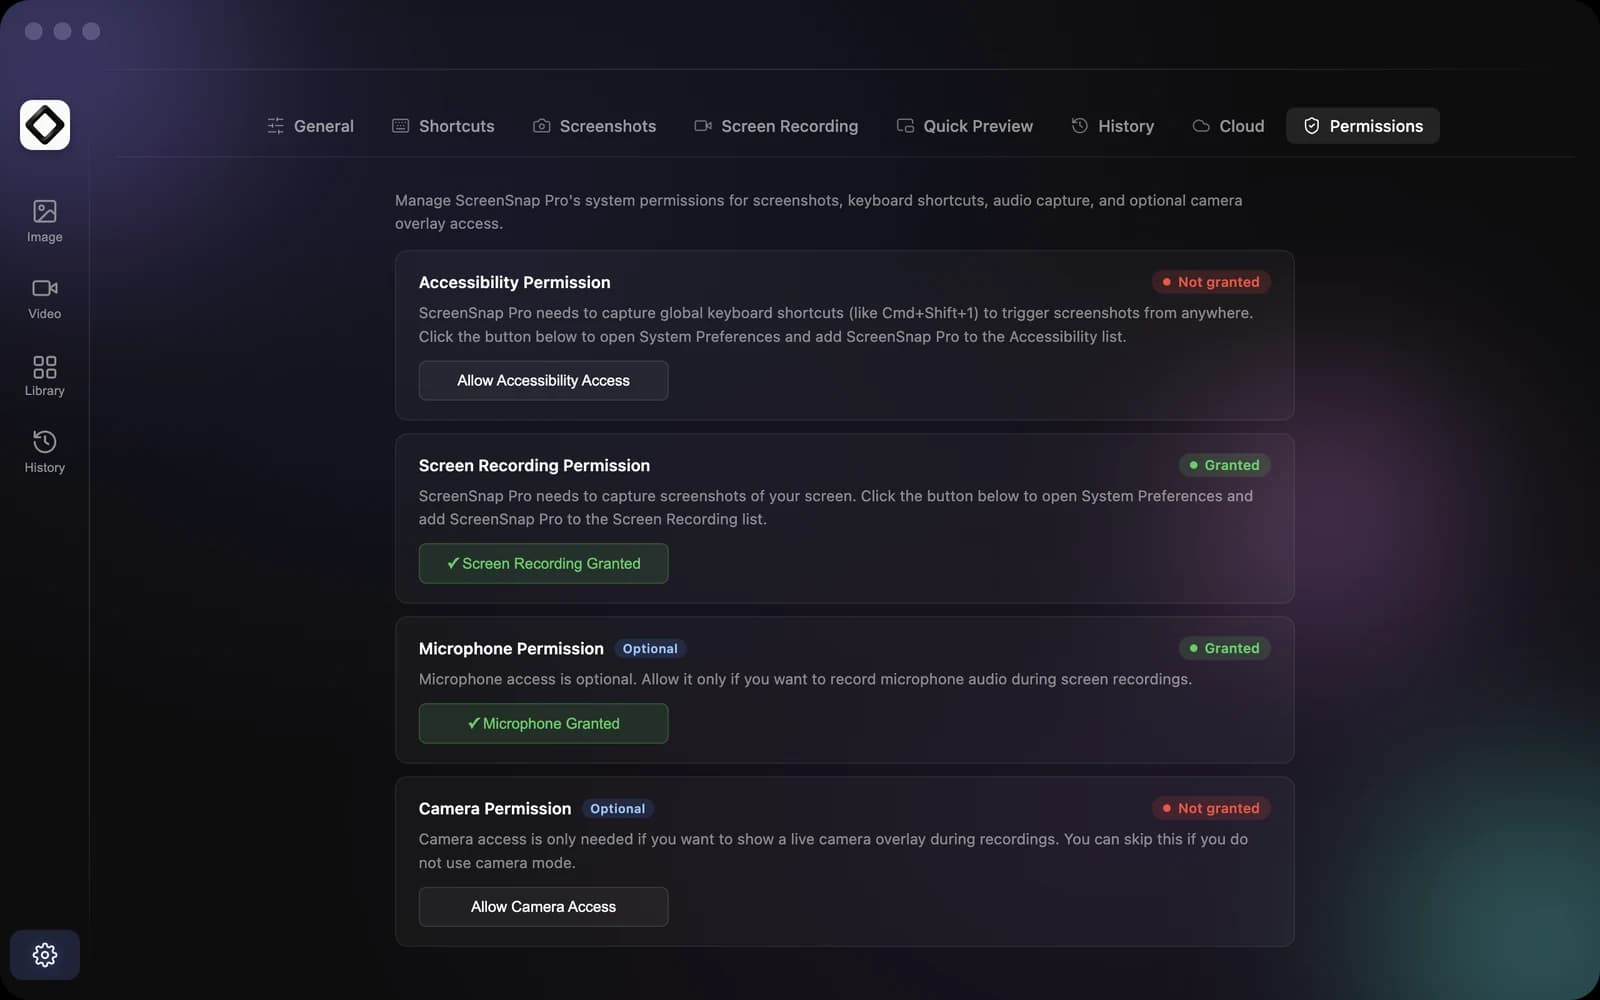
This tab shows the macOS permissions ScreenSnap Pro uses, each marked Granted or Not granted, with a button that opens the macOS prompt or the right page of System Settings. It does not appear on Windows.
- 1
Accessibility Permission: used for the global keyboard shortcuts. Button:Allow Accessibility Access. - 2
Screen Recording Permission: required to capture your screen. Button:Allow Screen Recording. - 3
Microphone Permission(optional): only needed to record microphone audio during screen recordings. Button:Allow Microphone Access. - 4
Camera Permission(optional): only needed to show a live camera overlay during recordings. Button:Allow Camera Access.
Captures failing or shortcuts silent? Start with this tab, then see Permissions on macOS and Windows and Troubleshooting.