Webcam, Cam Scenes and Cursor
Position, size and shape your webcam overlay, switch it to full screen with cam scenes, and restyle or hide the pointer in ScreenSnap Pro recordings.
Webcam overlay
If you recorded with a camera, your webcam appears automatically as a round overlay in the bottom right corner. To add a webcam video you recorded separately, click "Add webcam video…" in the Camera tab. Then adjust it in the Camera tab:
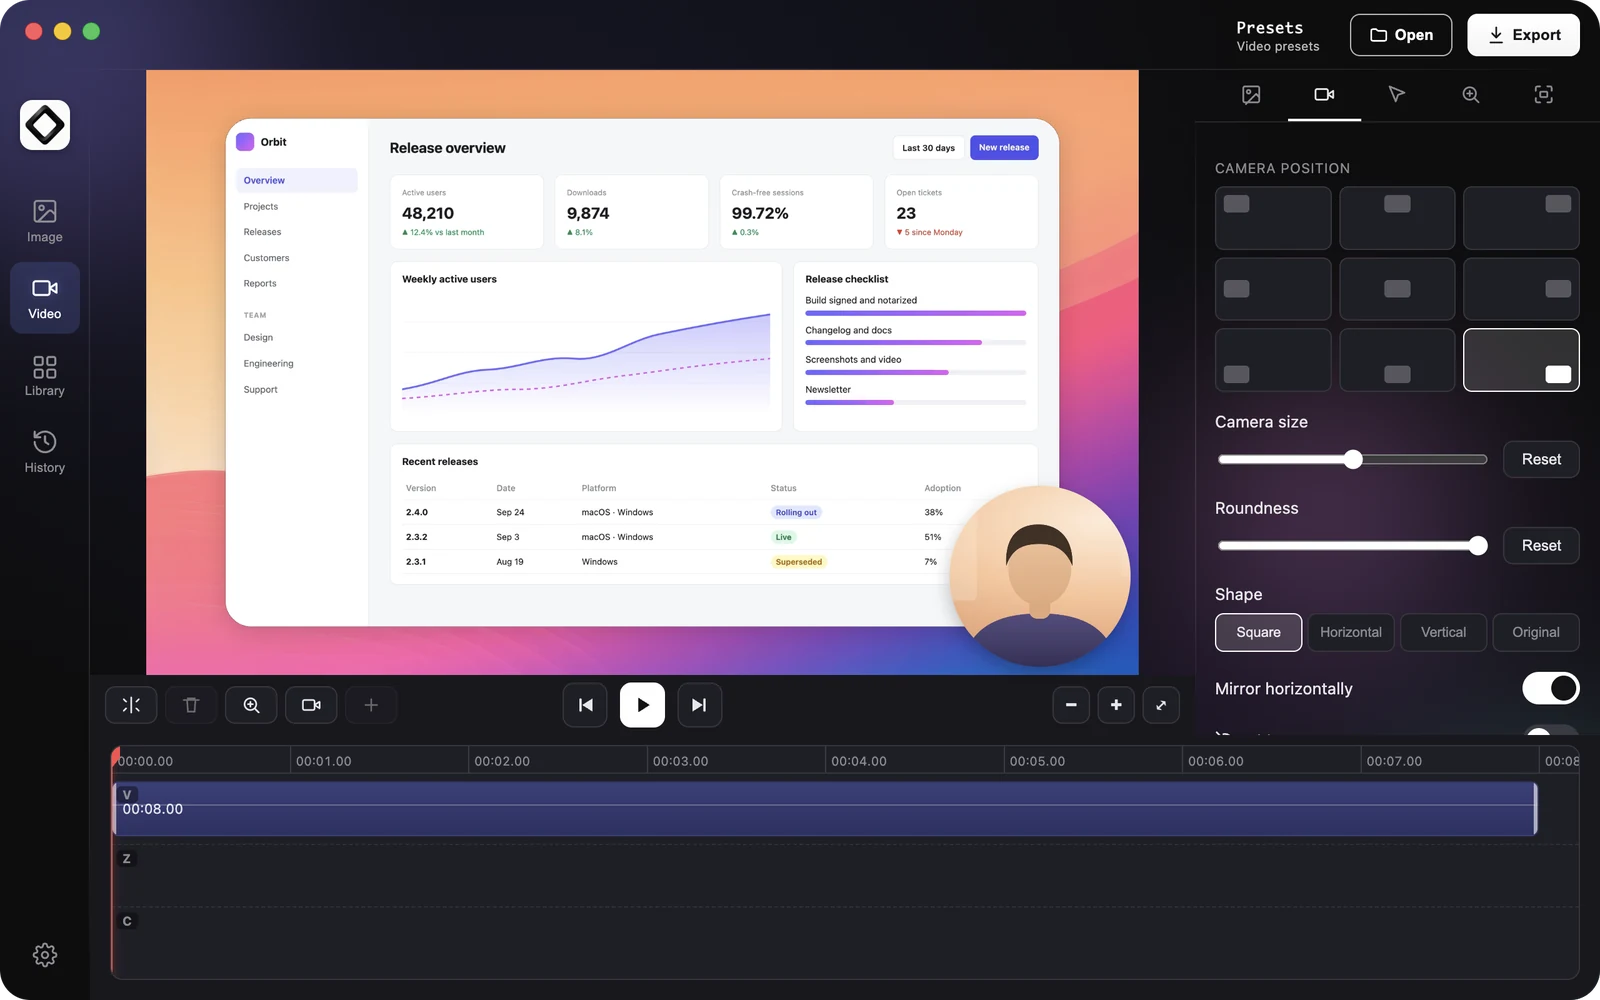
- 1"Camera position": pick one of nine spots on the grid.
- 2"Camera size" and "Roundness". With the "Square" shape, full roundness gives a circle. Lower values give rounded corners.
- 3"Shape": "Square", "Horizontal", "Vertical" or "Original".
- 4"Mirror horizontally" (on by default) and "Hide camera".
- 5"Shadow", "Margin" (distance from the edge), "Opacity" and "Border" with "Border color".
- 6"Replace" swaps the webcam video, "Remove" takes it out of the project.
Cam scenes
Cam scenes change how the webcam appears for part of the video, for example to show your face full screen for an intro or an outro.
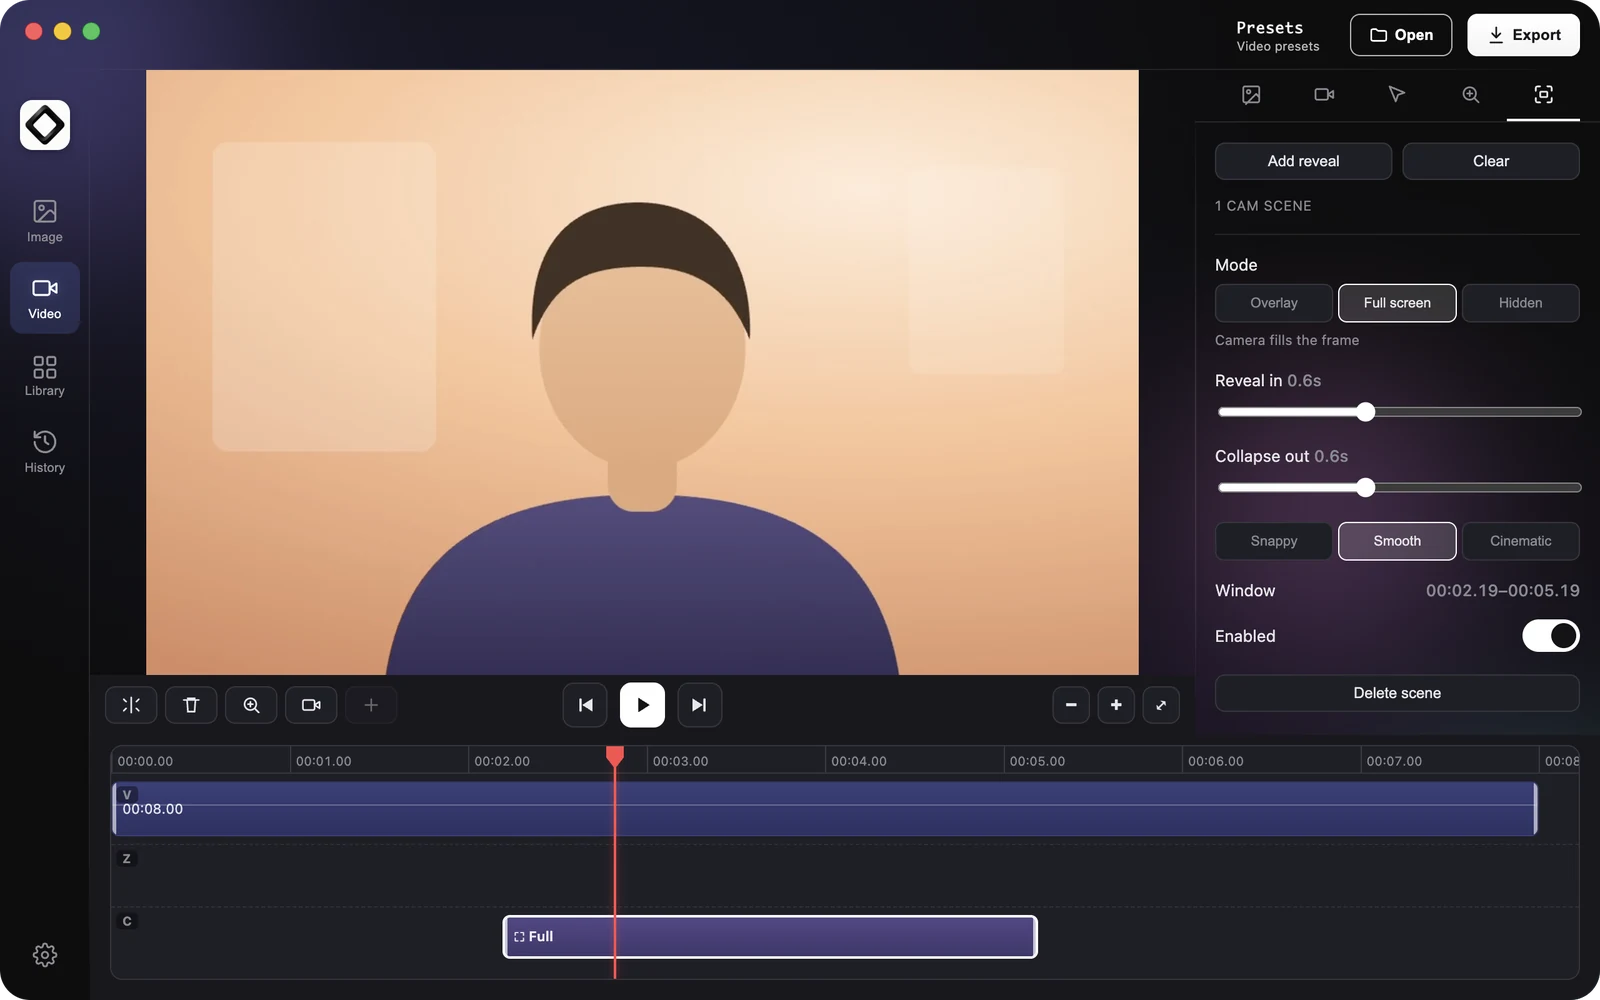
- 1Move the playhead to where the scene should start.
- 2Click "Add reveal" in the Cam scenes tab, or the camera button in the timeline tools ("Add webcam scene at playhead"). A full screen scene appears on the C lane.
- 3Drag the scene to move it, or drag its edges to change its length.
- 4Select it and choose the "Mode": "Overlay" (corner overlay), "Full screen" (camera fills the frame) or "Hidden" (camera hidden).
- 5Set "Reveal in" and "Collapse out" to control the transition, or pick "Snappy", "Smooth" or "Cinematic".
Cam scenes need a webcam in the project. If the tab says there is no webcam, add one in the Camera tab first.
Cursor
When ScreenSnap Pro records the pointer separately from the screen video, which is the usual case on Mac, you can change how it looks after recording. When the pointer is part of the video itself, which can happen on Windows, the Cursor tab is hidden because the pointer cannot be restyled. Options in the Cursor tab:
- 1"Cursor size": make the pointer larger so it stays visible in shared videos.
- 2"Cursor style": System, Light, Dark, Dot or Ring.
- 3"Always use pointer cursor": always shows the pointing hand.
- 4"Hide cursor if not moving": fades the pointer out while it rests.
- 5"Hide cursor": removes the pointer from the video completely.
- 6"Rotation" > "Tilt": angles the pointer.
- 7"Advanced" > "Motion smoothing": evens out shaky pointer movement.
The "Cursor size", "Tilt" and "Motion smoothing" sliders have a "Reset" button that restores the default value.