Pin Screenshots
Keep a screenshot floating above all your windows as a reference while you work, then move or resize it, copy its text, upload it or edit it.
Pin a screenshot
A pinned screenshot opens in its own small window near the middle of the display where your pointer is. It stays on top of every other window, so you can keep a design, a spec or a set of instructions in view while you work in another app.
- 1Take a screenshot, for example with
Capture Area. - 2Hover over the Quick Preview thumbnail.
- 3Click
Pin Screenshot.
Pinning works for screenshots. Recordings and GIFs can't be pinned. To pin an older screenshot, restore it from Capture History and click Pin Screenshot on its thumbnail.
Move and resize a pin
A pin starts at a compact size. Drag anywhere on the image to move it. Drag an edge or a corner to resize it, and the image keeps its proportions. You can also click the pin and use the keyboard:
- 1
+or=: zoom in by 10%. - 2
-: zoom out by 10%. - 3
Esc: close the pin.
Pin controls
Hover over a pin to show its toolbar:
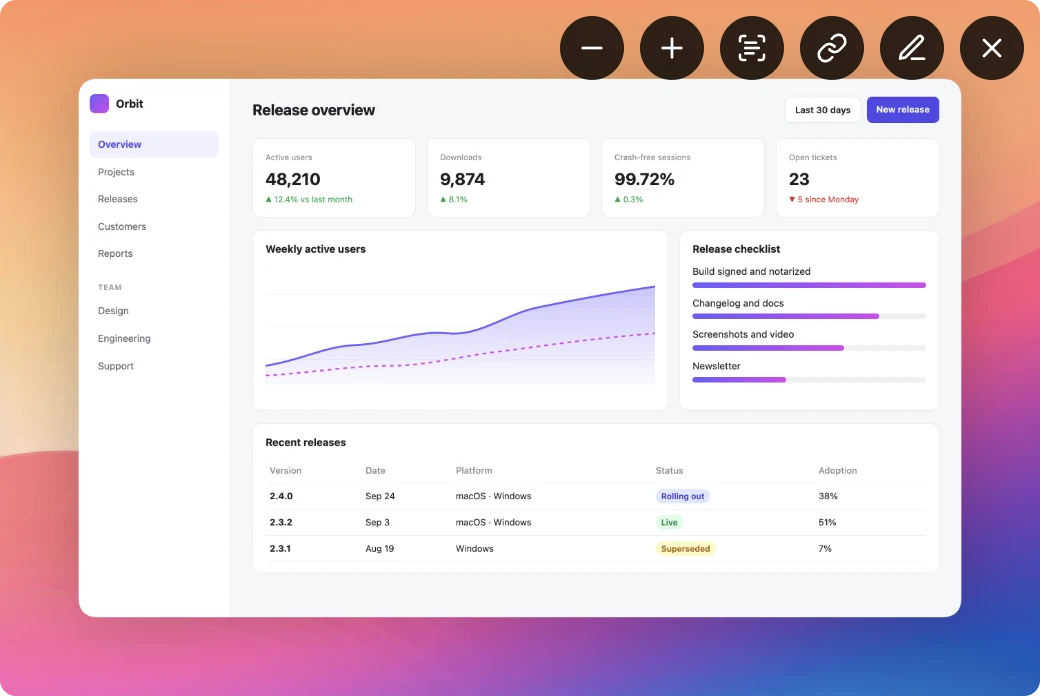
- 1
Zoom Out (-10%)andZoom In (+10%): make the pin smaller or larger. - 2
Copy Text (OCR): copy all the text in the screenshot. The button confirms with "Text Copied". - 3
Upload to Cloud and Copy Link: upload the screenshot and copy a share link. Click it again later to copy the same link. It appears when Cloud Upload is on and Auto Upload is off. - 4
Edit in Editor: open the screenshot in the editor. The pin closes. - 5
Close: close the pin. Your screenshot file is not deleted.
Use several pins
Pin as many screenshots as you need. Each pin is its own window that you can move, resize and close separately. That makes it easy to compare two versions of a design side by side, or to keep a few references in view while you write or code.