Library: Local Files and Cloud Uploads
Browse your saved screenshots and your cloud uploads in one place, then copy or create links, edit, convert or delete files from the Library.
Open the Library
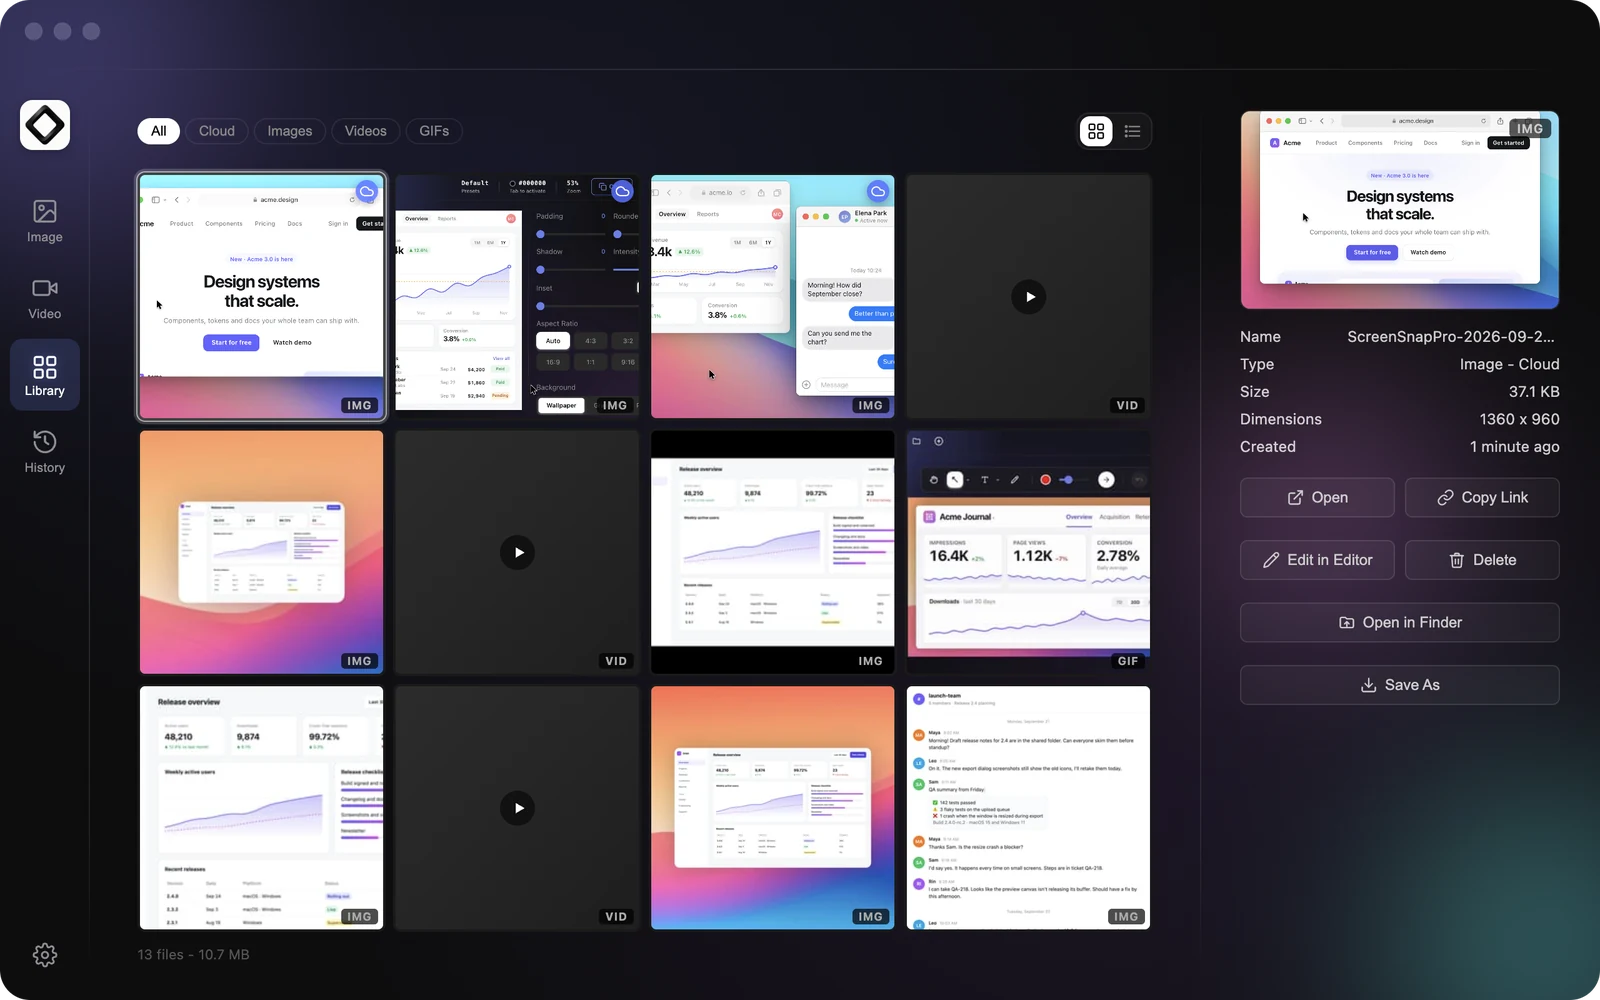
Open the editor (click the ScreenSnap Pro icon in the menu bar on Mac, or right-click it in the system tray on Windows, and choose Open Editor), then click Library in the left sidebar. The Library brings together the images and videos in your Save Folder and the files you uploaded to ScreenSnap Cloud. Uploaded files are marked with a cloud icon (Synced with Cloud), and a file that's both on your computer and in the cloud appears only once.
Find a file
Use the filters at the top: All, Cloud, Images, Videos and GIFs. Switch between Grid view and List view with the buttons on the right. The newest files come first. From your Save Folder, the Library lists PNG, JPEG, WebP, AVIF, GIF, MP4 and WebM files that sit directly in the folder, not in subfolders.
See details and preview
Click a file to see its Name, Type, Size, Dimensions and Created date in the right panel. Double-click it, or press Space, to open a large preview. Use the arrow keys to move between files, and press Esc or Space to close the preview.
Share, open and edit
The right panel shows the actions that fit the selected file. Copy Link copies the share link of an uploaded file. Create Link uploads a local file and copies its new link. Open opens the share link in your browser. Edit in Editor opens an image or GIF in the editor. Open in Finder on Mac, or Show in Explorer on Windows, shows a local file in its folder. Right-click a file for the same actions, where Open is called Open in Browser and Edit in Editor is called Open in Editor.
Convert an image with Save As
Save As makes a converted copy of an image and leaves the original untouched.
- 1Select an image or GIF in the Library.
- 2Click
Save Asin the right panel. - 3Choose a format: PNG, JPEG, WebP, AVIF, GIF, TIFF or PDF.
- 4The copy is saved to your Downloads folder and the button briefly shows
Saved!.
If a file with the same name is already in Downloads, a number is added, like name (1).png, so nothing gets overwritten.
Select several files
Cmd-click on Mac or Ctrl-click on Windows to add files to a selection, or Shift-click to select a range. A bar shows how many files are selected, with Copy Links (copies the links of the selected uploads, one per line), Delete and Clear. You can also right-click the selection to copy its links or delete all of it.
Delete files
Select a file and click Delete, or press Delete or Backspace. For an uploaded file, choose Delete Both to remove it from your computer and the cloud, or Only Cloud to remove just the upload and its link. A local file is deleted from your computer after you confirm; it isn't moved to the Trash or Recycle Bin. When you delete several selected files at once, you confirm once and both their local and cloud copies are removed.
Keyboard shortcuts
In the Library, the arrow keys move the selection, Space opens or closes the large preview, Esc closes the preview or clears a multiple selection, Delete or Backspace deletes the selected files, and Cmd + C on Mac or Ctrl + C on Windows copies the selected file's share link.
Good to know
Cloud files show up only with an active license. Without one, the Cloud filter shows Premium access is required to view cloud files and an Unlock Access button. When the Library loads your uploads, any upload that isn't on this computer yet is downloaded to your Save Folder, so you can preview and edit it. If you change your Save Folder, the Library shows the files in the new folder.