Crop & Cut
Crop a screenshot to the part you need, or cut a strip out of the middle of a long screenshot and join the rest, right in the ScreenSnap Pro editor.
Two ways to trim
The Crop button in the editor's top bar (labeled Crop & Cut underneath) opens a menu with two modes:
Crop keeps a rectangle and removes everything around it.
Cut removes a strip from the middle of the screenshot and joins the parts on either side, for example to drop the empty middle of a long page or chat.
Both change the screenshot itself. Your background, padding and other styling stay as they are.
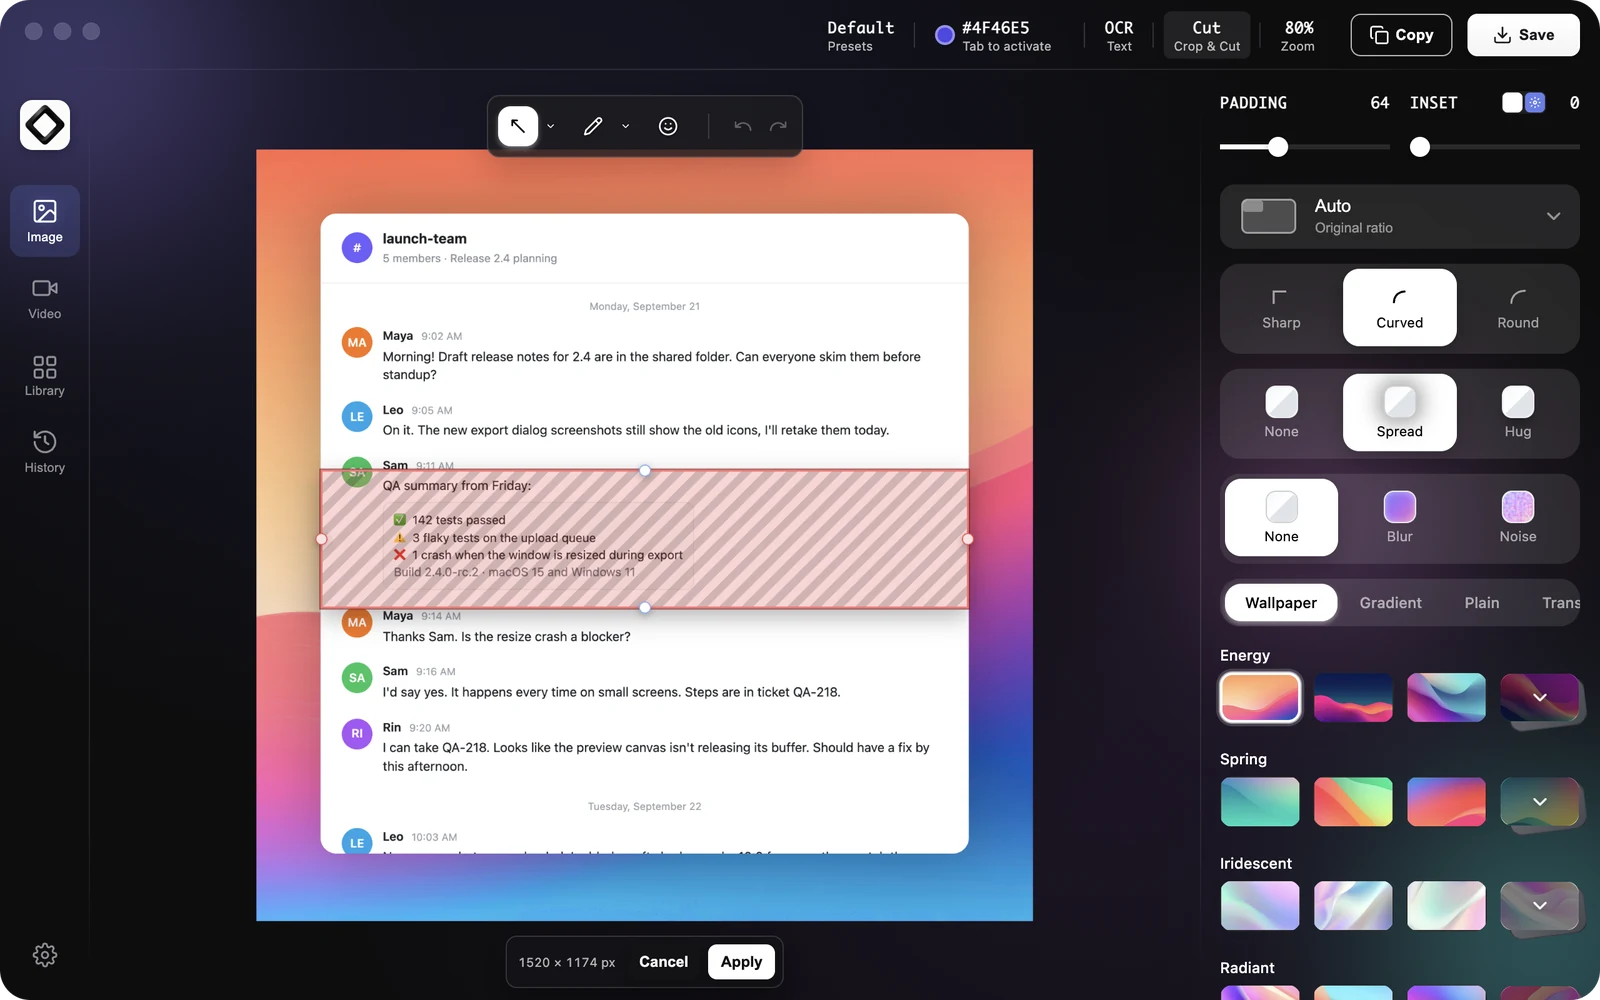
Crop a screenshot
Use Crop to remove menus, other windows or empty space around what matters.
- 1Click
Cropin the top bar and chooseCrop. - 2The selection starts around the whole screenshot. Drag its corner or edge handles inward, or drag across the screenshot to draw a new selection. Drag inside the selection to move it.
- 3Check the resulting size in pixels shown next to the
CancelandApplybuttons. - 4Click
Applyor pressEnter.
Cut out a strip
Cut is made for long screenshots: keep the top and bottom of a page and drop the part in between.
- 1Click
Cropin the top bar and chooseCut. A horizontal strip appears across the middle of the screenshot. - 2Drag up or down across the screenshot to mark rows to remove; the screenshot gets shorter. Drag left or right to mark columns to remove; it gets narrower.
- 3Drag the strip to move it, and drag its edges to make it thicker or thinner. Dragging one of the handles on the other two sides switches the strip to the other direction.
- 4Click
Applyor pressEnter. The parts before and after the strip are joined.
A cut always keeps some of the screenshot on both sides of the strip. To trim an outer edge, use Crop instead.
Crop or cut again, or leave
After you click Apply, the mode stays on with a fresh selection so you can crop or cut again right away. Each Apply is a separate undo step, so Cmd + Z (Ctrl + Z on Windows) reverts them one at a time. To leave, click Cancel, press Esc, click outside the screenshot, or pick an annotation tool.
What happens to annotations
Annotations move along with the screenshot. With Crop, any annotation that is not fully inside the kept area is removed. With Cut, annotations that touch the removed strip are removed, and the ones below or to the right move up or left with the image. A message tells you how many annotations were removed, and Undo brings them back.
Crop or cut first and annotate afterwards, so nothing you draw gets removed.