Video Editor Basics
Open recordings in the ScreenSnap Pro video editor, trim and split clips on the timeline, change speed and volume, and learn the editor shortcuts.
Open a recording
Video recordings are edited in the video editor, which lives in the "Video" tab of the ScreenSnap Pro editor window.
- 1Right after recording: click "Open Video Editor" in Quick Preview, or click the thumbnail.
- 2Any time later: choose "Open Video Project…" from the menu bar icon (Mac) or the tray icon's right-click menu (Windows), or click "Video" in the editor window's left sidebar.
- 3On the start screen, click "Open project…" to open a
.ssprojrecording (on Windows, select the.ssprojfolder), or "Import video…" to open an MP4, MOV, WebM, M4V, MKV or AVI file. Your "Recent projects" are listed below. - 4To switch recordings later, click "Open" in the top bar.
Right-click a recent project to "Open", "Reveal in Finder" (the same label is used on Windows), "Rename", "Duplicate", "Remove from this list" or "Move to Trash". On Mac you can also double-click a .ssproj file in Finder.
The editor at a glance
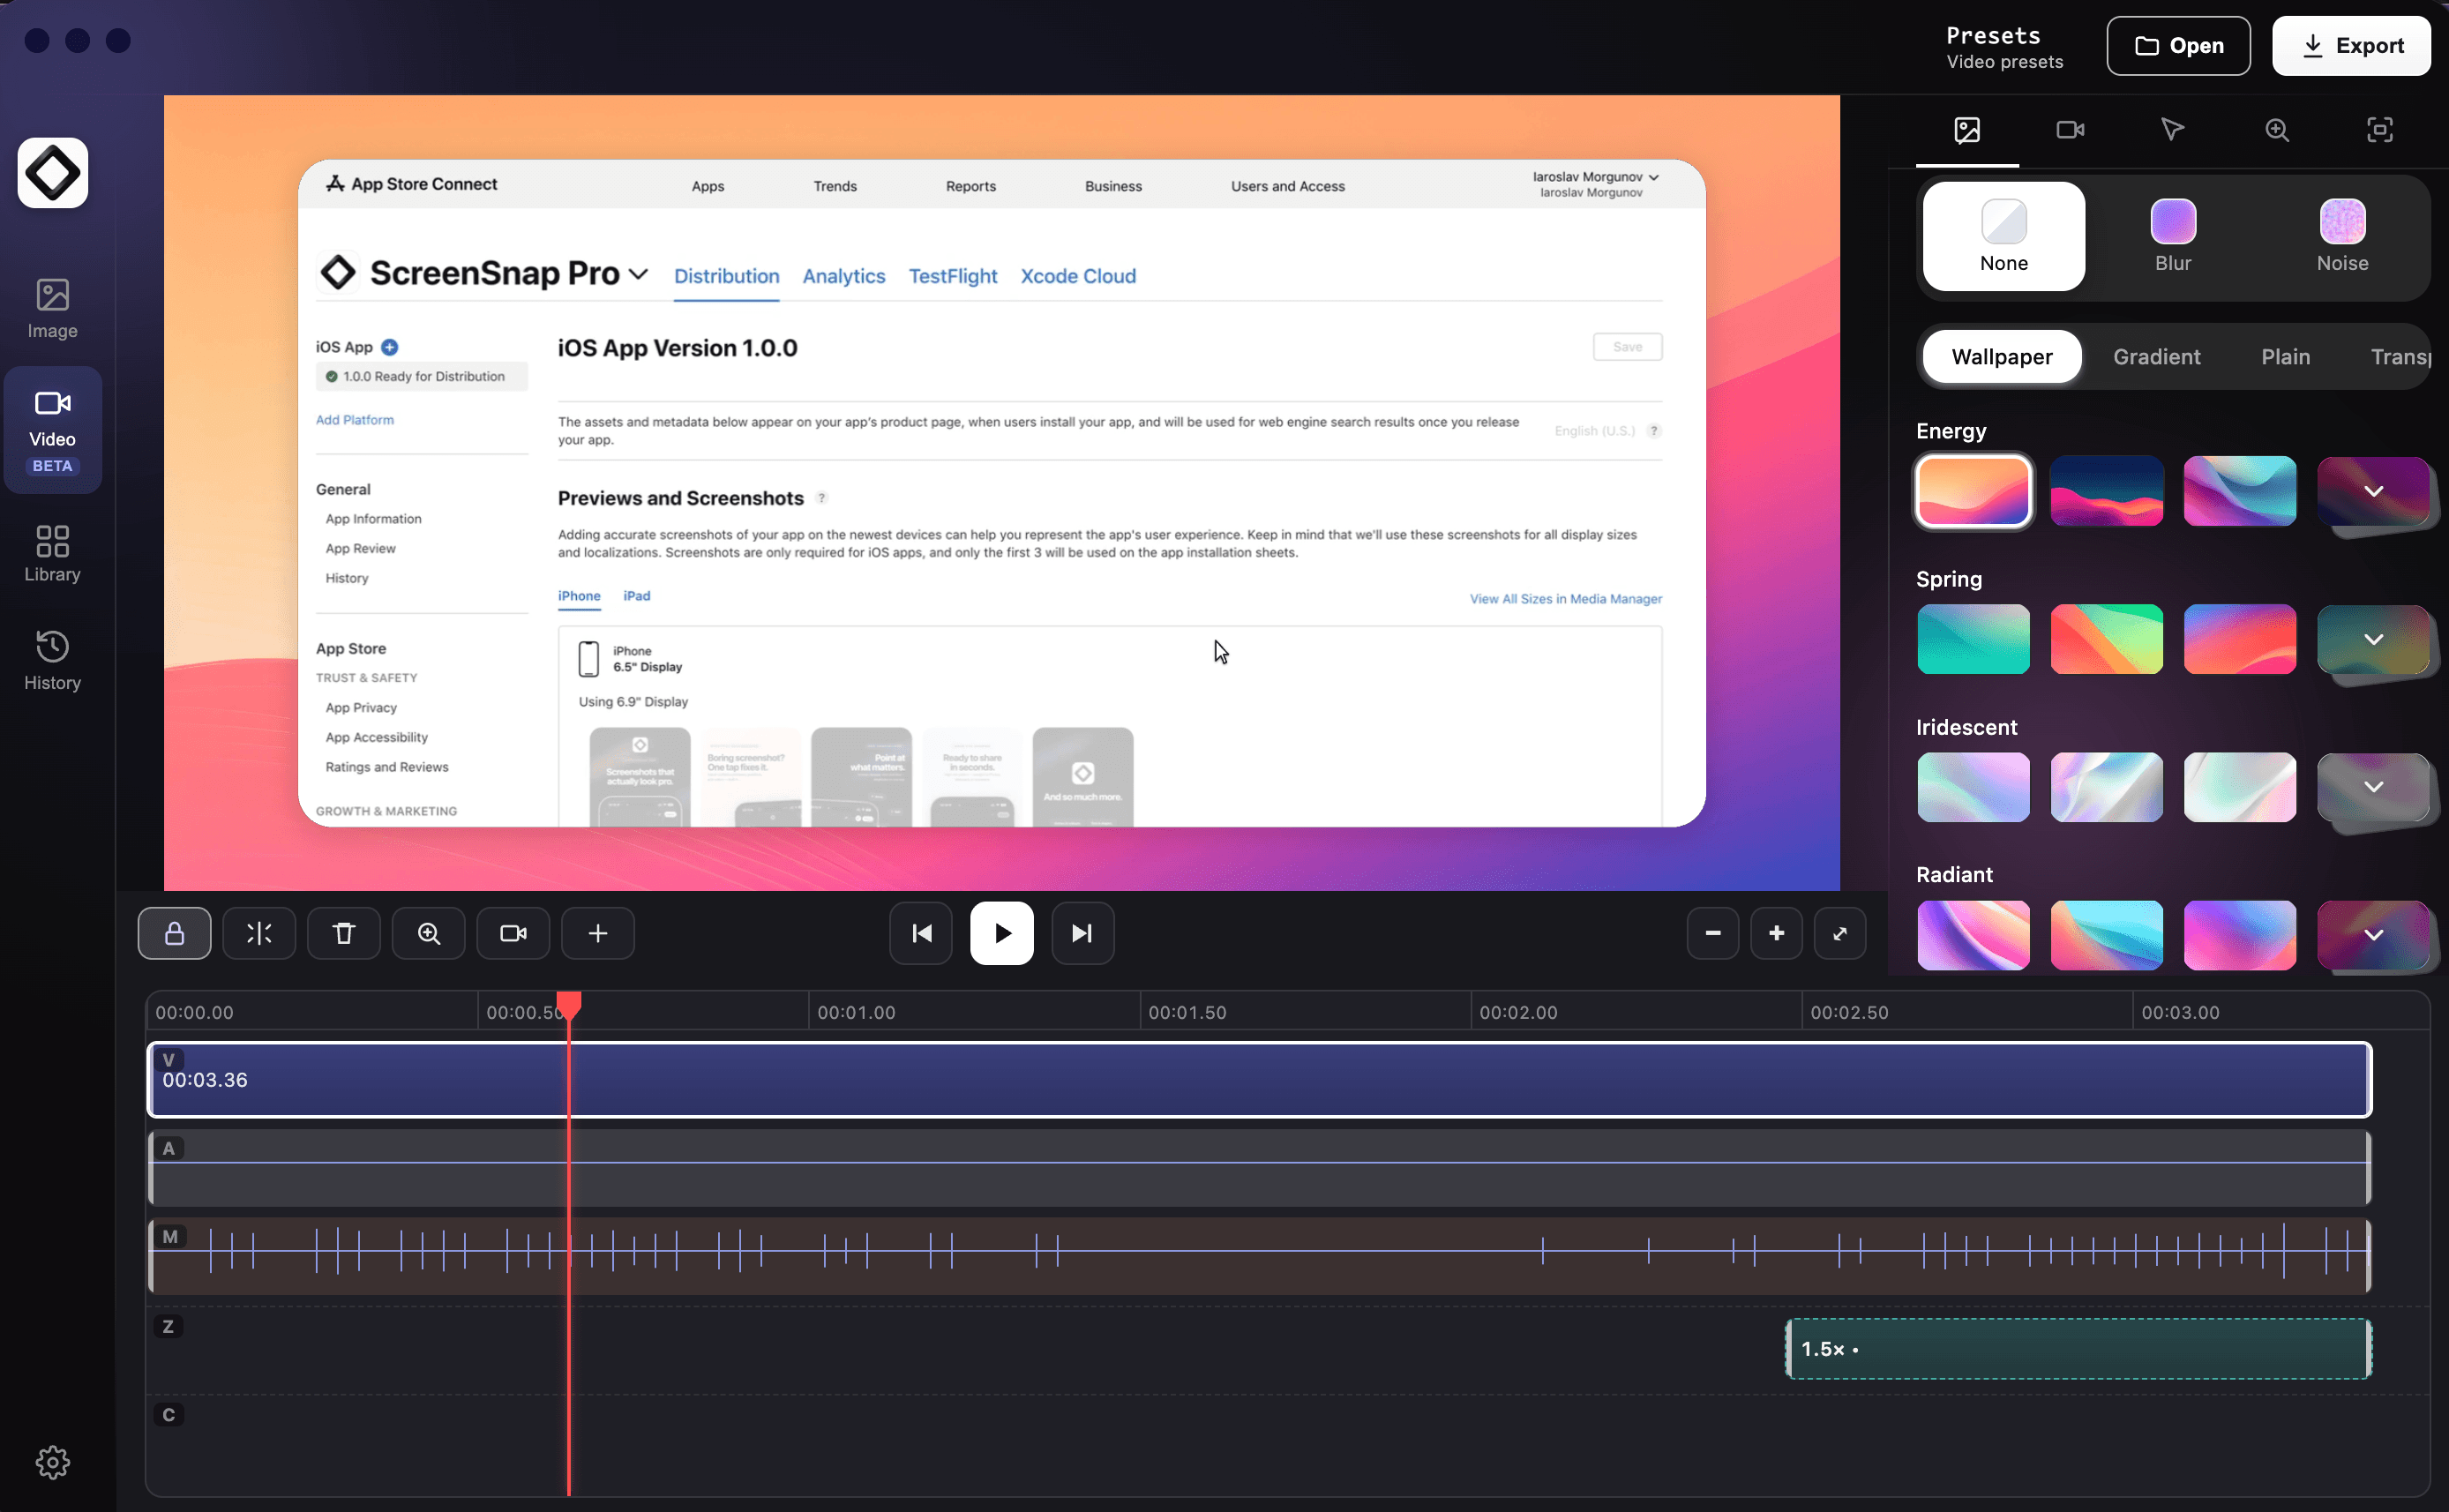
The preview is in the middle, with the timeline tools, playback controls and timeline zoom buttons right below it. The right panel has icon tabs for Background, Camera, Cursor, Zoom and Cam scenes. The timeline at the bottom shows your recording, the Z lane for zoom regions and the C lane for cam scenes. The top bar holds "Presets", "Open" and "Export". The Cursor tab only appears when ScreenSnap Pro recorded the pointer separately from the screen video, which is the usual case on Mac. When the pointer is part of the video itself, which can happen on Windows, the tab is hidden because the pointer cannot be restyled.
Trim, split and rearrange
Your edits never change the original recorded tracks, so you can always undo or rework them. By default, the video and its sound are shown as one combined row.
- 1Trim: drag the left or right edge of a clip to shorten its start or end.
- 2Split: move the playhead and press
S, or click the split button ("Split at playhead (S)"), to cut the clip in two. - 3Remove: select a clip and press
DeleteorBackspace, or click the trash button. - 4Move: drag a clip along the timeline. Right-click an empty gap for "Close gap" or "Close all gaps".
- 5Separate sound: right-click the clip and choose "Split into video & audio tracks" to edit the video (V), audio (A) and microphone (M) lanes on their own. "Combine into one track" brings them back together, as long as the audio has not been edited separately from the video.
With split lanes, the lock button (or L) decides whether edits apply to all lanes or only to the one you selected.
Speed, volume and audio clean-up
Right-click a clip on the timeline for more options. On the combined row, mute and volume apply to all of the clip's sound. Split the tracks first to adjust system audio and microphone separately.
- 1"Change speed": 0.25×, 0.5×, 1×, 1.5× or 2×. Speeding up a slow part is a quick way to shorten a video.
- 2"Mute" or "Unmute", and "Volume": 0%, 50%, 100%, 150% or 200%.
- 3"Normalize volume": measures the clip's peak and sets the volume so it reaches -1 dB.
- 4"Enhance mic (Studio Sound)": cleans up the whole microphone recording. Choose "Restore original mic audio" to undo it. Available when you recorded with a microphone.
- 5"Remove silence": finds quiet sections and cuts them out of the whole recording in one undo step.
Add music or other media
Click the plus button in the timeline tools ("Add a video or audio file as a new track") or drop a file onto the timeline. Audio files such as MP3, M4A, WAV or FLAC become new audio tracks, and video files become new layers above your recording. Adding media works in recording projects, not in videos opened with "Import video…".
Video presets
Presets store your Background, Camera and Cursor styles so every video can share the same look. Click "Presets" in the top bar, type a name and click "Save current settings". Click a preset to apply it to the open recording. The built-in "Default" preset is always there, and your own presets have buttons to rename them, update them with the current settings, or delete them. Applying a preset does not touch your timeline or zoom regions, and you can undo it.
Autosave, undo and shortcuts
Edits to a recording project are saved automatically as you work, so you can close the editor and continue later. Undo with Cmd + Z (Mac) or Ctrl + Z (Windows). Redo with Cmd + Shift + Z or Cmd + Y (Mac), Ctrl + Shift + Z or Ctrl + Y (Windows).
- 1
Space: play or pause. - 2
Home/End: go to the start / the last frame. - 3
Left Arrow/Right Arrow(or,/.): step one frame back or forward. - 4
S: split at the playhead. - 5
L: lock or unlock lanes (when lanes are split). - 6
DeleteorBackspace: delete the selected clip, zoom region or cam scene. - 7
Cmd + D(Mac) orCtrl + D(Windows): duplicate the selected clip, zoom region or cam scene. - 8
D: turn the selected zoom region or cam scene off or on. - 9
Cmd + C,Cmd + X,Cmd + V(Mac) orCtrl + C,Ctrl + X,Ctrl + V(Windows): copy, cut and paste a zoom region or cam scene at the playhead. - 10
CmdorCtrl+ scroll over the timeline: zoom the timeline in or out. The "Fit whole timeline" button shows everything at once.