Mac Preview App Guide: Edit Screenshots & Images (2026)
The Mac Preview app is Apple's built-in image and PDF viewer that doubles as a surprisingly capable editor. Whether you need to crop a screenshot, add annotations, convert file formats, or sign a document, Preview handles it without installing anything extra. For more advanced screenshot work, a dedicated tool like ScreenSnap Pro picks up where Preview leaves off.
But how far can Preview really take you? This guide covers everything the Mac Preview app can do — and where it falls short.
What is the Mac Preview app?
Preview is macOS's default app for viewing images and PDFs. It comes pre-installed on every Mac and opens automatically when you double-click most image files (PNG, JPG, HEIC, TIFF) or PDF documents.
What most people don't realize is that Preview is also an image editor. It includes tools for:
- Cropping, resizing, and rotating images
- Adding text, shapes, and arrows (annotations)
- Converting between image formats
- Filling out and signing PDF forms
- Removing image backgrounds (macOS Ventura and later)
- Adjusting color, exposure, and levels
For a free, built-in tool, that's a solid feature set. Apple's official Preview documentation covers all features, but this guide focuses on the practical stuff that matters most. If you've been opening Photoshop for simple screenshot edits, Preview might be all you need.
How to open screenshots in Preview
There are several ways to open your screenshots in Preview on Mac:
1. Double-click the file
Find your screenshot in Finder (the default location is your Desktop) and double-click it. If Preview is your default image viewer, it opens automatically.
Not sure where your screenshots are saved? Check out our guide on where screenshots go on Mac.
2. Right-click and choose "Open With"
Right-click any image file, hover over Open With, and select Preview. This works even if another app is set as your default.
3. Open from the screenshot toolbar
Press ⌘ + Shift + 5 to open the Mac screenshot toolbar. After capturing, click the thumbnail that appears in the corner. You can then click Open in Preview to start editing immediately.
4. Drag and drop
Drag an image file directly onto the Preview icon in your Dock or Applications folder.
Pro tip: You can open multiple images in Preview at once by selecting several files and pressing Space for Quick Look, or by dragging them all onto the Preview icon.
Annotating screenshots in Preview
Preview's Markup toolbar is where the magic happens. To access it, click the pencil icon in the toolbar or press ⌘ + Shift + A.
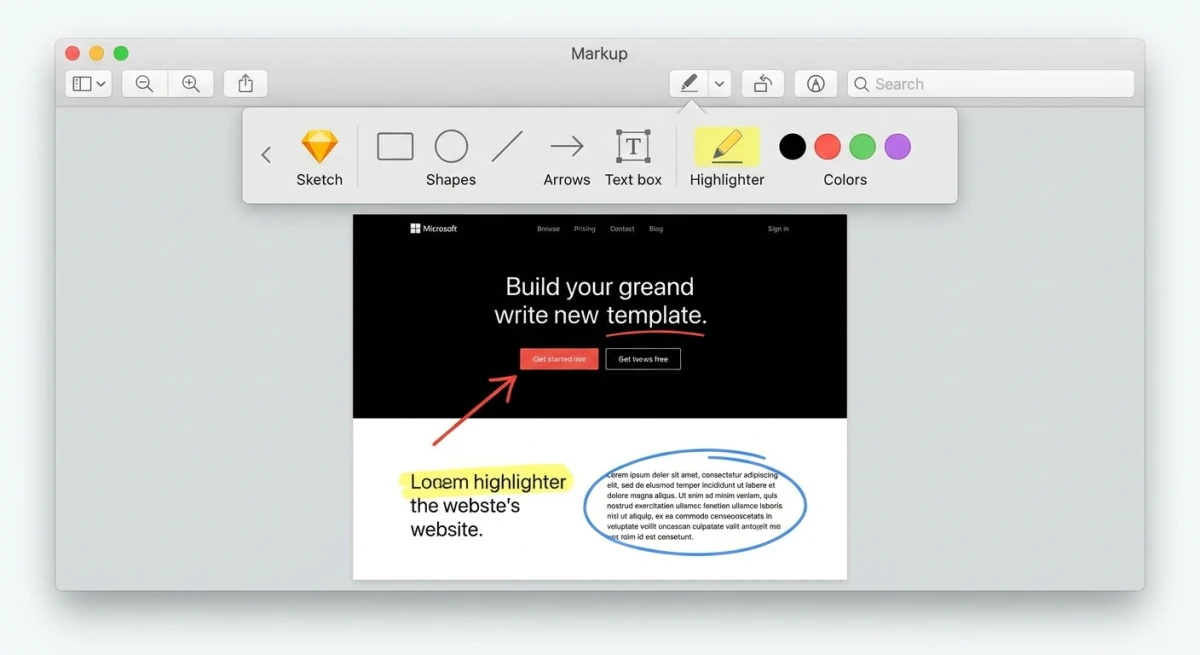
The mac markup tool options include:
- Text — Add text labels anywhere on the image
- Shapes — Rectangles, circles, lines, arrows, and speech bubbles
- Freehand drawing — Sketch directly on the image
- Highlighter — Draw attention to specific areas
- Signature — Add your saved signature
- Color and border — Customize line thickness and color
How to add arrows and shapes
- Open the Markup toolbar (
⌘ + Shift + A) - Click the Shapes button (rectangle icon)
- Choose your shape (arrow, circle, rectangle, line, star, etc.)
- Click and drag on the image to place it
- Use the handles to resize and reposition
How to add text annotations
- Click the Text button (T icon) in the Markup toolbar
- Click where you want the text
- Type your annotation
- Use the formatting options to change font, size, and color
For more advanced screenshot annotation on Mac, including numbered steps and blur tools, you may want a dedicated tool.
Cropping and resizing images
Preview makes basic image manipulation straightforward.
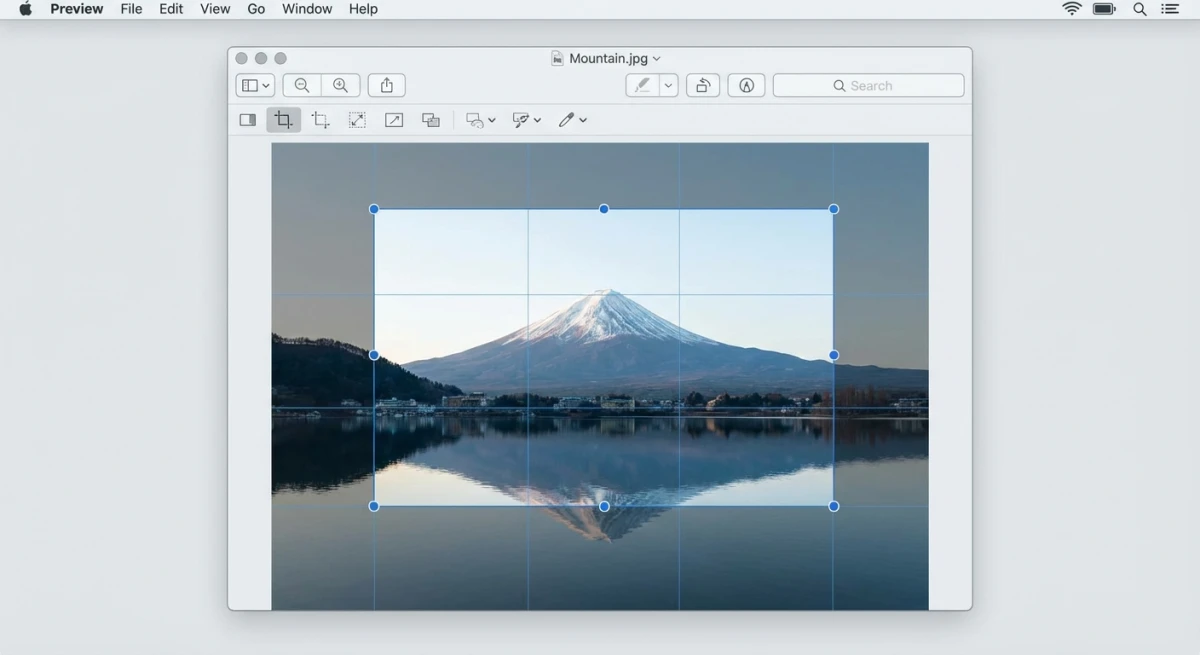
How to crop in Preview
- Open the Markup toolbar
- Click the Selection tool (dotted rectangle)
- Drag to select the area you want to keep
- Press
⌘ + Kto crop (or go to Tools > Crop)
Need more cropping options? Our crop screenshot Mac guide covers five different methods.
How to resize in Preview
- Go to Tools > Adjust Size (or press
⌘ + Option + I) - Enter new dimensions in pixels, inches, or other units
- Check Scale proportionally to maintain the aspect ratio
- Click OK
Important: Resizing down works great, but scaling up will make images blurry. Preview doesn't have AI upscaling.
How to rotate and flip
- Rotate: Press
⌘ + R(clockwise) or⌘ + L(counterclockwise) - Flip: Go to Tools > Flip Horizontal or Flip Vertical
Converting image formats in Preview
One of Preview's most useful features is format conversion. You can convert between PNG, JPG, HEIC, TIFF, PDF, and more.
How to convert image formats
- Open the image in Preview
- Go to File > Export (not "Save As")
- Choose your desired format from the Format dropdown
- Adjust quality settings if available (JPG has a quality slider)
- Click Save
Preview supports these output formats: HEIC, JPEG, JPEG 2000, OpenEXR, PDF, PNG, and TIFF.
For batch conversions or less common formats like WebP, you can use our free image format converter tool.
Batch converting multiple images
- Open all images in Preview (select all, right-click, Open With > Preview)
- Press
⌘ + Ato select all in the sidebar - Go to File > Export Selected Images
- Choose the format and destination folder
- Click Choose
This is a huge time-saver when you need to convert a folder of PNGs to JPGs, or HEIC photos from your iPhone to a more compatible format.
Adjusting color and exposure
Preview has basic color tools that work well for quick fixes on screenshots and photos.
How to adjust colors
- Go to Tools > Adjust Color (or press
⌘ + Option + C) - Use the sliders to modify:
- Exposure — Brighten or darken the overall image
- Contrast — Change the gap between light and dark areas
- Highlights and Shadows — Tweak bright and dark spots on their own
- Saturation — Make colors pop or tone them down
- Temperature — Shift warmer (yellow) or cooler (blue)
- Sharpness — Sharpen edges
- Changes show up live so you can check before saving
This helps when a screenshot looks too dark or washed out. You won't get Photoshop-level control. But for quick fixes on your preview mac images, it does the job.
Practical color adjustment examples
Here are some common fixes you can do with Preview's color tools:
- Dark screenshot from a meeting? Push Exposure right to brighten it. Bump Contrast up a bit so text stays sharp.
- Washed-out iPhone photo? Pull Saturation up a notch. Nudge Shadows down to add depth.
- Yellow-tinted screen? Move Temperature toward blue. Common for Night Shift or f.lux users.
- Blurry capture? Try the Sharpness slider. Don't overdo it — too much adds grain.
Each slider shows changes live. Press ⌘ + Z to undo if you go too far.
Auto-adjusting levels
Click the Auto Levels button at the top of the color panel. Preview reads the image and sets what it thinks looks best. This works well for most screenshots and casual photos. If it's not right, you can still tweak sliders after.
Tired of plain screenshots? Try ScreenSnap Pro.
Beautiful backgrounds, pro annotations, GIF recording, and instant cloud sharing — all in one app. Pay $39 once, own it forever.
See what it doesSigning documents with Preview
Preview lets you create and save digital signatures for filling out forms without printing.
How to create a signature
- Open a PDF in Preview
- Click the Markup toolbar icon
- Click the Signature button
- Choose your method:
- Trackpad — Draw your signature with your finger
- Camera — Hold a signed paper up to your Mac's camera
- iPhone — Sign on your iPhone screen (Continuity feature)
- Click Done to save
Once saved, your signature appears in the Signature menu for quick reuse across any PDF.
Filling out PDF forms
Preview automatically detects fillable fields in PDFs. Click on any field and start typing. For checkboxes, just click them.
If a PDF doesn't have fillable fields, use the Text tool from the Markup toolbar to type directly onto the document.
Removing image backgrounds in Preview
Since macOS Ventura, Preview can remove backgrounds from images. This used to need a third-party app.
How to remove a background
- Open the image in Preview
- Click the Markup toolbar icon
- Click the Remove Background button (person icon with a dotted outline)
- Preview finds the subject and strips the background
- Save as PNG to keep the see-through areas
This works best when the subject stands out clearly. If colors blend between the subject and the background, edges may look rough.
For cleaner results, try our transparent background maker. But for quick jobs — like cutting out a product photo or pulling a person from a screenshot — Preview does a solid job.
Tips for better background removal
- Use images with good lighting and a clear gap between subject and background
- It works better on photos than on screenshots with lots of UI
- If the cut isn't clean, undo (
⌘ + Z) and crop closer to the subject first - Save as PNG — JPG can't do see-through areas and will add a white fill
Advanced mac preview app tips and tricks
Preview has hidden features most people never find. These save a lot of time once you know them.
Quick Actions in Finder
You don't need to open Preview to use some of its features. Right-click any image in Finder and look for Quick Actions:
- Markup — Opens the markup toolbar in a Quick Look window. Press
Spaceon a file, click the Markup icon, and start drawing. No need to open the full app. - Convert Image — Change format and size right from Finder. Pick JPG, PNG, or HEIC, choose a size, done.
- Remove Background — On macOS Ventura+, this strips the background in one click.
These use Preview's engine but skip the step of opening the app.
Markup from Quick Look
Press Space on any image in Finder to open Quick Look. Click the Markup button (pencil icon) in the top-right. You can crop, mark up, and resize — without opening Preview fully.
This is the fastest way to add an arrow or text to a screenshot before sending it. Click Done and save changes or make a copy.
Using Preview with iPhone Continuity
If you have an iPhone or iPad nearby, Preview can pull content from it using Apple's Continuity features:
- Continuity Camera — Go to File > Import from iPhone or iPad and pick Take Photo or Scan Documents. Your iPhone camera opens. The photo lands in Preview on your Mac.
- Continuity Markup — Right-click an image in Finder > Quick Actions > Markup. Click the iPad or iPhone icon to draw with Apple Pencil or your finger. Changes sync to your Mac live.
- Handoff — Viewing an image on your Mac? Pick up where you left off on your iPad (and vice versa).
Both devices need the same Apple ID and the same Wi-Fi network.
Other hidden tricks
- Combine images into a PDF — Open several images in Preview. Select all in the sidebar. Go to File > Print > Save as PDF. Done — one merged file.
- Extract PDF pages — Open a PDF. Select pages in the sidebar. Drag them to your Desktop. Each becomes its own file.
- Magnifier tool — The loupe in the Markup toolbar lets you zoom into one spot for detail work.
- Instant alpha — The magic wand tool in Markup selects and deletes areas of similar color. Good for rough background removal on simple images.
Preview app limitations
Preview is great for basic tasks. But it has clear limits that matter if you work with screenshots often.
| Feature | Preview | Dedicated screenshot tools |
|---|---|---|
| Annotation tools | Basic (text, shapes, arrows) | Advanced (blur, pixelate, numbered steps, emojis) |
| Screenshot backgrounds | ❌ None | ✅ Gradient backgrounds |
| Cloud sharing | ❌ Manual upload required | ✅ Instant shareable links |
| GIF recording | ❌ Not supported | ✅ Screen to GIF |
| OCR text extraction | ❌ Limited (Live Text only) | ✅ Full OCR from any image |
| Scrolling screenshots | ❌ Not supported | ✅ Capture full pages |
| Batch editing | Basic (export only) | Full batch workflows |
Here's where Preview falls short:
- No blur or pixelate tool — You can't hide sensitive information in Preview without workarounds
- No screenshot beautification — Can't add backgrounds to screenshots for presentations or social media
- No cloud sharing — Every share requires manually attaching the file. Check our cloud screenshot sharing guide for better options
- No GIF recording — Preview is images and PDFs only. For GIFs, see how to record GIFs on Mac
- Limited annotation set — No numbered steps, no emoji stamps, no highlighter presets
When you need more than Preview
Preview is perfect for quick edits. But if you regularly take screenshots for work — whether for documentation, bug reports, social media, or technical docs — you'll hit its limits fast.

Signs you've outgrown Preview:
- You're adding the same annotations repeatedly
- You need to share screenshots quickly via link (not as attachments)
- You want your screenshots to look polished with backgrounds
- You need to capture scrolling content
- You're copying text from images and need reliable OCR
Tools like ScreenSnap Pro fill these gaps with 500+ wallpapers, 15 annotation tools (including blur and numbered steps), instant cloud sharing, and GIF recording — all for a one-time $39 purchase. It's the natural upgrade when Preview's basics aren't enough.
For a broader look at your options, check our roundup of the best screenshot apps for Mac.
Keyboard shortcuts for Preview
Knowing these shortcuts will speed up your Preview workflow significantly:
| Action | Shortcut |
|---|---|
| Open Markup toolbar | ⌘ + Shift + A |
| Crop selection | ⌘ + K |
| Adjust size | ⌘ + Option + I |
| Adjust color | ⌘ + Option + C |
| Rotate clockwise | ⌘ + R |
| Rotate counterclockwise | ⌘ + L |
| Zoom in | ⌘ + + |
| Zoom out | ⌘ + - |
| Actual size | ⌘ + 0 |
| Fit to window | ⌘ + 9 |
If you're a keyboard shortcut person, you'll also want to check out our complete Mac screenshot shortcuts guide for the capture side of things.
Frequently Asked Questions
Morgan
Indie DeveloperIndie developer, founder of ScreenSnap Pro. A decade of shipping consumer Mac apps and developer tools. Read full bio
@m_0_r_g_a_n_