Visual Note-Taking Guide 2026: Sketchnotes Made Easy
Visual note taking is a way of recording ideas with a mix of words, simple drawings, boxes and arrows instead of lines of plain text. It works because of dual coding: your brain stores a concept once as words and once as a picture, which gives you two ways to recall it later. You do not need art skills. You need about five shapes and some practice.
Visual notes (often called sketchnotes) turn a lecture, meeting or book into one page you can read at a glance. This guide covers the building blocks, four page layouts, paper and digital setups, and a hybrid method that mixes screenshots of slides with hand-drawn notes. If you are still picking where your notes will live, start with this roundup of the best study notes apps.
Why visual note-taking helps you remember more
Three lines of research explain why sketchnotes stick better than a wall of text.
Dual coding. Psychologist Allan Paivio proposed that memory runs on two linked systems, one for words and one for images. His dual coding theory predicts that an idea stored in both forms is easier to retrieve. A drawn lightbulb next to the word "insight" gives your memory two hooks instead of one.
The drawing effect. In a 2016 set of experiments, researchers Wammes, Meade and Fernandes asked people to either draw or write out words on a list. The group that drew recalled far more, and the benefit held across many versions of the test (study summary on PubMed). The quality of the drawings did not matter much. Stick figures count.
Processing beats copying. A well-known 2014 study found that students typing on laptops tended to copy lectures word for word and did worse on concept questions than students writing by hand (APS summary). Later replications found a smaller gap, sometimes none, but the lesson holds. Notes help when you have to decide what matters. Visual notes force that choice, because you cannot draw every word.
A 2010 study by Jackie Andrade adds a bonus: people who doodled during a dull phone message recalled 29% more of it than people who only listened.
Visual note taking vs sketchnotes vs doodle notes
The terms overlap, and most people use them interchangeably.
- Visual note taking is the broad practice of adding images and structure to notes.
- Sketchnotes is the term Mike Rohde made popular in The Sketchnote Handbook. It means real-time notes built from hand lettering, icons, containers and arrows.
- Doodle notes usually means a teacher-made worksheet with partial drawings that students fill in and color. They are a classroom tool for younger learners.
This guide treats sketchnoting as the core skill. Once you can sketchnote, the other two follow.
The four building blocks of sketchnotes
Every sketchnote you have ever admired is built from the same four parts. Learn these and you can take visual notes on any topic.
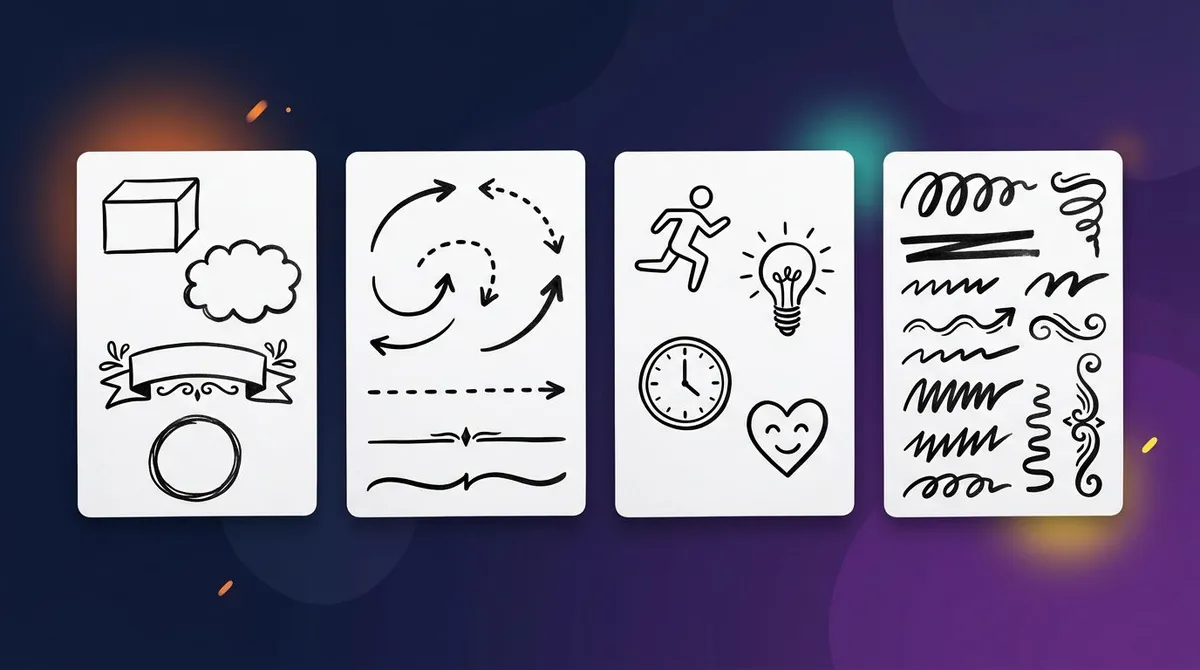
1. Containers
Containers group related ideas. Draw a box, a cloud, a speech bubble, a banner or a circle around a key point. Keep a few types and give each a job. For example, clouds for questions and banners for main takeaways.
2. Connectors
Arrows, dotted lines and dividers show how ideas relate. An arrow says "this leads to that." A dotted line says "these are linked." A thick divider says "new topic." Connectors are what turn a page of scraps into a story.
3. Icons
Icons are the "visual" in visual notes. Build a small library of 20 to 30 you can draw in under five seconds each. Start with these:
- A stick figure (person, user, team)
- A lightbulb (idea)
- A star (important)
- A clock (time, deadline)
- A speech bubble (quote)
- A checkmark and an X (do and don't)
Everything can be made from circles, squares, triangles and lines. That is why art skills are optional.
4. Typography
Your writing is a visual element too. Use three sizes: big block capitals for the title, medium letters for section headers, and normal handwriting for details. Add a shadow on one side of a word and it looks bold. Hierarchy lets a reader scan the page in seconds.
4 sketchnote layouts that work for any topic
Pick a layout before the talk starts. It saves you from running out of room in the top corner with an hour to go.
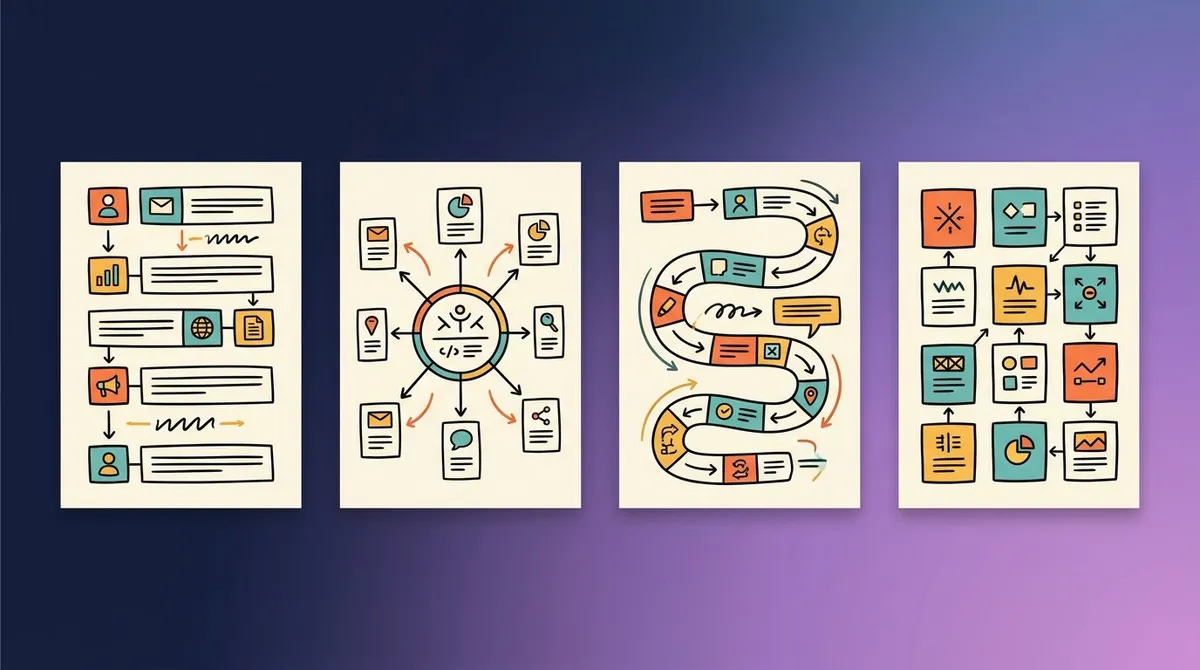
| Layout | How it looks | Best for |
|---|---|---|
| Linear | Rows from top to bottom, like a normal page | Lectures that follow an outline |
| Radial | Main topic in the center, ideas around it like spokes | Brainstorms, book summaries |
| Path | A winding road or line that ideas hang off | Processes, timelines, stories |
| Modular | A grid of boxes, one idea per box | Talks with clear separate points |
Linear is the easiest place to start. Radial works when you know the big theme but not the order of points. Path suits anything with steps, such as a history lesson or a product launch plan. Modular is a safe choice for panels and meetings, because you can fill boxes in any order.

Tired of plain screenshots? Try ScreenSnap Pro.
Beautiful backgrounds, pro annotations, GIF recording, and instant cloud sharing, all in one app. Pay $34 once, own it forever.
See pricing and featuresPaper vs iPad vs desktop: choosing your sketchnoting setup
There is no single right setup. Each one fits a different situation.
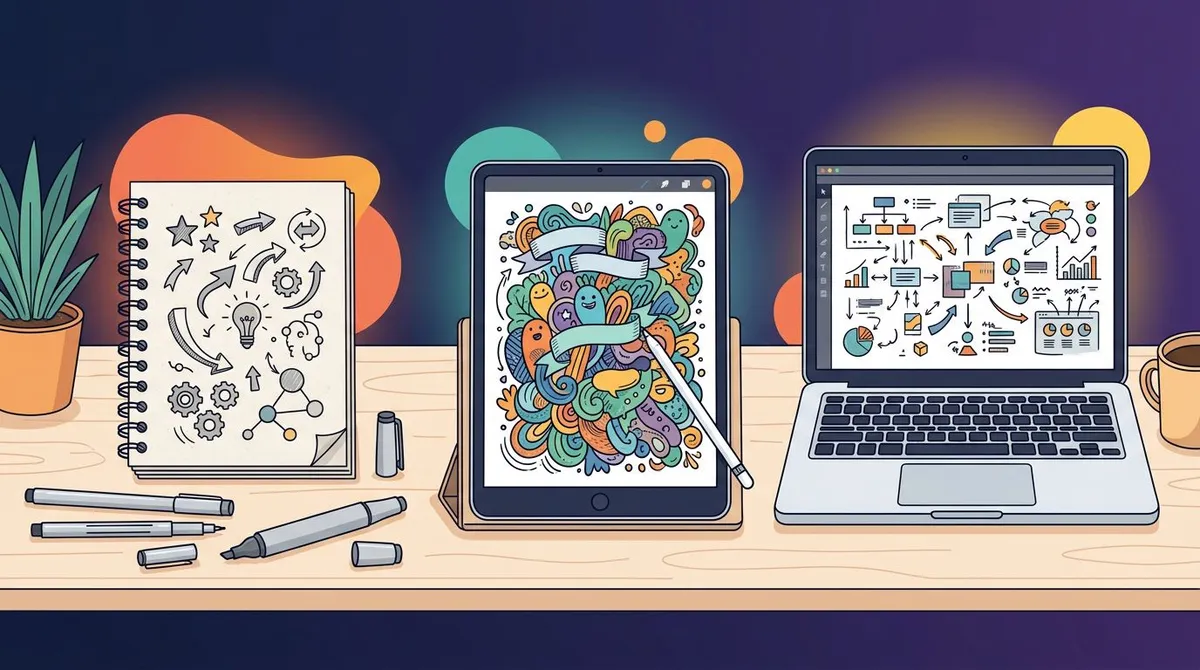
Paper
Paper is fast, cheap and has no distractions. A starter kit is a dotted notebook, a black fineliner, a thicker black marker and one gray or colored brush pen for shadows. The limit is editing: you cannot move a box once it is drawn.
iPad or tablet
A tablet and stylus give you undo, layers and endless color. Apps like GoodNotes and Notability mix handwriting with typed text and imported images. Procreate suits drawing-heavy pages, and Concepts offers an infinite canvas for radial maps. The tradeoff is cost and the pull of notifications.
Desktop
Desktop is the weakest place to draw freehand with a mouse. It is the strongest place to capture what is on screen: slides, diagrams, shared documents and video calls. That is why the best digital workflow often starts on the desktop and borrows from the other two.
The screenshot + annotation hybrid method for lectures and meetings
Online lectures and video meetings throw slides at you faster than you can sketch them. Copying a complex chart by hand wastes the attention you need for listening. The hybrid method fixes that: capture what is on screen, then add the visual thinking on top.

Step 1: Capture the slide
When a slide with a chart or diagram appears, grab only that region. Use Cmd + Shift + 4 on a Mac or Win + Shift + S on Windows (the Windows 11 Snipping Tool guide covers every mode). For video calls, this guide to screenshot a Zoom meeting on Mac explains what the other side can and cannot see. If your teacher shares the PDF deck, you can annotate the PDF for free instead.
Step 2: Annotate over it
Add your sketchnote layer straight onto the capture:
- Circle or highlight the one number or label that matters.
- Draw an arrow from it to a short note in your own words.
- Drop numbered markers on the parts the speaker walks through, in order.
- Add one icon that sums up the slide (a lightbulb, a warning sign, a star).
A free browser option is the image annotation tool, which lets you add arrows, shapes, lines, pen strokes, highlights and text to an image, then download it as a PNG.
Step 3: Connect the captures
Place the annotated screenshots onto your main page, in GoodNotes, OneNote or a paper print, and draw connectors between them. Now the slide is the evidence and your drawing is the understanding.
Step 4: Review and reuse
After class, turn key diagrams into flashcards. The Anki image occlusion guide shows how to hide labels on a captured slide and quiz yourself. If you want the full audio too, compare the best lecture recording software.
If you do this every day, a dedicated capture tool saves steps. ScreenSnap Pro, for instance, captures a region and lets you mark it up with 17 annotation tools (including arrows, shapes, text, a highlighter and a numbered counter). It can also pin a screenshot so it stays visible above your notes while you sketch. It also pulls the text off a slide with OCR. It costs $34 once, with no subscription.
Sketchnote examples by use case
Here is what a good visual note looks like in four common situations:
- University lecture: A linear layout. The title banner sits at the top, each slide topic gets a row, and annotated screenshots hold the charts. A "questions" cloud in the corner collects what to ask later.
- Book summary: A radial layout. The book title sits in the center, one spoke per chapter, and each spoke ends in a single icon and one quote.
- Team meeting: A modular grid. Boxes for decisions, blockers and next steps. Stick figures with initials mark who owns each action.
- Podcast or talk: A path layout. The winding line follows the speaker's story, with speech bubbles for quotes worth keeping.
How to sketchnote: a 30-day practice plan
Short daily practice beats one long session. Give this plan 10 to 15 minutes a day.
Week 1: Build your icon library. Draw five new icons a day from common words (idea, time, money, team, growth). By day 7 you have 35. Keep them on one reference page.
Week 2: Letters and containers. Practice three title styles and five container shapes. Then sketchnote one short article a day using only text, boxes and arrows.
Week 3: Live practice. Sketchnote a 5 to 10 minute video each day, such as a short talk. Try a different layout each day. Aim to finish before the video ends.
Week 4: Go hybrid and review. Take notes on a full lecture or meeting with the screenshot method above. At the end of each day, ask two questions. Can someone else read this page in 30 seconds? What would you draw bigger next time?
For more ideas and community examples, Sketchnote Army has collected sketchnotes from around the world for years.
Frequently Asked Questions
Start with one page
Visual note taking is a habit, not a talent. Pick one layout, learn ten icons and try it on your next lecture or meeting. If most of what you learn arrives on a screen, a quick capture and markup tool makes the hybrid method smooth. ScreenSnap Pro is a one-time $34 purchase with one license and 2 seats, so it covers two computers, Mac or Windows.

Morgan
Indie DeveloperIndie developer, founder of ScreenSnap Pro. A decade of shipping consumer Mac apps and developer tools. Read full bio
@m_0_r_g_a_n_